How a Bold Paint Color Totally Transformed our Boring Kitchen
I gave our boring white kitchen a budget-friendly makeover that really shows how a few small updates like fresh paint and new hardware can make a huge difference.
I’m so excited to share this kitchen makeover! If you’ve ever dreamed about painting your neutral cabinets a big, bold color, you’re going to love this makeover.
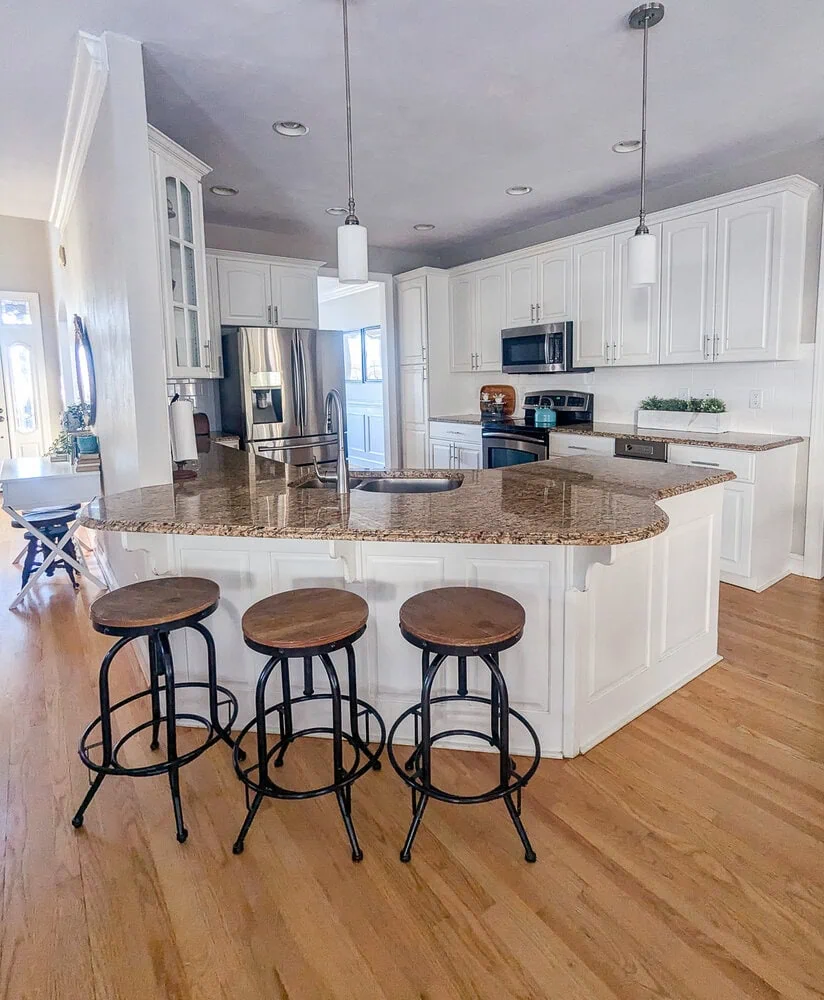
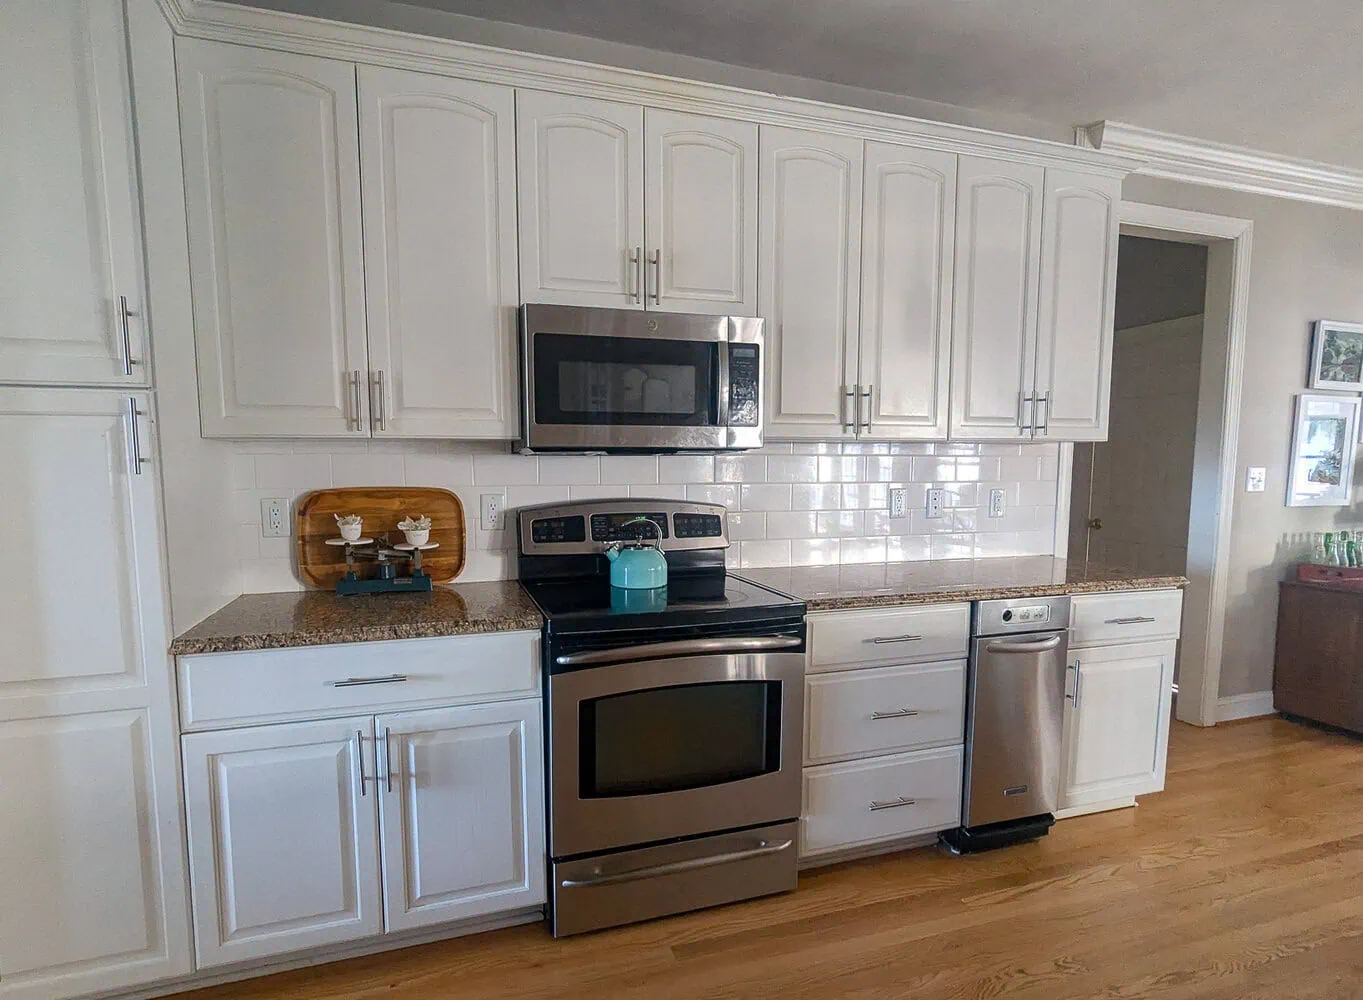
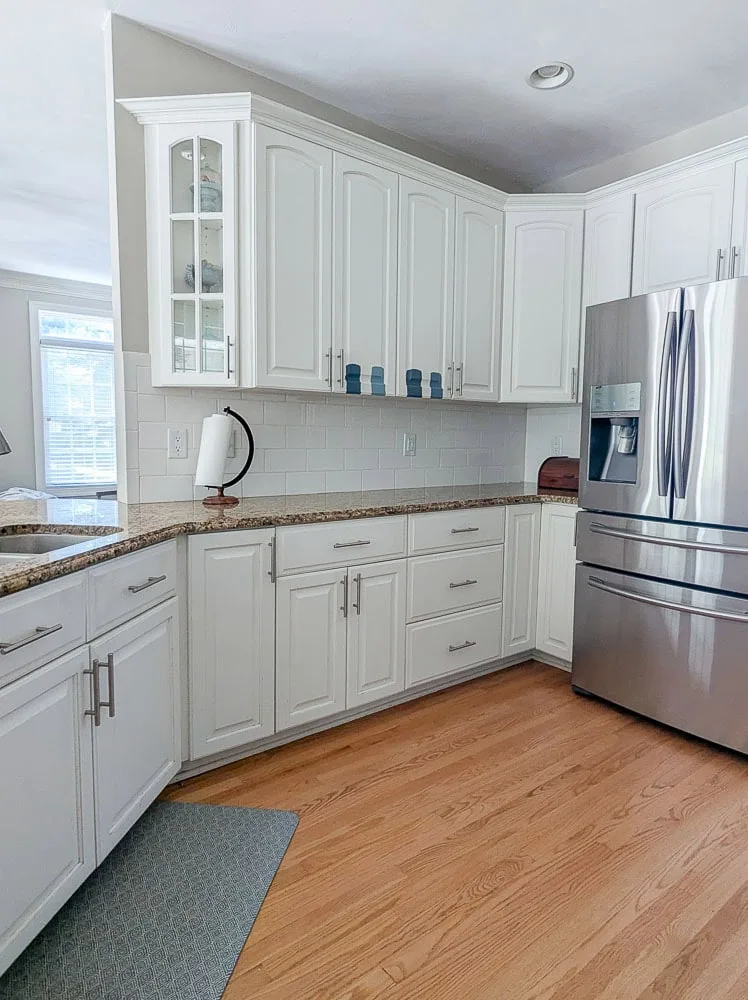
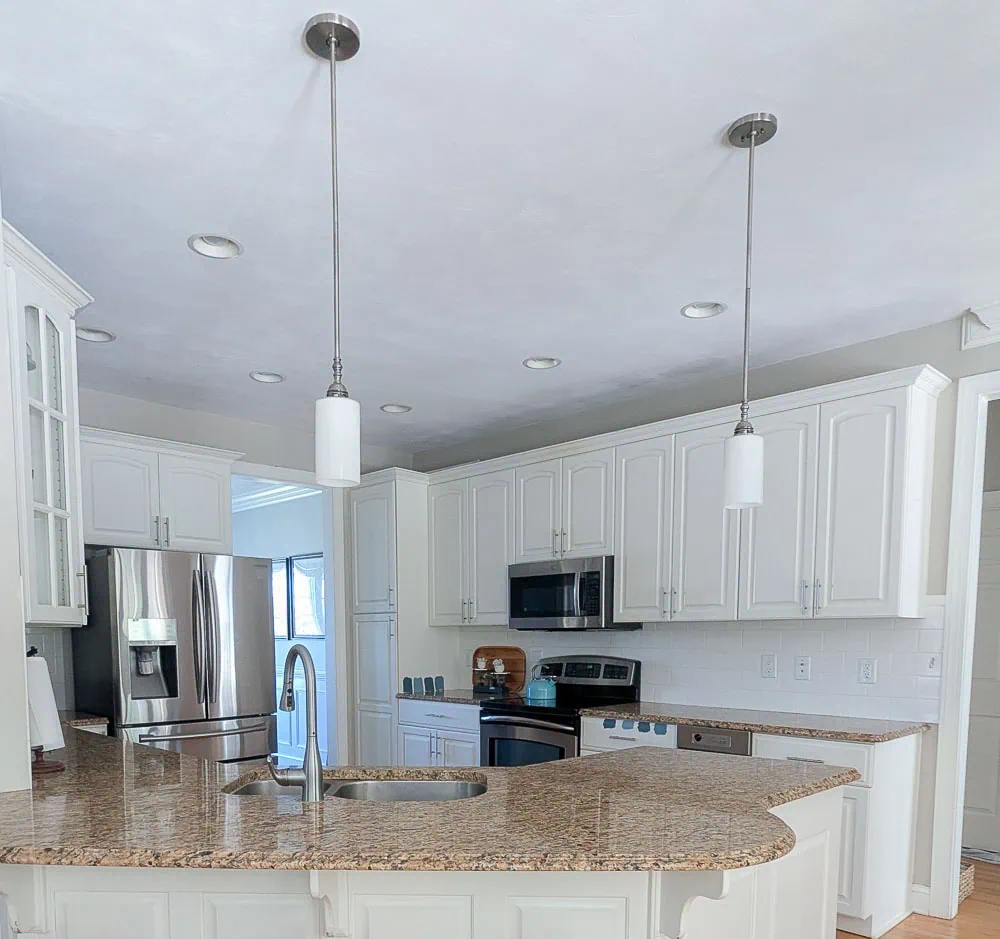
To be fair, our kitchen really wasn’t bad before. I have had some ugly kitchens before and this kitchen was actually pretty nice. But it was also generic, bland, and very, very white. I love white cabinets, but when you combine white cabinets, white subway tile, and builder basic hardware, it all makes for a pretty boring kitchen.
Here’s what I started with:
This post contains affiliate links which means if you make a purchase after clicking a link I will earn a small commission but it won’t cost you a penny more. Click here to see my full disclosure policy.
It wasn’t a bad space at all, but it was in desperate need of some color and life.
This kitchen makeover was not a huge gut renovation. Yes, there are some things in here I definitely wouldn’t have chosen – the brown granite, the angled peninsula, the divided sink. But those are all things that I can live with and that would cost way too much to change.
I know home renovation shows make it seem like you really can’t have a great kitchen unless you completely start from scratch and spend tens of thousands of dollars, but I’m a big believer in working with what you have whenever possible. Most of the time, there is absolutely no reason to rip out your kitchen and start from scratch. So whenever I’m working on a kitchen or bathroom, I start with what’s already working.
In this case, my kitchen layout was super functional and everything was actually in really good shape. It just needed some color and style to bring it to life.
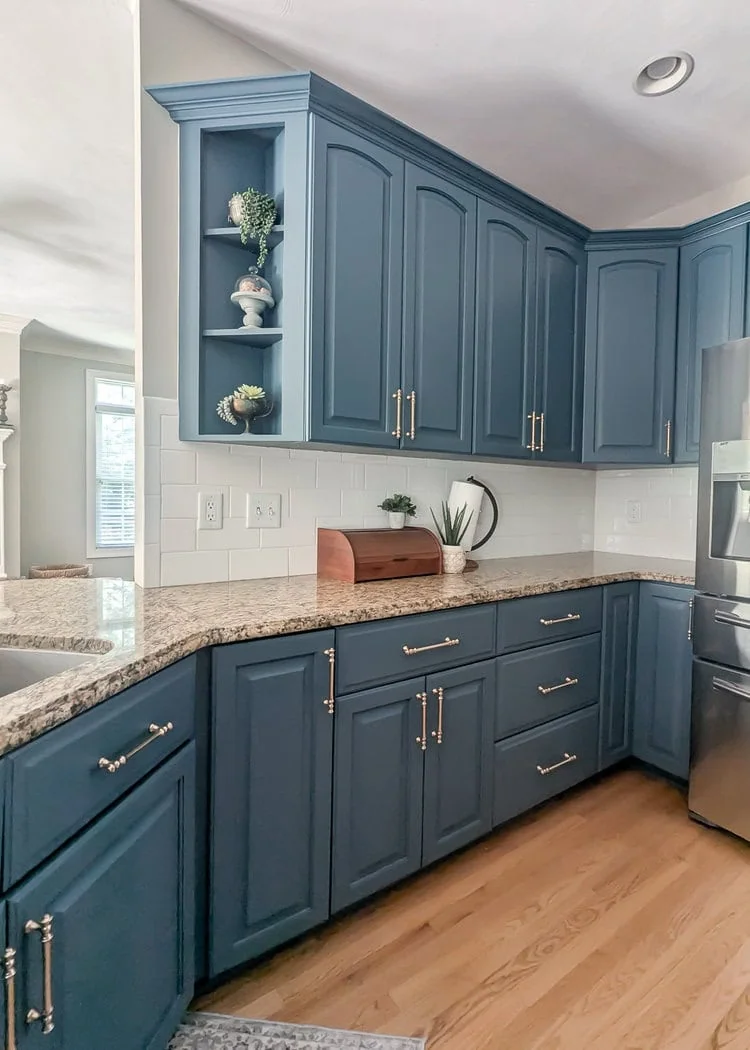
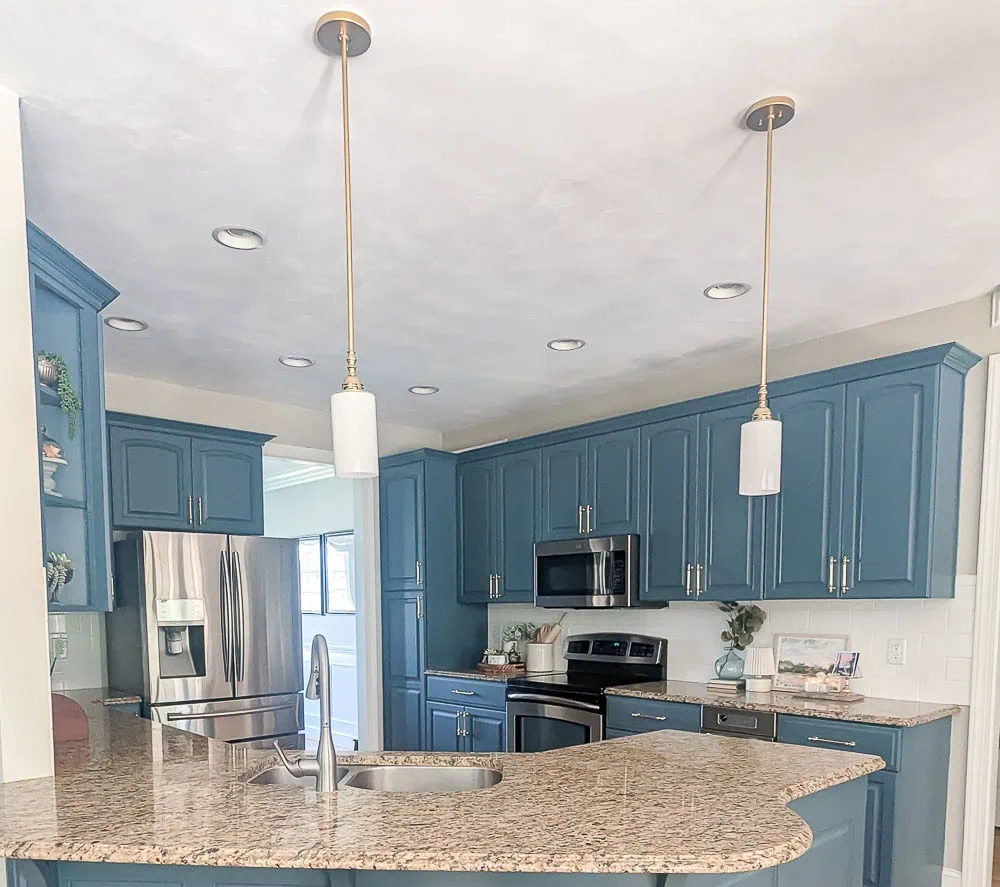
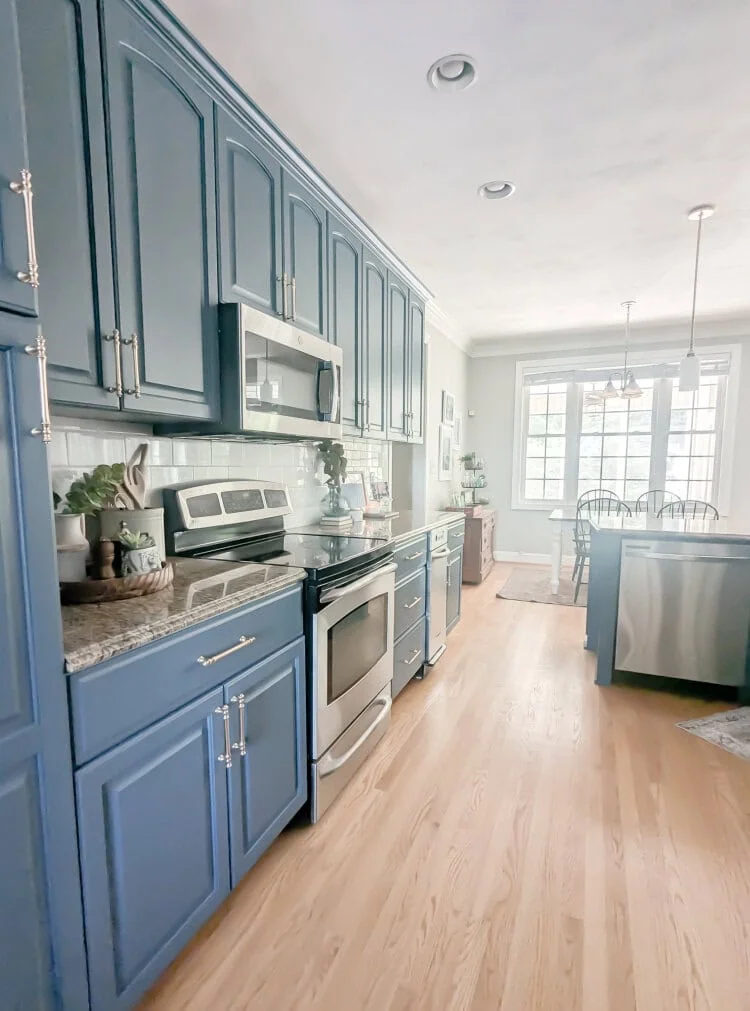
After some simple DIY projects and a lot of paint, here’s what the kitchen looks like now:
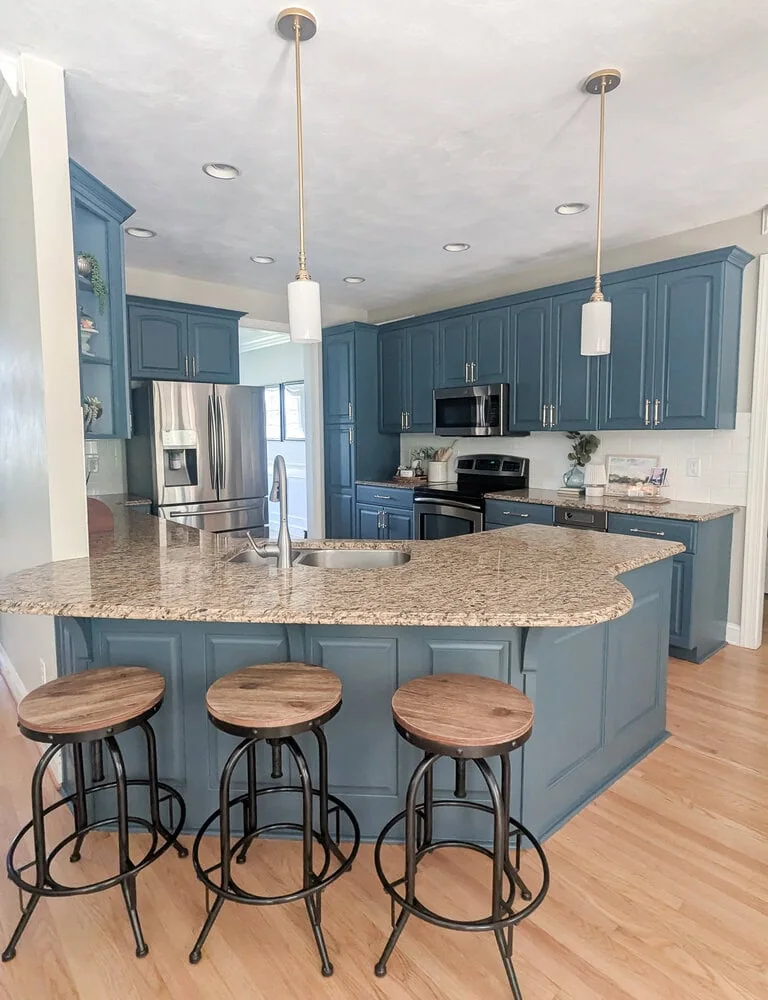
Even though all the bones of the kitchen are exactly the same, the whole room has such a different feel. Instead of feeling generic and bland, it feels warm and inviting.
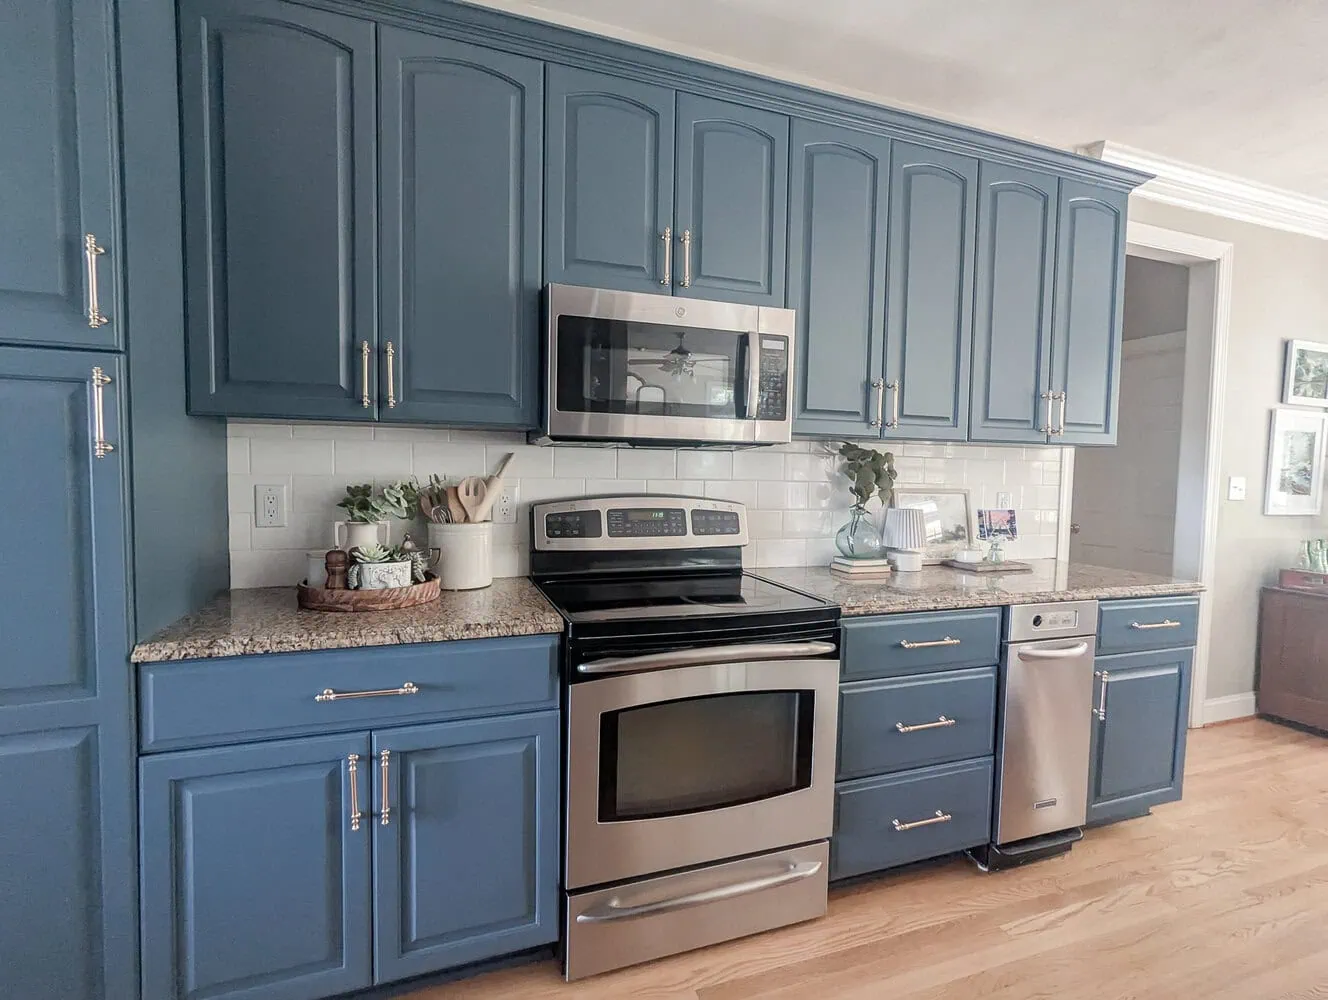
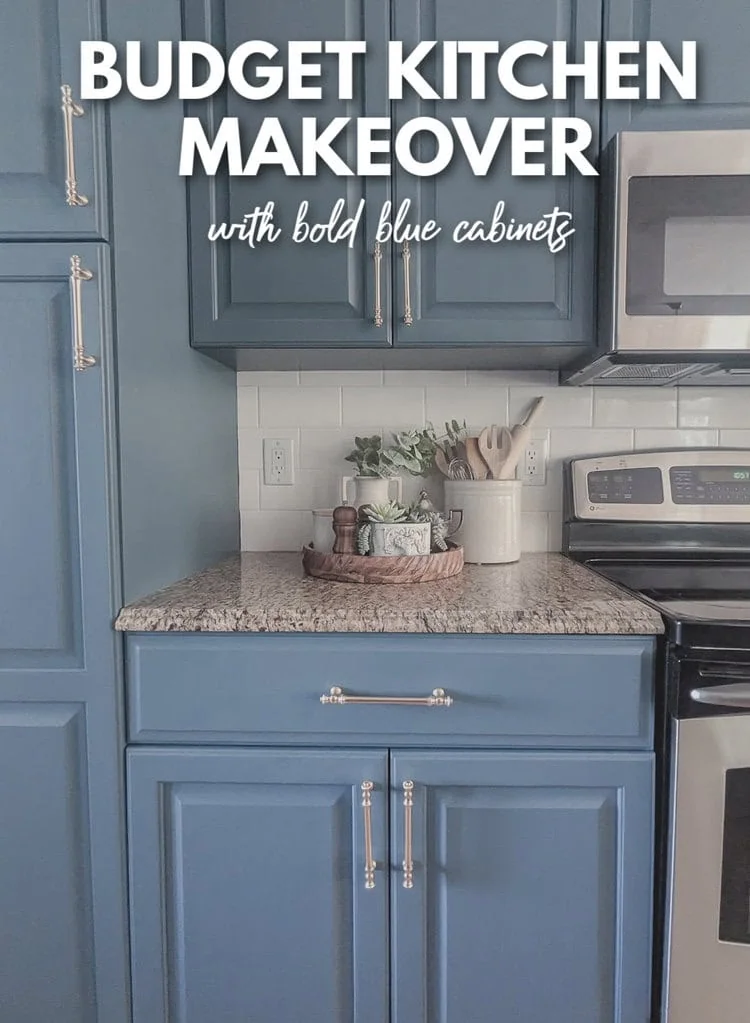
By far the biggest change in this room was painting the cabinets that beautiful shade of blue, but here’s a breakdown of everything I did in this room:
- Painted the kitchen cabinets (the color is Sherwin Williams Waterloo)
- Added new brass hardware
- Removed the one glass cabinet door
- Replaced the corbels on the peninsula overhang
- Painted the existing pendant lights
Painting the cabinets
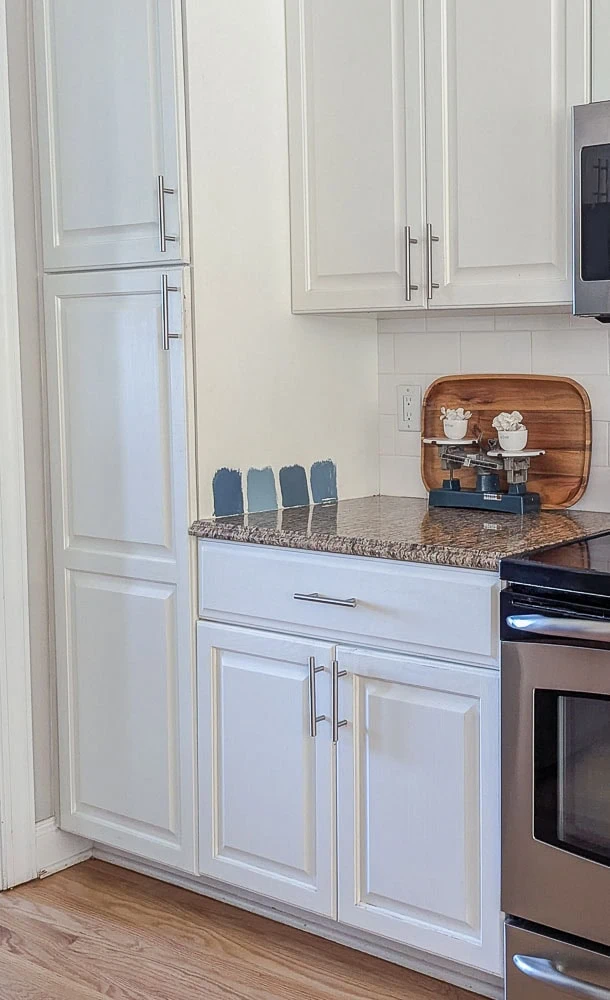
The biggest change I made in this room is definitely that bold color on the cabinets. I spent a lot of time narrowing down what color I wanted to use because painting cabinets is a huge task and I wanted to get it right the first time.
After looking at many, many paint chips, I narrowed it down to a few options and painted them directly on the cabinets in several places. Since the countertops weren’t changing, it was especially important that the cabinet color worked with the countertop color.
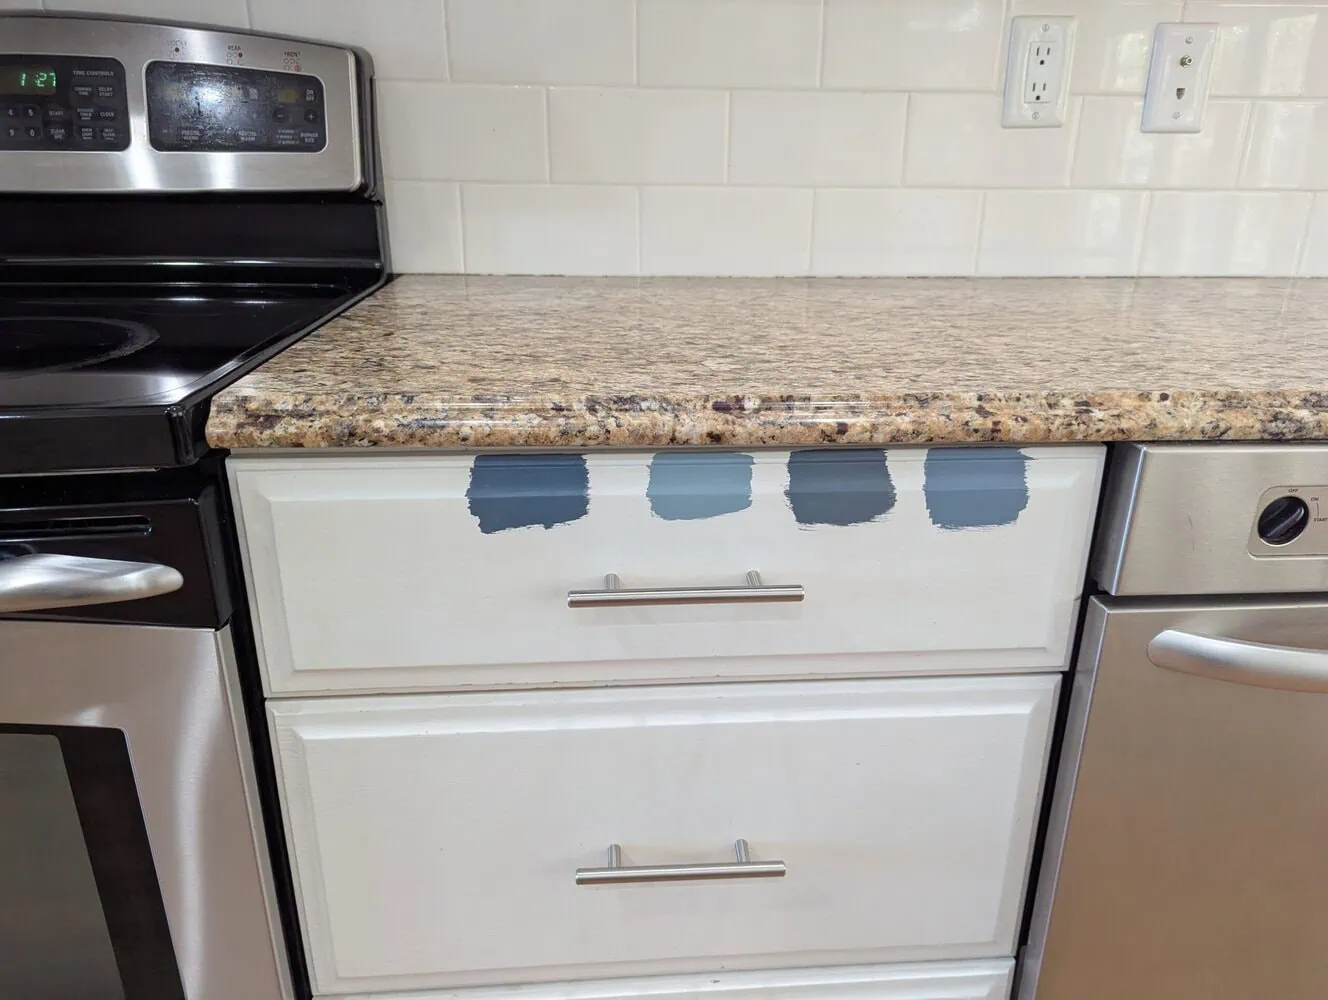
In the end I chose the color Waterloo (farthest to the left in the above photo) and used Sherwin Williams Emerald Urethane paint in satin. This is a great dark blue color with a lot of gray in it.
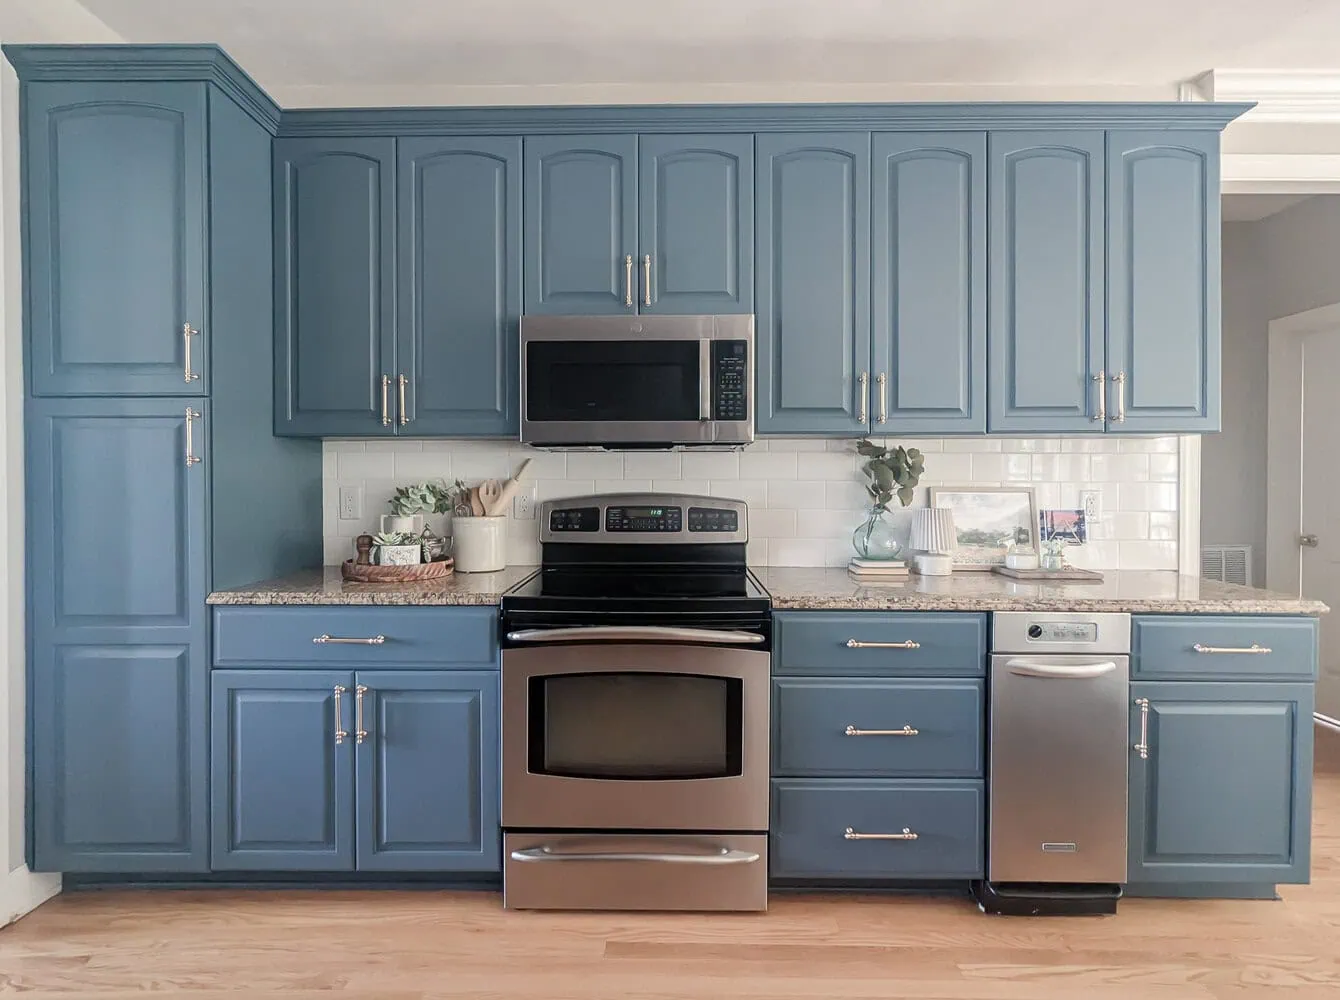
I absolutely love this color on the cabinets. It’s a dark color, but our kitchen gets tons of natural light so the room still feels light and welcoming. And the rich blue manages to make the whole room feel both grand and cozy at the same time.
Want more info? This post has everything you need to know about repainting cabinets that have been painted before. (Repainting cabinets is actually pretty different from painting cabinets that have never been painted.)
New hardware
The blue paint made the biggest difference, but I think the new hardware is actually my favorite part of the room. The old pulls were about as generic as you can get so I knew I had to replace them.
I chose these really beautiful brass pulls with a vintage feel. I found them on Amazon and this style comes in many different sizes and finishes. I chose the brushed brass finish and they definitely look like they were much more expensive than they were!
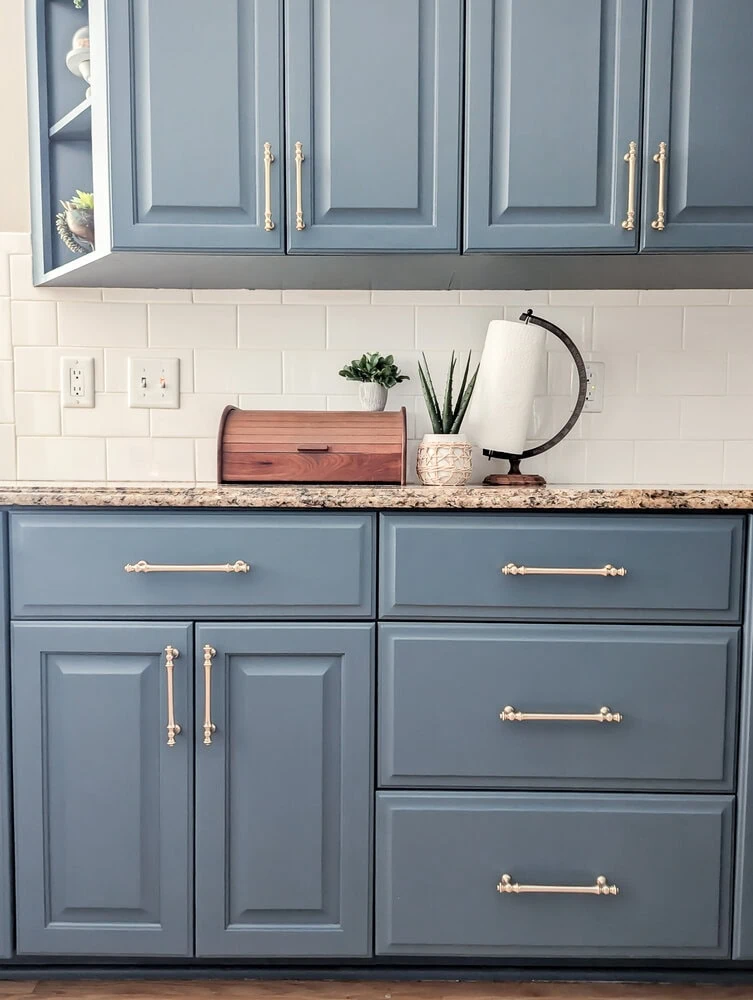
I used 5″ pulls on the cabinet doors and 6.3″ pulls on the drawers and I love how the two look together.
I highly recommend this hardware but you do have to be really careful when ordering hardware from Amazon. I ordered several different pulls and knobs in a brushed brass finish and they were all a slightly different color – even ones from the same company! Luckily, it was easy to return the ones that didn’t work.
Replacing the corbels
I absolutely hated the old corbels under our kitchen peninsula. I feel quite certain nobody else noticed them – not even my husband! But my eyes were constantly drawn to them and I hated them.
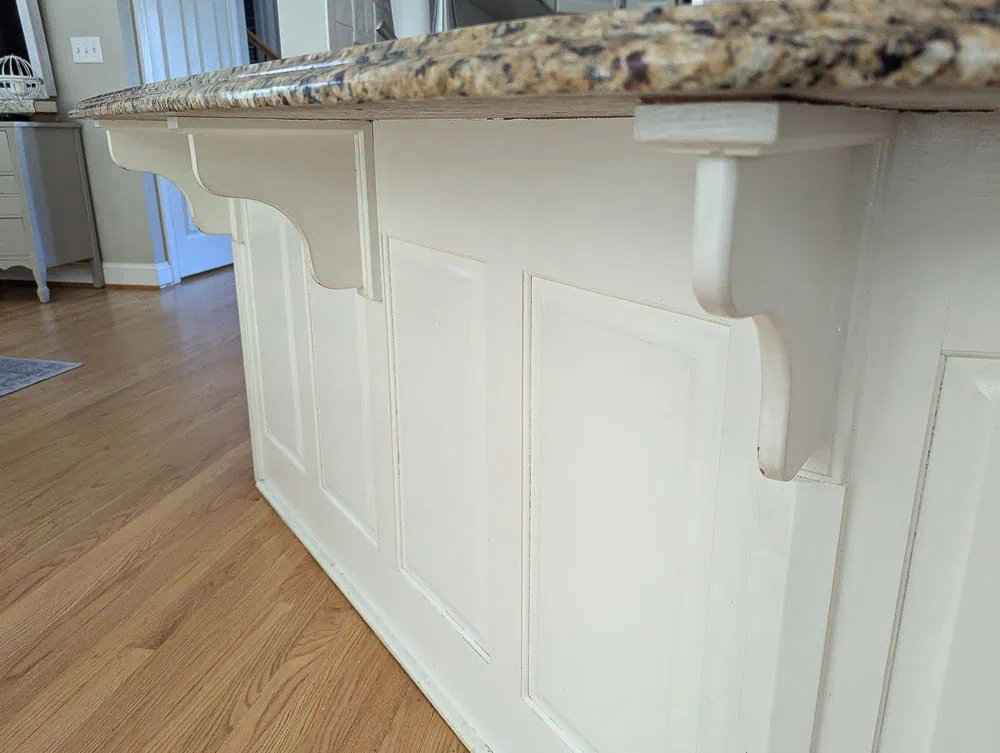
That squiggly shape just felt very primitive and unfinished compared to the much more traditional paneling on the cabinets. So since I was painting the cabinets anyway, it felt like a good time to replace them.
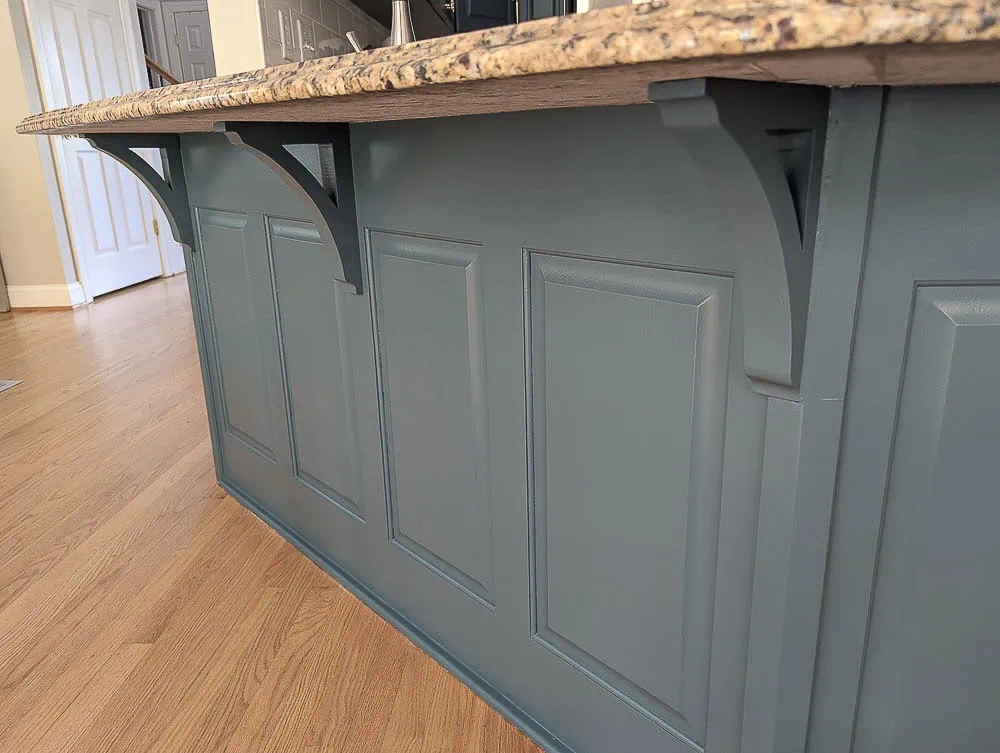
I found these replacements that were the same height and I think they look so much nicer! They definitely fit the style of the cabinets much better.
Removing the glass door
Our upper cabinets had one little glass door on the end. When I took all the doors off to paint them, I started wondering if it might be better to just leave that door off altogether. I liked the glass door well enough, but I didn’t love that you couldn’t see what was inside the cabinet very well. It felt silly to have a display cabinet where you couldn’t really see what was on display.
So once I had painted everything, I tried it both ways and decided I really like it better without the door. And if I change my mind in the future, I can easily just put the door back in place.
Painting the pendant lights
The final project was updating the pendant lights.
I considered replacing them with new brass pendant lights to coordinate with the new brass hardware. But then I decided that I could save a lot of time and money by just painting the pendants I had instead.
I used Rustoleum metallic gold spray paint (my favorite gold spray paint) and in about an hour, they were perfect.
I know a lot of people worry about mixing different metal tones, but it’s totally okay to use multiple metals in one room. The key is to stick to just a few metals and to use each one more than once.
The Final Details
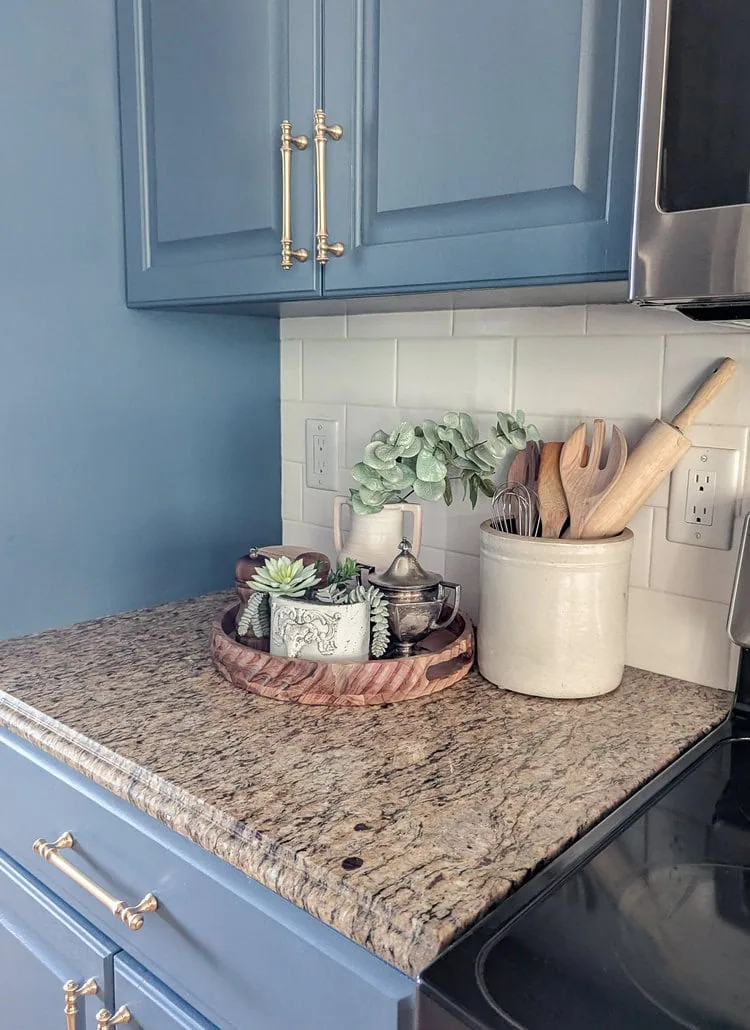
Okay, I used to roll my eyes at the idea of ‘styling’ or ‘decorating’ a kitchen. And if you have a really small kitchen, there probably isn’t room on the countertops for anything decorative anyway. But if you have lots of counterspace like I do, adding a few decorative touches can go a very long way to making your kitchen feel beautiful. In fact, if you don’t have the time and money to update anything else, a bit of styling could be enough to make it feel pretty again.
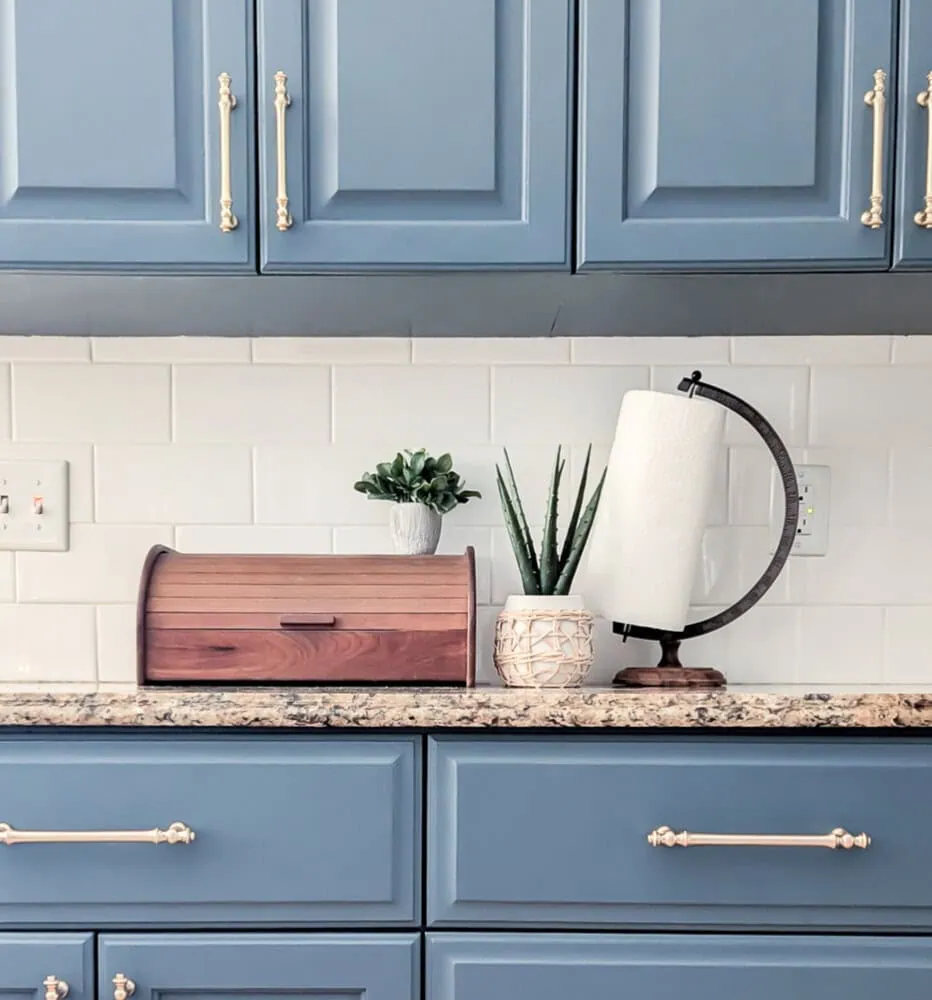
Most of my kitchen styling is also functional, but there are a few things that are just to look pretty.
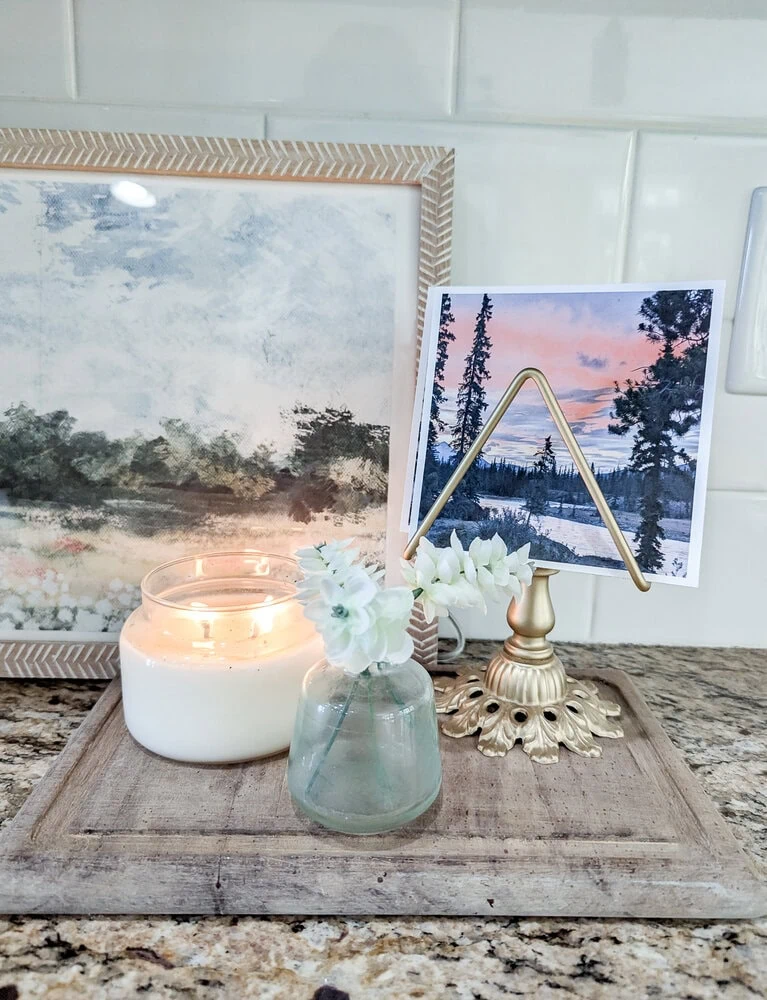
I found this beautiful wooden tray at TJMaxx and it holds some kitchen essentials like the salt and pepper shakers and a sugar bowl along with a few things that are just pretty. (I made the white wooden box vase from an old sewing machine drawer.)
I also added a few things on the other side of the stove including a tiny lamp and a small framed print.
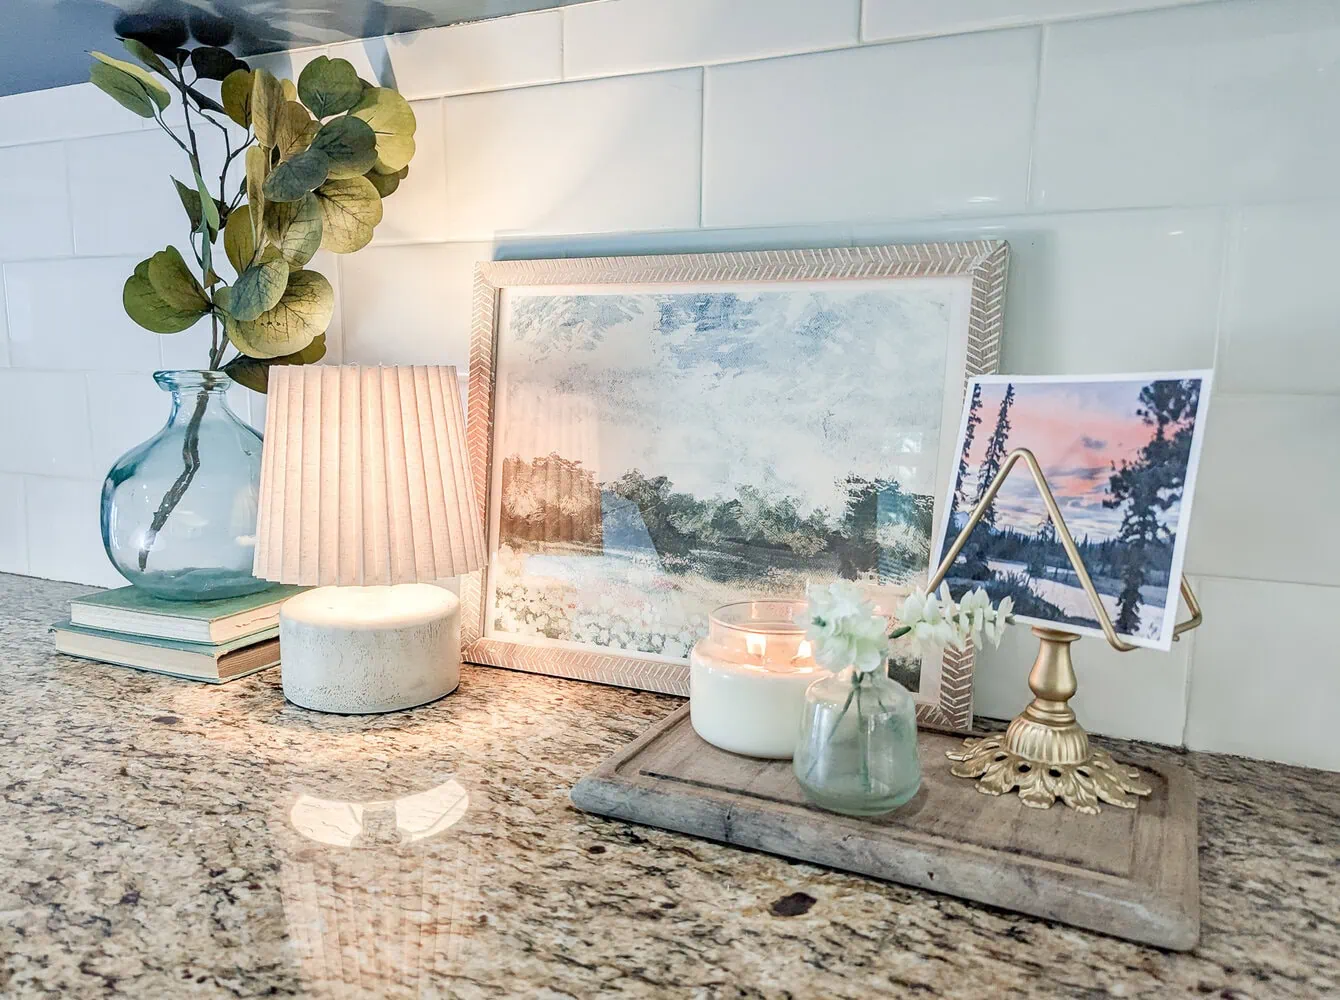
One of my favorite things in the kitchen is the gold napkin holder. I found it at a thrift store and love the cute little shape. Instead of using it for napkins, I decided to use it to display a few favorite vacation photos.
And of course I’m still using the paper towel holder I upcycled from an old globe stand many years ago.
Sources and Budget
All in all this kitchen refresh cost around $350. The biggest expenses were the paint for the cabinets and the new hardware. (Our kitchen has 40 cabinets and drawers which makes for great storage, but really adds up when you’re buying new hardware!)
Here are links to all the things I used in this space:
- Paint for cabinets – Sherwin Williams Waterloo
- Gold paint for pendant lights – Rustoleum metallic gold
- Brass cabinet hardware – Amazon
- Corbels – Amazon
And that’s the kitchen! Now I’m itching to go add more color to rest of the house!
Want more inexpensive kitchen ideas? You can see all my kitchen DIY posts here or check out my total kitchen makeover from my last house. (That one was a real doozy!)
I’d love for you to pin this post on Pinterest!

Congratulations on your beautiful kitchen! The affordable redo is inspiring.
Thank you so much!
WOW! This looks amazing. So happy you had the guts to do this. :)
Thank you – I’m really happy with how it turned out!
Looks great! Did you paint the cabinets yourself? Thanks.
Yes, I did and I just published a post with more details about the process – https://www.lovelyetc.com/repaint-painted-cabinets/
Carrie, your kitchen update is spectacular! Love the shade of blue on your cabinets. Your projects are so doable and your “work with what you have” attitude is inspiring!
Thank you so much for your kind words!
Beautiful job. Makes me want to get up and start on my kitchen right now!
Thank you!
Very nicely done! I restained my cabinets a few years ago.. I was able to remove the divider so that it just had the glass front, not the divided glass. You could try that if you decide that you want the door up.
That’s a great idea too! My cabinet has the divider built in but it would probably be an option to cut it out in the future.
Great job! I’m typically a white cabinet girl but liked the blue much more than I thought I would.
Thank you Alice! I love a white kitchen too but I’ve always wanted blue cabinets and finally got my chance.
Absolutely beautiful! I often think of painting my dark brown cabinets blue, but I’m terrified I’ll mess it up! Bravo to you!
Thank you! Maybe one day you’ll decide to just go for it!
Those blue cabinets are gorgeous!! Just the perfect shade of blue. I love your new cabinet hardware, too. We have those generic ones on new cabinets we just bought about a year ago, but I’ve saved the link to your drawer pulls if we want to update our look in a year or so.
Those corbels are beautiful, too. I must admit I couldn’t at first see the difference until I saw your close up picture. Really nice. Plus painting those light-rods was genius and saved money as your existing lights are great for that space but the new color works better. I’m adding your kitchen to my Pinterest board because it just so pretty!
Thank you so much! Other than the paint, it really was just a lot of small changes but I’m so happy with how it all works together!
Absolutely beautiful!! What paint color are the walls around the kitchen?
Thank you! The walls are Benjamin Moore Revere Pewter. They were already this color when we moved in but I really like it because it works really well with both warm and cool colors.
Really like the changed corbels. So much better suited to your style. Also-the decision to skip the glass door was spot on. Couldn’t see a thing with it there.
Thank you! I know those are small details but they really do make a difference – at least to me!