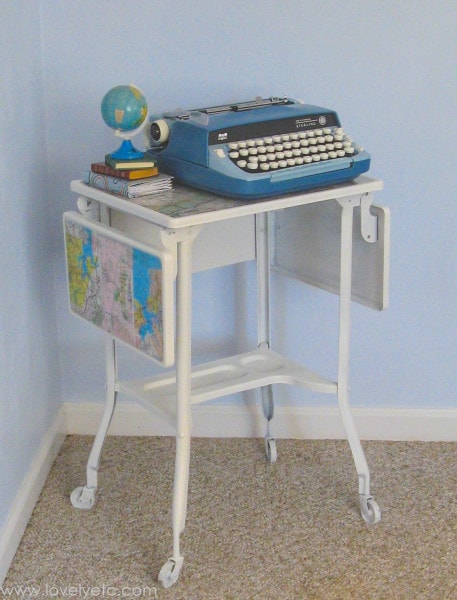
I absolutely love a good map project, especially map decoupaged furniture. This little typewriter stand was the perfect chance for me to try it out for myself.
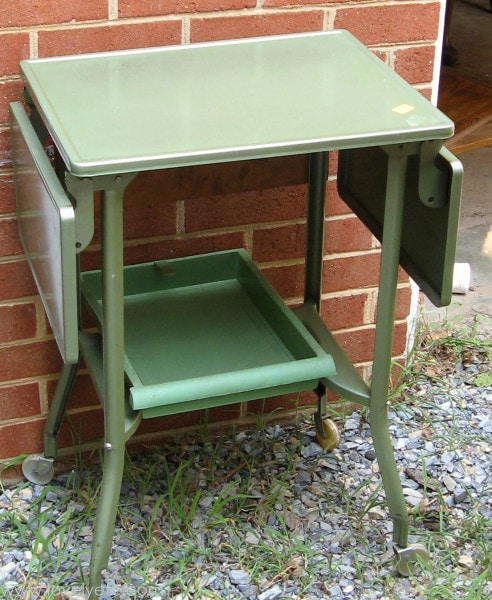
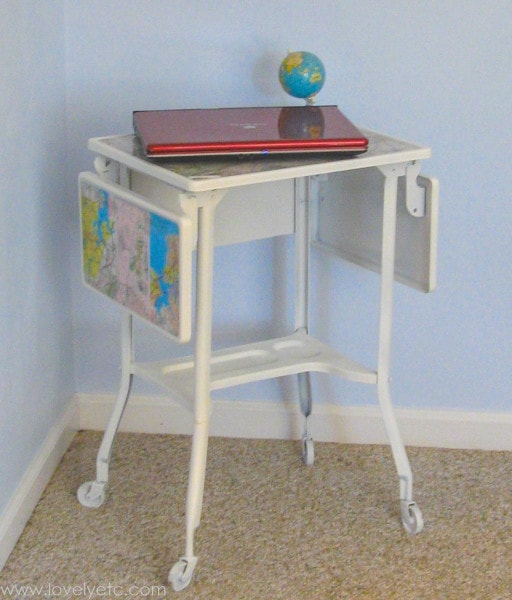
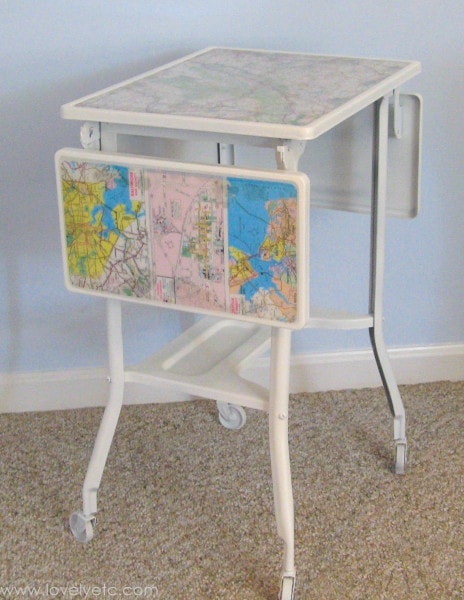
I started off by updating the whole thing using spray primer followed by white spray paint. Then I picked a few maps from my thrifted map collection. I wanted the maps to fit inside each of the three sections on top. I carefully cut out my map pieces and mod-podged them to the tray.
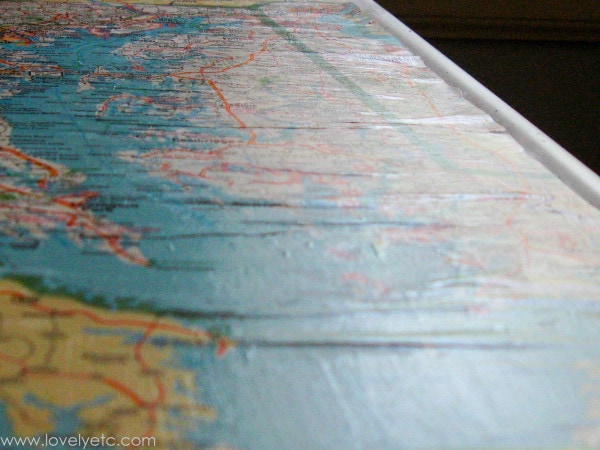
At this point it looked pretty awesome from a distance but up close it was a bit of a wrinkled mess. Plus, I knew I wanted the top to be a bit more durable than simply mod-podged paper. I decided resin would be the perfect solution.
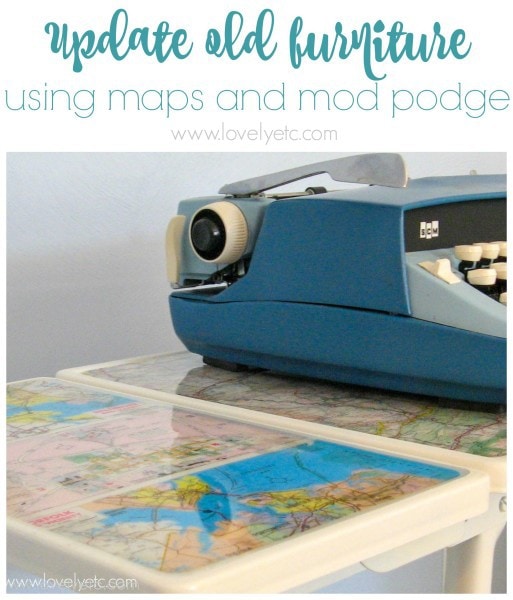
I had never used resin before, but after doing some research I picked up some Envirotex pour-on resin. And it worked perfectly – my table now has a durable, glossy finish and not a wrinkle in sight.
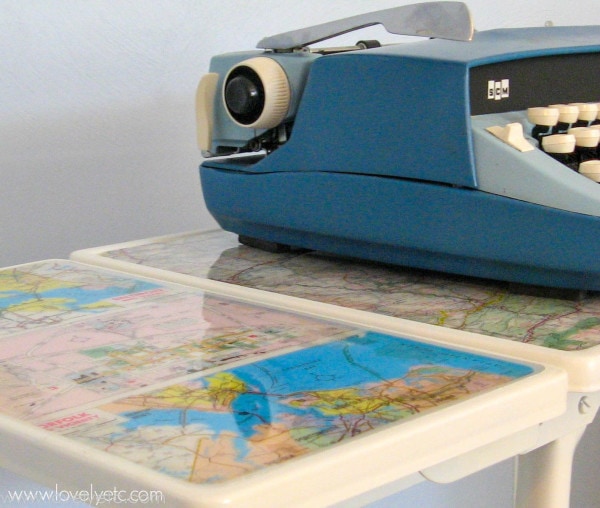
I’ve heard resin can be very finicky so I followed the directions for mixing the two parts to a T.
A few tips for using this resin:
- If you are using resin on top of paper, be sure to seal the paper surface first with a few layers of mod-podge or a similar sealer. Pay special attention to making sure the edges are completely sealed to the surface. If there are any bubbles or cracks, the resin will leak under the paper and cause discoloration.
- When you pour the resin onto your project, tiny bubbles will appear everywhere. The directions say to use a propane torch to easily remove the bubbles. I don’t have a propane torch and I wasn’t about to buy one. It does say that you can exhale gently to get the same results. I read a tip online to blow slowly through a straw which is what I did and it worked perfectly. DO NOT use a blowdryer. That will not help. It is not the heat that removes the bubbles, it is the carbon dioxide.
- If you do use the blow-through-a-straw method, be careful that no tiny drips of spit make it onto the resin. (Just being real here). Water droplets will cause bubbles that cannot be blown out. (This happened to me and I used a foam brush to gently remove the contaminated resin while it was still wet).
- Make sure to mix enough resin for your project. You don’t want to run out. But also, pour very slowly so that you don’t pour on too much. I overpoured one of the sections and it was a huge pain dealing with the overflow.
- It really isn’t that hard to do a project like this. The resin is self-leveling so basically you just mix it and pour it on and it takes care of the rest.
I am so happy with how this project turned out and this typewriter table happens to also make the perfect laptop table.
If you love map projects as much as me, be sure to hop over and check out my map mirror too.

Karen G @ It's Still Life says
I absolutely love this and plan to steal you idea. Yep, I recently got a table just like and have been trying to figure out what to do with it. Thanks so much for sharing.
Korrie@RedHenHome says
That is SO COOL! Love the maps, and love the tips about the resin. I *want* it!!
Sara says
Carrie, it’s perfect! While I pride myself on having an imagination when it comes to thrifting furniture, that is one piece I would have been puzzled about and walked on by. Great job!
Lindsay says
such a great piece…and so you!!!
Julie says
So cute & original :) I just re finished an old typewriter stand a few months ago! Fun!
⚜ ↁℯℬℬᴵℰ⚜@ Debbiedoos blogging and blabbing says
Hi Carrie…you are so talented. I love this piece. Cool typewriter too. FYI every Monday I host a newbie party and would love to have you sometime.
Colleen says
Oh my gosh…I have this same table. It’s been sitting in my basement for several weeks waiting for an idea to pop up! This is great! Thanks!!!
Prairie Mama says
This is by far my favorite project this week!
Beautifully done!!! What a great laptop table…..Hmmm you have my mind a wheeling now.
Blessings!
KraftyKym says
This is wonderful! I love everything about it. Great job!
Prissyville says
How awesome! The resin seemed to bring out the bright colors of the map. Great choice! I totally loved your tips, especially the “keeping it real” part! lol! Great job!
Butterflies & Seashells says
Adorable! I love the map and the arrangement. I have one that I painted robins egg blue. Come by and check out my blog.
Benita
Butterflies & Seashells says
Adorable! I love the map and the arrangement. I have one that I painted robins egg blue. Come by and check out my blog.
Benita
Shabby Friends says
That is soooo creative. Thanks for sharing.
Heather at Happy Chippy Junk says
So stink’n cute!!
Heather at Happy Chippy Junk says
So stink’n cute!!
andrea says
Maps are so hot right now! Great tutorial and I love the final product. Andrea @ townandprairie
Ellen says
That has to be one of the cutest typewriter tables I’ve seen in awhile! Love it! :)
Bettsi says
Carrie, I love it! Extremely awesome!
NYCLQ says
What a GREAT looking piece and fantastic idea! As Bettsi just said – “Extremely awesome!”
xo Lynda
Shannon Green says
That turned out great! The resin makes it look extra nice.
Lauren @ My Wonderfully Made says
LOL — sadly, I remember using these in school when I took typing. I love what you did with this one — very clever transformation!
Marie says
Wow…you’ve totally transformed that old typewriter stand! It’s gorgeous how you’ve modernized it…that’s totally sellable! Happy Monday!
-Marie
Dawn says
Fabulous! Really enjoyed this post! Dawn Suitcase Vignettes xo
Jake says
Wonderful! I picked one of these up at the local thrift about a month ago – for $5. It’s just been sitting there waiting for me to find some inspiration. Found!
Grammy Goodwill says
That looks so much better than it did before. You did a great job.
Red Brick Shanty says
I love your table! It looks so modern, great job.
Jacqueline says
I’m in love with your typewriter table! I should have took the one from the estate sale when I had the chance! Was working with resin difficult?
Jackie says
This is totally amazing!!! I am dying to try out resin now…if only I could find a typewriter table. Maybe I will start with a tray first. Thanks for the tips.
Visiting from Home Stories A to Z
Rachel says
This looks great. I LOVE maps too. Thanks for the helpful tutorial. I would love it if you would stop by and link this up at the crafty link party going on right now at Lines Across My Face.
I hope to see you soon,
Rachel.
http://linesacrossmyface.blogspot.com/2011/08/cure-for-common-monday-4-craft-link.html
BeingBrook says
Love the little typewriter table. I am into maps right now and am doing some in my teenage son’s room. It is impossible to get them wrinkle free. I’ll have to try to resin!
carmen0777 says
Really love this transformation! I too have a “thing” for maps! Thanks for the tips with Resin, I’ve never used before, but plan to as I expand my DIY’ing.
Joysy28 says
That is so cute! And thanks for the resin tips!
InMyOwnStyle says
Love typewriter tables. I had one as my very first desk and creative space when I was growing up. I wish I still had it. I love maps too and your resin tips are great.
I am going to link your post to my DIY Daily page on my site which is where I place projects I love.
My best- Diane
birdsandsoap says
I have this exact same cart! I found it thrifting like five years ago and just haven’t come around to a good solution for it – Until NOW!! Thanks so much for the idea. The metal just looked so “utilitarian- chic”, but I couldn’t bare to get rid of it since the drop down leaves are so clever. I thought I would paint it a fun color or something. Your mod podge is perfect. And the resin just takes it to another level. I’ve heard it is tricky to work with, but I think you have inspired me to give it a go! Thanks!
Cassie @ Primitive & Proper says
i love it! the maps suit the industrial style of the table perfectly!!! awesome job!
Cassie @ Primitive & Proper says
i love it! the maps suit the industrial style of the table perfectly!!! awesome job!
One Charming Thing says
Awesome! Thanks for the info, I’ve been hesitating using resin for years! I’ll try it now. :)
Sheila
PⒿ @ $ € € ₦$ ₣®0₥... says
Cool project. Really love the how to portion as well.
PⒿ @ $ € € ₦$ ₣®0₥... says
Cool project. Really love the how to portion as well.
Lisa - A Room with A View says
visiting via handmade home, am about to redo my kids’ basement table (old kitchen table) and was thinking mod podge+anything else that would work..this gives me ideas. thx for sharing..love it!
Amy @ TheMombot.com says
LOVE this! I just bought a typewriter stand for $5 on craigslist. I plan to use it for a tiny crafting station. I hadn’t even thought about using a resin, so I’m so glad I came across your post. Thanks for the extra tips too (especially the spit one – haha!)
Lindsay says
This is such a unique piece! I am so impressed by what you did with it. Very creative & absolutely gorgeous!
I would love to have you link this up to my first link party–
http://southernlovely.blogspot.com/2011/08/show-share-1.html
Sara says
Carrie, I had to come back and say I’m so proud of you and the fact that I can say “Hey, I know her!” I’ve been seeing your little table circulating. You’re creating a little buzz! Keep up the great blogging!
Julia @ 551Eastdesign says
This might be one of my favorite pieces I’ve ever seen! LOVE!
april@gingerbread says
seriously? four bucks? you totally scored girl! I lve it…I hope you will link up here:
http://www.thegingerbreadblog.com/2011/08/sweet-saturday-v1.html
Bethany @ A Fish Who Likes Flowers says
Your table is beautiful!!! And thanks for all the tips for using resin, I’ll have to keep them in mind.
april@gingerbread says
thank you so much for linking up! I hope to see you next week!
xoxo
Nita {ModVintageLife} says
I featured your typewriter table today at my Mod Mix Monday party.
the gardener's cottage says
nita sent me. wow, i really love the look of this. excellent job.
xo
janet
april@gingerbread says
YAY…I featured you here:
http://www.thegingerbreadblog.com/2011/08/sweet-saturday-v2.html