This rustic DIY wooden nativity is beautiful and simple to make using the free printable pattern and a few basic tools.
We always had a nativity scene in our home at Christmas when I was growing up. I loved to look at each of the figures and think about their role in the story.
As an adult, I’ve struggled to find a nativity set that I really love. I have a cute wooden nativity with peg people that my kids like to play with, but I wanted something more. So I decided to make one myself.
This simple DIY nativity was actually on my list of Christmas projects last year but I never got around to it, so I decided it was going to be the first thing I made this Christmas.
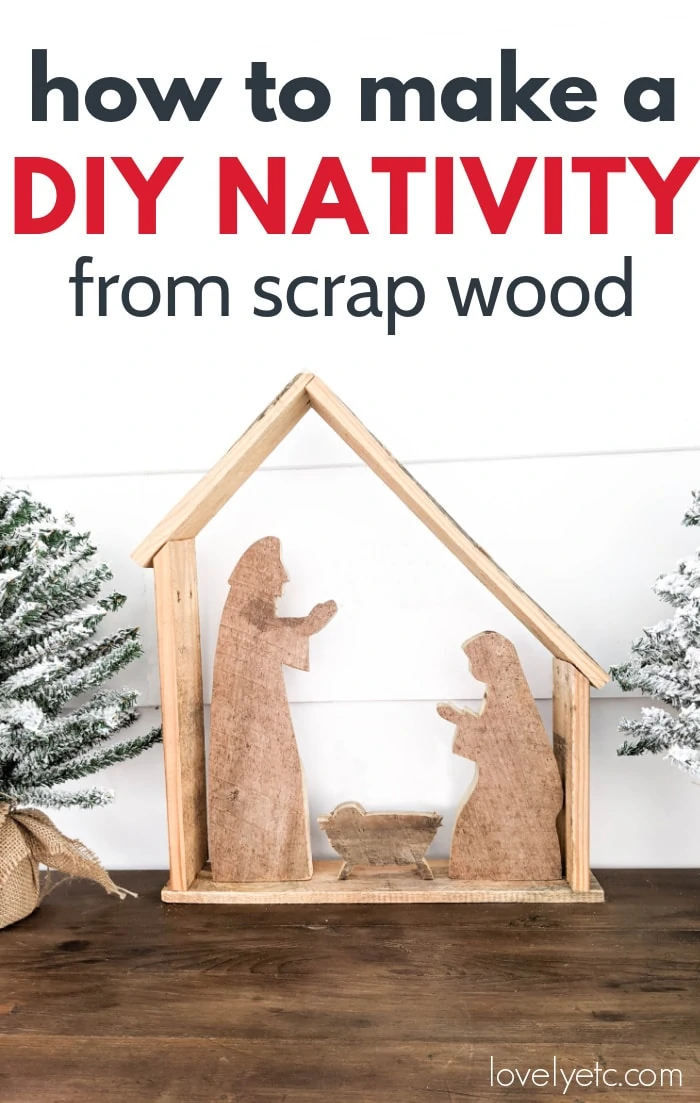
It doesn’t have a whole host of characters or tons of detail like the nativities I remember from childhood. But I think it is beautiful anyway.
And I think the rustic simplicity is a perfect match for the beautiful but humble story of Jesus’ birth.
I’ve tried to make this as easy to recreate as possible with a printable pattern, step-by-step instructions, and a video tutorial below.
This post contains affiliate links which means if you make a purchase after clicking a link I will earn a small commission but it won’t cost you a penny more. Click here to see my full disclosure policy.
Materials
- Wood for Jesus, Mary, and Joseph – This is the perfect project for using up any scrap wood, pallet wood, or reclaimed wood you have laying around. You need wood that is at least 6 inches wide for the Mary and Joseph figures. You want to choose wood that is ½” to 1’ thick. If you don’t have scrap wood that will work, a single 6”x8′ pine plank will be plenty.
- Wood for the stable – 1”x4” boards are perfect for building the stable. If you don’t have scrap wood, you can get furring strips at your local home improvement store. They are super cheap and are rough cut which gives the perfect texture for this project.
- Pattern for Mary, Joseph, and Jesus – You can download the printable pattern here.
- Sandpaper
- Wood glue – for building the stable
- Pencil
Tools
- Jigsaw or Scroll Saw – I used a jigsaw to cut out my nativity figures and it worked great. If you have a scroll saw, it should be even easier.
- Miter saw – I have this Ryobi miter saw and I love how easy to use it is.
- Nail gun or Hammer and finishing nails – You can absolutely make this with just a hammer and nails, but a nail gun makes the whole thing faster. I have this nail gun – it’s easy to use and doesn’t require an air compressor.
How to make a DIY Wooden Nativity
Choosing wood
I’m a bit of a hoarder of scrap wood so I pulled an old piece of weathered wood out of my scrap pile for this project.
I love the way this nativity set looks made with textured, weathered wood. But I think it would also look gorgeous with new, smooth boards stained dark.
If you are using new boards but you want them to look weathered, there are lots of ways to make new wood look old.
When you are choosing your boards, choose the roughest boards you can find. Then rough them up even further using a hammer, chains, a screwdriver, anything you have around. (That part is very satisfying.)
Then wipe on a few coats of stain or use Rustoleum Weathered Wood Accelerator for a great grayish finish with lots of color variation.
Dimensions and Pattern
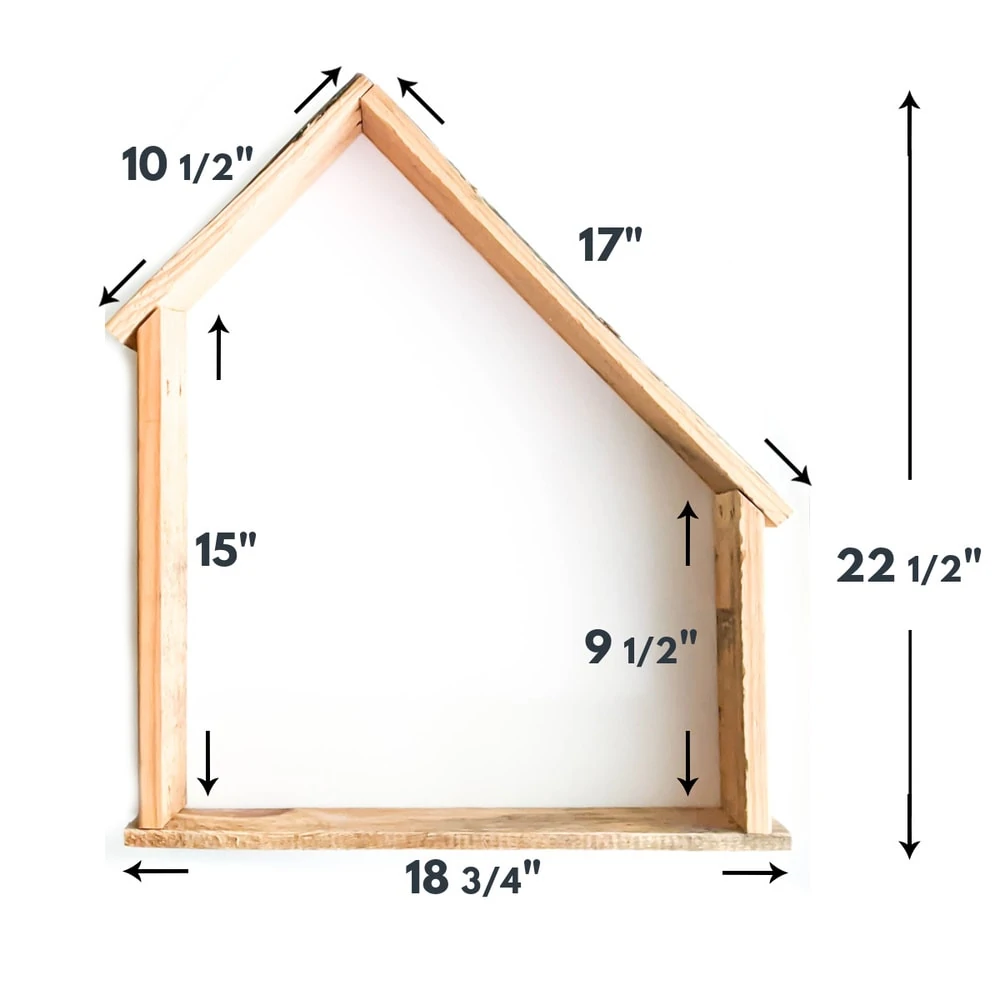
My nativity is 18.75″ x 22.5″. I wanted it to be large enough to have some presence.
The largest figurine, Joseph, is 4.25″ x 15.25″, Mary is 4.75″ x 10.75″, and Jesus is 5.5″ x 3.25″.
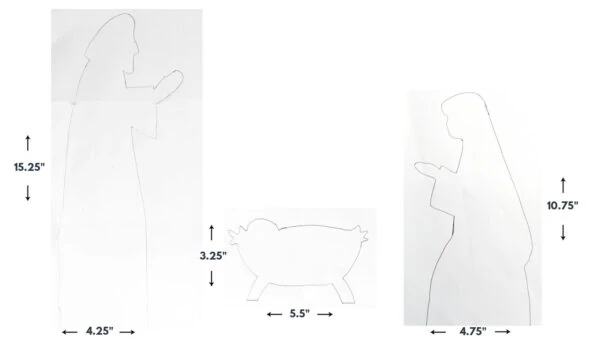
Click here to download the patterns for Jesus, Mary, and Joseph.
You could definitely make this smaller or larger by printing the pattern pieces larger or smaller and adjusting the size of the stable pieces. You could also make an even larger version for outdoors using ¾” plywood for the figures.
To build a nativity set that is similar in size to mine, just print the above pattern onto regular 8.5 x 11″ paper.
Mary and Joseph are each larger than a standard sheet of paper so they will each print onto two sheets of paper. Once they are printed, just cut them out and tape the pieces together to form your pattern.
Cutting out Jesus, Mary, and Joseph
Once you have cut out your pattern, trace each figure onto your wood.
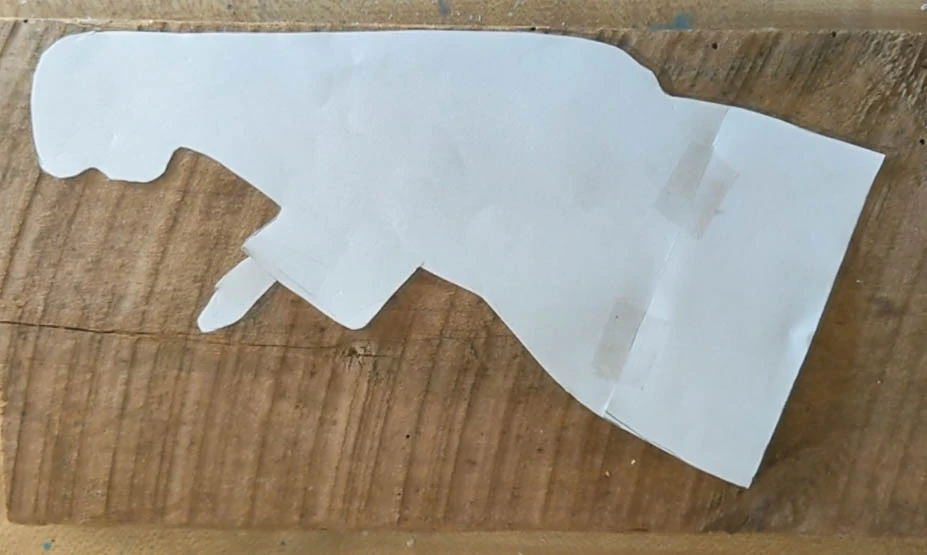
Then you can start cutting them out.
If you have a scroll saw, this is the perfect project to use it for. I don’t happen to have a scroll saw, so I’m using my trusty jigsaw.
As always, be sure to take proper safety precautions and wear eye protection when operating power tools.
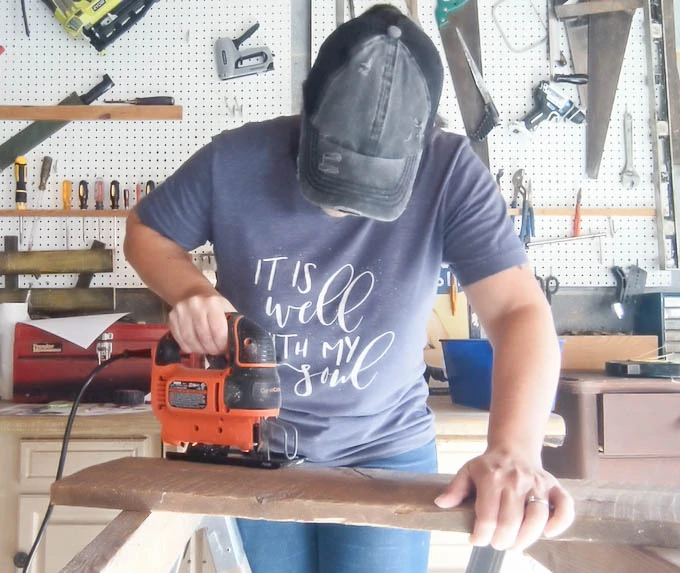
Jigsaws are great for cutting curves but cutting more complicated shapes like these does take a little time.
You can’t just trace around your shape with a jigsaw the way you would with a pencil or a pair of scissors. The jigsaw just isn’t able to turn on a dime that way.
In the straighter areas like Mary’s back, you can pretty easily just follow the curve of the pattern with your jigsaw.
But in the more detailed areas like around the face and the arms, you’re going to need to make lots of small cuts, cutting in from the edges and cutting out pieces of excess wood as you go.
You can get a better look at how this looks in action in the video tutorial at the end of this post. And you also may want to check out this post from the site Mama Needs a Project if you need more info on using a jigsaw to cut shapes in general.
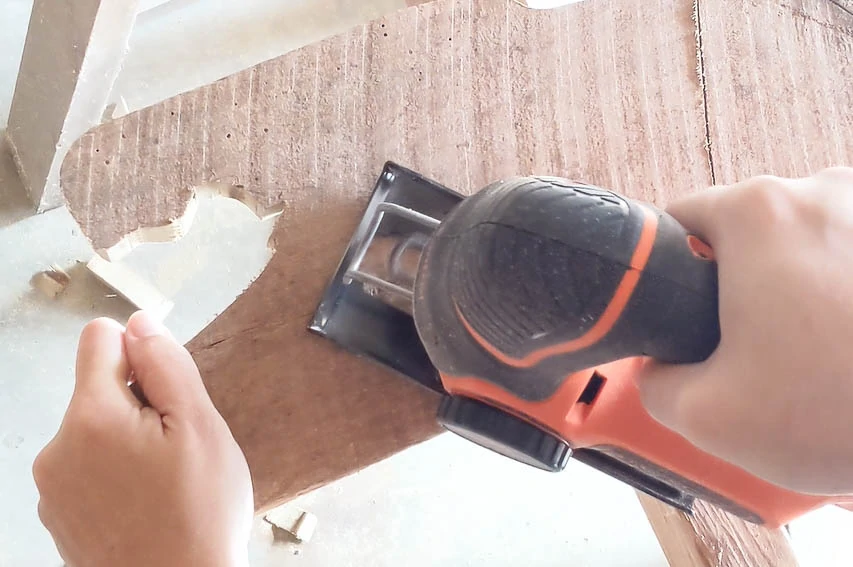
Once you have all of your figures cut out, sand the cut edges lightly to knock down any rough spots.
Cutting out the stable
Once your figures are cut out, it’s time to make the stable. Or if you want to skip the stable and just use the people, that works too.
Compared to cutting out the figures, the stable is a piece of cake. I started out by laying out my wood to get an idea of what size and shape would work best. Then I used my miter saw to cut each piece to size.
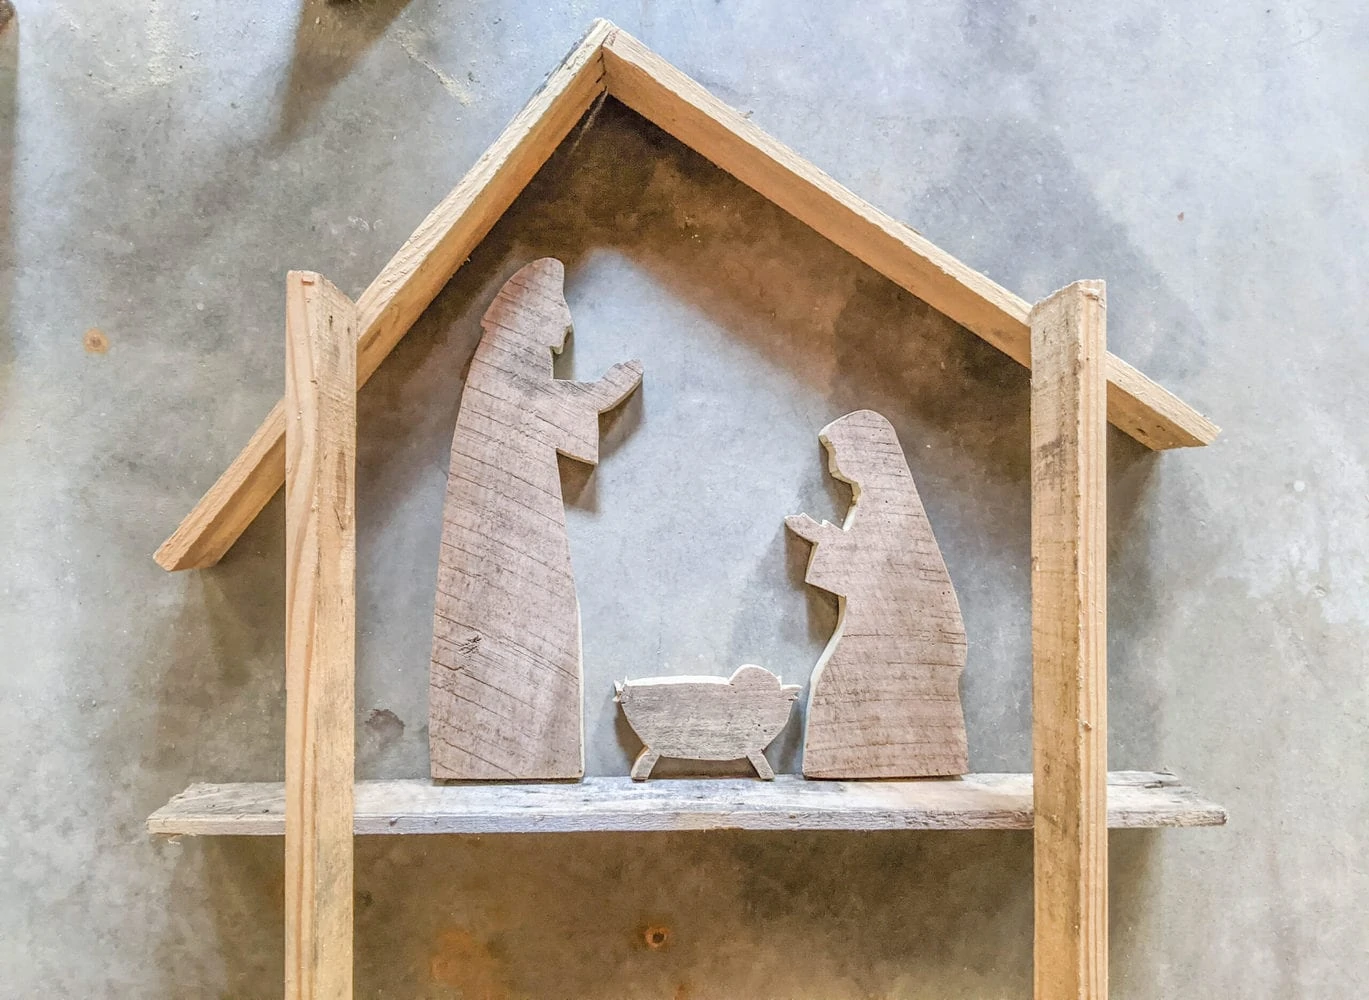
Cut the pieces for the roof and floor 18 3/4″, 17″, and 10 1/2″ with straight cuts at each end.
The two sides of the stable will each have an angled cut where they meet the roof.
Cut one side 9 1/2” long with a 45 degree angle at one end.
It works best to cut the final side to measure; it will be around 15″ with an angled cut at the top.
Put the other pieces in place and then measure the final side, using a pencil to mark the correct angle to meet the roof. (This angle should be close to 45 degrees, but again, it works best to measure it once everything else is in place for a perfect fit.)
Building the stable
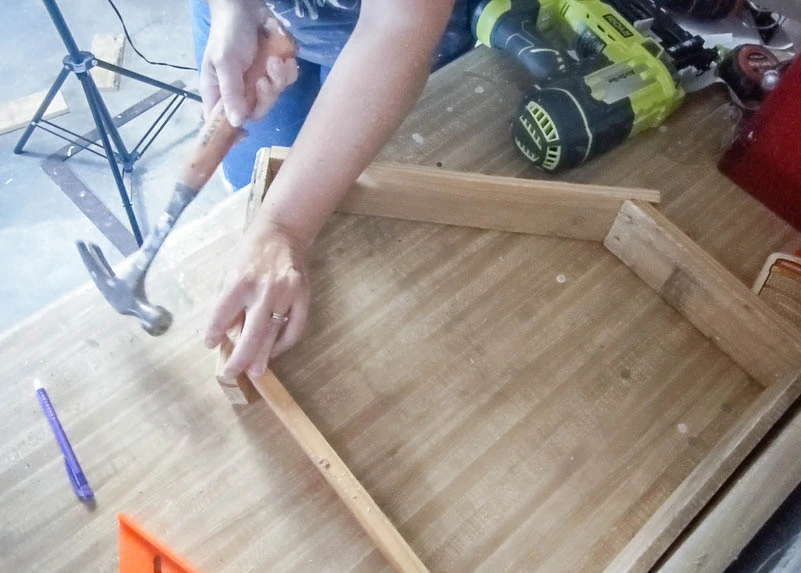
The stable is constructed using wood glue and nails.
If you have a nail gun, that makes things go much faster, but if not, a hammer and finishing nails also works just fine.
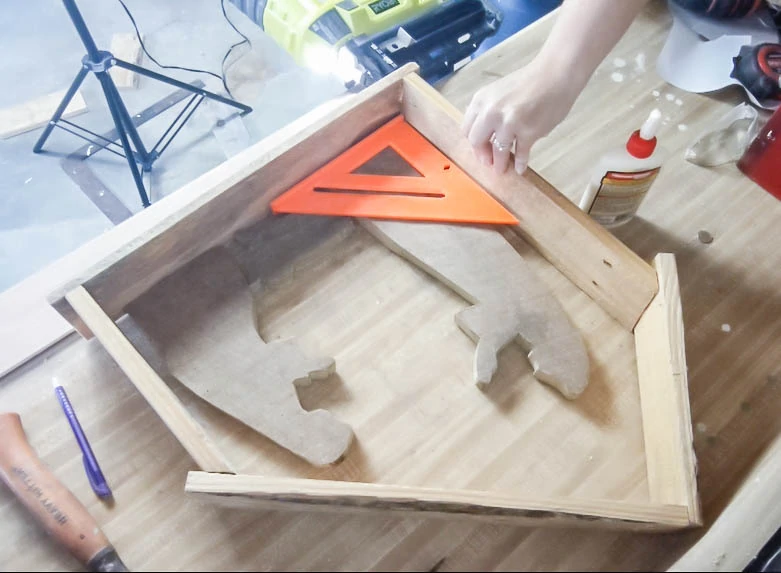
Use wood glue to attach each piece; then use two finishing nails to secure each board in place.
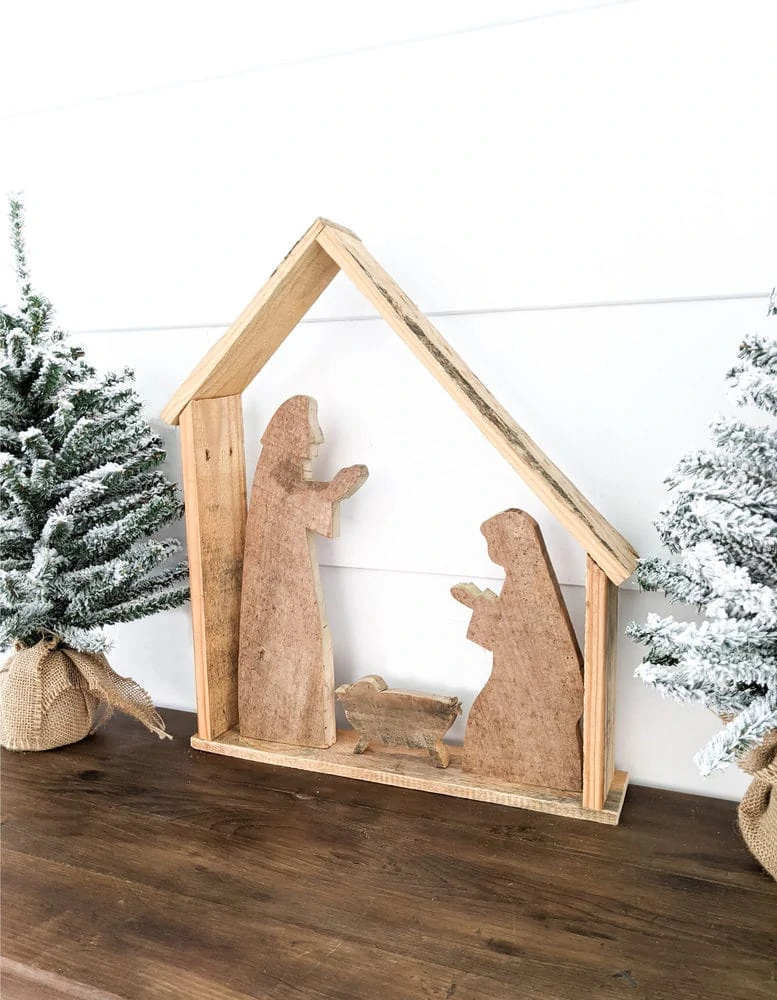
You can attach Mary, Jesus, and Joseph to the stable floor if you would like or you can just set them in place. I ended up attaching mine because my kids constant running and thumping through the house kept knocking Joseph over.
Adding an optional backing
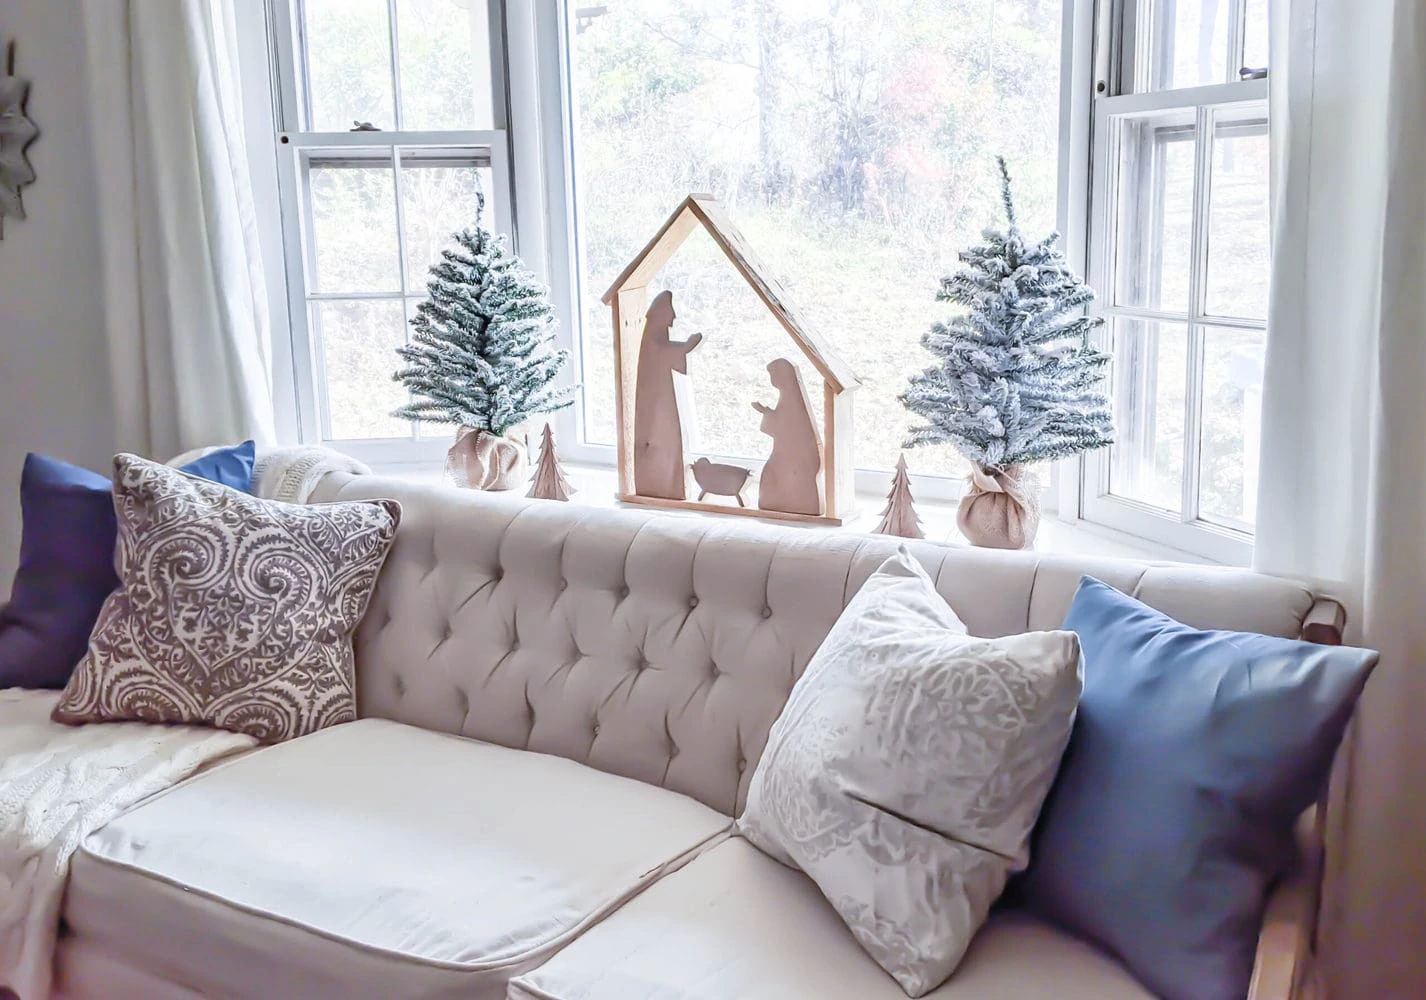
I created my diy wooden nativity with the idea of putting it in my bay window. I love that it looks basically the same from both sides so you can enjoy it from inside or outside the window. It’s also perfect for using in the center of a table or anywhere else it will be seen from both sides.
If you are putting your nativity on a table or shelf, you can add a backing to the stable if you prefer.
Adding a wood backing is really simple. Just trace your stable onto a piece of ¼” plywood, cut it out, and attach it with glue and finishing nails. You can stain or paint the backing if you want to help the figures stand out more.
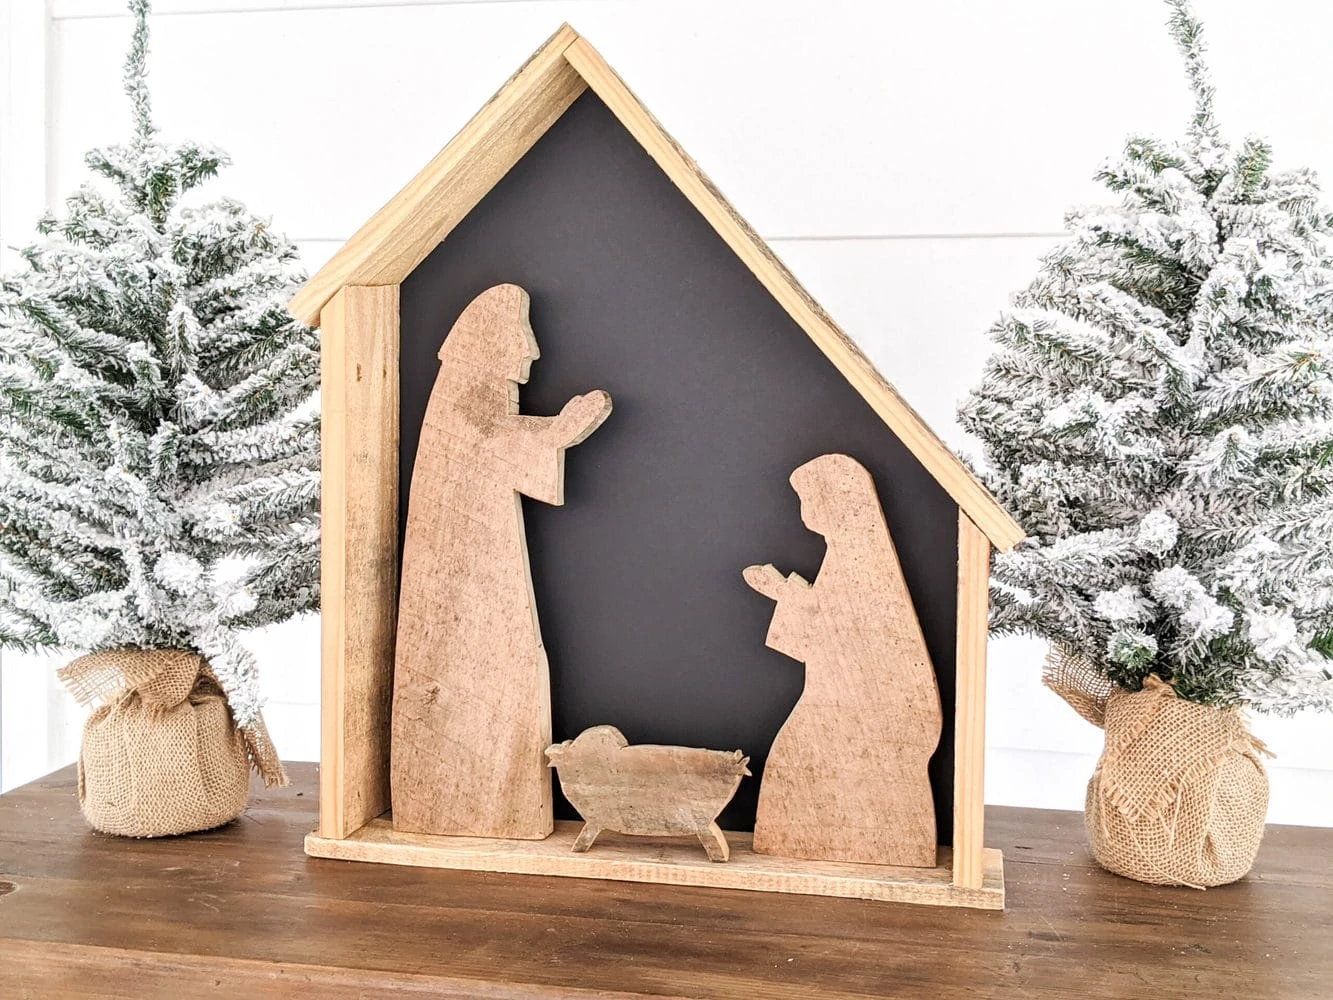
For these photos, I went the super easy route and just added a quick backing of black posterboard.
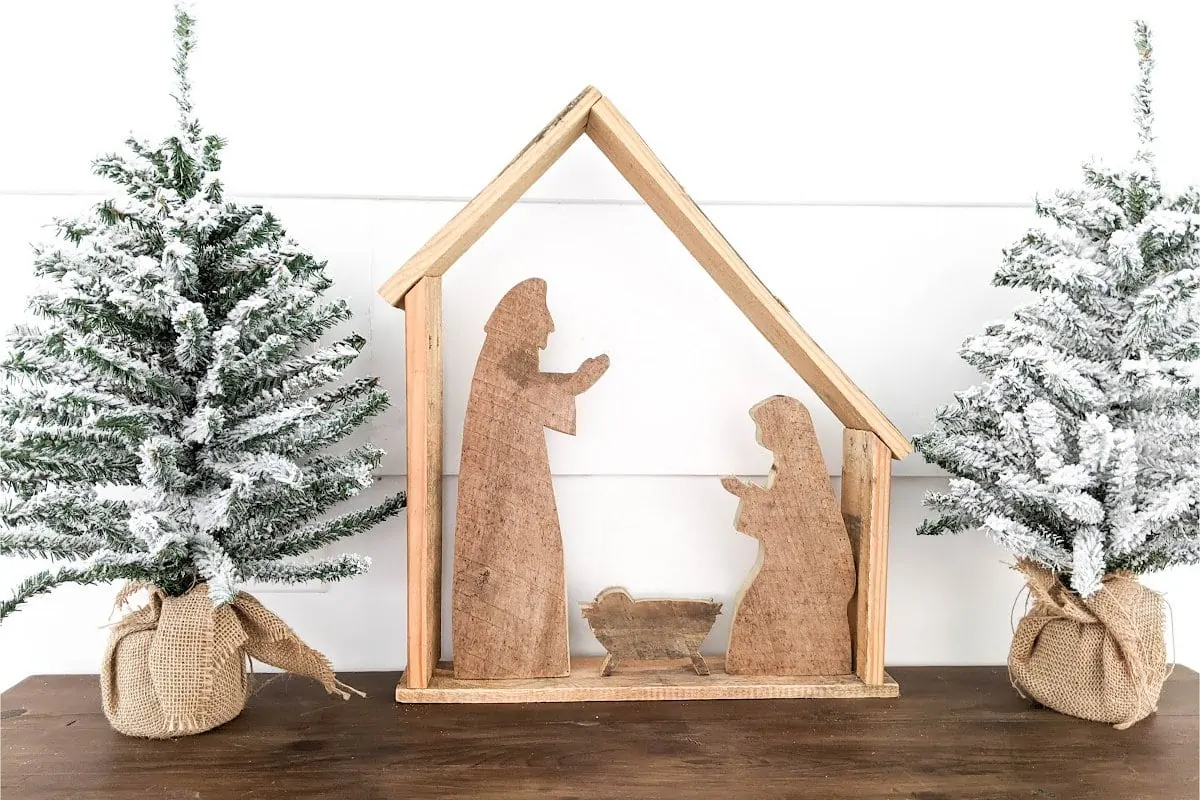
I’d love to know which version you prefer – open or with a backing? I think I’m partial to the open backed nativity, but both options are nice.
Video Tutorial
I also created a video tutorial for the more visual learners. This video is especially helpful if you aren’t quite sure about cutting the figures with a jigsaw.
I’d love for you to subscribe to my Youtube channel!
Looking for more simple Christmas DIYs? I’ve got you covered with the posts below!
I’d love for you to pin this post on Pinterest!
How to Make a Simple DIY Wooden Nativity
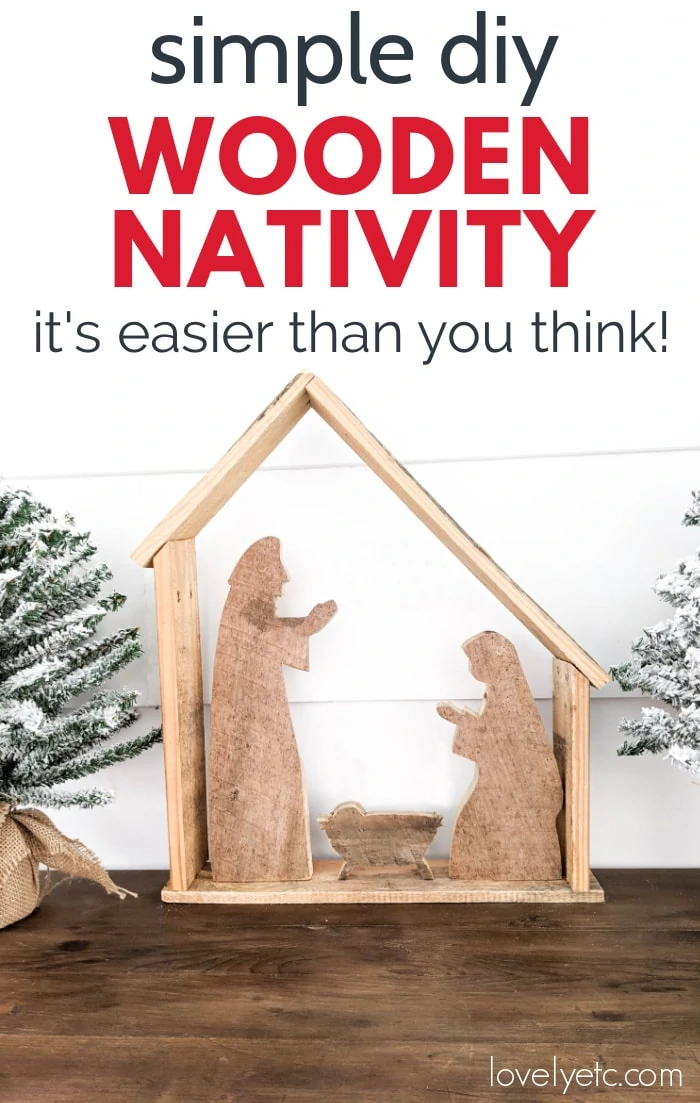
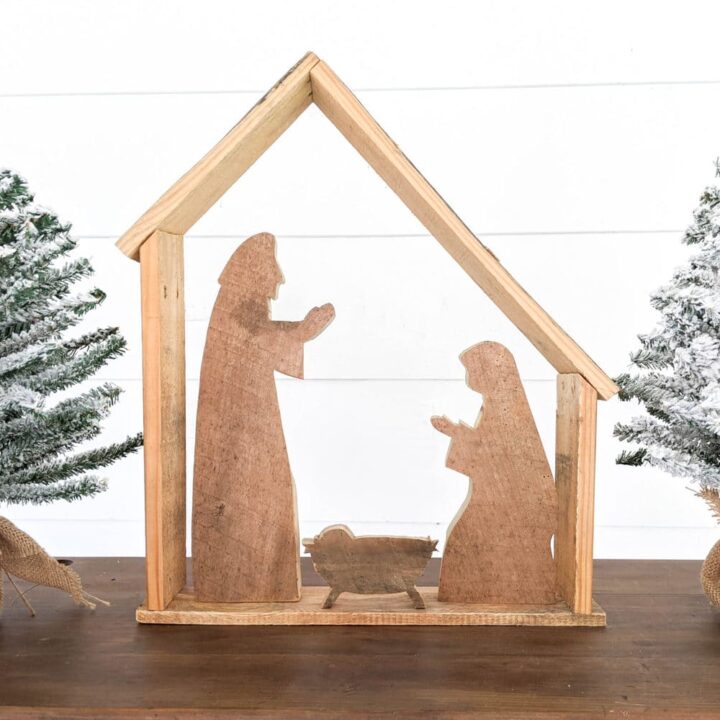
This simple wooden DIY nativity is a beautiful piece that can be made with the included free template. This will become an heirloom piece that can be displayed each Christmas for years to come!
Materials
- Wood for Jesus, Mary, and Joseph - pallet wood or other rustic wood that is 1"x6"
- Wood for the stable - rustic 1"x4" boards work well
- Pattern for Mary, Joseph, and Jesus – You can download the printable pattern here.
- Sandpaper
- Wood glue
- Pencil
Tools
- Jigsaw or Scroll Saw
- Miter saw
- Nail gun or Hammer and finishing nails
Instructions
- Download the free pattern for Jesus, Mary and Joseph.
- Print the pattern onto regular 8.5 x 11″ paper. Mary and Joseph will each print onto two sheets of paper. Cut them out and tape the pieces together to form your pattern.
- Trace each figure onto your wood.
- Cut the figures out with a scroll saw or jig saw.
- Cut the pieces for the roof and floor 18 3/4″, 17″, and 10 1/2″ with straight cuts at each end.
- The two sides of the stable will each have an angled cut where they meet the roof. Cut one side 9 1/2” long with a 45 degree angle at one end.
- Cut the final side to measure; it will be around 15″ with an angled cut at the top.
- Use wood glue to attach each piece; then use two finishing nails to secure each board in place.
- Set Mary, Jesus, and Joseph in place or attach them to the stable floor if you prefer.
Recommended Products
As an Amazon Associate and member of other affiliate programs, I earn from qualifying purchases.


Kathy says
I love this – thank you so much!
Carrie says
Thank you!
Marietta Walker says
Beautiful and simple elegance.
Carrie says
Thank you!
Amy says
Oh my, this is gorgeous. I love the simplicity of it, and that uneven roofline is just perfect. I like both versions, but probably prefer it with no back. The photo with it in front of your window is stunning. Thanks so much for sharing the plans! I’m going to put this on my “to-make” list. :)
Carrie says
Thank you!
Paula@SweetPea says
I love this project, Carrie! This is something that your boys will enjoy every Christmas and one day you can pass down to one of them.
Carrie says
Thank you! I would love to pass this down one day!
Jeanie says
Thank you for sharing this!!! Every year when I put out our nativity, I am reminded that I haven’t found one that I really like. This one perfectly captures the essence of that heavenly event. I inherited a scroll saw and have used it once the other day. I’m looking forward to getting this nativity made before this Christmas. And I may even make one for our church, pastor, and our parents. Thank you again. Your design is beautiful.☺️✝️