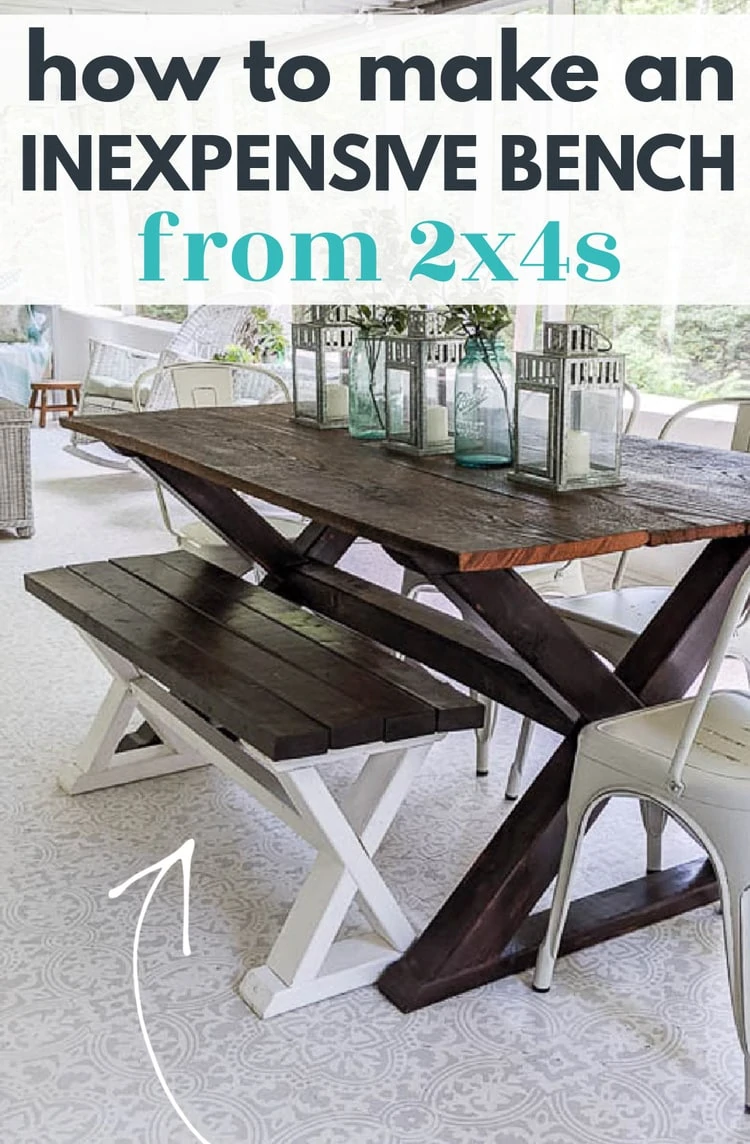
How to Build a DIY Wood Bench from Inexpensive 2x4s
Step-by-step tutorial to make a DIY wood bench from inexpensive 2x4s that works beautifully both indoors and outdoors.
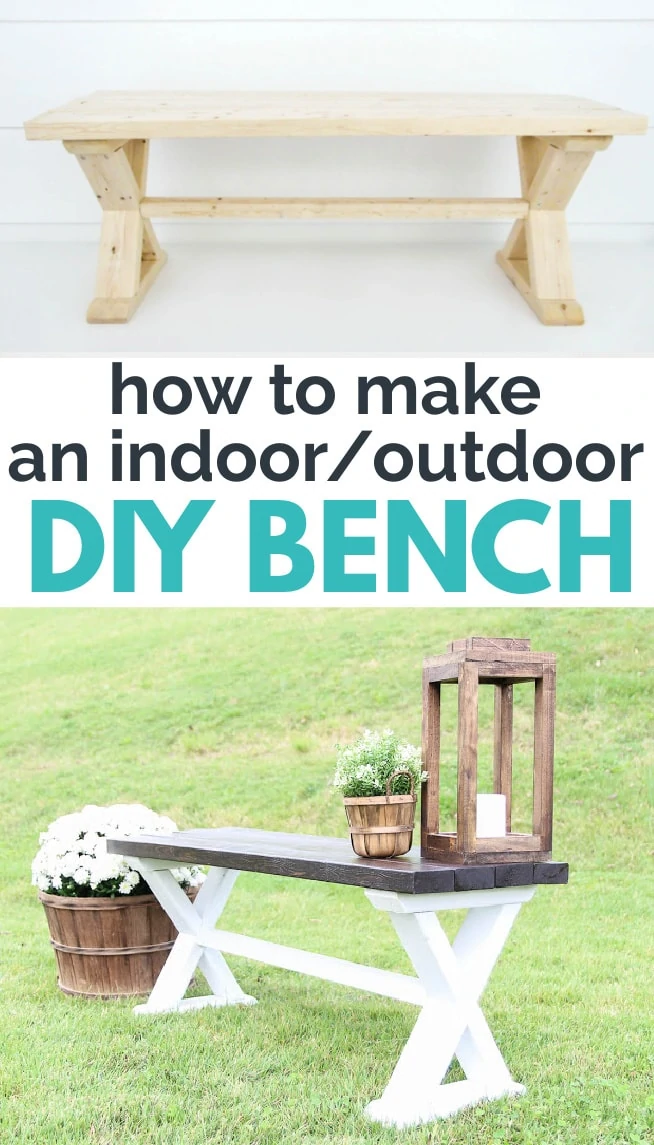
This DIY bench is one of those pieces of furniture that looks great in just about any room in your house. It’s an awesome bench for a mud room or entryway. It looks beautiful at the end of the bed. It’s perfect paired with a farmhouse table and chairs. And the slat-top and water resistant finish mean it’s right at home in the garden or on the patio. It works basically anywhere!
And because it is made of simple 2×4 planks, this bench is very sturdy and very inexpensive. A couple of years ago, I was able to buy all of the wood for this bench for less than $20! With lumber prices going up like crazy, it would cost a bit more these days, but it’s still very affordable.
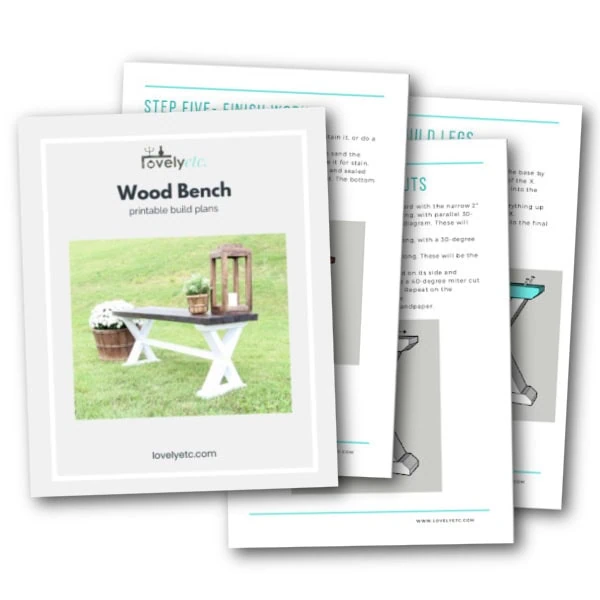
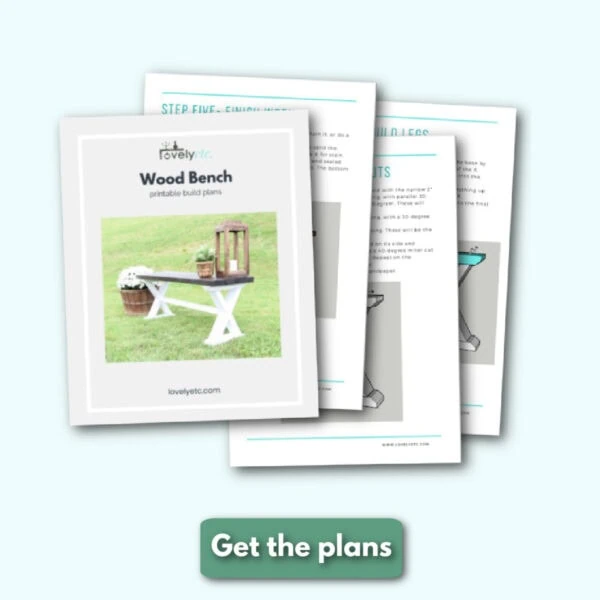
I am sharing the tutorial for building this bench below and I’ve also created even more detailed printable pdf build plans. The build plans walk you through exactly how to build this bench including a tools list, materials list, and simple step-by-step instructions with drawings. You can purchase the build plans in my shop here.
This post contains affiliate links which means if you make a purchase after clicking a link I will earn a small commission but it won’t cost you a penny more. Click here to see my full disclosure policy.
How to Build a DIY Wood Bench
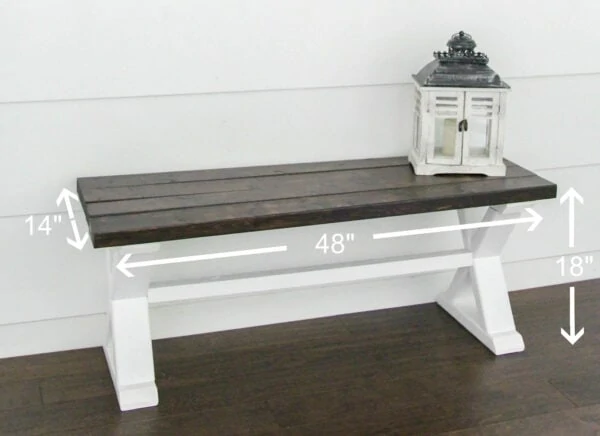
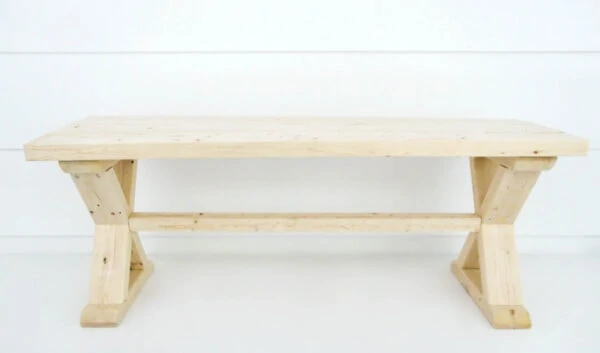
The finished bench is 4 feet long, 14 inches wide, and 18 inches high.
Materials
- Four 2″x 4″x 8′ wood boards – These are just basic 2x4s like contractors use for stud walls. They may be labeled as framing lumber or studs.
- One 2″ x 2″ x 8′ wood board – These are very inexpensive and can usually be found with the furring strips.
- 100 and 220 grit sandpaper
- Wood glue
- 2″ wood screws – if you are planning to use your bench outside, it’s a good idea to use exterior screws
- 2.5″ pocket screws
- Finishing nails
- Paint, stain, and sealer of your choice. If you are using your bench outdoors, be sure to choose exterior paint and a sealer that can stand up to outside use. I used Rustoelum Kona Stain, Valspar exterior paint in white, and General Finishes High Performance Topcoat in flat.
- Paintbrush for applying paint. This is my favorite paintbrush for painting furniture. I prefer to use a clean rag to wipe on most wood stains.
Tools
- Tape measure
- Miter saw
- Drill and drill bits
- Pocket hole jig – I have and love the Kreg R3 – it’s a smaller, less expensive Kreg Jig that is still pretty easy to use. If you are new to woodworking and don’t want to make a big investment, the Kreg Jig mini is the least expensive option.
- Hammer – you could also use a nail gun if you have one on hand, but you’ll be nailing less than ten nails so a hammer will work just fine.
Cut wood for the X bench legs.
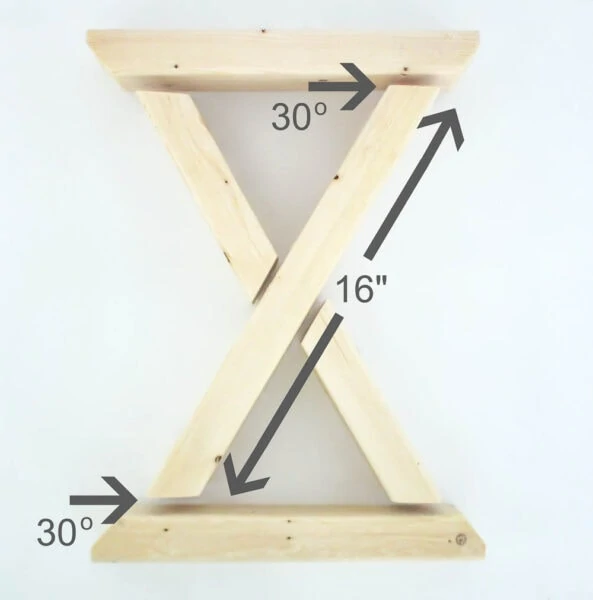
The legs may look a bit complicated if you are newer to woodworking, but they really aren’t difficult.
Start by cutting two pieces of 2″x4″ that are 16″ long, with parallel 30-degree angles at each end. These will form the longs sides of each X.
To make the shorter side of each X, cut four pieces of 2″x4″ that are 8″ long, with a 30-degree angle at each end as shown in the photo below.
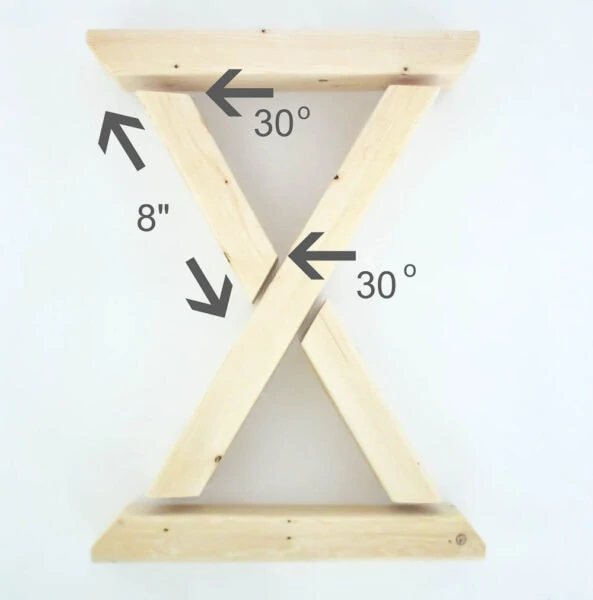
To make the top and bottom supports for the legs, cut four pieces of 2″x4″ board that are 13″ long. Then to add a nice angled edge detail, you can make a 40 degree miter cut one inch from the edge of each board.
Sand any rough edges smooth with 100-grit sandpaper.
Build the bench legs.
The legs are put together using wood glue and 2″ screws.
Screw the long side of the X and the first 8″ piece to the base by screwing two screws through the base into each side of the X. Screw two more screws through the long side of the X down into the top of the shorter end.

To finish the X, line the final 8″ piece of the X and the top up and then screw through the top into both sides of the X. Finally, screw straight through the long side of the X into the final short side to secure it.
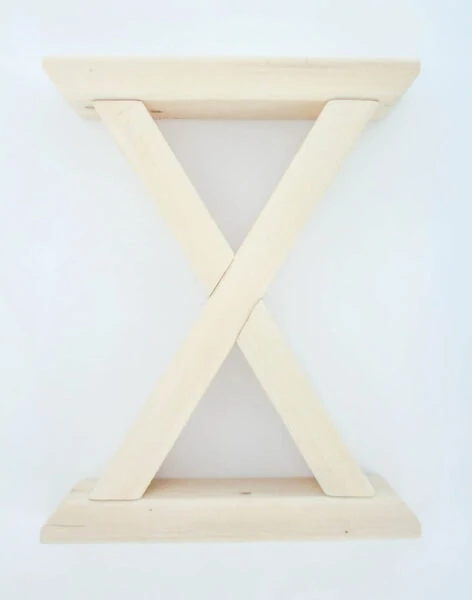
Repeat for the second leg.
Cut and attach the stretcher.
The board that connects the two bench legs is called the stretcher and helps give the bench stability.
Cut the 2″x2″ board 36″ long.
Use your pocket hole jig to drill one pocket hole near each end of this board.
Attach the 2″x2″ support between the two legs in the middle of the X using 2.5″ pocket screws in each pocket hole. It is easiest to lay each X leg on the floor while you attach the support. Once the bench is flipped right side up, these pocket holes will be on the bottom and won’t be seen.
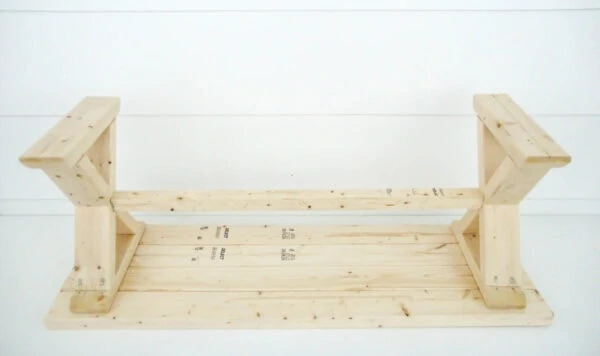
Prepare the bench top.
Cut the remaining 2″ x 4″ boards into four 48″ pieces. These will form the bench top.
Lay these boards out on a flat surface, face down, leaving a small gap between each board. This gap leaves room for the wood to expand and contract and also allows for water drainage if you are using your bench outdoors. Nickels work perfectly as spacers.
Set the legs in place on top of the upside-down bench top. Make sure the legs are centered across the planks and are an equal distance from each end of the bench top. Each leg should be around 2.5″ from the end of the bench top.
Attach the bench top.
Drill two holes through the end of each leg into the top boards and attach them with 2.5″ screws. This will secure the two outer boards of the top. The two inner boards cannot be attached in this manner because of the position of the X legs,
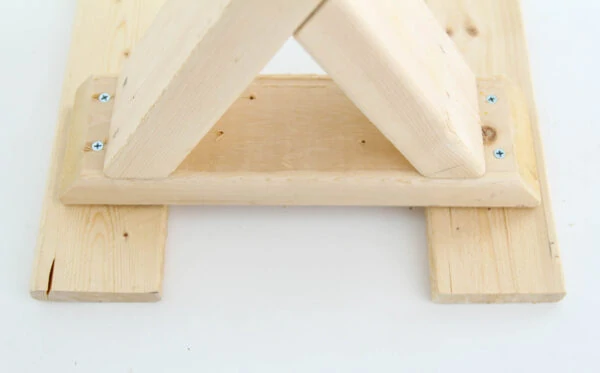
Turn the bench over. Lay the remaining two 2″ x 4″ boards on the top, using the nickels as spacers again to keep them spaced evenly. Use finishing nails to attach each board to the legs.
When it comes to the finish, there are so many choices. You could paint the whole thing, stain it, or do a two-tone look like I did. Whether you choose to paint or stain, it’s a good idea to lightly sand the wood with 220-grit sandpaper first.
I chose to do a classic dark wood and white two-toned finish for my own bench. The top was stained using Rustoleum Kona Stain and sealed with General Finishes High Performance Flat TopCoat. The bottom was painted using white exterior paint.
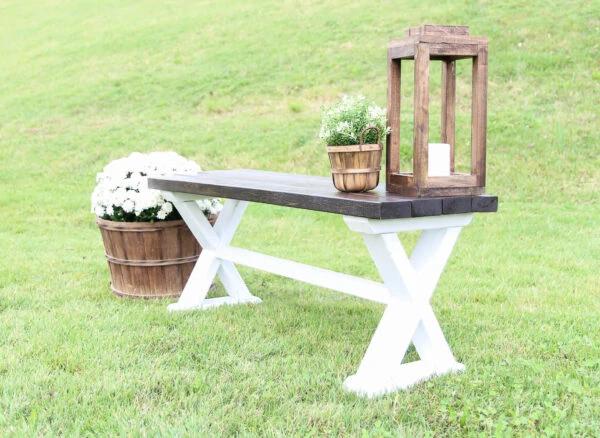
This bench is super versatile and looks gorgeous in all kinds of places.
I chose to pair my own bench with a DIY farmhouse table on our screened porch. I added these inexpensive chairs to complete the set and we love eating our meals out here when the weather is nice.
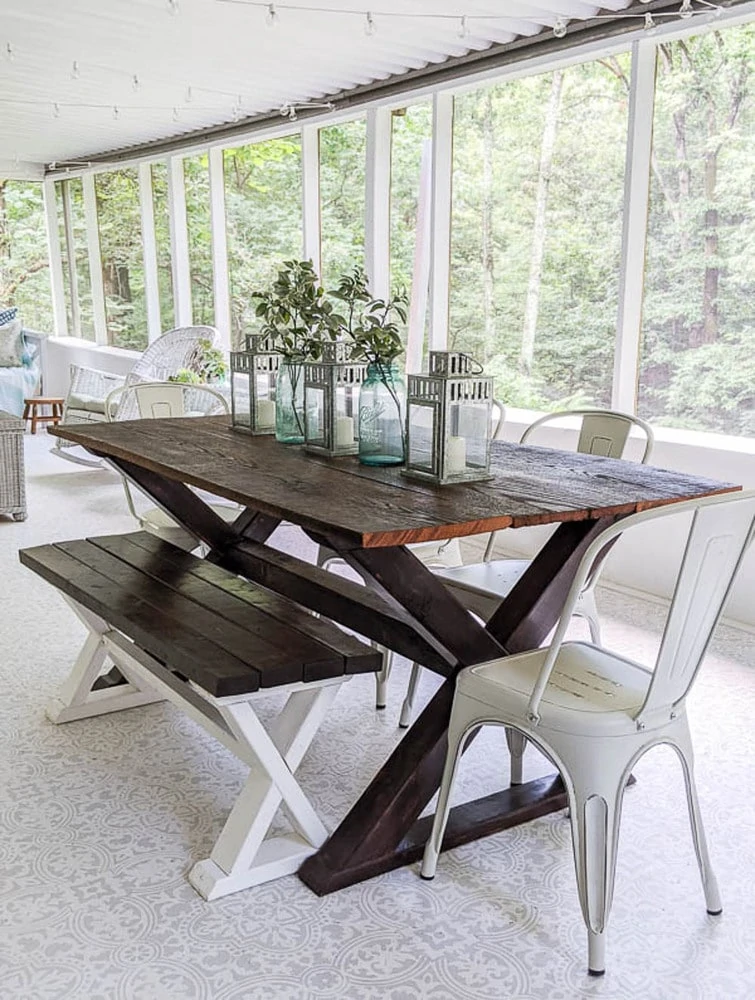
If you are interested you can find all the details of my budget screened porch makeover here. (It’s one of my favorite spots in our whole house!)
Don’t forget, there are printable build plans available in my shop with cut lists and step-by-step instructions
Other simple woodworking ideas I think you’ll love:
- How to Build a Beautiful DIY Farmhouse Table with X Legs
- How to Make a Gorgeous DIY Planter Box for Cheap
- How to Build a DIY Daybed for $50
- Where to Get Cheap or Free Wood for DIY Projects
I’d love for you to pin this post on Pinterest!

This is really cute! Thanks for the detailed instructions.
Thank you!