How to Build a Beautiful DIY Farmhouse Table with X Legs
This detailed tutorial shows step-by-step how to build a beautiful DIY farmhouse table that works perfectly both indoors and outdoors.
When I needed a new table for our screened-in porch, I decided it was the perfect time to build one myself and I absolutely love how it turned out.
This table works beautifully in a dining room, on a covered porch, or outside on a patio depending on how you finish it.
It has a clean, simple design, but the chunky X legs keep it from feeling plain. They also help keep the lumber cost low, since you won’t need to buy any fancy turned table legs to make this table.
The X legs are created using a super sturdy lap joint so you can feel confident this table will hold up to whatever your family throws at it.
I am sharing the tutorial for building this table below and I’ve also created printable pdf build plans. The build plans walk you through exactly how to build this bench including a tools list, materials list, and simple step-by-step instructions with drawings. You can purchase the build plans in my shop here.
This post contains affiliate links which means if you make a purchase after clicking a link I will earn a small commission but it won’t cost you a penny more. Click here to see my full disclosure policy.
How to Build a DIY Farmhouse Table
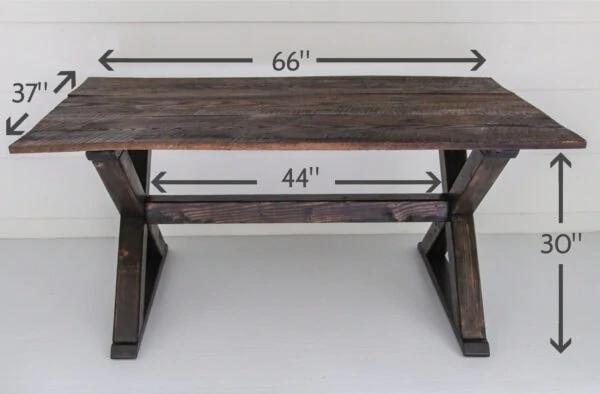
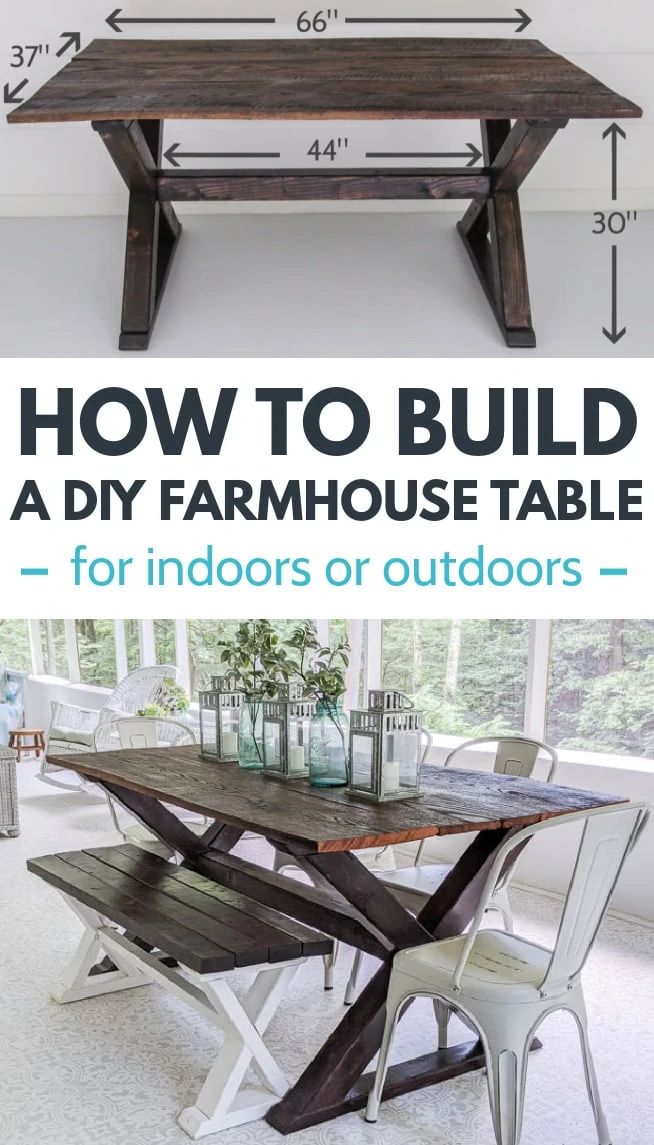
The finished table is 37″ wide, 66″ long, and 30″ high.
Materials
- Three 4″x4″x8′ boards – these will form the table legs
- 100 and 220 grit sandpaper
- Wood glue
- 2½” wood screws – if you are planning to use your table outside, it’s a good idea to use exterior screws
- Two 2″x4″x8′ pine boards – for the top and bottom of each X leg
- Four 2″x10″x6’ wood planks – to make the tabletop, you can also use just about any width wood plank for the tabletop and this is a great project to use reclaimed wood on if you have some on hand
- Four figure eight tabletop fasteners – to attach the tabletop to the legs
- 2.5″ pocket screws
- Stain or paint and sealer of your choice – If you are using your table outdoors, be sure to choose exterior paint and a sealer that can stand up to outside use. I used Rustoelum Kona Stain and General Finishes High Performance Topcoat in flat.
- Clean rags and/or paint brush – for applying paint and stain. This is my favorite paintbrush for painting furniture. I prefer to use a clean rag to wipe on most wood stains.
Tools
- Tape measure
- Pencil
- Miter saw – for cutting all of the angled cuts
- Circular saw – for cutting boards to size and creating the lap joint where the two pieces of the X meet
- Wood chisel – for creating the lap joint
- Drill and drill bits
- Pocket hole jig – I have and love the Kreg R3 – it’s a smaller, less expensive Kreg Jig that is still pretty easy to use. If you are new to woodworking and don’t want to make a big investment, the Kreg Jig mini is the least expensive option.
Cut the wood for the X Legs
The first step is to construct the X legs. I love the look of these big chunky X legs and they are also incredibly sturdy.
When you are buying your 4″x4″ boards, pay attention to what type of wood is available. My local store only had 4″x4″s in a very red toned wood which made it tricky to match up stain colors later on. But I’ve since seen 4x4s in pine at other stores. If you are planning to paint your table, the wood tone doesn’t really matter, but for stain using the same type of wood will make it much easier.
Start by cutting two of the 4″x4″x8′ boards into four pieces that are 36.5″ long each, with parallel 45-degree angle cuts on each end. Sand any rough edges.
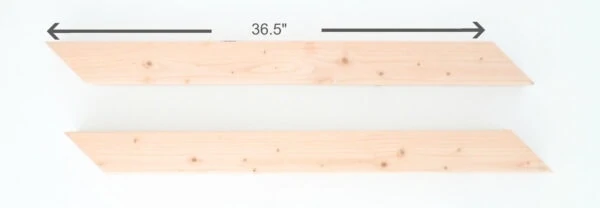
To form the X legs, you are going to create a lap joint with these two pieces of wood. A lap joint is a very strong joint that will ensure that the table is sturdy and can support weight well.
Creating a lap joint can seem really intimidating if you have never done it before, but as long as you take it one step at a time, it’s pretty simple.
Create a lap joint
Lay your wood down with the angles as shown in the photo above. Measure 18″ from one end of the wood. Mark a straight line perpendicular to the board.
Repeat on the other side.
There should be 3.5″ between the two lines. Before beginning your cuts with the circular saw, double check that your wood is oriented correctly.
Set your circular saw blade to 1¾”. The saw will be cutting halfway through each board, about 1¾” deep.
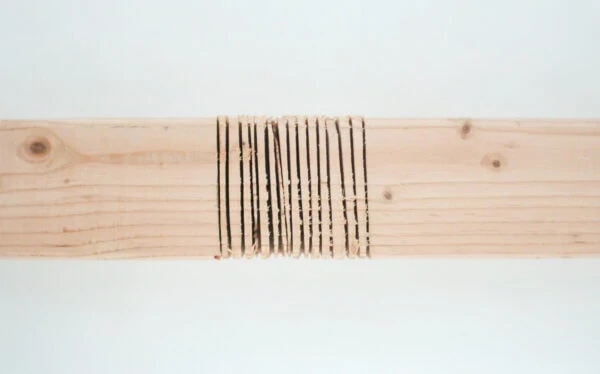
Carefully cut along the two lines you drew in the center of your wood. Then, make many parallel cuts close together between those two cuts.
Use a wood chisel to knock out the slivers of wood from this section. The thin bits of wood should be pretty easy to remove with your chisel.
If you are having a hard time with this for some reason, just cut a few more passes with your circular saw.
Try to get the wood slivers removed as cleanly as possible for a smooth inner edge. When you are finished it should look like the photos below.

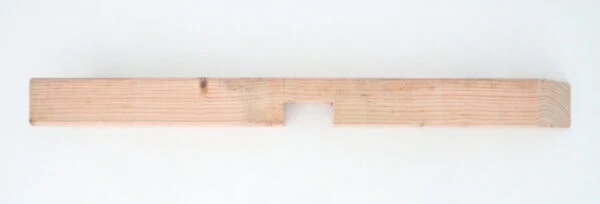
Repeat for the other three 4″x4″ boards. Sand any rough edges smooth.
And now the most intimidating part of this whole table is done!
Assemble the X Legs
To form the X legs, fit two of the leg boards together to form a tight X.
If they don’t quite fit, you may need to cut a bit more to make a large enough space. Just try not to cut too much or your joint won’t fit as tightly.
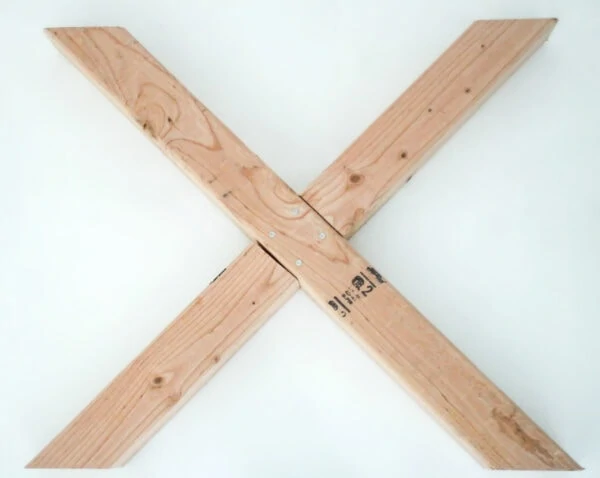
Attach these two pieces together with wood glue at the joint. Predrill holes and use 2.5″ screws to connect them.
Repeat for the other leg.
Add the top and bottom piece to each leg
Cut four pieces of 2″x4″ boards at 35″ long each. These will be the top and bottom supports for each X leg.
To give a nice angled edge, turn each 35″ board on its side and measure 1″ from the end of the board. Make a 45-degree miter cut at the 1″ mark.
Repeat on the other end of the board.
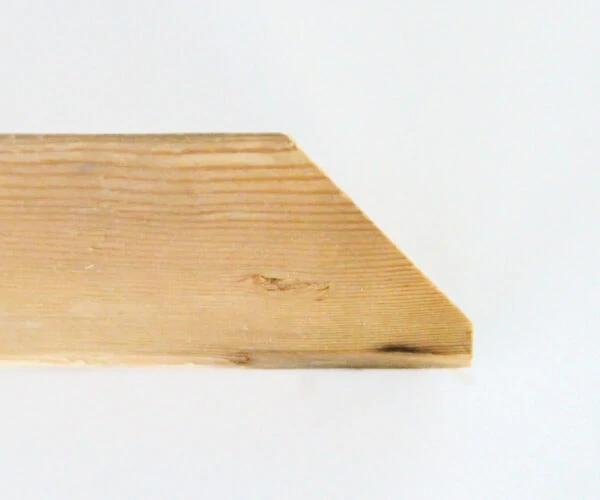
Repeat for both ends of the other three boards and sand any rough edges.
Center one of these supports on top of one of your X legs. Attach it with wood glue and 2.5″ screws. Attach the other to the bottom of the X leg in the same way.
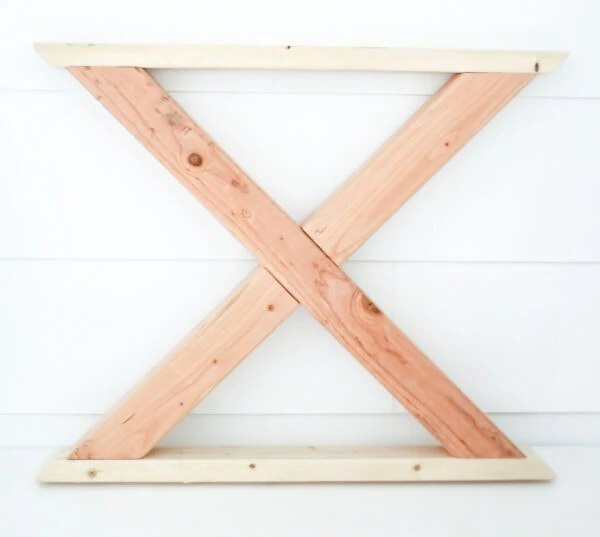
Repeat for the second leg.
Assemble the Tabletop
For my own tabletop, I used reclaimed wood that a family member had stored away in their garage. The boards are 1″ thick and 12-14″ wide and worked great.
A project like this a great time to use reclaimed wood, especially if you are going for a more rustic finish for your table. Boards of any width can work and they don’t even need to all be the same width, but they do need to be the same thickness.
Of course not everyone is lucky enough to have reclaimed wood stashed away, so another solution that also looks amazing is to use 2″x10″ boards to make your tabletop. (If you need help finding wood, I have a post with lots of ideas of ways to find reclaimed wood for cheap.)
To make the plank tabletop, cut each of your 2”x10” boards to 66″ long with your circular saw. Sand any roughness from the cut edges.
Lay the boards for the table top upside down on a flat surface. Use a pocket hole jig to drill pocket holes every 6 or so inches along the boards.
Attach them together using 2 ½” pocket screws.
Cut and Attach the Stretcher
The stretcher is the horizontal support between the two X legs. This piece gives the table a lot of structural support.
To make the stretcher, cut the remaining 4″x4″ board to 44″ long and drill two pocket holes on the underside of each end.
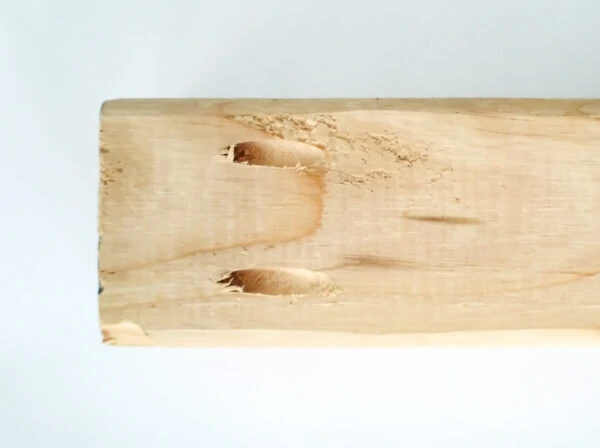
You will be attaching the stretcher right in the middle of each of the X legs. Before attaching the stretcher, be sure to position your table legs so that the screws are on the inside of the table where they will be out of sight.
Set the X legs in place upside down and have a helper hold the support in place or use scrap wood to elevate it to the correct height as you attach it to the X legs. Then add wood glue to each end and use 2½” pocket screws to attach it to the center of each X leg. When you flip the table right side up, the pocket holes will be hidden underneath.
Attach the Tabletop
To attach the tabletop to the legs, we are using figure eight fasteners. These are small fasteners made especially for connecting tabletops. They allow the wood to expand and contract naturally without cracking or twisting. (If you want more info, this post about figure eight fasteners from The Handyman’s Daughter is really helpful.)
We will be using two fasteners on each table leg. Place half of each figure eight fastener on top of your table legs with the center of the figure eight at the edge of the leg. Drill a wide shallow hole for the figure eight fastener to sit in so it is flush with the top of the table leg.
Chisel out the wood around the edges of this hole to make a u-shaped hole so the fastener can swivel from side to side as needed. This allows it to move with the wood.
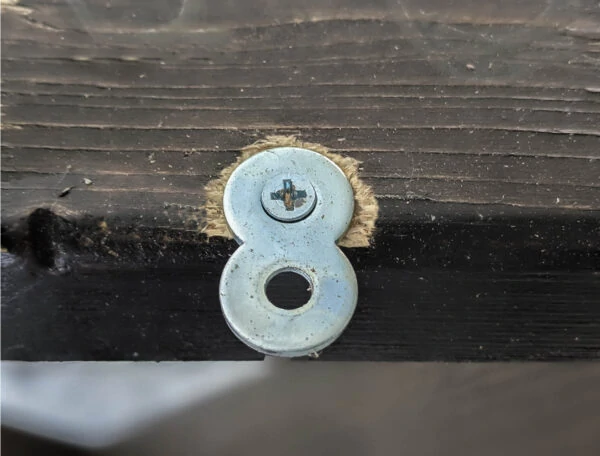
Predrill a hole into the table leg and screw the fastener in place.
Repeat for the other three fasteners.
Place the table top upside down on the floor. Set the legs in place on top of the upside-down tabletop. Make sure the legs are centered across the planks and are an equal distance from each end of the tabletop.
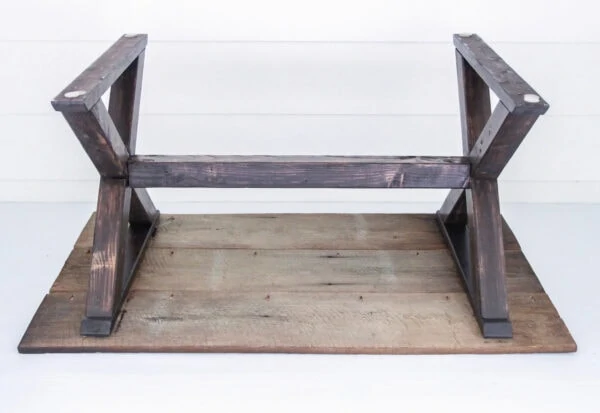
Predrill holes and screw the open ends of each figure eight fastener into the bottom of the table top.
Finish the Table
To finish your table, you can add the stain and sealer of your choice.
The reclaimed wood I used for my tabletop was already a dark finish, so I stained the rest of my table using Rustoleum Kona Stain to match.
I sealed it with General Finishes High Performance Top Coat in Flat. This sealer isn’t completely matte, but it does have a very low sheen. In general, I always like to finish more rustic furniture with a flat finish.
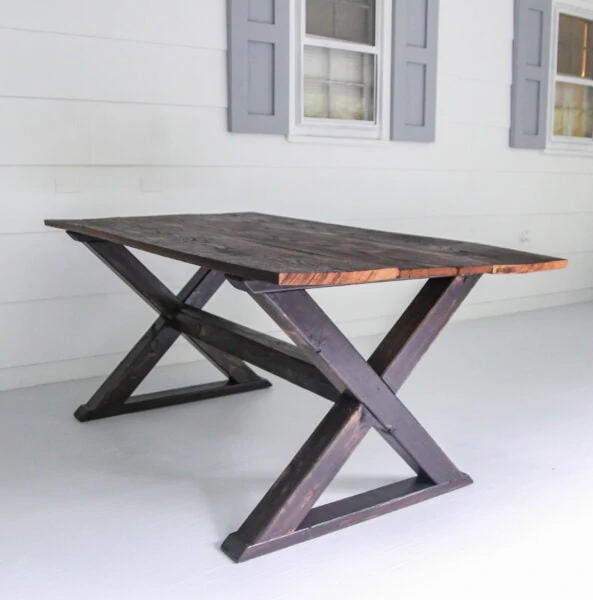
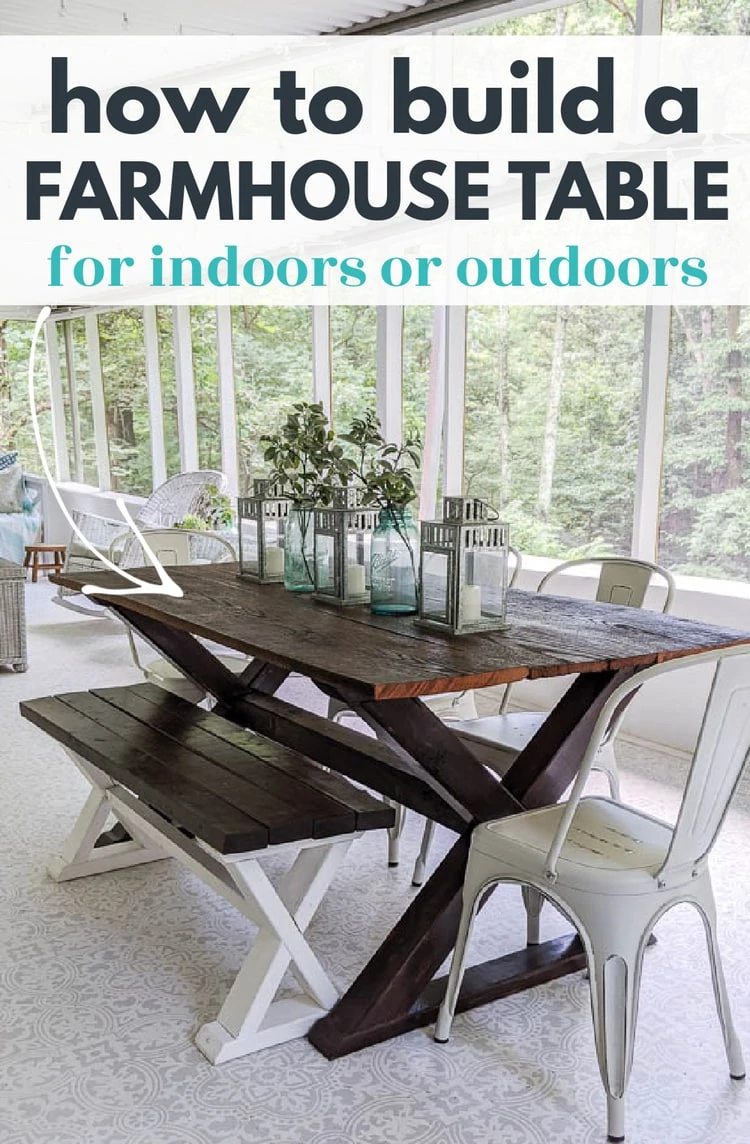
This table has been an awesome addition to our screened-in porch. I paired it with my DIY X leg bench and these inexpensive chairs from Amazon.
Depending on how you finish it, I also think this table would look great in a farmhouse style dining room or out on a patio.
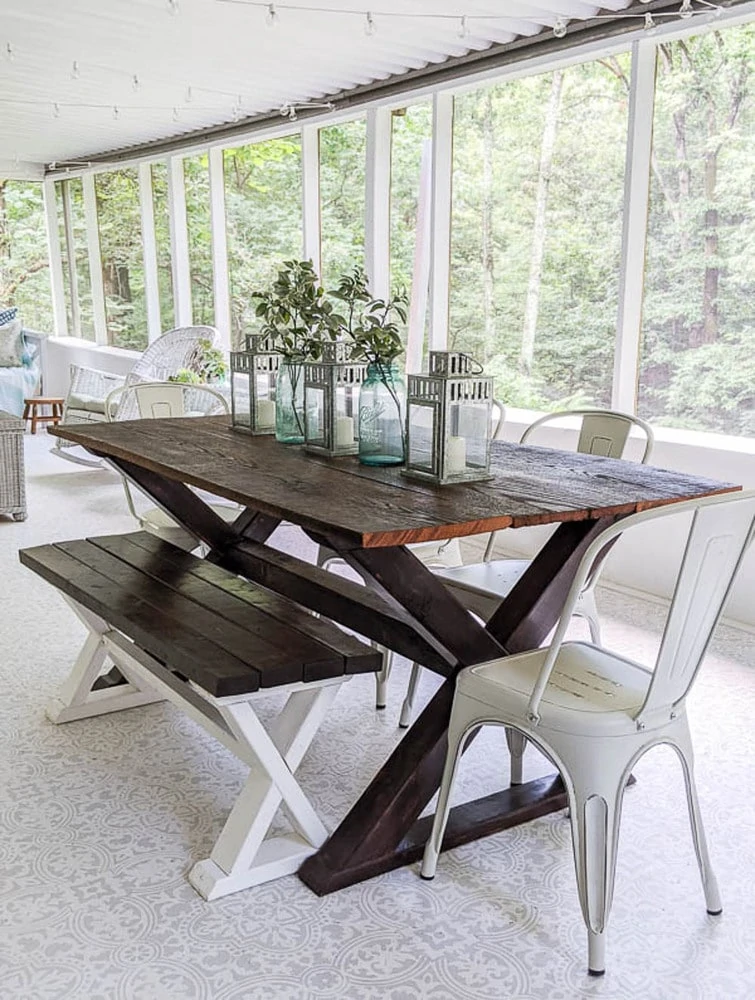
If you are interested you can find all the details of my budget screened porch makeover here. (It’s one of my favorite spots in our whole house!)
Don’t forget, there are printable build plans available in my shop with cut lists and step-by-step instructions
Other woodworking ideas I think you’ll love:
- How to Build a DIY Wood Bench – it coordinates perfectly with this table
- How to Make a Gorgeous DIY Planter Box for Cheap
- How to Build a DIY Daybed for $50
- Where to Get Cheap or Free Wood for DIY Projects
I’d love for you to pin this post on Pinterest!
