How to Build a DIY Daybed for $50
This beautiful DIY daybed is budget-friendly and simple enough that even a woodworking beginner can build it. This daybed is perfect if you need another bed or extra seating for any space, indoors or outdoors.
I built this daybed for our big screened in porch. I’ve been crushing on porch swing beds for quite awhile, but sadly our screened porch doesn’t have the right type of ceiling for hanging one.
But I still wanted a big, cozy spot for lounging, reading, and even napping, so I decided a regular daybed would also do quite nicely.
This daybed can be used for an outdoor space like ours, but it’s also perfect for a bedroom, office, or family room.
It’s a fairly easy build even if you are newer to woodworking and looks so beautiful when it’s finished.
And at less than $50 in lumber, it’s incredibly budget-friendly!
To keep costs down, I used inexpensive framing lumber for my daybed. This is lumber that is typically used for framing walls in houses and it is often not quite as perfect as other lumber which is why it is so inexpensive.
When you are choosing your wood, be sure to look for pieces that are straight and free or major knotholes and other blemishes.
Of course, you could also use higher grade lumber instead, but it will be more expensive.

This post contains affiliate links which means if you make a purchase after clicking a link I will earn a small commission but it won’t cost you a penny more. Click here to see my full disclosure policy.
Daybed Build Plans
I am sharing the tutorial for building this table below and I’ve also created printable pdf build plans. The build plans walk you through exactly how to build the daybed including overall dimensions, tools list, materials, list, cut list, and simple step-by-step instructions with drawings.
You can purchase the build plans for the twin size daybed in my shop here. And after many requests, I have also created build plans for a full size version of this daybed.
How to Build a DIY Daybed

The finished daybed fits a standard 38″ x 75″ twin mattress and is 29.75″ tall, 41″ deep, and 80″ long.
Materials
- (14) 2x3s @ 8 ft (framing lumber)
- (1) 2×4 @ 8 ft (framing lumber)
- (1) 2×2 @ 8 ft
- 1/4″plywood @ 36″ x 73″
- 2.5″ Kreg pocket hole screws
- Wood glue
- 2″ screws If your daybed will be used outdoors, it’s a good idea to use exterior screws/deck screws.
- Wood filler
- Pocket hole plugs – You can use these to fill in a few pocket holes that will be visible in the finished daybed. They give a great clean finish, but you can also use wood filler instead if you prefer.
- Sandpaper
- Stain or paint and sealer of your choice – If you are using your table outdoors, be sure to choose exterior paint and a sealer that can stand up to outside use.
- Twin mattress
Tools
- Miter saw – for cutting all of the angled cuts
- Drill and drill bits
- Kreg Jig – I have and love the Kreg R3 – it’s a smaller, less expensive Kreg Jig that is still pretty easy to use. If you are new to woodworking and don’t want to make a big investment, the Kreg Jig mini is an even cheaper option.
- Nail gun – I have this Ryobi brad nailer. It is easy to use and I love that it doesn’t require an air compressor. If you don’t have a nail gun, a hammer and 2.5″ finishing nails will also work just fine.
- Carpenter’s square
- Tape measure
- Pencil
- Paintbrush – These are my favorite paintbrushes for painting furniture.
1. Cut the wood
Use a miter saw to make the following cuts from 2x3s for the daybed frame:
- 4 @ 28.5″ for the legs
- 4 @ 34.5″ for the side frames
- 2 @ 72″ for the back frame
- 1 @ 75″ for the front
- 8 @ 36.5″ for the slats
Use a miter saw to make the following cut from the 2×2:
- 2 @ 28.5 for the back
2. Assemble the two sides of the daybed

Add two pocket holes with your Kreg Jig to each end of the 34.5″ pieces.
(If you’ve never used a Kreg Jig before, it’s a simple way to make really strong joints for woodworking. I think this tutorial on using a Kreg Jig is helpful if you need some help getting started.)
Use 2.5″ Kreg screws to connect two 34.5″ boards between the two 28.5″ legs. The lower crossbar should be 7.5″ from the bottom of the leg.

That completes the outer frame for one side of the daybed. Repeat for the second side.

Next we are going to form the Xs for each side. It works best to measure these as you go to make sure your pieces fit well.
Use a miter saw to cut a 20 degree angle at one end of a 2×3 board that is at least 38″ long.
Set this in place inside one of the frames you made and mark where the second cut needs to be made. Use a miter saw to cut along the mark you made.
Next make the two shorter crosspieces. Cut a 20 degree angle on one end of each. Then fit them in place and mark where the inner side needs to be cut. Make the cut using your miter saw.
Use your Kreg jig to add pocket holes to the outer ends of each crosspiece. Attach these to the frame using wood glue and 2.5″ Kreg screws. I chose to use a small finishing nail to attach the two smaller crosspieces at the center of the X rather than pocket holes for a cleaner look.
3. Assemble the Back of the Daybed
The back is very similar to the two sides.

Add two pocket holes with your Kreg Jig to each end of the 72″ pieces and use 2.5″ Kreg screws to connect them to the two 28.5″ 2×2 legs. Again, the lower bar will be 7.5″ from the bottom of the legs.
Cut a 2×3 at 16″ to form the middle brace. Add a pocket hole to each end of this board and attach it to the center of the back frame using 2.5″ Kreg screws.

That completes the outer frame for the back of the daybed.
Form the pieces for the two Xs on the back of the daybed the same way we did the sides.
4. Attach the sides to the back
Now it is time to start putting all of the parts together!
Lay the back flat on the ground and line up one of the sides next to it. Mark where you will be drilling holes to attach the side to the back.

Predrill 2 holes straight through the side at the top and two more at the bottom.
Use 2″ wood screws to attach the side to the back. (You can also make your 2.5″ Kreg screws work if, like me, you don’t have other screws in the correct size on hand.)

Repeat for the second side.

5. Assemble the platform of the Daybed
Add two pocket holes with your Kreg Jig to each end of the 75″ 2×3 you cut earlier.
This will form the front of the daybed. Attach it to the two sides with 2.5″ Kreg screws.

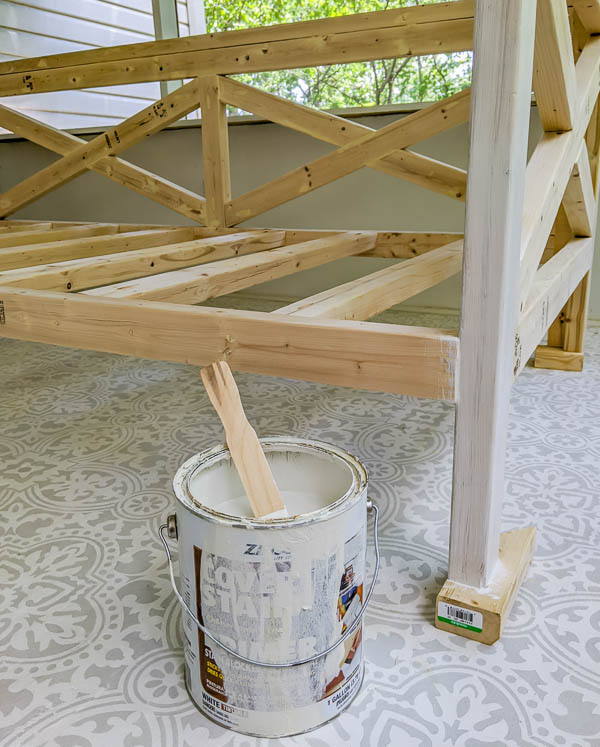
Next you are going to attach the 36.5″ slats you cut earlier. Add two pocket holes to each end of the slats. Then attach them to the frame using 2.5″ Kreg screws.

(My photos only show six slats, but they should really be a bit closer together than mine so I recommend using at least eight.)
Tip: Cutting a couple of supports from scrap wood to hold each slat at the correct height makes this so much easier. Just cut two pieces of wood 8.5″ tall and slip them under the ends of each slat as you attach it.

6. Attach the top trim
Finally, we are going to cut and attach the boards that sit on top of the sides and back of the daybed. This gives the daybed a much more finished look.

Cut one 2×3 80″ long for the back and two 2x4s 38.5″ long for the two sides. Set these in place and make sure they fit well
. The back piece should be flush with the daybed frame on the inside, while extending past the back of the daybed. (This is to keep the back comfortable for sitting.)
The armrests should be centered on the sides of the daybed frame and slightly extend past the front of the daybed. Attach these pieces to the daybed frame using a nail gun or a hammer and finishing nails.

7. Add plywood for stability
Finally, you may choose to add a piece of 1/4″ plywood to the bottom of your daybed for added stability if needed. We are not using a box spring on our daybed and our mattress definitely needed just a bit more support.

If you choose to add a piece of plywood, cut it 36″ x 73″ or just slightly smaller than the twin mattress.

And your daybed is built!
8. Fill the pocket holes and other imperfections
Before painting or staining your daybed, you need to fill in all of the pocket holes as well as any other cracks or holes in your project.
You can buy pocket hole plugs to fill your pocket holes. Pocket hole plugs are solid wood, come in a variety of wood types, and are cut to perfectly fill pocket holes. (And they are surprisingly affordable.)
The other option is to use wood filler to fill your pocket holes. This is the option I went with, mostly because I already had wood filler on hand.

If you are using plugs, you will insert them and then sand them smooth before painting or staining.
If you are using wood filler, you can apply it with a putty knife or your finger. Allow it to dry completely and then sand it smooth.
Then clean all of the dust from your daybed and you are ready for stain or paint.
If you are planning to stain your daybed, I recommend using pocket hole plugs rather than wood filler. Even though you can buy stainable wood filler, personally I’ve never been really satisfied with how it looks stained.
9. Paint or stain your daybed
You can choose to either paint or stain your daybed.
I chose to paint my daybed mostly because I am planning to use it outside and exterior paint is an easy, durable finish for outdoor furniture.
If you are painting your daybed, I highly recommend starting with a coat of primer first. Oil-based primer will help seal any knotholes in the wood and prevent bleed-through, especially if you are painting your daybed white or another light color.
If you are planning to use your daybed outdoors, be sure to use exterior paint. I decided to go with a light gray shade for my daybed.
I created a custom color by mixing a few exterior paints I already had on hand. (I love when I can use up some of the paint leftovers in my stash!)
If you want more info on painting furniture so that your paint furniture really lasts, I’ve got a great guide to painting furniture as well as a post that’s all about painting outdoor furniture.

Once the paint or stain has dried, you can move your mattress into place and enjoy!

The Finished Daybed

Here’s a little sneak peak of the daybed in it’s final spot on our porch and you can see my full budget screened porch makeover here. This is by far my favorite room in our whole house!
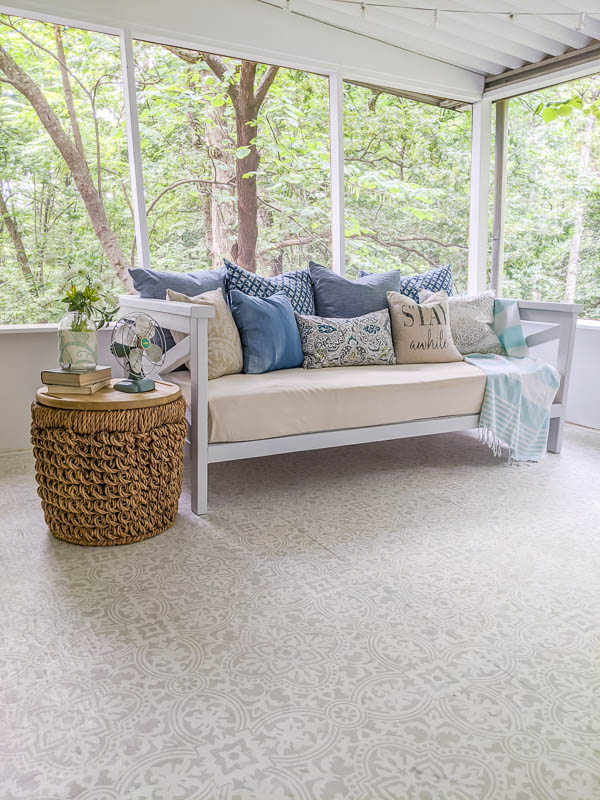
For now I’ve made a quick cover for my daybed from an inexpensive canvas drop cloth. And since my daybed is on our porch, I also protected the mattress with a waterproof twin mattress cover that protects all five sides.

You can also buy a nice cover for your daybed if you prefer. World Market has a great option with a similar look to mine (but way more tailored.) Or you can also buy awesome zippered covers on Etsy in a variety of colors.
Printable Build Plans
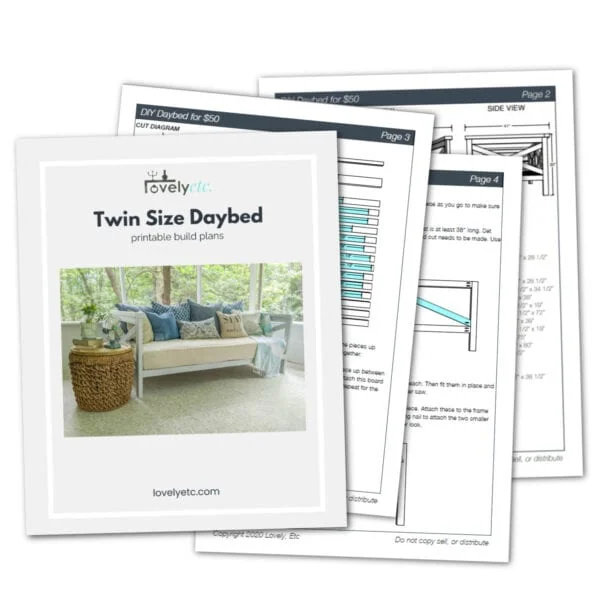
And remember, if you want a little more help, you can get detailed pdf build plans for the twin size daybed here. And you can get build plans for the full size daybed here.
Video Tutorial
I’d love for you to pin this project on Pinterest!

Other simple woodworking ideas I think you’ll love:

I love it Carrie! Thanks for all the great details.
Thank you! We have all been enjoying it so much!
How much weight do you guess it’ll stand up to?
That is hard to say. We have had a couple of 200 lbish adults sitting on it at one time. The structure itself is very stable. If there is a weak point, it is the individual slats. Putting a lot of weight directly onto one slat could cause it to break, but the plywood and mattress help disperse the weight across all the slats.
After a while of being plopped on by full sized people, eventually the slats will give way, and most likely toward the center where it is the weakest. I’m planning to make one of these, but I’ll modify it a little to increase the weight capacity: In the center, instead of a slat, I’ll add a full beam fastened at each end, and 2 more legs. (Or if you don’t like the look of legs in the middle, you can just add a 5th leg, dead center underneath where it won’t be visible, attached to the center beam.) It’s important to use wood glue at the weight-bearing joints. The glue holds better than nails or screws alone do.
I think the fifth leg in the center where it can’t be seen is a great idea to give more stability without being seen!
This turned out so cute Carrie!
Thank you Michelle!
This is beautiful! And you can’t beat the price! :)
Thank you Michelle!
That’s awesome! Looks fantastic!
Thank you!
This is beautiful! My husband and son are building two! I don’t know how you were able to do it for $50 though. We spent $145 each in just wood, screws and wood glue.
Thank you and how fun that you guys are building two! I’m guessing the cost difference is because I used super cheap 2×3 framing lumber – like what buiders use for stud walls. They are definitely more rustic than nicer boards, but are less than $3 for each 8′ board and I don’t mind the rustic touch. Also, I didn’t include screws and wood glue in my total since I know many people may already have them on hand. Either way, I hope you love your daybeds!
I bought the wood, KJ screws and pocket hole plugs at Lowes this weekend for $57.71.
My daughter wants a light stain so that will still cost a little more.
That’s awesome! I hope you love it when it is finished!
If I wanted to make this a swing bed instead what would I need to do differently?
I haven’t made a swing bed before, so I don’t want to steer you wrong. But in general, you would need to remove the legs, make the base a bit more sturdy, and add ropes to hang. I’m adding making a swinging bed version to my to-do list for this year though!
Tina, I’m in the process of making two of these as swinging daybeds – I’m using 2×4 lumber instead of 2×3 for more support, and since our mattresses are 12” thick (twice the thickness) I had to make the back and sides taller. I also omitted the 7-1/2” that the legs added to the frame. I’m using the Kreg XL jig for assembly which according to Kreg, is twice as strong as their standard jig. I’ll take pics once they are done!
Those sound awesome!
Odd question, would you have any dimensions for a full size bed?
No I don’t, but a few people have asked so I will have to add that to the to-do list.
What depth of twin mattress did you purchase? 6, 8, 10, or 12. I love this and my husband and I are building one in my office for a guest if needed.
Our mattress is 6 inches deep. I think any depth would work but if you get a 10 or 12 inch, the side and back won’t be as high above the mattress.
Could I make this as a loft or bunk bed you think? Awesome job btw!
Thanks! I’m sure you could make this a loft or bunk beds. I haven’t done it of course, but you could probably combine this tutorial with bunk bed or loft bed plans.
This is gorgeous! Is there anyway to make it so it can be taken apart for to make more easily to move from one house to another?
Good question. When it is finished, it is around the size of a couch so I’m not worried about fitting it through doorways. But if you want it to fold smaller, you could leave the screws that attach the sides to the back exposed so they can easily be removed. Attach the front support the same way and you will be able to separate the front, sides, and back. And instead of using pocket holes to attach the slats, screw side rails to the front and back and set the slats onto the side rails so they can be removed easily.
Hi! I’m making this tomorrow, hopefully. I purchased your plans and you refer to the mattress measurements as twin standard, the thing is, I have a mattress made in my country and I’m worried mine has different standards, mainly the width, which in our case is 39 inches, Is this the same as yours? Thanks in advance!
It sounds like it is pretty much the same! Twin mattresses here are usually 38-39 inches and either size should fit.
Hi! I love this so much! We bought everything to start making it this week! I was wondering what size those pillows are, as I’m trying to find the right thing online. Would you think four 20” x 20” pillows are needed to cover the back so no one is hitting their head on the wood? Thanks in advance & thank you for making this tutorial!
I have four Euro pillows along the back of mine – I believe they are 26″ x 26″. You could use 20×20 pillows, but I think you would probably need 5 or 6. Good luck!
Came out great added a support block in the front for a little extra support, kids love to jump….
Great idea and I love that it turned out great!
Would this be able to fit a trundle underneath it? I would love to be able to build this for my guest room but need to be able to sleep 2 people!
The current design has the bottom of the bed frame only 7.5″ above the floor which would probably be too low for a trundle. But it would be really easy to modify it to make it higher. There are no supports in the middle that would block a trundle bed from rolling in and out. You would just need to make the leg pieces a bit longer for more clearance and it should work great!
By any chance, do you have dimensions for a Full mattress? I’ve already purchased the plans! Thanks!
I don’t but I think I need to make some!
Hi Carrie,
I want to use 30*75 inch mattress rather than 38*75 inch. Do I have to cut the wood for side frames at 26.5 inch?
Yes, that will work. And then you will also need to cut the pieces of the X shorter as well. Once you make the outer frame, you should be able to measure how long those pieces need to be.
How much adjustment would need to be made on the cut list to accommodate a twin xl bed?
The long side would need to be 5 inches longer to accommodate a twin XL mattress. You would need to increase the pieces for the top and bottom of the back side as well as the front support. You would also need to increase the length of the wood that makes the two Xs along the back.
Thank you for these plans and instructions. I have used them to create a day bed for my daughter using a UK ‘single’ size mattress. UK lumber comes in a very different set of sizes, but your instructions are very clear and I have been able to adjust accordingly.
One thing that my daughter wanted was enclosed sides to the bed – she liked the ‘cross’ for the back. I routed groves around the inside of all the side elements and inserted ‘slats’ to enclose the ends. This makes it a better ‘all round’ bed.
Can only say thank you for the inspiration and providing such detailed instructions that I felt I could attempt it!
I’m so glad it was helpful and you were able to make it work in the UK. It sounds like you made a lot of awesome customizations!
Hi I would love an update on how the mattress has been after a couple of years outside, inside the zip around cover. I plan to buy and build your plans. Thank you
So far the mattress still looks and feels great! It is on a covered porch so it gets very little direct rain but has done great with the fluctuating temps.