How to Make a Gorgeous DIY Planter Box for Cheap
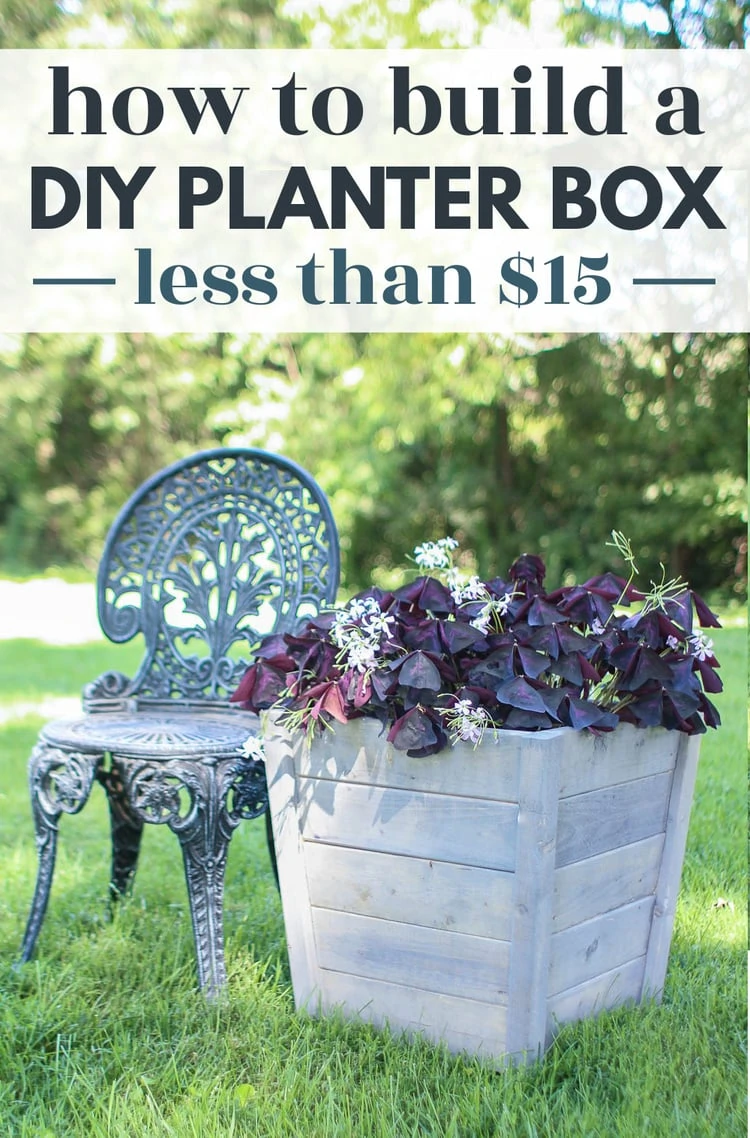
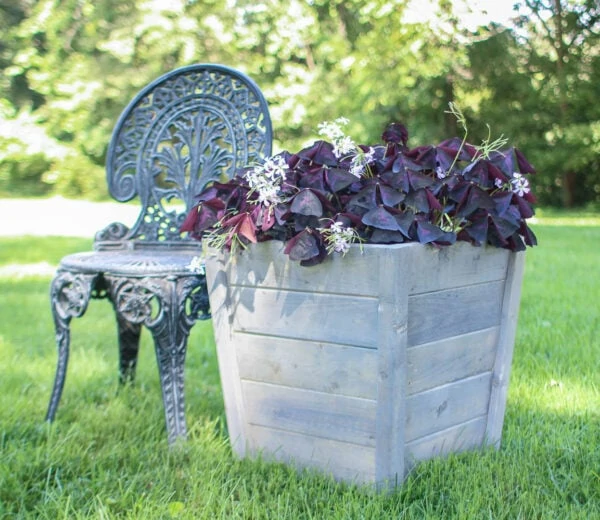
This DIY wooden planter box is beautiful, inexpensive, and easy to build. The tapered sides, beautiful gray finish, and large size make a real statement even though it is made from inexpensive rough-cut lumber.
This planter box turned out exactly the way I pictured it in my head. I think it is beautiful and I love how the weathered gray finish and the elegant tapered sides make it stand out for other planters.
Even better, this planter box is incredibly affordable to make. It is made from inexpensive rough-cut lumber and you can buy all the wood you need for a large planter box for less than $15.
I have created printable pdf build plans for this DIY planter. The build plans walk you through exactly how to build the planter including a tools list, materials list, cut list, and simple step-by-step instructions with drawings. You can purchase the build plans in my shop here. Or you can follow the tutorial for building this planter below, but it isn’t quite as detailed as the pdf plans.
This post contains affiliate links which means if you make a purchase after clicking a link I will earn a small commission but it won’t cost you a penny more. Click here to see my full disclosure policy.
How to Build a DIY Wooden Planter Box
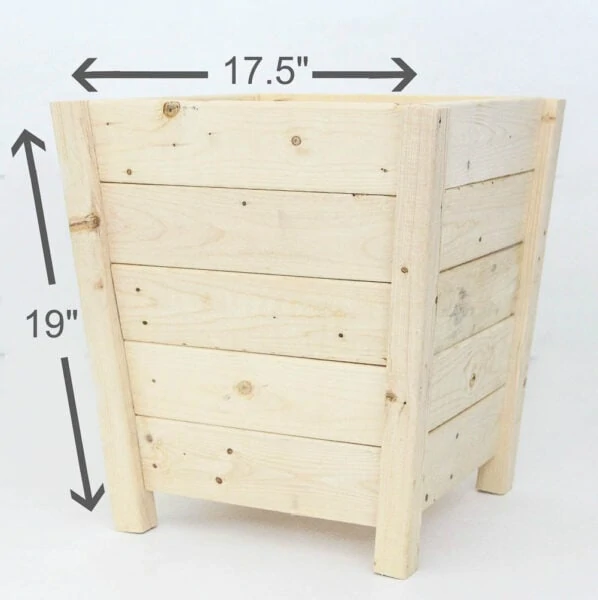
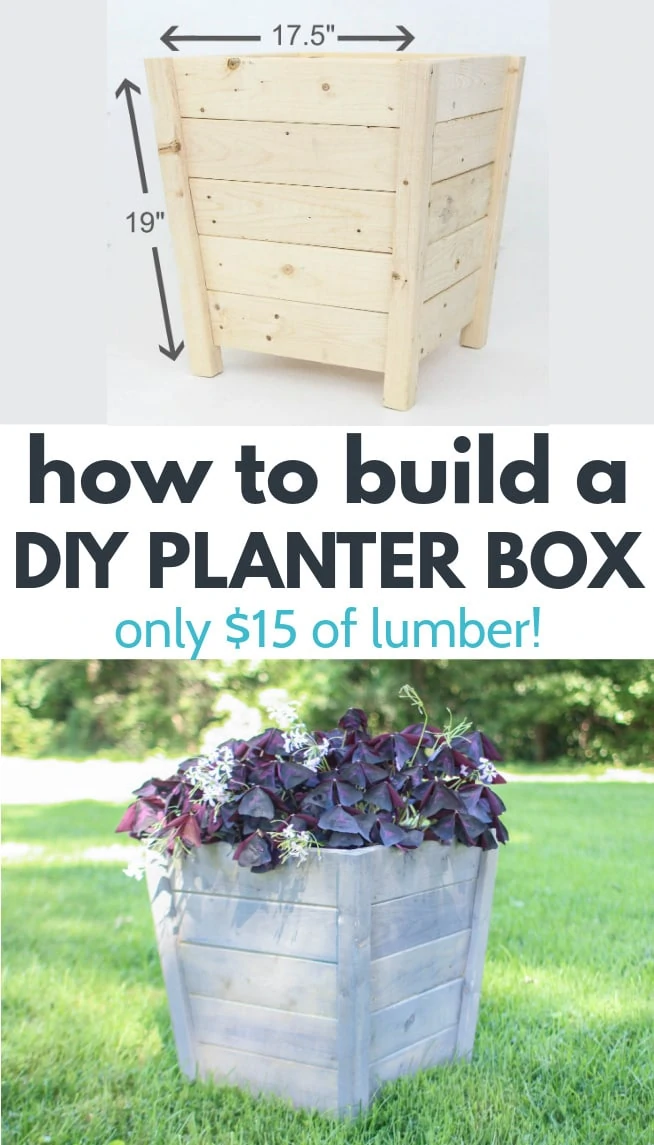
The finished planter is 19” high, 17.5” wide at the top and 14” wide at the bottom.
Materials
- Three 1″ x 4″ x 8′ furring strips
- 2″ x 2″ x 8′ pine board – you can also usually find these with the furring strips,
- 1¼” coarse pocket hole screws
- Stain or exterior paint of your choice – I used Rustoleum Weathered Wood Accelerator, Varathane Sunbleached Stain, and Varathane Spar Urethane to seal it.
- Clean rags and/or paint brushes – to apply your chosen finish
Tools
- Tape measure
- Pencil
- Miter saw
- Kreg Jig – I have and love the Kreg R3 – it’s a smaller, less expensive Kreg Jig that is still pretty easy to use. If you are new to woodworking and don’t want to make a big investment, the Kreg Jig mini is the least expensive option.
- Drill
1. Cut the wood planks.
Each side of the planter contains five 1″ x 4″ planks cut at a 5-degree angle on each end.
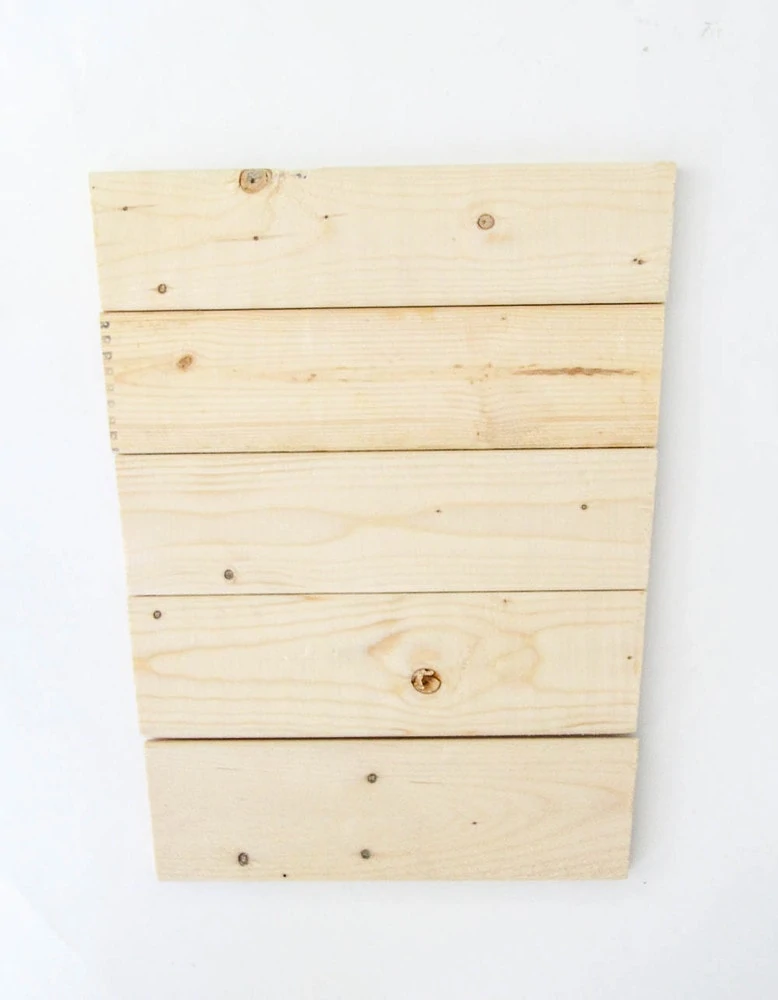
Set your miter saw to cut 5-degree cuts. Cut the top plank as shown with a 5-degree angle at each end. The length of the top plank is 14.5″.
Use this top board to determine the length of the next board. Measure the bottom edge of the top board and cut the top edge of the second board to that same length. Continue measuring this way until all five boards are cut.
Cut the wood for the other three sides of the planter box the same way.
2. Cut the corner supports.
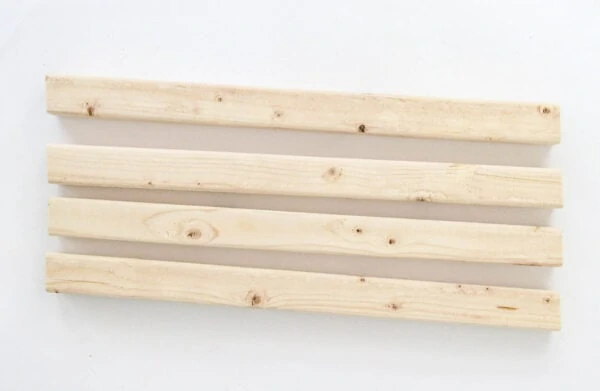
The 2″ x 2″ boards will be the corner supports. Cut the top of the first support at a 5-degree angle with your miter saw, with a length of about 19″ long, and making a parallel 5-degree angle cut along the bottom.
3. Assemble the first side of the planter.
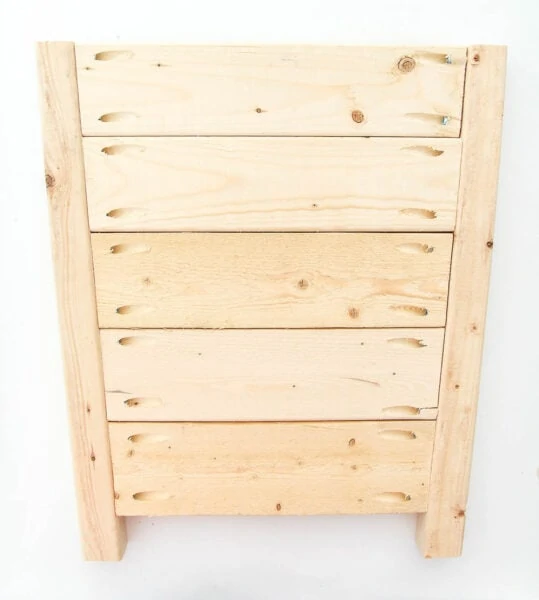
Use a kreg jig to drill four pocket holes on the back of each plank, two along each short end.
Now, assemble the first side of the planter. Since the corner supports and the plank sides are two different thicknesses, you need to use scrap wood to help align the boards while they are being assembled.
Lay a few of the cut pieces of 1″ x 4″ wood on a flat surface. These planks will act as spacers to raise the planter sides to the same level as the thicker corner supports correctly.
Arrange the planks for one side of the planter face down on top of the spacers. Use a drill and pocket screws to attach the planks to the two corner supports on either side using the pocket holes. This creates the first side.
4. Assemble the rest of the sides.
Lay out the planks for a second side and attach them to one of the supports from the first side, remembering to line up the top plank and use spacers below the planks to keep them aligned correctly with the corner supports.
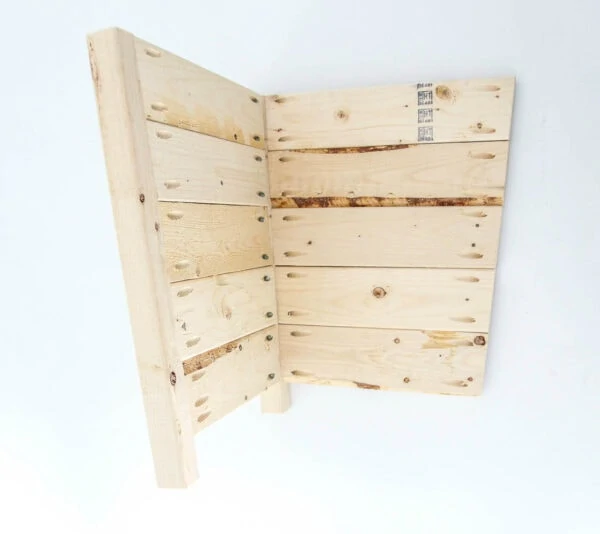
Add the final two sides in the same manner.
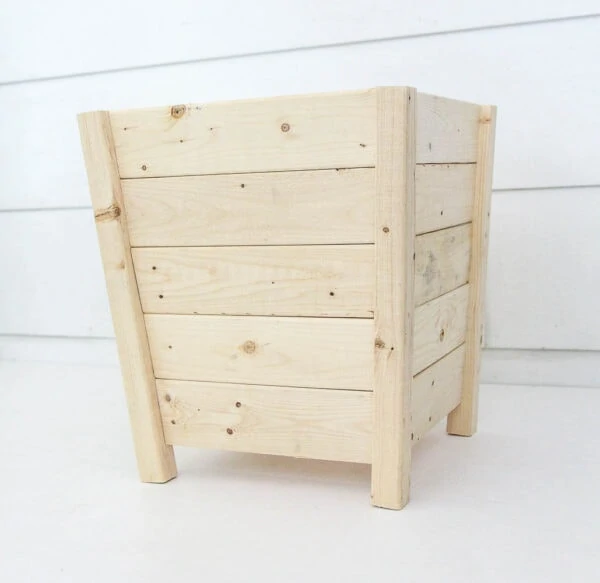
5. Paint or stain your planter.
Whatever finish you choose for your planter box, make sure it is water resistant. If you choose to use paint, use a good exterior paint.
For my own planter, I used a clean rag to apply a coat of Rustoleum Weathered Wood Accelerator followed by a coat of Varathane sunbleached stain.
I love the rustic warm gray finish this created. The great thing about the Weathered Wood Accelerator is the finish has a lot of variation and texture to it just like real weathered wood has. It reacts with the tannins in the wood to produce the finish so you never know exactly what you are going to get.
Even though I liked the look of the Weathered Wood Accelerator on its own, it was a bit more rustic than I wanted. Adding a coat of the sunbleached stain lightened up the color and gave it more of the coastal vibe I love.
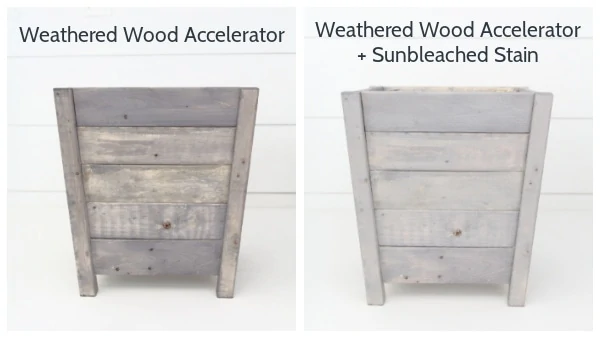
Once I was happy with the finish, I protected it with an exterior sealer. (Be sure to seal all of the surfaces of your planter, inside and out.)
6. Add your plant.
The final step is to add your plant or tree. You can simply set your plant in its inexpensive plastic pot directly into the planter. If the pot is large enough, the angle of the sides will hold it in place. If it needs extra support, you can cut a few scraps of wood and wedge them in at the correct height for your pot.
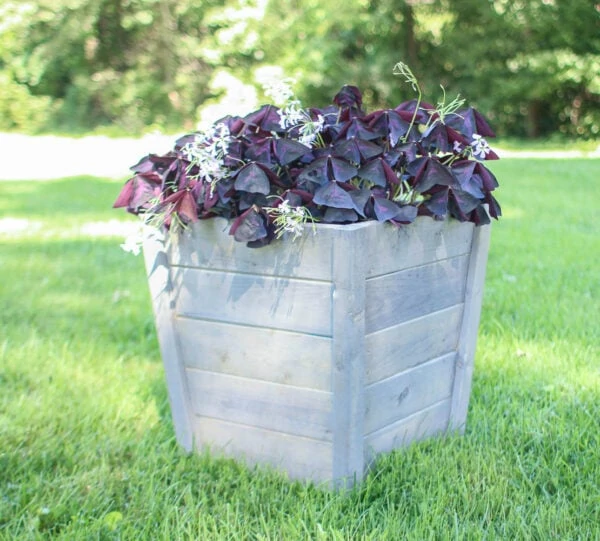
This beautiful plant is my grandmother’s purple shamrock. She is amazing with plants and it is absolutely gorgeous.
And remember, if you want a little more help, you can get detailed pdf build plans here.
Other simple woodworking projects I think you’ll love:
- How to Make Wood Storage Cubes in Any Size
- How to Build a Cheap and Easy TV Frame that Swivels
- Where to Get Cheap or Free Wood for DIY Projects
I’d love for you to pin this post on Pinterest!
