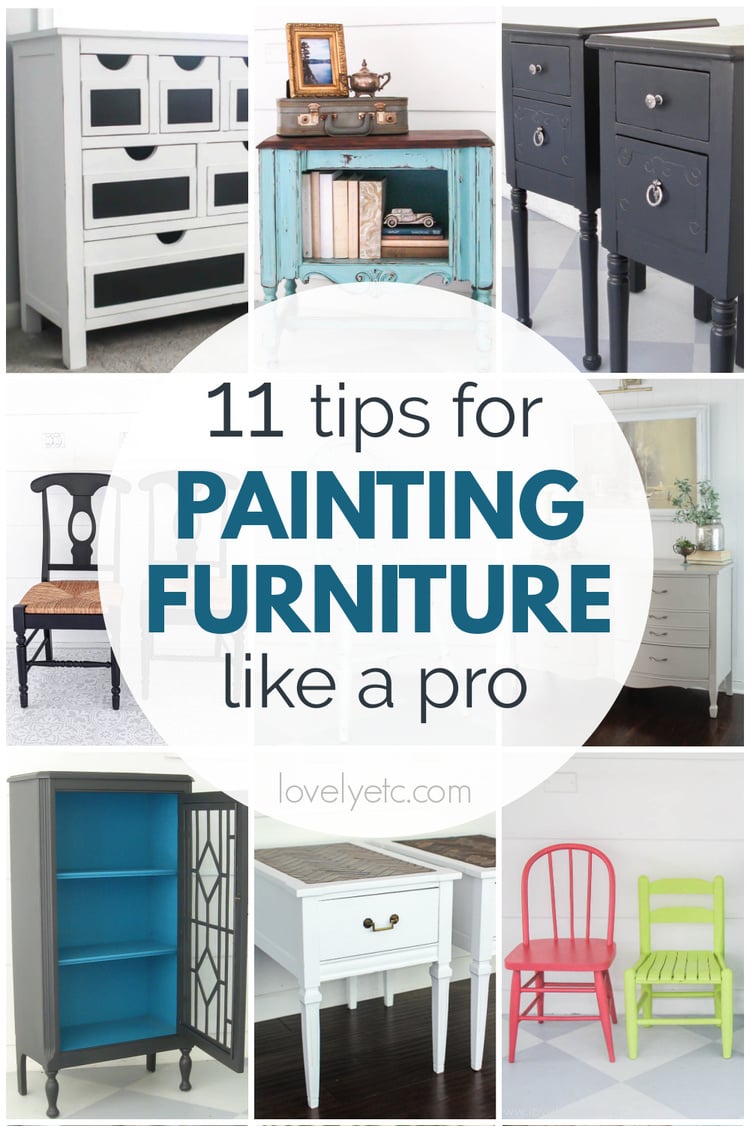
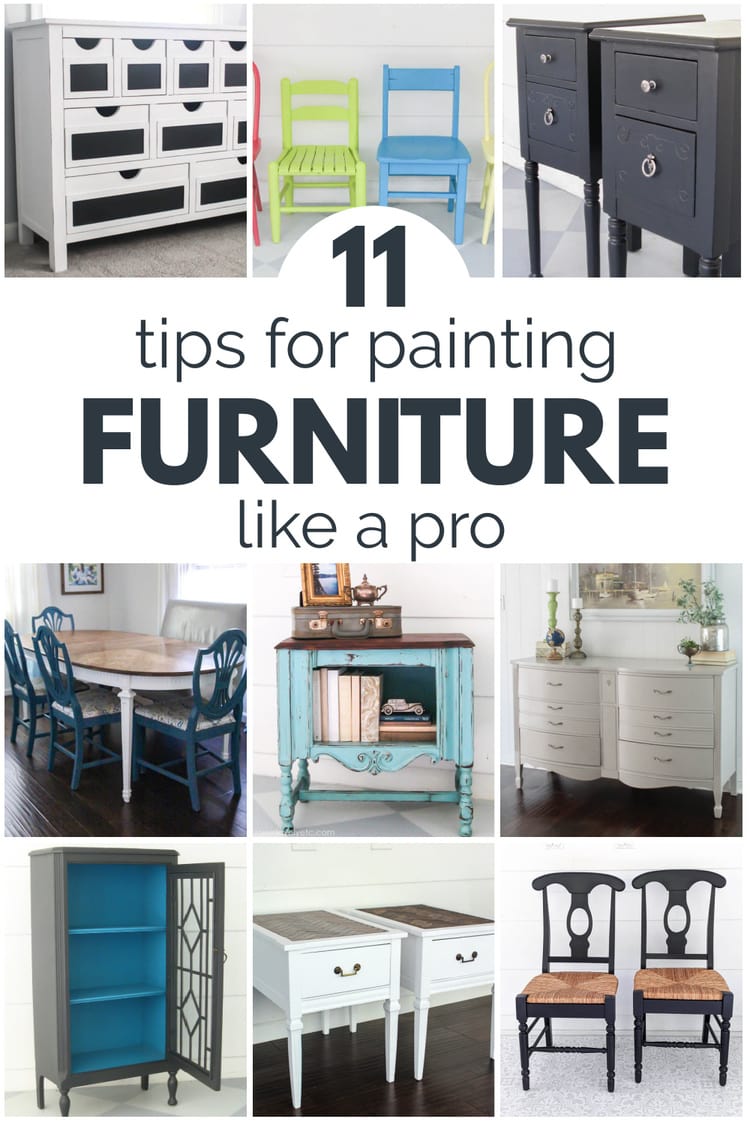
10 Tips for Painting Furniture Like a Pro
These 10 tips for painting furniture like a pro will help you get the beautiful paint finish you’ve been dreaming of.
Several years ago, I discovered the beauty of painted furniture. DIYer that I am, I rolled up my sleeves and immediately got to work painting some old cast-off furniture pieces.
Looking at those first pieces now, I can see that I had no idea what I was doing. They weren’t terrible and they look great from a distance…but up close, not so good
Since then, I have painted lots of furniture pieces, both to use in my own home and to sell to others. In the process I’ve learned how to get really beautiful results that last.
These are my top tips for painting furniture that looks beautiful and stands the test of time.
This post contains affiliate links which means if you make a purchase after clicking a link I will earn a small commission but it won’t cost you a penny more. Click here to see my full disclosure policy.
How to Paint Furniture Like a Pro
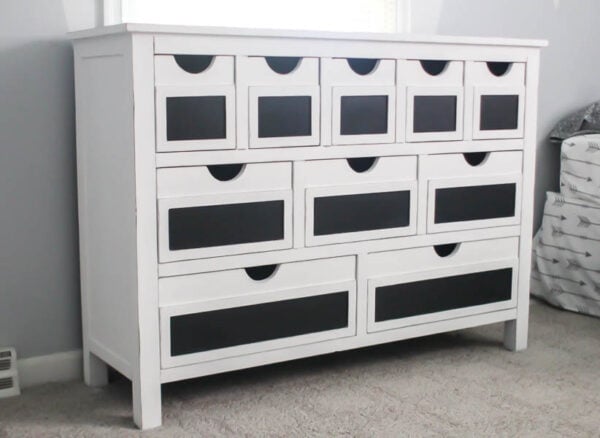
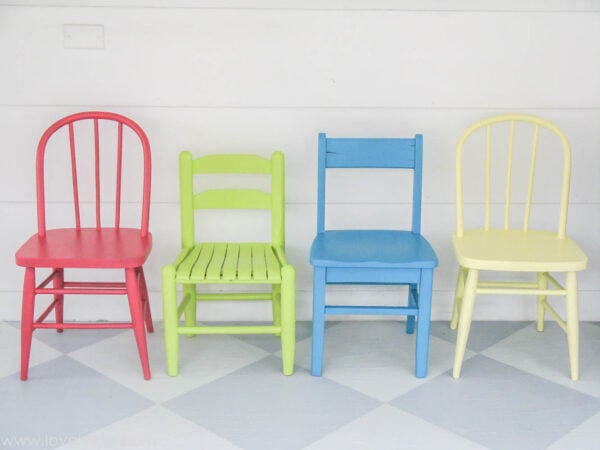
1. Start with a plan – distressed or smooth.
Before you begin, decide what look you are going for – smooth and flawless? Worn and distressed? This decision will lay the foundation for every other decision about your piece.
If you know you want an aged, distressed finish, choose a more matte finish paint like chalk paint, Old-Fashioned milk paint, or latex paint in flat or eggshell finish. As you are painting, you won’t need to worry so much about leaving brush strokes or getting a perfectly even finish.
If you are going for a smooth flawless finish, you may want to choose a paint with a smoother, more reflective finish like latex paint in a satin or semigloss finish, Wise Owl One-Hour Enamel, General Finishes Milk Paint. You’ll also want to be much more careful about keeping your brushstrokes smooth and even.

Not sure which paints are best for furniture? I’ve got a review of all the top choices along with my top picks for the best furniture paints.
2. Know when to sand.
It really is important to properly prepare your furniture piece before painting. Always, always start by cleaning your furniture to remove any dirt, dust, or grease.
You don’t always have to sand furniture before painting, but sometimes it is absolutely essential. So how do you know when you need to sand?
- If you are going for a smooth finish, it is a good idea to lightly sand the entire piece to smooth any flaws.
- If your piece has a super shiny or a flaky finish, you should always start by sanding it.
On the other hand, if you are going for a more weathered, distressed finish or painting a furniture piece that’s in good condition, you can probably skip the sanding.
3. Use high quality paint brushes.
I am a major cheapskate and I used to buy the cheapest paintbrushes I could.
Big mistake.
Bristles were constantly shedding onto my projects and they left horrible brush marks. Getting a smooth paint finish was basically impossible.
I have since become a huge fan of Purdy paintbrushes. They are a little more expensive up front, but they last so much longer that it evens out in the end. And you can get a much smoother finish with them.
4. Use a roller for flat surfaces.
Small foam rollers are perfect for painting large smooth surfaces. The paint goes on much faster and leaves a very smooth finish.
Just look for rollers specifically made for smooth surfaces – they often say they are for doors and trim.
5. Use the right primer.
Much like with sanding, you also don’t always have to use primer.
If you are using chalk paint, you may be able to skip the primer. But even with chalk paint, you will need to use primer if
- you are painting furniture with a dark or reddish finish a light color. These types of finishes often lead to wood tannins bleeding through and messing up your paint finish if they aren’t sealed with a good primer first.
- you are painting raw, unfinished wood.
- you are painting almost any type of wood furniture a pure white. A good primer will help prevent yellowing and help you need less coats of paint overall.
If you are using latex paint or other paints that do require primer, I have become a huge fan of using oil based primer when painting furniture. My favorite primer is Zinsser cover stain oil-based primer. It will stick to almost any surface and is fantastic at sealing in the old finish.
(Don’t worry, you cannot paint latex paint over oil-based paint, but you can paint latex paint over oil primer.)
I used to use latex primer because clean up is easier. But I often had the old reddish wood finish seep through and discolor the paint. This has not happened once since I started using oil based primer.
One word of caution though – this primer goes on with a lot of texture so you may need to lightly sand your piece again before painting.
6. Getting a smoother paint finish.
There are a lot of factors in getting a smooth paint finish like using the right paint brushes. But one factor that often gets overlooked is making sure your paint is the right consistency.
Sometimes over time your paint may thicken a bit. Even if you just bought the paint, it may have been on the shelves in the store for awhile. If it is too thick, it won’t self-level on the furniture as well which means more visible brushstrokes.
So how will you know if your paint is the right consistency? After stirring your paint well, lift your paint stirrer and let some paint run back into the paint can. If it is gloppy or very slow moving, it is too thick. It should be a similar consistency to heavy cream.
You can thin any water-based paint by adding simple water or by adding Floetrol. Floetrol is a latex paint additive that thins the paint and helps eliminate brush strokes.
If you are using an oil-based paint, you can thin it with Penetrol.
Just go slowly when thinning your paint. You can always add more thinner, but if you add too much, it’s tough to fix.
7. Save time on clean up.
You don’t have to clean your brushes and rollers every day. Most furniture pieces require more than one coat of paint and more than one day of work. Washing your brush/roller after each coat of paint can be a huge pain.
Instead I put my brushes and rollers in a large ziplock bag or wrap them in foil and stick them in the fridge. As long as they are sealed, you can leave them in the fridge for a few days without the paint drying.
By doing this, you only have to clean all of your supplies once – when you are completely finished with your project.
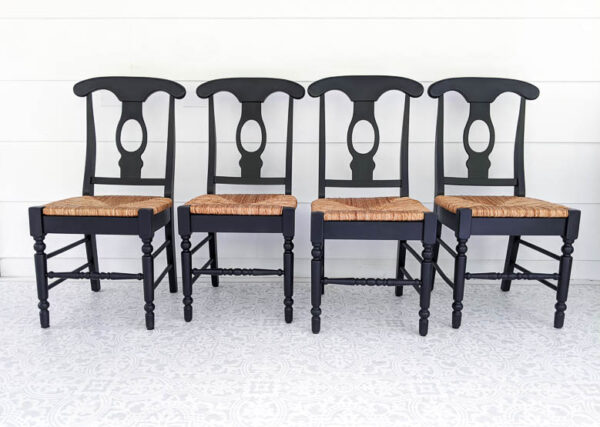
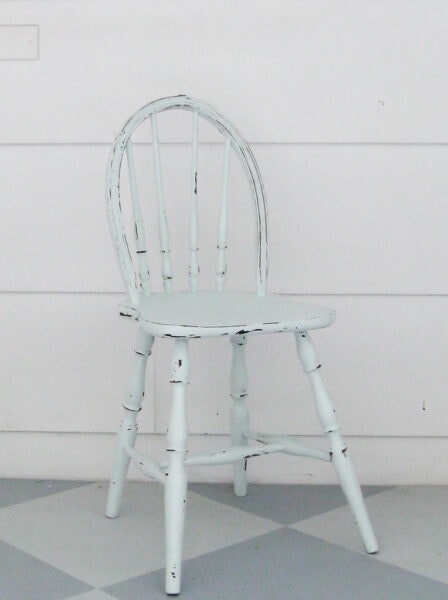
8. Keep any distressing natural-looking.
When you are going for a distressed look, keep the distressing natural. Nothing looks more fake than random little circles sanded into the front of a piece of furniture.
Start with 220 grit sandpaper and then if that isn’t working well, try 150 grit.
Whether you distress a little or a lot, focus on the parts of your furniture that would naturally receive a lot of wear and tear: edges, corners, drawer fronts, raised decorations. Slowly add more distressing until you are happy with the look.
Remember you want the distressing to look like the natural effects of age, so try to avoid the impulse to make the distressing symmetric or even. Instead, try to keep it a bit random.
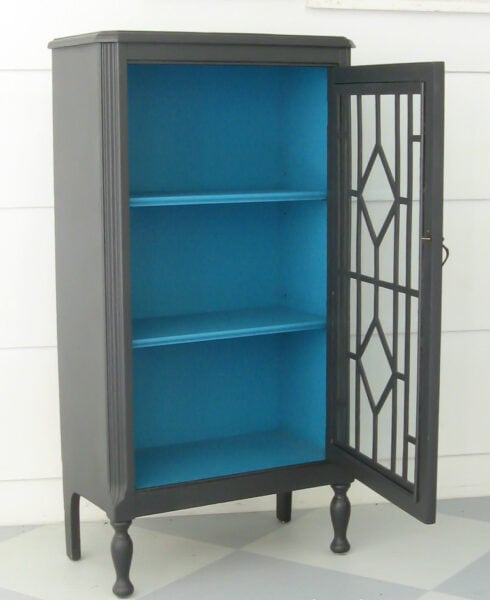
9. Protect your paint finish.
After doing all of the work to paint a beautiful piece of a furniture, it’s important to protect your finish.
If you are sealing a stained surface, a wipe-on polyurethane works great. If it is a painted surface, a polycrylic sealer is better to prevent yellowing. This will protect your finish from the wear and tear of daily use.
So when do you need to use a top coat or sealer?
- If you are using chalk paint, you always need to protect it with a top coat.
- You should always protect tabletops, shelves, or other surfaces that will have objects on them with a sealer.
- If you are going for a flawless paint finish with no distressing, a good sealer will keep your finish looking perfect for longer.
I’ve also got more info on the best sealers for painted furniture right here.
10. Allow your paint to fully cure.
I used to think that if paint was dry, then it was good to go. It turns out that isn’t true at all. Drying is only the first step.
Latex paint doesn’t fully harden, or ‘cure’, for up to thirty days. If you subject your painted furniture to everyday use before that, there is a good chance you will end up with scratched and dinged paint.
This might not matter if you are going for the aged, distressed look, but if you want a smooth finish definitely treat you furniture with care the first few weeks.
11. Bonus Tip! The best furniture paints.
Since writing this post, so many new amazing paints created specifically for painting furniture have hit the market. I certainly haven’t tried all of them, but I have used quite a few. There are two paints that really stand out to me.
General Finishes milk paint is my go-to for an all-around great furniture paint. This is not like other milk paints you may have heard of that give a very chippy, aged look.
General Finishes milk paint is actually an acrylic paint, it’s easy to work with, and it’s my preference for pieces with a smooth paint finish.
If you are looking for a great chalk paint to experiment with, Dixie Belle is a great choice. It is easy to work with, works well for both vintage and modern finishes, and is available in a variety of pretty affordable sizes.
Both of these paints give a fantastic finish and can also be used without primer as long as your piece is in good condition.
You can, of course, still use latex paint for painting furniture as well. You will just need to be extra careful with sanding and priming your piece properly.
Whatever paint you choose to use, painting furniture is an amazing way to give old furniture new life.
Want a bit more help with your next furniture painting project? Head over to my step-by-step guide to painting furniture.
I’d love for you to share this post on Pinterest!

Great tips Carrie! I haven’t painted much furniture before…totally pinning! :-)
thanks,
Sarah
Thanks Sarah! It really is such a great way to get just the look you want for super cheap.
I LOVE the look of re-purposed furniture. I look forward to getting to know you through #SITSblogging.
Thanks Jamie!
We are waiting to close on a house, then let the fun begin! These are some great tips. I’m pinning so I’ll have it available when I need it! Stopping by from #SITSblogging
Thanks Leanne! Congrats on your new house!
Awesome tips! Especially the one where you can use latex over oil primer. Need to store that one away for when I tackle my kitchen. Again. Sigh!
Pinning for sure! And thanks so much for sharing at the Super Saturday Link Party, my friend!
Hope you have a fabulous weekend!
:) Linda
Thank Linda! My mind was really blown when I learned you could paint latex paint over oil primer. And thanks for hosting the party!
So happy to run across this post tonight! I am getting ready to paint a secretary desk I have and a small corner hutch. Thank you for the tips!
And I just read an old post on your painted floors and I absolutely loved them! I have been trying to convince my husband of this possibility for so long about our 1 room with grimey carpet. Now I have proof!
Thanks Ginger! Good luck painting your secretary desk and hutch – I love a good painted furniture project. And good luck convincing your husband about your floors – no more grimey carpet!
I’ve been such an advocate for retaining the natural wood finish for furniture for so long. But I just can’t. Painted furniture is SO PRETTY. I’m ready to dive in, thanks for all the great tips!
I know what you mean – I feel really bad painting over nice wood because it is so hard to undo. But to get around the painted furniture guilt, I just find the cheapest, ugliest wood furniture I can and paint away happily!
These are great tips. I did not know about letting the furniture “cure”. That explains a lot!
That was a revelation for me when I first learned it too!
I really liked the tips about getting the distressed look. It wouldn’t make sense to have stress in places that don’t receive very much. However, it does make sense that the edges corners and drawer fronts would get more worn. These area great tips. Thanks for sharing.
Thanks Johnny. I love to see distressed furniture but hate when it is really fake looking.
Great transformation! I liked all those furnitures. I’ll definitely try all these tips and start painting some of our furnitures. Thanks for the inspirations.
Magic Look
I like your approach to distressing, and agree those fake dings and sanded circles in the middle of a drawer are not great. I like to sand every piece i do, it helps me get acquainted with it and figure out what I want the finished piece to look like. Not always successful but I learn from every piece.
Good point Fleur. Sometimes I think figuring out what I want the finished piece to look like may be the hardest part! And I definitely learn from every piece as well. When I look back at my first couple pieces of painted furniture, I see so many mistakes and flaws – it helps me see how far I’ve come!
Thnks for the advice.
I’ve never painted furniture. But I have read tons of these kind of post, and what is still not clear for me is, when to use chalk paint (and avoid the sanding) and when to use other paint. I mean seriously I really dont get it.
Thnks again :D
Great question. In general, chalk paints and other paints that are specifically for cabinets and furniture are the best way to go. Latex paint will work and I used to paint furniture with it all the time but the sanding and priming make the process much longer and the results are not as consistent. I love using chalk paint for any furniture that I am going to be distressing or giving a more aged look to. I prefer General Finishes paint for pieces I want to be smooth and flawless. Either type of paint can be used without sanding and priming. Unless you happen to already have latex paint on hand that you want to use, I would go with a chalk paint or other furniture paint every time. (By the way, I think I may write a follow up post on this because there are so many great paints out there and factors to consider so thanks for the question!)
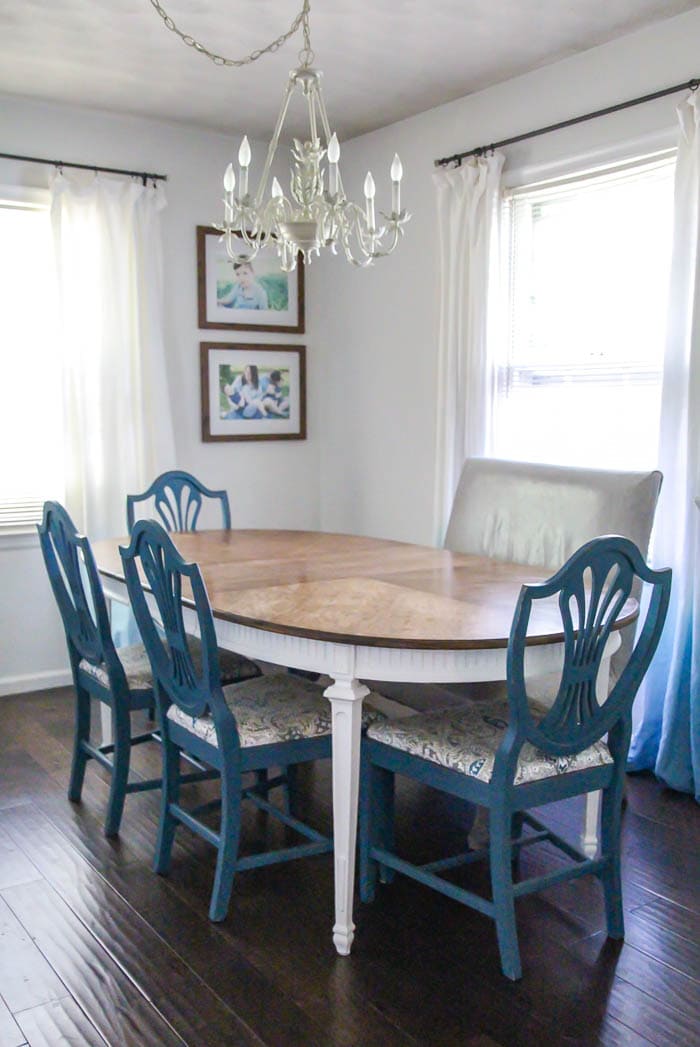
Sooo question. If I am starting with a wooded table, similar to the grey library table, and I want alil distressed look. Should I sand and prime, if I’m using latex paint? And if I’m wanting an aged piece should I skip the sealer and just sanding to age? Thanks is advance!!
Megan
;>
Megan, Good question. I think one of the hardest things about painting furniture is how many different ways there are to do it! If you are using latex paint, yes I would lightly sand and use primer first. You might be able to get away with skipping it, but there is a high likelihood that would just cause problems later. And since you are going for a distressed look, you might be able to skip the sealer too. I do recommend that you are least put sealer on the tabletop though. Since we set things on tabletops, they get a lot of wear and tear and end up not looking very good when left unsealed. I have tried to skip the sealer a few times on tabletops and in no time the paint became scratched and discolored.
Thanks for sharing your thoughts with me on painting furniture. One thing that I liked was that you said that you should decide whether or not you want the paint to be smooth or flawless. My wife wants to redo one of our rooms, and I think that this will help! Thanks!
Glad it helps!
Hi Carry. Thanks for your article. Can you please share a little bit more info on how to choose the brushes? Is it ok to have only 1 size brush? Or there should be a minimum set of brushes?
Great question. It’s fine to have one size brush – an angle brush anywhere from 1.5″-2.5″ works great. I definitely wouldn’t go with a no-name cheap brush though. Purdy brushes are a great choice and they are available at any home improvement store for a pretty low price.
I love these tips! I’m a beginner and I’m going to try them all!