Painting furniture white: secrets to the perfect finish
Learn how to paint furniture white without yellowing or bleed-through. I’m sharing all of my tips and tricks for painting furniture white and getting a perfect finish.
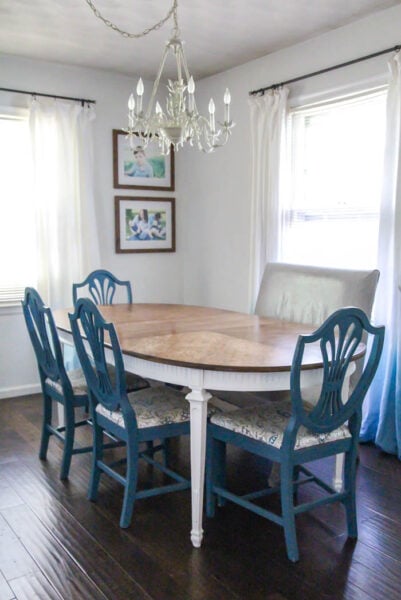
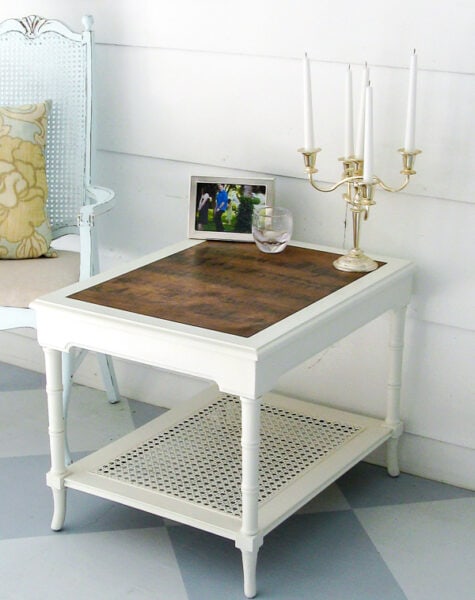
Painting furniture is one of my favorite ways to create a beautiful, one-of-a-kind home on a budget. I love painting furniture with bold, bright colors, but there is also something magical about painting furniture white.
It is so fresh and simple and can work with absolutely any style from farmhouse to midcentury modern to contemporary. And if you’re painting furniture to sell, white furniture is always in demand.

But painting furniture white also comes with a couple of unique challenges.
For one thing bright white paint does not cover as well as other colors of paint. I have tried many, many types of paint and across the board, white paint requires more coats of paint than other colors.
But by far the biggest problem with painting furniture white is yellowing.
This post contains affiliate links which means if you make a purchase after clicking a link I will earn a small commission but it won’t cost you a penny more. Click here to see my full disclosure policy.
How to prevent white paint from yellowing
The last thing you want to see when you’re putting the last coat of fresh white paint on a piece of furniture is dingy yellow spots, but it’s a pretty common problem.
There are two main reasons white paint yellows.
- Bleed-through. When you paint wood furniture, the moisture in the paint can cause the wood grain to open and release wood tannins, or natural oils within the wood. When you paint furniture white, these tannins will cause your beautiful paint finish to look yellow and splotchy.
- The sealer. Whenever you paint furniture, you need to protect your paint furniture with a clear sealer. Some sealers like polyurethane naturally yellow with time and should never be used over light color paints. But sometimes even the sealers that are supposed to be non-yellowing cause problems over white paint. To be fair, they probably yellow over any color paint, but it’s only noticeable over white paint.

To prevent your white furniture from yellowing, you need to take steps to prevent bleed-through and use the right sealer.
How to prevent bleed through
Preventing bleed-through is pretty simple. All you need to seal in the tannins is a good oil-based primer. Water-based primer isn’t going to cut it, but don’t worry, you can still use a water-based paint like chalk paint or latex paint over an oil-based primer.
My favorite is Zinsser Cover Stain oil-based primer. Every time I’m planning to paint a piece of furniture white, I start with this primer. Well, now I do anyway. I used to try to skip this step and learned pretty quickly that it is definitely necessary.
(I’ve also got a whole post about when you need to use primer and when to skip it if you’ve got more questions.)
Using primer also helps with the problem of needing so many coats of white paint to get even coverage. Starting with white primer cuts down on the coats of paint you will need to get even coverage. And since most paints cost considerably more than primer, this is a real money-saver.
Non-yellowing sealers for white furniture
The second tricky part of painting furniture white is the sealer. Most painted furniture needs to be sealed to protect the paint finish from scuffs, stains, and scratches. But some sealers yellow over time and ruin your beautiful white finish.
Finding the right sealer to protect your white furniture is trickier than you might think. Oil-based sealers like polyurethane are especially prone to yellowing, but even ‘non-yellowing’ sealers like polycrylic can still yellow if they are applied too thickly.
My favorite sealer for painted furniture is General Finishes High Performance Top Coat. It is easy to apply and gives a very durable finish. But even General Finishes had to put a disclaimer on their website about their finish yellowing over white paint.
General Finishes background was originally on the professional side, and the incidences of yellowing topcoat over white paint were almost nil, and when our sprayable professional finish, Enduro White Poly, is used, there have been no incidences. But as the use of our paints has increased in the up-cycling and furniture refresh markets, we have heard more reports of our topcoat yellowing.
You can tell from their statement that their finish definitely can be used over bright white furniture if applied correctly. If pros can do it with no problem, than the rest of us should be able to make it work as well.
After talking to a few painting pros and painting many pieces of furniture white with fantastic results, I’ve learned a couple of simple tricks to prevent your water-based sealer from yellowing.
- Use several very thin coats of sealer. Thick, gloppy coats are much more prone to yellowing.
- Mix some white paint right into your sealer. Mix your first coat of sealer with 10-15% white paint and 85-90% sealer. Follow with a second and third coat that are 100% sealer for durability.
 and a fresh coat of white paint, they look amazing. Learn all of my tips and tricks for painting furniture white without yellowing.")
The best white paints for furniture
Let’s talk about paint for a minute. Every line of furniture paint has a great white paint. In fact most paint lines had several shades of white: a pure white and several other whites with more of a gray or yellow undertone.
Personally, I am partial to pure bright whites. I love pure white because it looks fresh and clean with any color scheme.
The downside of pure white is that it has less pigment than other paints, so it almost always requires more than two coats of paint to get even coverage. White paints with a touch of color tend to need fewer coats of paint.
There are tons of great paints out there, but here are a few that I really love to work with. (And if you want to know more, I have a whole post about the best paints for furniture.)

Bright whites
- General Finishes Milk Paint in Snow White
- DecoArt Satin Enamels in Pure white
- DecoArt Americana Decor Chalky Finish in Everlasting
- Dixie Belle Chalk Paint in Cotton
Whites with a cool/gray undertone
Whites with a warm/beige undertone
- Fusion Mineral Paint in Raw Silk
- Wise Owl Chalk Synthesis Paint in Antique Villa
- Dixie Belle Chalk Paint in Drop Cloth

Ready to tackle a piece of furniture? Here’s a step-by-step guide to getting the perfect white finish on furniture.
Supplies for painting furniture white
- Cleaner – this is my favorite cleaner to use when painting furniture
- Wood Filler if needed to fill cracks and scratches
- 220 grit sandpaper – if needed to smooth wood filler or rough areas
- Oil-Based Primer – this primer is a must when painting white furniture
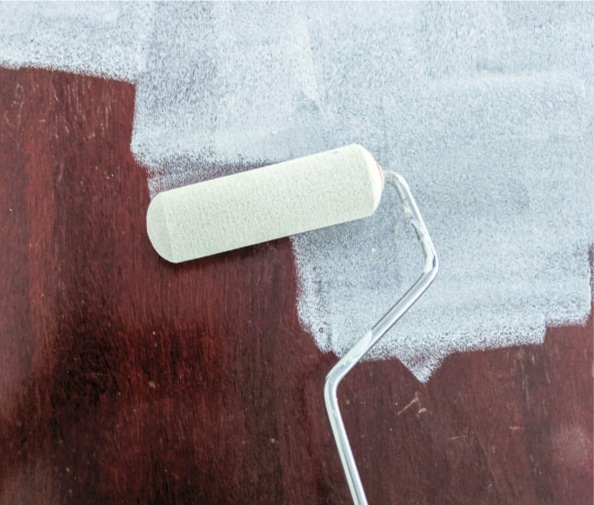
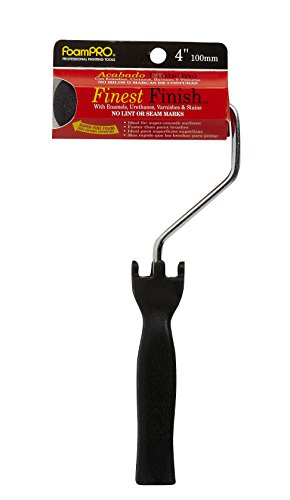
- Small foam roller
- Paintbrush – any high quality paint brush will work. These Purdy angle brushes are my favorite for getting a smooth finish on painted furniture.
- White paint of your choice.
- Non-yellowing sealer: I love General Finishes Flat Out Flat for distressed, vintage finishes and General Finishes High Performance Top Coat for smooth, more modern finishes. If you missed it, there is more info on using these topcoats on white furniture above.
- Foam brush or blue sponge applicator – I recently discovered the blue sponge applicator and it is awesome for getting a really smooth finish when applying topcoat.
Tutorial: how to paint furniture white
Painting furniture white is pretty similar to painting furniture any other color, but getting a perfect finish is definitely trickier when you’re using white paint.
These step-by-step instructions include everything you need to know to prevent the bleed through, yellowing, and uneven finish we talked about earlier.

Prepping your furniture for paint
The first step to any furniture painting project is to give your furniture a good cleaning. It’s definitely not the most fun step, but it has to be done. Even if you do everything else right, paint simply isn’t going to stick to dust, dirt, or grease.
I like to use Krud Kutter PrePaint Cleaner for cleaning. It’s quick and easy and gets the job done. A simple mixture of water and dawn dish soap also works well.
Once your furniture is clean and dry, look it over to see if any repairs need to be made before painting. If anything is loose or needs to be repaired, this is the time to do it.
Remove any hardware you don’t want painted. If you are planning to replace any drawer pulls or knobs, check to see if you will need to change the placement of the screw holes. If so, fill in the old holes with wood filler and sand smooth. You can fill any deep scratches with wood filler as well.
When the wood filler has completely dried, sand it smooth with 220 grit sandpaper.
In most cases you don’t need to sand your entire piece of furniture before painting, but there are a couple of exceptions.
If your furniture has a very slick, glossy finish, it’s a good idea to lightly sand the entire thing with 220 grit sandpaper to rough it up just a bit. This will help give the primer a better surface to grip. And if your furniture has any spots that are rough to the touch, you can use sandpaper to sand them smooth.
After sanding, clean off all of the dust.
Priming your furniture
You don’t have to use primer every time your paint a piece of furniture. But if you are painting furniture white, primer is always a good idea.
As I mentioned above, one of the biggest issues with painting furniture white is bleed-through. The best way to stop bleed-through is to start with a coat of oil-based primer.
I use Zinsser Cover Stain oil-based primer all the time and it has never failed me. And yes, you can use any paint over an oil-based primer including latex paint or chalk paint.
A small foam paint roller works great for priming the large, flat sides of your furniture piece and a paintbrush can help get any edges and crevices the roller can’t reach.
I recommend keeping a separate paintbrush on hand for applying oil-based products like primer. Also, remember that whenever you paint with oil-based primer or paint, you will need to clean your paintbrush using mineral spirits rather than water.
Don’t worry if your furniture looks messy and blotchy with only the primer. That is totally normal and once you start painting, it will look much better.

Painting your furniture white
And now for that gorgeous white paint you chose!
Again, you can paint the large, flat surfaces of your furniture with a small, foam roller and then use a paintbrush to prime any areas the roller can’t reach. These are my top paintbrush picks if you aren’t sure what kind to use.
As I mentioned above, it will probably take three or more coats of paint to get an even finish. Be sure to let the paint dry completely between coats and avoid the temptation to touch up the paint while it is still wet.
What to do if you still have bleed-through
There have been a few times when I still had a few small spots of yellow bleed-through on my paint finish even after properly priming. This is almost always because I missed a few spots with the primer.
How will you know if it is bleed-through? If you yellow or brown spots or streaks appear on your fresh paint, you have bleed-through.

If this happens to you, don’t panic. You can fix it without completely starting over.
But you do have to fix it. If wood tannins are messing up your paint finish, adding more coats of paint absolutely will not work. (Believe me, I’ve tried.)
Allow your paint to dry completely. Then pull your oil-based primer back out. Use a paintbrush to paint an even coat of primer just around the spots where you are having bleed-through.
You don’t need to re-prime the entire piece, but do make sure you completely cover the trouble spots. Once the primer is completely dry, you can continue painting.
Sealing your white furniture
The final step is sealing that beautiful paint finish. Sealing your painted furniture is one of the most important things you can do to make sure your paint finish lasts. Of course as I mentioned before, this step is a bit trickier when painting furniture white.
I prefer to use General Finishes High Performance Top Coat. I typically apply my topcoat with a foam brush, but I recently started using the blue sponge applicator from Dixie Belle paints for applying my topcoat and love the smooth finish it gives.
If you used more of a creamy/warm shade of white, you won’t need to worry so much about your paint yellowing. You can apply your topcoat straight from the can. Just be sure to use several thin, even coats.
If you used a pure white shade, it helps to mix some of your paint with your sealer. You can mix them in a spare paint can or even a plastic cup. Mix your first coat of sealer 15/85 paint to sealer. (You don’t have to be exact; just estimate.)
Follow with a second and third coat that are 100% sealer. Remember to use several thin coats and apply the sealer in long, even strokes rather than a lot of short back and forth strokes.
I like to do 3 – 4 coats of sealer on high traffic furniture pieces. You may be able to get away with 2 coats on furniture that doesn’t get handled often and on pieces with a distressed finish. (Since any chips and dings will just add to the distressed look rather than ruining the finish).
Once your final coat of sealer is dry, you can begin using your painted furniture, but be extra gentle with it for the first several weeks.
Paint can take up to 30 days to fully cure/harden even after it is dry to the touch. This is the time when it is the most likely to get scratched and dinged.
Okay, now you’re prepared. Go forth and paint all the furniture white!


Painting Furniture White: Secrets To The Perfect Finish
Sharing all of my tips and tricks for painting furniture white and getting a perfect finish.
Materials
- Wood Filler
- 220 grit sandpaper
- Oil-Based Primer
- White paint
- Sealer
Tools
- Small Foam Roller
- Paintbrush
- Paint Tray
Instructions
- Prep the furniture piece by giving your furniture a good cleaning.
- Take care of any necessary repairs.
- Remove any hardware you don’t want painted.
- Fill in the old holes with wood filler and sand smooth.
- Prime with an oil-based primer using a small foam paint roller for priming the large, flat sides of your furniture piece and a paintbrush to prime the small areas.
- Once the primer is dry you can paint the large, flat surfaces with a small, foam roller with the white paint of your choice. Use a paintbrush to paint the smaller areas.
- Repeat with 2-3 coats of paint, allowing the paint to dry completely between coats.
- For high-traffic pieces, finish with 2 coats of a nonyellowing water-based furniture sealer.
Recommended Products
As an Amazon Associate and member of other affiliate programs, I earn from qualifying purchases.
-
 3M 9000NA-20-CC Sandpaper Aluminum Obyide, 9-Inch by 11-Inch, Very Fine
 -
Purdy 144024420 White Bristle Series Adjutant Angle Sash Paint Brush, 2 inch
-
FoamPRO 184 Finest Finish Mini Roller (High-Density Foam) 4"
-
KRUD KUTTER PC326 PC32 Prepaint Cleaner/TSP Substitute, 32-Ounce, Original Version
-
General Finishes High Performance Water Based Topcoat, 1 Quart, Satin
-
Zinsser 03504 Cover Stain Interior/Exterior Oil Primer Sealer, 1-Quart, White


Google Web Story: How to Paint Furniture White
Oh wow. What a difference the white paint makes! Great tips, too. Can’t wait to see the finished room! Susie from The Chelsea Project
Thanks Susie!
Great tips! I love the contrast of the white paint against the dark drawer fronts.
Thanks Katie! That contrast of black and white is definitely right up your ally!
Looks great! Primer is my #1 tip for painting furniture white (or off-white/cream/etc.) too!
Yes, it makes such a difference even when it isn’t ‘required’.
This turned out beautiful. I think everything looks better painted white! I can’t wait to see your reveal!
Thank you Roxanne!
this turned out great! can’t wait to see the finished space.
Thanks Morgan!
I love how it turned out! It is so fresh and bright now. Looking forward to see it in the room next week :)
Thank you Maureen!
The dresser look so much better now! Good choice!
Thanks Natalie! I think so too!
That dresser looks so much better after you painted it! Great job!
Thanks Nicki! I think so too!
Helpful article, but I’m confused on one point. You recommend using Generall Finishes Topcoat, but when I clicked through to their site their first statement was a warning not to use it with white. What’s all that about?
Yes, they do warn about that. I talked about that in the post because I know it is confusing. Their statement basically says that professionals have used it for years without problem but when DIYers started using it, they encountered a lot of issues. This leads me to think that many of the issues were probably caused by a lack of knowledge of correct painting techniques – like always using a primer that will block tannins first and applying topcoat in very thin layers. Also, after talking to some master woodworkers, I learned a tip to mix a bit of white paint into your topcoat before putting it over white paint. This helps prevent any yellowing that may have happened even with proper prep.
I recently bought my first home, and I’m filling it with budget pieces. I am going for that farmhouse vibe. The pieces I’ve collected along the way are cherry red or stained. I scuffed the pieces, wiped with a tack cloth, and cleaned with white lightening. The paint store rep said I didn’t need a primer. Well here I am wishing I would have found your blog sooner. I have 3 coats of Behr’s super white, and it’s bleeding through. What advice can you provide?
Oh man. In my experience a lot of paint store reps know a lot about painting walls and very little about painting furniture! If I were you, I would stop what you are doing and use an oil-based or shellac primer. (I prefer the oil-based but either will work). You can use it right over the paint you used and then paint over it with the same paint once dry. It will prevent any further bleeding. Good luck!
Hi,
I read your post on painting furniture white and the post on types of white paint.
I wondering if you have tried the Benjamin Moore Advance Alkyd paint. It is used kitchen cabinets.
I have not personally tried it, but have heard great things from other painters.
This is so very helpful, thank you!
One question is can I use Frenchic AlFresco white paint over the Zinsser primer and not use a top coat?
OR preferably a Satin white paint over the primer without a top coat?
I haven’t used Frenchic paint before, but I looked it up and it looks like it should work over the Zinsser primer fine without a top coat. Latex paint would also work fine. I would just be careful – I have found that high traffic surfaces like table tops usually need a sealer to be durable even if the paint says no sealer is needed. Furniture that gets touched less often is usually fine without a separate sealer. Good luck!
I should have mentioned that I am not painting the tabletop. I am researching how to slightly whiten it evenly and use maybe Tung oil.
I just read “Pure Tung oil must be thinned with Citrus Solvent to create the proper consistency for application and penetration into the wood.” I used it for years on an old pine table without thinning and it worked great. I just did it once a year.
Do you have any suggestions?
I don’t have any experience with this – I’m sorry!