Bringing old furniture back from the dead
You may remember this sad little cabinet that I found at a yard sale several weeks ago. It was in pretty bad shape with peeling veneer, loose glass, and a completely detached back.
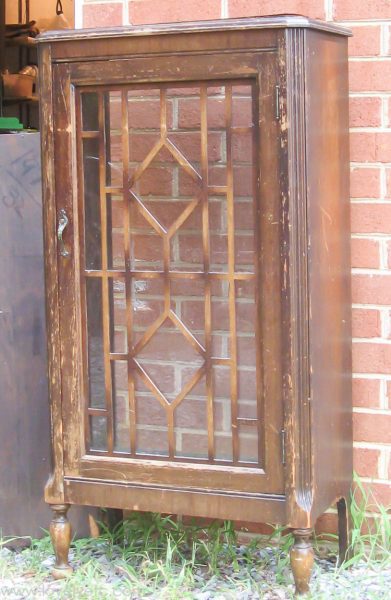
In spite of all that, there was still something very charming about it. But it definitely needed some love!
This post contains affiliate links; see my full disclosure here.
Luckily none of the veneer was actually missing, but it was coming off in quite a few places. I used basic wood glue to reattach all of the loose veneer and then stacked some heavy boards on top to hold it down while the glue dried. (These glue injectors make it super easy to get the glue into even the smallest spaces.)
Luckily the back wasn’t missing, it had simply fallen off. I tacked it back on with small brad nails. And I filled in a few cracks with wood filler and then sanded it smooth. I removed the interior trim piece and the glass. And finally, I cleaned the piece well and it was ready to paint!
Honestly, a lot of times getting a piece of old furniture prepped takes way longer than the actual painting!
For the paint on this piece, I used my favorite primer: Zinsser cover stain oil primer. This is my go-to primer for furniture projects because it sticks to anything and does a great job of sealing in old finishes so they never bleed through onto your fresh paint job. After the primer dried, I sanded lightly to get everything nice an smooth and then painted.
For this makeover, I used regular old latex paint in a couple of my favorite colors: Valspar Cooled Lava on the outside and Behr Peacock Feather on the inside. (Yep, you can totally paint latex paint over oil primer without a problem. It’s painting oil over latex that tends to go poorly.) I did use a few tricks to get a perfectly smooth paint job without using a paint sprayer.
First, I added Floetrol to my paint. Floetrol is a paint additive that reduces brush marks when painting. The other trick that really helps give a crystal clear glass finish – using a small foam paint roller for the flat surfaces and a high quality paint brush to get in the corners and details. (These paintbrushes are my current favorites.)
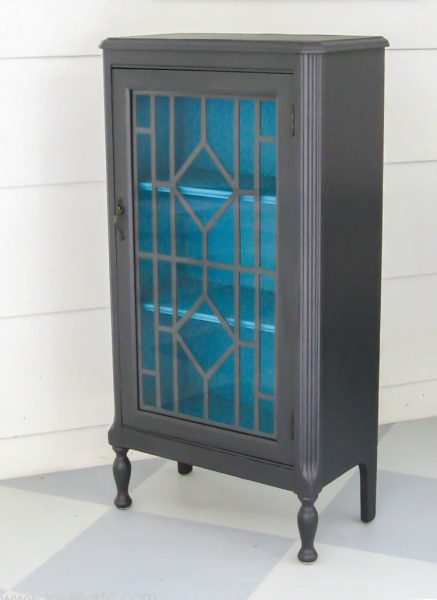
What a transformation! She looks about 1000 times better than the before. And I am really liking the modern colors with the vintage shape.
At first I was a undecided about whether or not to reattach the trim piece in the door. I love the little legs and detailing on this piece. But I was worried the front may be a bit busy – and it will look even more busy once it is full of dishes or books or whatnots. Perhaps it would be more polished without the detailing in the door?
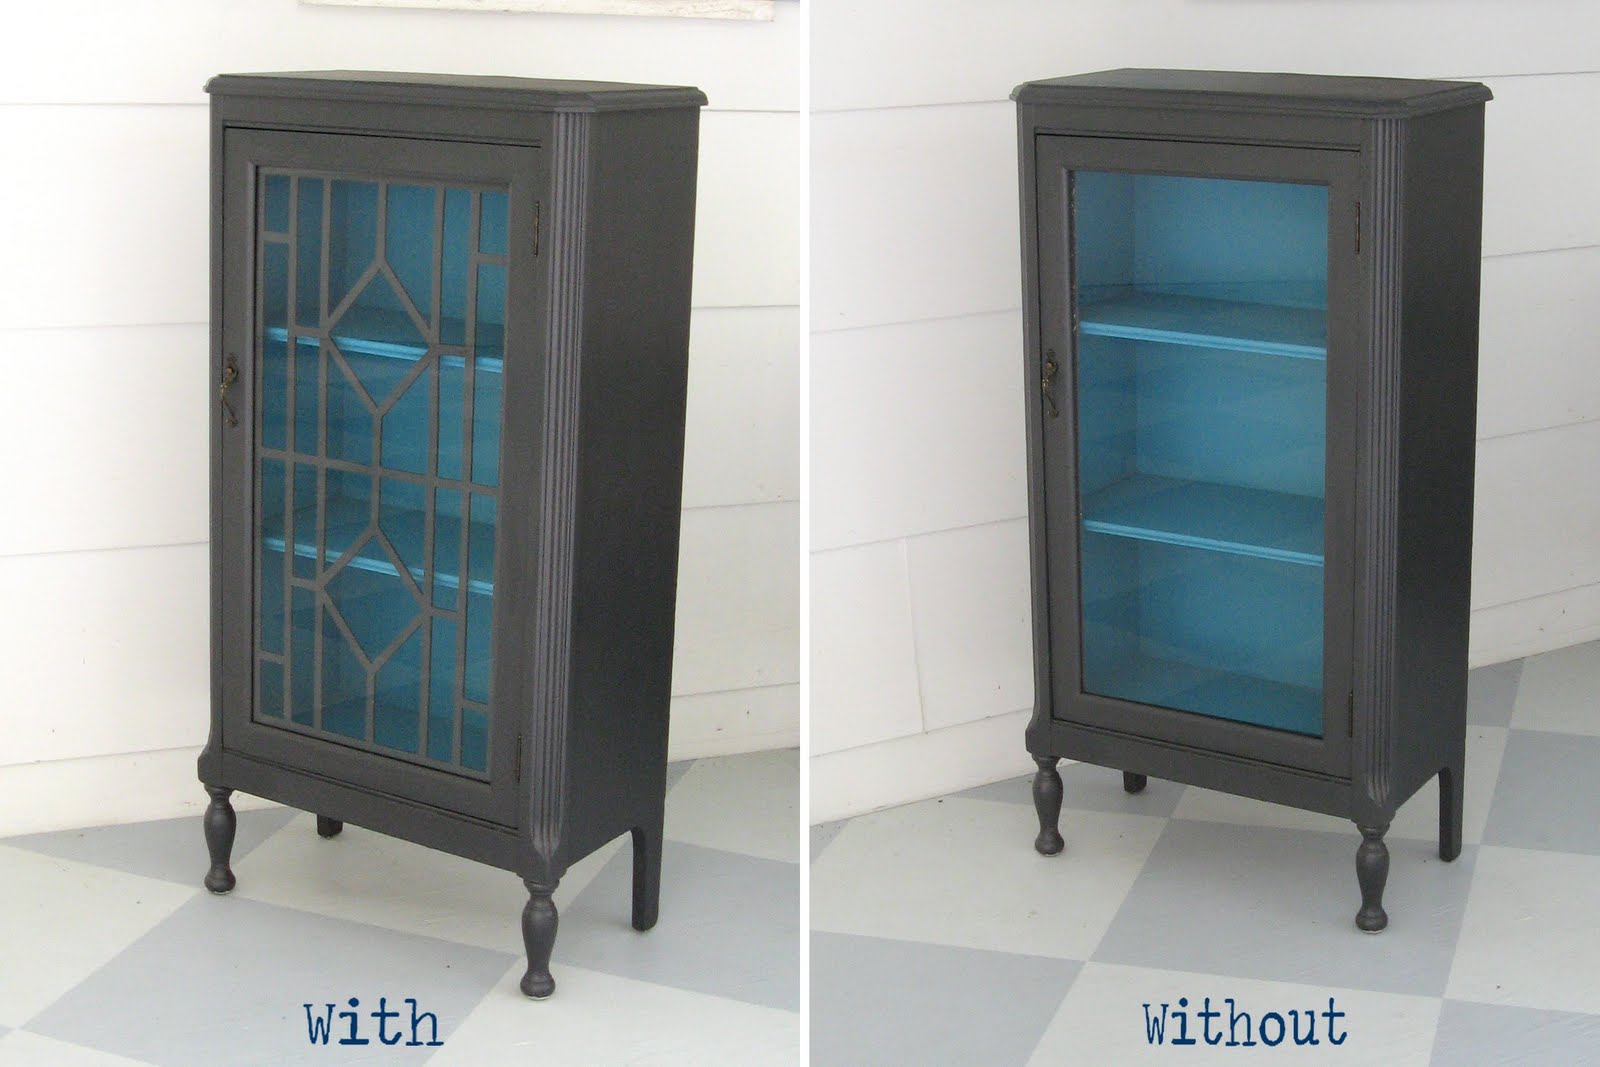
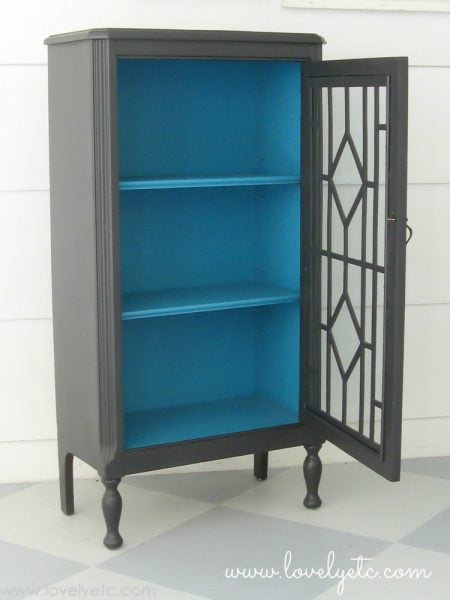
In the end I like it both ways, but it just seemed like a shame to lose the character of that original trim so I added it back. I’m really happy with how it looks in the end – wouldn’t this piece look amazing full of all white milk glass or ironstone pieces! What would you have done if this were yours? With trim or without?

Hi Carrie, I found your lovely cabinet over at the Get Your DIY On Party. I love the color combination and I’m liking the cabinet with or without the insert. With the insert would look great with white trinkets behind it and without would look great with colorful trinkets with coral, blues, and greens.
Thanks Marie – that is why I was so torn. It really does look good both ways! Though I did end up putting the insert back in.
This makeover is awesome, Carrie! Way to see the potential! Thanks so much for linking up to the “Get Your DIY On” Challenge! Be sure to come back on April 6th for our “Think Spring” challenge!
Thanks April! I love finding old junk that I know can be awesome.
Carrie this is a beautiful piece! I am in love with the blue on the inside- stunning!! I am featuring it on my blog today for the Get Your DIY On Features- thank you for linking up your Trash To Treasure Projects with us and I hope you’ll be back on April 6th to link up Spring Projects!
Mandy @ The Hankful House Blog
Awesome! Thanks Mandy.
Hi! Honestly I do believe that seems to be wonderful both equally approaches but you certainly use a position concerning the busy-ness on the aspect. I guess this will depend on what you long for to work the particular cabinet. Possibly, you can get the particular aspect down and also conserve that a place in the event you want to put it back on? Good luck!
Hi Carrie
Your piece is beautiful! Could you share a little bit about what you did to the cabinet before you painted it. Did you strip and sand it? Thanks and great job.
Thanks Debbie! Looking back, I really didn’t give a lot of detail in that post! Sorry about that. Before painting, I used wood glue to reattach the loose bits of veneer. Then I sanded the whole thing to smooth everything out. I used an oil-based primer to help make sure the old dark wood finish didn’t bleed through the paint and then very lightly sanded everything one last time. And then paint. Hope that helps. I don’t always do all of that prep work but this piece was in really poor shape and needed it.
Carrie, the paint color: cooled lava by Valspar, for the outside of the cabinet…..was that sprayed or brushed on? If brushed, what type of brush did you use to
get the sprayed-on look?
The paint was brushed on. To get a really smooth paint finish, I used a Purdy paint brush for the corners and edges. (The Purdy 2 inch angle brush is my favorite.) I used a small foam roller for the large, flat surfaces. These are often labeled as being for doors and trim and say for smooth surfaces. To keep the finish really smooth, you can also lightly sand with a high grit sandpaper in between coats if it looks like it needs it. Good luck!
It is absolutely stunning!! Amazing color choices. And the trim is definitely a must.
Ruth
Thank you so much Ruth!