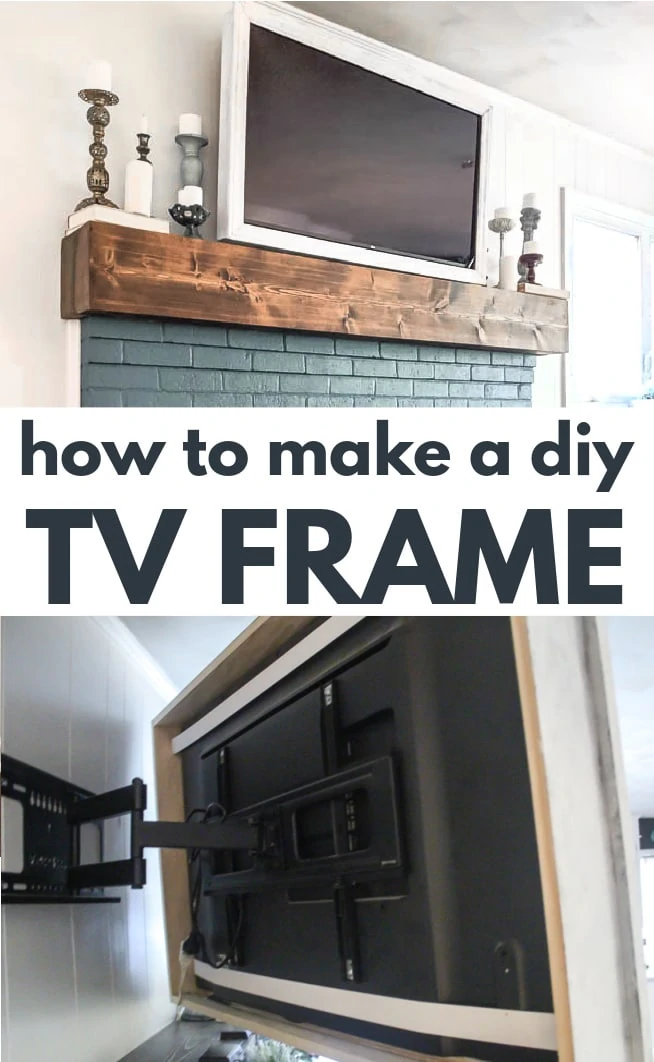
How to build a cheap and easy TV frame that swivels
How to make a cheap and easy DIY TV frame for your wall-mounted TV. This wood TV frame is simple, lightweight, and swivels with your TV.
Over the past year, I’ve turned our ho-hum brick fireplace into a gorgeous spunky fireplace! (I never realized fireplaces could be spunky, but my pretty navy fireplace definitely is!)
But that blah TV hanging over the mantel was not my favorite. I’ve wanted to do something to disguise it or make it blend in more since the first day we hung it there.
I’ve seen some brilliant ideas to cover the TV with art or shutters or doors, but this is our only TV and we watch it pretty regularly (perhaps a bit too regularly if I’m honest).
Since anything that was going to cover the actual TV was out of the question, a nice TV frame seemed like the best option.
You can actually buy frames for your TV, but as you’d imagine, they are pretty expensive. So I started planning how to build my own.
Let me just stop right here and say I’ve wanted to frame our TV for a few years now, but it really just seemed way too hard. Plus it’s something we would be looking at every single day so it needed to look good!
Thankfully putting this together was a million times easier than I anticipated!
Honestly, the whole thing only took a couple of hours. Of course, for me those hours were spread over several days because, well, kids. But this is seriously such a doable project even if building isn’t your thing.
When I planned my TV frame, there were a few important things I really wanted.
- It needed to be lightweight.
- It needed to be able to swivel with the TV mount so we can also watch TV from the kitchen if we want.
- It needed to allow for plenty of ventilation for the TV.
- It needed to be easy to install and remove.
- And it needed to be pretty. Since that’s basically the point of the whole thing after all!
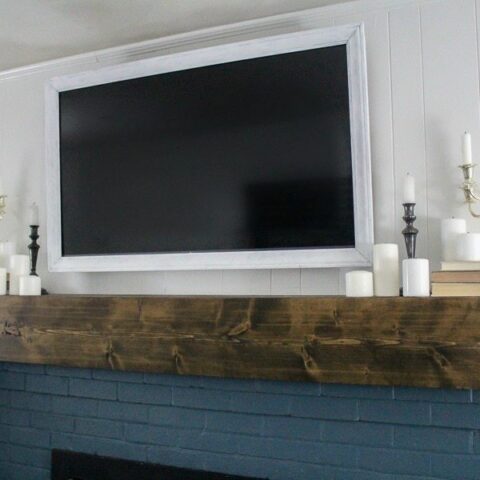
This is what I came up with:

Pretty awesome right?
It’s so simple but it really just helps the TV mesh with everything else happening on the fireplace. And it checks every box on my wishlist – Hooray!
Before I get to the tutorial, I want to say a big thank you to Ryobi for sending me a miter saw and nail gun to use for this project.
I have always loved my little jigsaw so much that I saw no reason to get any more power tools for years! But when I was able to use my new nail gun instead of just using a hammer and nails like usual, I was an instant convert.
This nail gun is awesome because it doesn’t require an air compressor And it was just so much faster and easier. Same with the miter saw.
I immediately started thinking of projects I’ve done in the past where I could have halved my time if I’d had these then! And with three little kids constantly calling my name (or crying) saving time is oh so worth it!
This post contains affiliate links which means if you make a purchase after clicking a link I will earn a small commission but it won’t cost you a penny more. Click here to see my full disclosure policy.
Materials for DIY TV Frame
Wood cut list
- 1×4 pine board (the width of your TV +.5 inches)
- two 1×4 pine boards (the height of your TV + 2 inches)
- 1×2 pine board (the width of your TV +.5 inches)
- Door casing for the front of the frame
- 2 pieces the width of your TV + 6 inches
- 2 pieces the height of your TV + 6 inches
Other Supplies
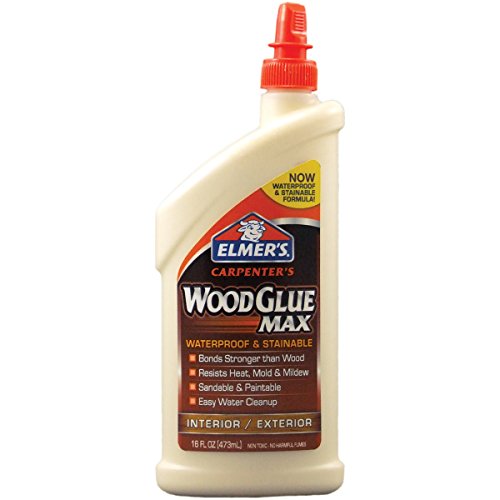
- wood glue
- paint in the color of your choice
- paint brush – this is my favorite paint brush for getting a smooth finish
- wide waistband elastic – I know this sounds super weird, but this is actually one of the tricks to making this lightweight TV frame work!
Tools
- tape measure
- nail gun or hammer and nails – I have a Ryobi AirStrike and I love it. It saves me so much time on projects.
- staple gun and staples – for attaching the elastic
- miter saw
How to Make a DIY TV Frame
Start by measuring the height and width of your TV.
The first part of the frame is the box that goes around the TV itself. This is really just a basic box. The only thing unique about it is that the bottom side is made of a 1×2 board while the rest is wider.
Our TV has all the important stuff at the bottom – the power button, remote sensor, speakers, etc. So it seemed smart to leave these uncovered. This also helps with leaving some space for air to flow around the TV for ventilation.
You won’t see this empty space in the final frame because the front of the frame covers it.
I chose to use 1×4 boards because they were wide enough to cover the sides of my TV and any cords coming out of the back of it.
My frame doesn’t reach quite all the way to the wall. Again, I thought this would help with air flow.
I also wanted to keep my frame lightweight – visually as well as actual weight. With our big, chunky mantel, I knew a huge frame would make the whole thing look too heavy.
If your TV mount goes out further from the wall, you may want to use a wider board. This is the TV mount we have – it keeps the TV pretty close to the wall and can also swivel and tilt in any direction.

I cut the boards for my box with the miter saw and used my nail gun to nail it all together.
Using the measurements above, this box will be just slightly larger than your TV which makes it easy to slide on and off.

Next, I made the frame for the front. This is where the miter saw really comes in handy.
For the front of the frame, you need to measure the height and width of your TV screen. Not the entire TV, just the screen. Part of what makes this frame so pretty, is it fits the TV perfectly with only the screen showing.
The screen measurements are going to be the measurements for the inside of your frame.
I used door casing for this. Some people use crown molding, but I didn’t want my frame to stick out from the wall quite that far. There were several styles of door casing at my local home improvement store, so I just chose the one I liked the most.
I cut my frame boards at 45 degree angles using my miter saw. Just be sure that your boards and angles are all facing the correct way before cutting. (I messed up one piece and had to redo it. Whomp whomp.)

Then I used wood glue to connect the frame face together.
Once it was dry, I was ready to attach my frame to my box. This is a little tricky, simply because you want to make sure your frame is exactly in the right spot to perfectly frame the TV screen.
This is one part where you will need a helper. Hang the box around your TV and then have your helper hold the frame around the screen.
Measure the distance between the outer edge of the box and the outer edge of the frame on each side. Then take it all down, line the two pieces up, and use your nail gun to attach the frame to the box.
This is where the nail gun really helps because you can quickly nail everything together before anything shifts out of place.

The final step to building the actual frame is finishing the back.
At this point, my frame hung pretty nicely on my TV but I needed something to keep it secured in place. I didn’t want to hang it on the wall itself since our TV mount swivels and sometimes we turn it so we can watch something from the kitchen.
I considered using more wood, but I wanted to keep it as light as possible and also easy to put on and take off. So a couple of sturdy straps seemed like the perfect solution.
I used waistband elastic which is a really sturdy elastic. I cut two pieces, one for the top of the TV and one for the bottom.

Since this is elastic, it is pretty stretchy. It took a little trial and error but I found that cutting the elastic about 8 inches shorter than the width of my TV worked well.

I used a staple gun to staple it to the inside of my frame and then slipped the elastic around the TV to slide the frame on.

As far as the paint finish goes, the sky is the limit.
I chose to paint mine a distressed white. I didn’t want it to disappear in front of the white walls but I also didn’t want it to be too dark and compete with the fireplace itself.
I don’t have any pictures of the painting process but it was pretty simple.
I painted the whole frame with one quick coat of Rustoleum Chalked paint in Charcoal. Then I used a chip brush to dry brush on a coat of light gray chalk paint followed by several layers of white chalked paint. I kept adding layers of white until I was satisfied with the look. I didn’t even bother sealing this piece since it will very rarely be touched.

And that’s it. This little frame is such a simple addition, but it really makes a huge difference in finishing off this space.
Plus the custom design works so well with the TV. There is plenty of airflow at the bottom and at the open back to prevent the TV from overheating and there is still access to the buttons and speakers along the bottom as well as all of the input ports on the back of the TV.

And I love that it is light enough that it doesn’t need to be attached to the wall and can easily swivel with the TV.

I am so glad I finally got the nerve up to tackle this project! I love it!

If you’re interested in seeing how I made that big chunky mantel for cheap, I’ve got a tutorial right here. And you can find all the info on painting the brick here.


And now I’m feeling all fired up and ready to knock some awesome DIY projects off my to-do list this year!
How to build a cheap and easy TV frame that swivels
Learn how to build a DIY TV Frame with just a few simple supplies.
Materials
- 1×4 pine board (width of your tv + .5")
- 2 1×4 pine boards (width of your tv + 2")
- 1x2 pine board (width of your tv)
- Door casing (2 pieces the width of your tv + 6 inches, 2 pieces the height of your tv + 6 inches)
- Wood Glue
- Paint
- Paintbrush
- Thick waistband elastic
Tools
- measuring tape
- nail gun or hammer and nails
- staple gun and staples
- miter saw
Instructions
- Measure the height and width of your TV.
- Cut the pine boards for your box to the sizes above with a miter saw.
- Use a nail gun to nail it together to form a box.
- To make a frame for the front of the tv with the miter saw, cut your boards at a 45 degree angle. They should be cut just large enough for the screen of the TV to completely show.
- Use wood glue to connect the frame together.
- Once it's dry, attach the frame to the box with a nail gun.
- Staple two pieces of wide band elastic across the back of the frame with a staple gun. This will help keep the frame secured to the TV.
- Paint the frame the color of your choice.
- Slide it into place around your TV.
Recommended Products
As an Amazon Associate and member of other affiliate programs, I earn from qualifying purchases.

I’d love for you to pin this post on Pinterest!

Google Web Story: How to Build an Easy TV Frame That Swivels
Fabulous! Televisions are a decor nightmare which you fixed. Great work that looks complete.
Happy Creating,
Karen Marie
Thank you Karen! TVs really are a decor nightmare!
You are brilliant! This looks just terrific. I’ve wanted to do this, too .. thanks for the tutorial.
Thank you! I wanted to do this for so long and I’m so glad I finally did it!
Carrie, I love this idea! We are working on renovating our living room. Actually, we’re done with the major renovation, now it’s just all the details and decorating – like trying to decide if we’re going to mount our TV on the wall above our fireplace or not. Now that you’ve had your framed TV up for a few months, how do you like it? Anything you’d do differently?
Ooh, sounds like you are doing the fun stuff now! I am still loving our framed tv. It looks so much better and has worked well and I really don’t know of anything I would do differently! I love it when it works out that way!
Im planning our living room update, with a tight budget. This is a great solution, super $ friendly (specialty compared to the Samsung Frame TV 55″ $1500). Glad i found your tutorial
(The mantel looks great!)
Thank you! I looked at the Samsung Frame TV too – so expensive! Good luck with your living room update!
Hi! Thank you for this, love it and going to try! Just curious. The sensors for my tv are on the bottom/front perimeter of the tv, are yours too? Curious if you’re able to use the remote if those sensors are covered up, since framing right around the screen and covering the tv case? Hope this makes sense. Thanks!!
Yes, it makes total sense. Our sensors are also on the bottom/front. Our frame and TV can be moved and swiveled and sometimes get in a weird angle where the remote doesn’t work well. But typically, the remote works fine. There is an opening at the bottom of the frame which definitely helps.
This is the most clever idea! I’ve searching for framing tv and this is it! I will try to give a sleek look on my tv! Thanks!
Yay, I’m so glad it helps!
I used these plans and it worked out great! I made a few changes by drilling vent holes in the top and bottom of the box, and used sawtooth hangers to fix to wall since my tv doesn’t swivel. Perfect fit! Wish I could attach pics!
I’m so glad it worked well for you! I wish you could attach pics too – I’m going to have to work on a solution for that!
So this frame is essentially just sitting on top of the tv, correct?
Yep, it is sitting on the TV and the elastic helps hold it in place. It is lightweight enough that it can rest there without a problem.
Super easy project with great results. We bought a 32 in tv and are using it as a digital photo frame. This frame is perfect for it! Finished in about 2 hours then just had to wait for the stain to dry!
That is great to hear! And I love the idea of using your TV as a digital photo frame – so smart!
Ran into a slight issue. Why is the 1×2 the “width of the tv” but the top 1×4 is “width of the tv +.5”?
Won’t that make for an asymmetrical build?
Yes, thank you so much for pointing this out! I don’t know how I missed it, but the 1×2 should also be the width of the tv + .5″. I am updating the post to show this. And again, thanks for pointing this out.
Thank you for this idea I just made it following your directions. It is exactly what I’ve been wanting thank you so much!
I am so glad to hear that!
What nailer gun do you use? No compressor! Excellent
I use the Ryobi Airstrike Brad Nailer – It is really easy to use and I love that you don’t need a compressor!