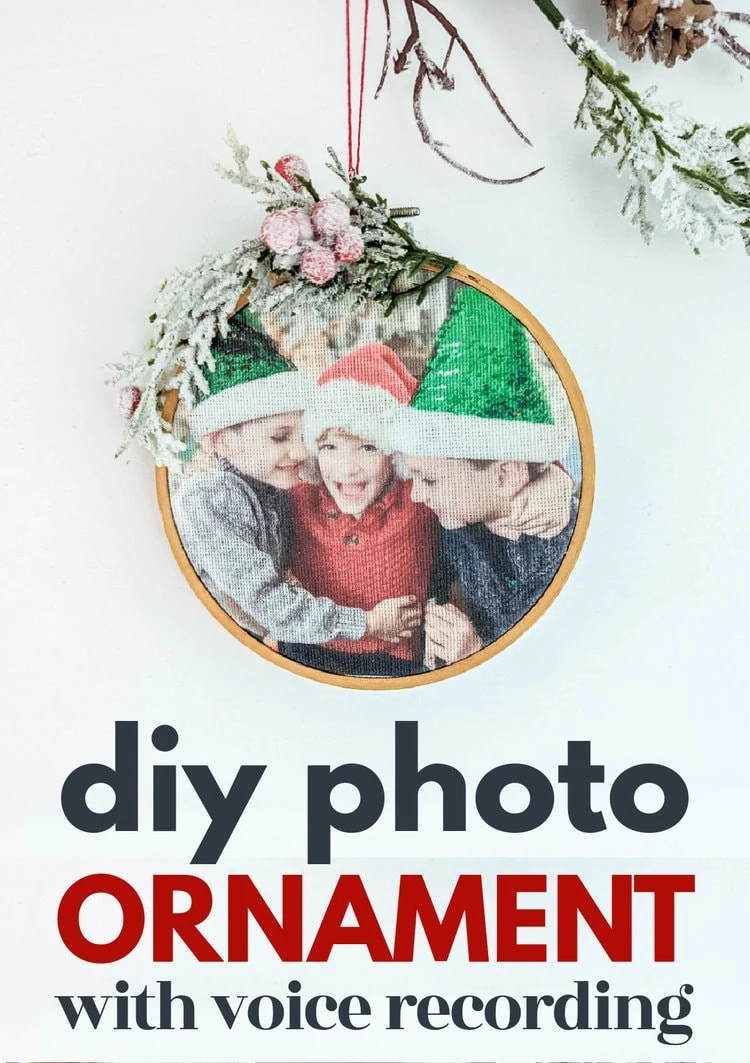
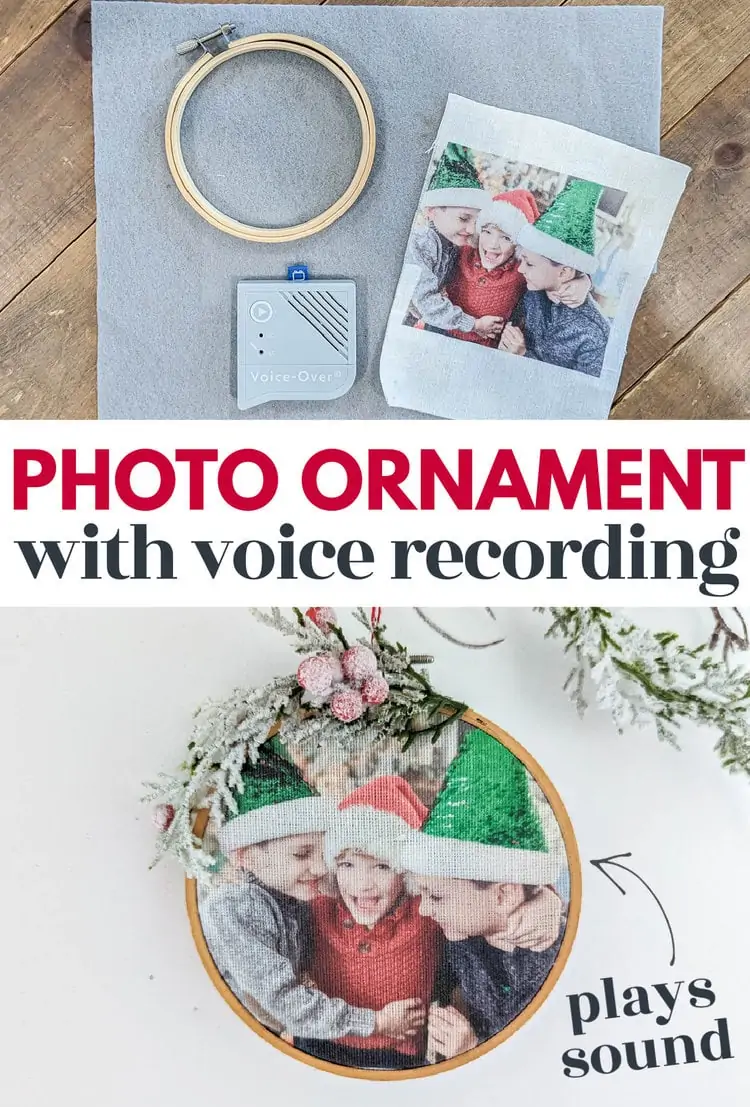
DIY Voice Recording Christmas Ornaments to Treasure for Years to Come
Everything you need to know to make a DIY voice recording ornament. These ornaments make amazing family keepsakes that you can use to decorate your own tree or give as a gift.
I’ve shared dozens of homemade Christmas ornaments over the years and I have to say these voice recording ornaments just might be my favorite of them all.
These days I’d say we’ve all gotten fairly good at capturing photos of our families at special times of year. But what about the sound of their voices? Their laughter?
There’s something so special about hearing the voice of someone you love – it can instantly take you right back to how you felt sitting and talking with them.
My boys are five, seven, and ten this Christmas and I absolutely love the sweet sound of their high-pitched little voices. I know I probably don’t have too many more years before those little voices start to change, so I really wanted to do something to preserve them now.
But I definitely don’t think these ornaments are only for those with small children. I think this would also be an incredible way to preserve the voice of an aging parent or really anyone that you love.
I’m sharing a full step-by-step tutorial for making your own voice recorder ornaments as well as ideas for what to record on them and a video tutorial.
This post contains affiliate links which means if you make a purchase after clicking a link I will earn a small commission but it won’t cost you a penny more. Click here to see my full disclosure policy.
Embroidery Hoop Recordable Ornaments
There are many different styles of ornaments that could work as voice recording ornaments. The main criteria is simply that you need to be able to push the button that makes the audio play.
I wanted my voice recorder to be incorporated into the actual ornament rather than simply added on afterwards, so I knew a fabric ornament would be my best bet.
With a soft fabric ornament, the voice recorder can be completely encapsulated inside the ornament while still being able to be played by pushing the button. In fact, it’s very similar to stuffed animals that ‘talk’ or play music when you press their hand or foot.
I chose to make embroidery hoop ornaments with my voice recorders. Using embroidery hoops is the easiest way to create fabric ornaments with really nice, clean edges.
Plus, bonus, no sewing required!
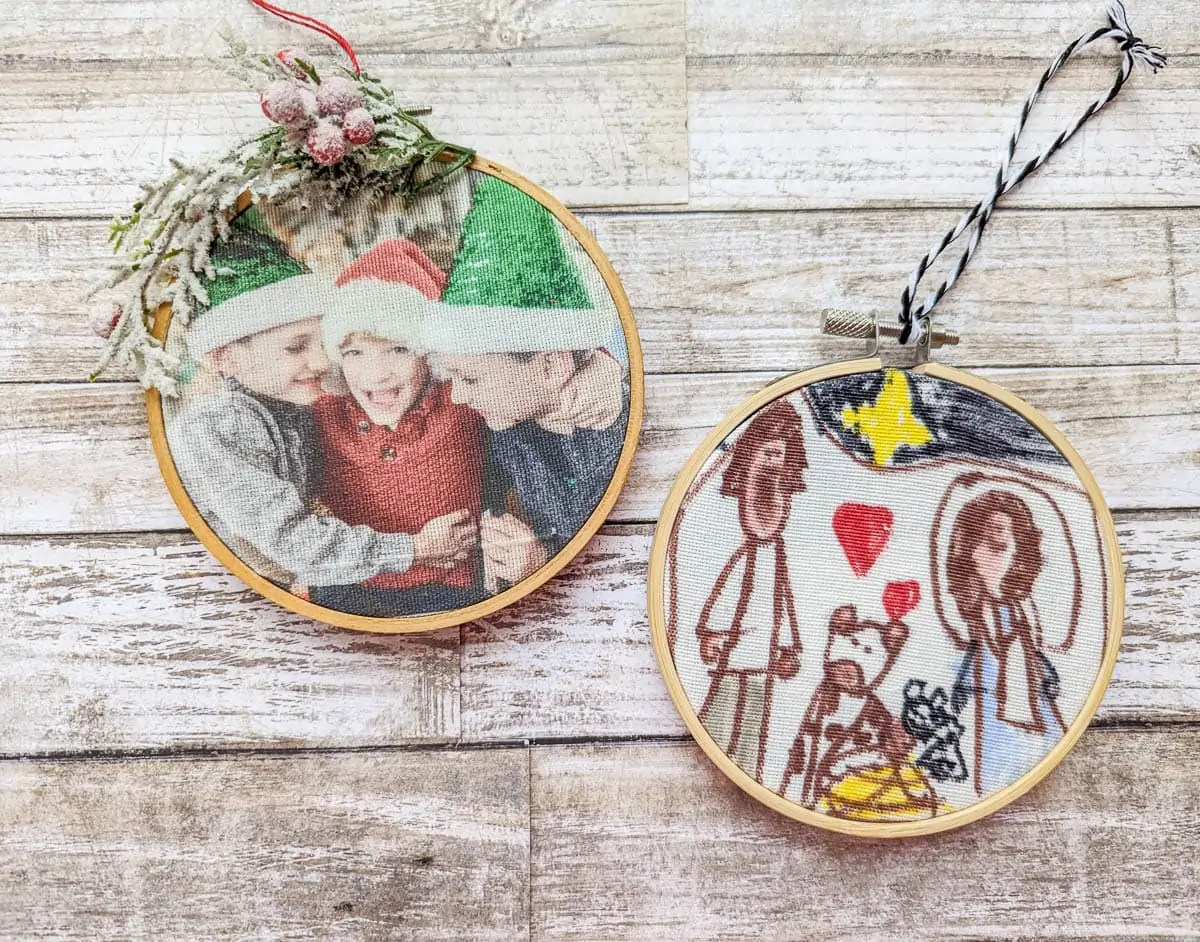
I made two different types of embroidery hoop ornaments – one with a family photo and one with one of my kids’ drawings.
Another fun idea would be to use a bit of fabric from a favorite Christmas sweater, another beloved piece of clothing, or even a baby blanket.
Or you could also just use a nice piece of fabric if you want a more subtle or sophisticated ornament.
Materials
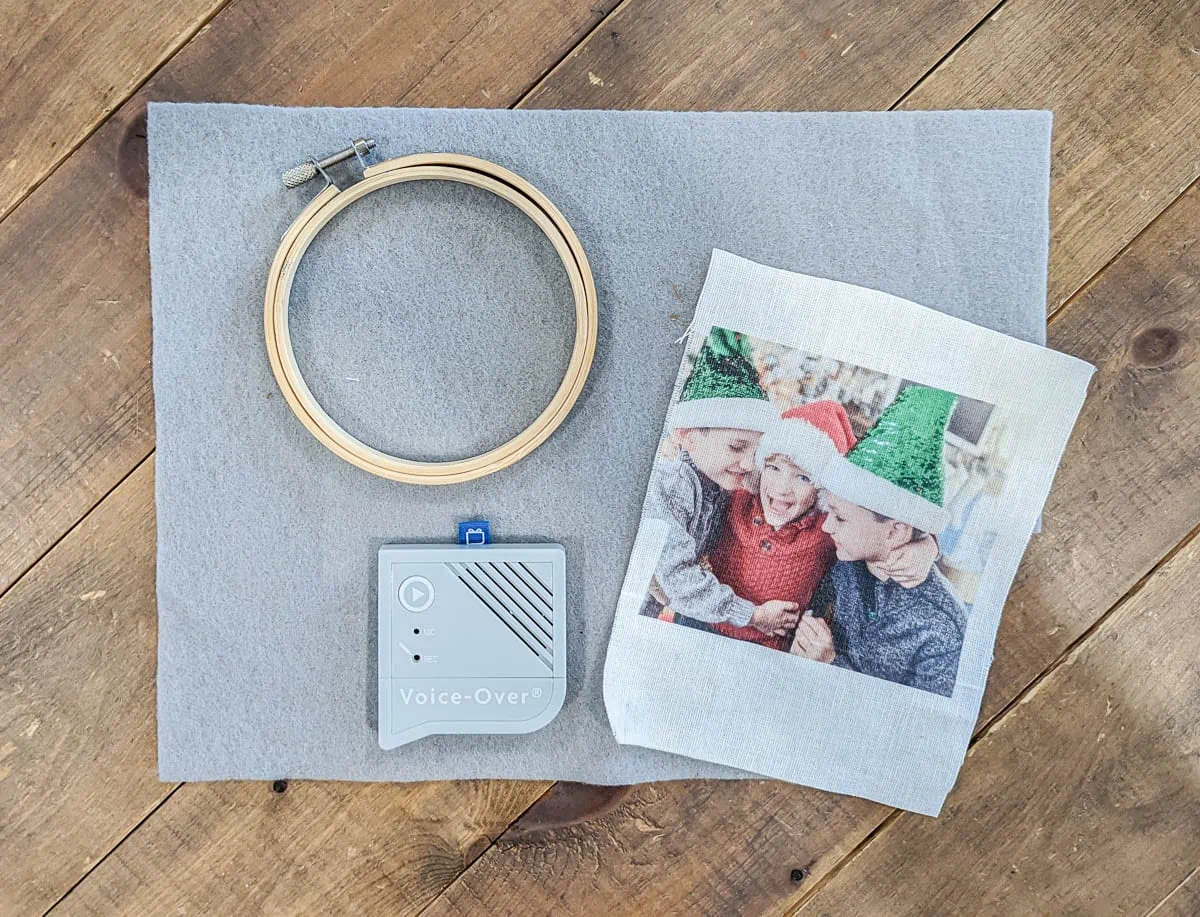
- Voice Recorder – I used this voice recorder from Amazon. It’s small, easy to use, and holds up to 60 seconds of sound – perfect for a Christmas ornament. Like many things, it’s cheaper per ornament if you purchase a three pack.
- 4″ embroidery hoops – You’ll need one for each ornament. You can buy them individually anywhere that sells crafting supplies including Walmart or buy them in bulk on Amazon. Either way they are just a few dollars each.
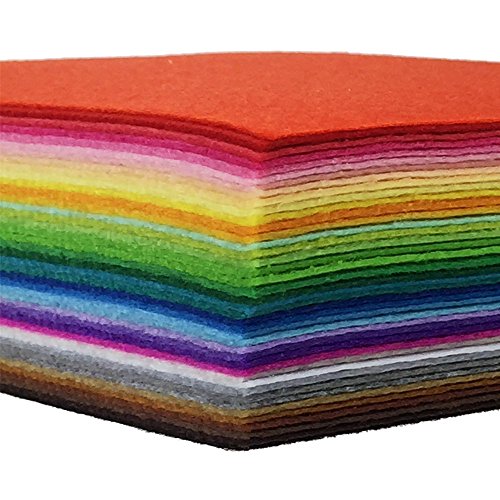
- Felt – to seal the back of the ornament for a nice finished look
- Hot glue gun – to attach the felt to the back of the ornament
- Fabric scissors – for cutting your fabric and felt to size
- Sharpies or Fabric markers – if you would prefer to hand-draw your design (or have your kids hand-draw a design), both Sharpies and fabric markers works great for drawing directly onto fabric.
There are a few different options for printing your photos onto fabric:
Option one: Buy printable fabric
- Printable fabric– this is a super easy way to print photos and other images directly onto fabric to use for your ornaments. I have not used this fabric personally, but it has great reviews.
Option two: Create your own printable fabric
- Scrap of smooth white fabric – if you’d rather not buy special fabric, you can use any scrap fabric you have on hand. The best fabric for this project will be white and have a smooth, tight weave.
- Freezer paper – freezer paper is the secret to giving any fabric the stability it needs to go through a regular printer
- Clothing Iron – for attaching the freezer paper to your fabric
How to Make Voice Recording Christmas Ornaments
There are two main parts to making these ornaments – recording the audio and making the ornament itself.
I’m going to share how to record the audio first, followed by how to put the ornaments together.
Choosing a Voice Recorder
The voice recorder really is the most important part of this entire ornament. After doing a deep dive into the available options, I chose this voice recorder from Amazon.
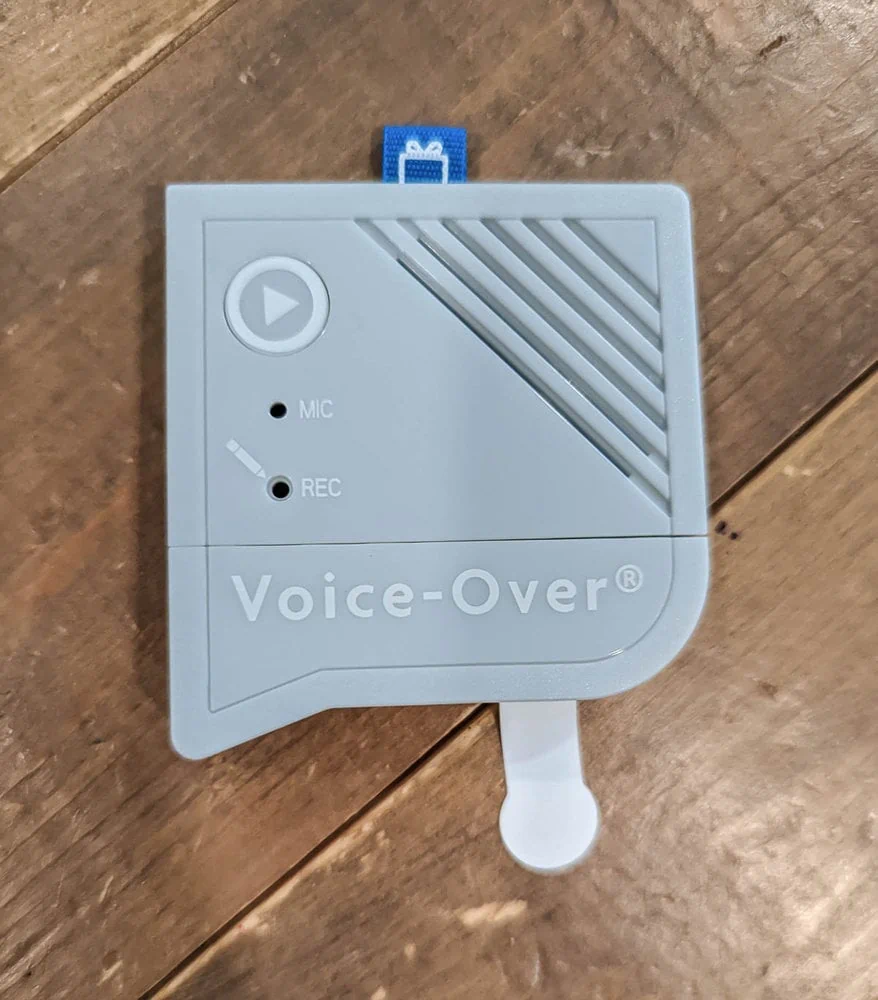
I wanted a recorder that was small enough to be part of an ornament and could be played back over and over.
I also liked that this voice recorder can record up to sixty seconds of sound while most of the others I saw could only record 20-30 seconds. Sixty seconds is long enough to sing a song or tell a complete story.
The voice recorder can also be re-recorded multiple times in case you mess up.
There is one downside though. The sound quality is what you might expect from a fairly inexpensive recorder. It is easy to hear the recording and distinguish voices, but you shouldn’t expect the sound to be as clear as a cell phone recording.
What to Record
When it comes to what to actually say on the voice recorder, there are tons of fun possibilities.
Whether you are recording an older relative, your children, or yourself, here are some ideas of things you can say:
- Tell a Christmas memory from long ago.
- Sing a favorite Christmas carol.
- Tell how to make a beloved Christmas recipe.
- Read the story of Jesus’ birth or a few favorite Bible verses.
- Talk about what Christmas means to you.
- Let you child tell what they know about Santa or explain what happens on Christmas morning.
- Record the ambient noise and conversation in your home on Christmas morning as presents are opened.
Recording onto the voice recorder
You can record your voice directly into the voice recorder, but I chose to record my audio using my phone first. That way I could edit out any mess ups.
This also gives you a safe backup of your audio in case anything ever happens to your ornament.
There are all kinds of voice memo apps you can use for this, but I just did regular video. Even though I knew I wouldn’t be using the visual part of the video, it was super easy to record and I knew the sound quality would be good.
If you get a clean take, you’re ready to transfer your recording to your voice recorder.
Or if you need to, you can also use your favorite video editing software to make any needed edits. I made a few edits to some of my own recordings, mainly to take out awkward pauses and cut the recording down to the right length.
Once your audio is ready, you can record it to your voice recorder. Be sure the volume on your phone or laptop is turned up and there is no annoying background noise.
To record, remove the paper tab from the voice recorder to activate the battery.
Press the tip of a pin into the hole where it says REC. The voice recorder will beep letting you know it is ready. As soon as you hear the beep, start playing your audio.
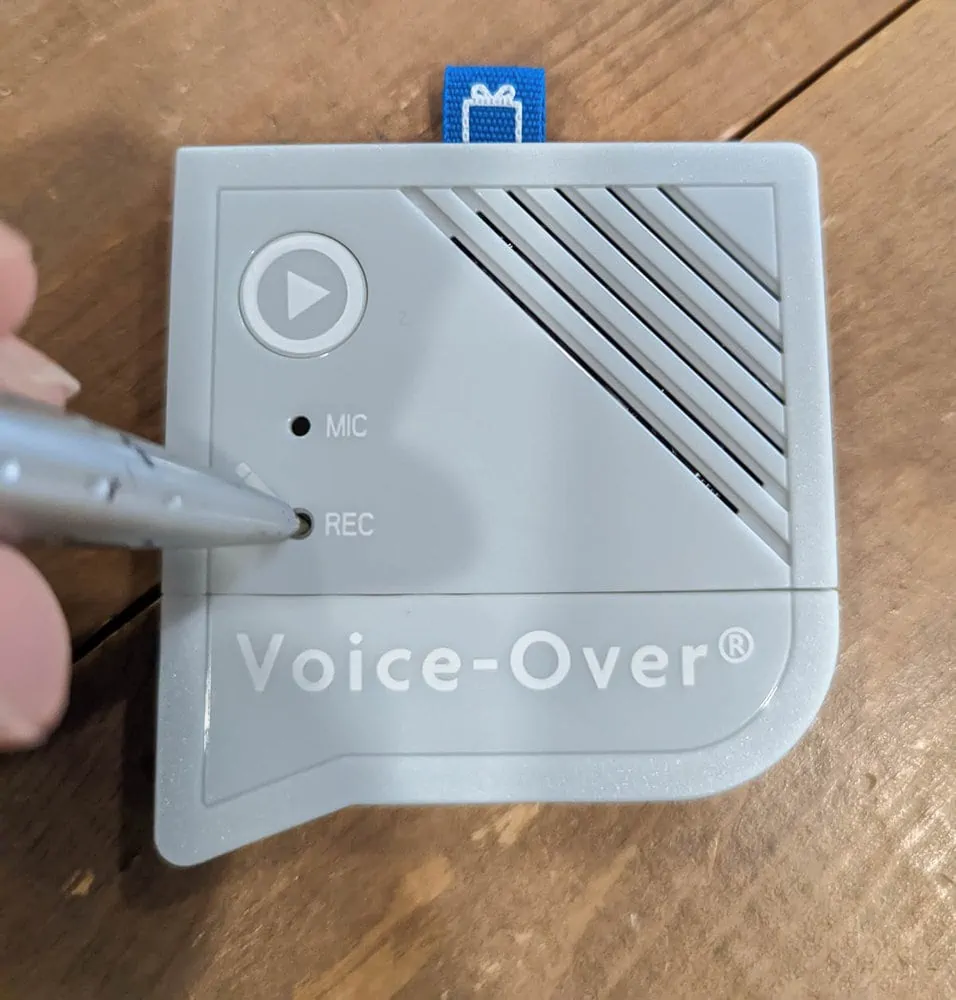
Keep the pin pressed down until you are finished recording. When you release it, you will hear another beep.
Then you can press the play button to hear what your recording sounds like.
If for some reason your recording didn’t turn out well, you can always press the button again and re-record your sound bite.
Making the ornament
Now that your audio recording is all set, it’s time to put the ornament together.
If you are just using a nice scrap of fabric rather than a custom design, you can skip ahead to the section onputting your fabric in the hoop.
I made two different types of custom ornaments – one using photos and one using a drawing by my son.
Drawing directly onto Fabric
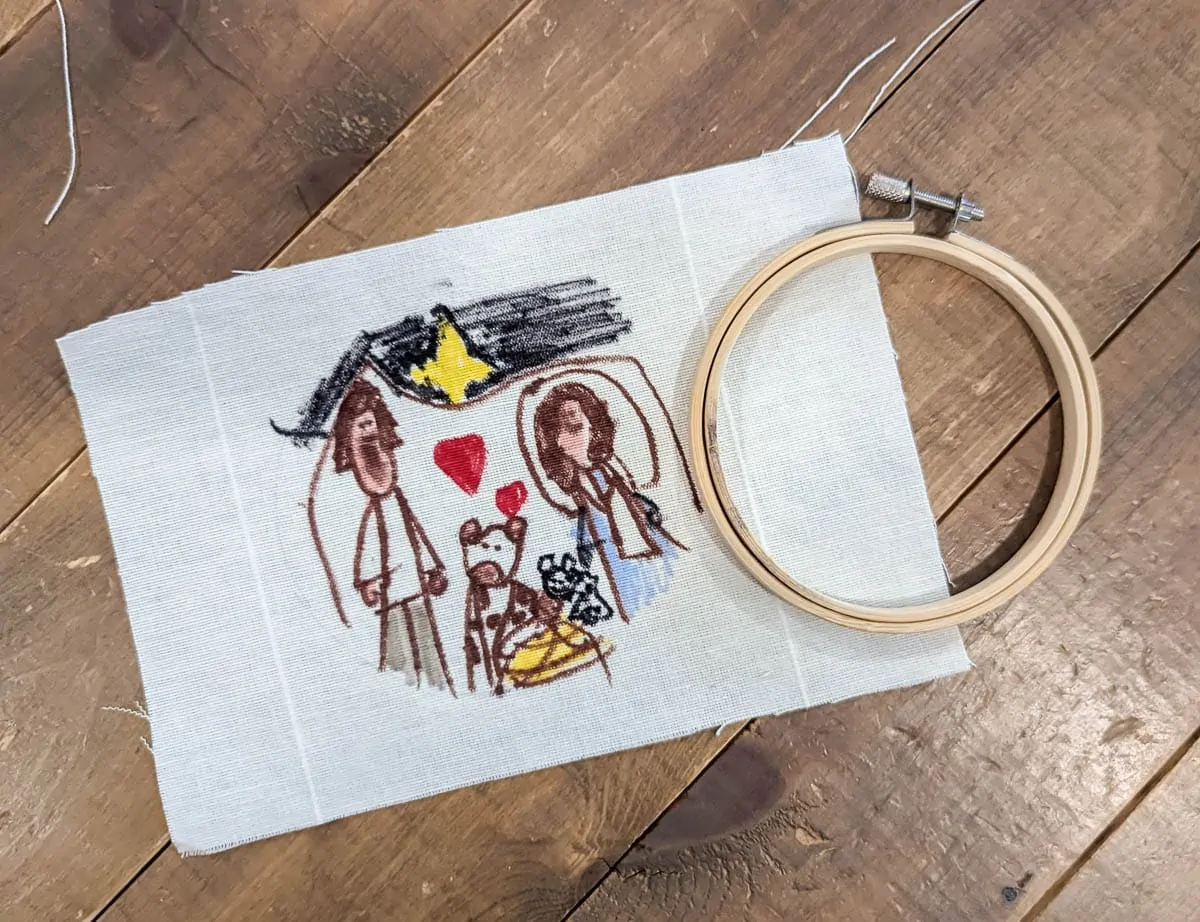
For the drawings, the easiest thing to do is simply have your kids draw directly onto a piece of fabric.
Trace the embroidery hoop lightly onto the fabric with a pencil so they can see how big their drawing space is. Then they can use fabric markers or Sharpies to draw their picture.
My son Griffin used regular Sharpie markers for his drawing of the nativity below and it worked just fine.
Alternatively, if you have a drawing you want to use that your child has previously drawn on paper, you can take a photo of it and print it onto fabric using the method below.
Printing Photos onto Fabric
There are a couple of different ways you can print photos onto fabric.
The easiest way is to buy printer-ready fabric and follow the instructions. You should be able to quickly and easily print your photos.
The Freezer Paper Method of printing on fabric
The cheaper way to print on fabric is to use scrap fabric and freezer paper.
This is the method I used and while I loved that I was able to use free materials I already had on hand, it wasn’t quite as easy as using printable fabric.
Start by ironing your fabric to remove any wrinkles. Light colored, fairly smooth fabrics work best for this project.
Cut a sheet of freezer paper to be 8.5″x11″ (the same size as regular printer paper). Then place it on top of your fabric with the waxy side facing the fabric.
Lightly iron over the freezer paper and it will adhere to the fabric.
Cut the fabric to the same size as the precut freezer paper (8.5″x11″).
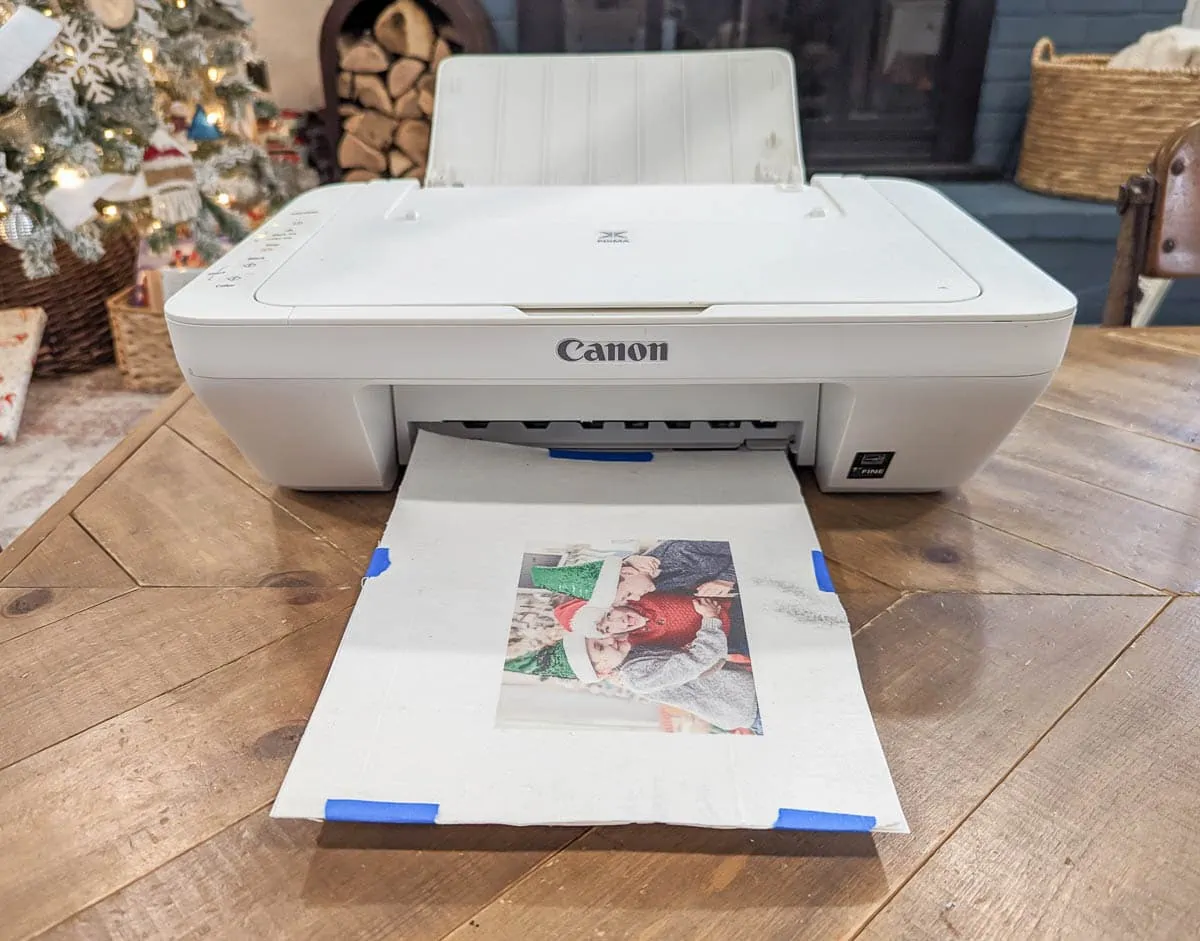
Now your fabric is ready for printing. Load it into your printer, making sure the fabric side is facing the right direction to be printed on.
Then print your photo as a 4″x6″ print at the highest quality setting.
When printing my photos, my printer really struggled to grab onto the freezer paper.
To make it work a bit better, I used painter’s tape to tape the freezer paper/fabric to a piece of card stock. This helped it print better, but I still needed to hand feed the paper in to get it started.
Once your photo is printed, you can remove the card stock and freezer paper.
Putting the fabric in the hoop
Once your fabric is ready, you can slip it into the embroidery hoop. Make sure the photo is framed well in the hoop and gently tug the edges of the fabric to pull it taut.

Then you can use fabric scissors to cut away the excess fabric, leaving a border of around 1″ of extra fabric all around the hoop.
Wrap the extra fabric around the back of the hoop and use hot glue to glue it in place.
Adding the voice recorder
Now you are ready to add the voice recording you made earlier.
The voice recorder comes with a mounting square that you can use to easily attach it to the back of the ornament.
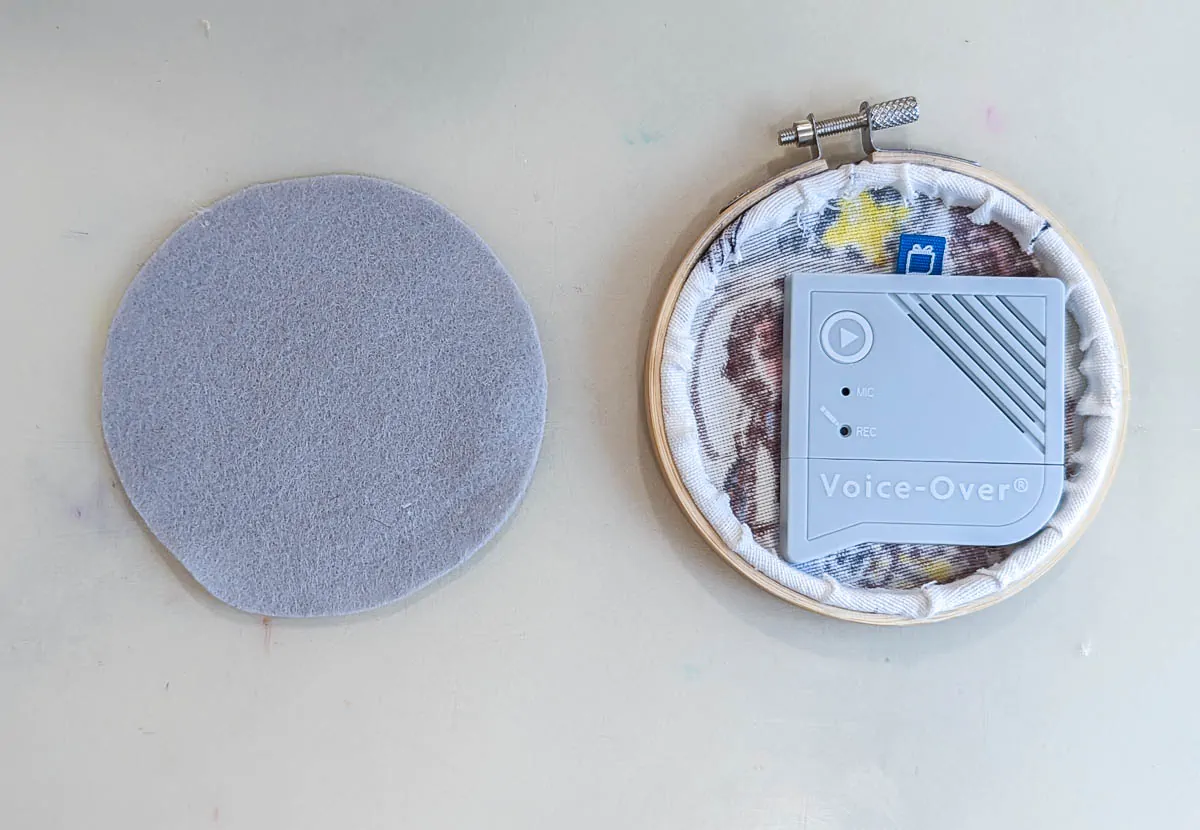
Finish the back of the ornament
You can leave your ornament like this with the back exposed if you want, but I prefer a cleaner look.
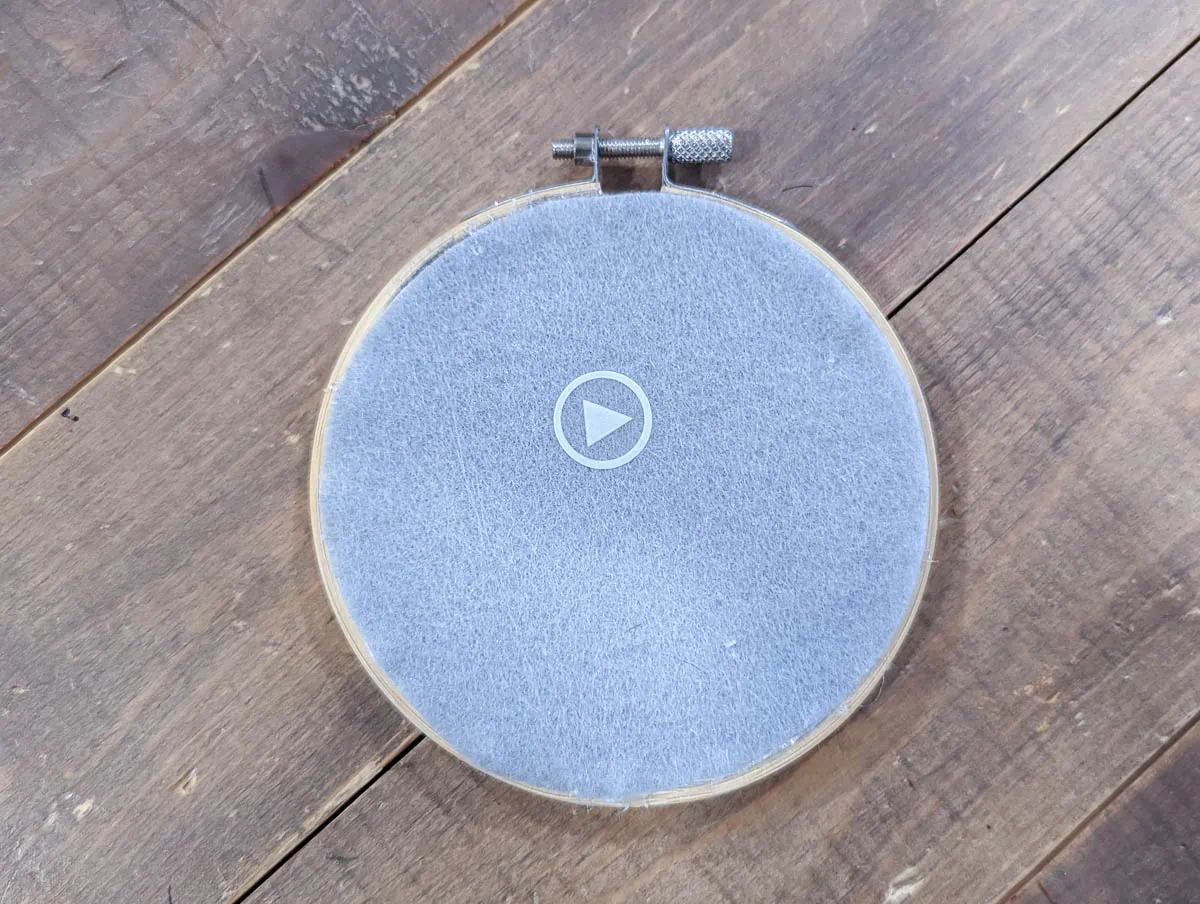
To finish off the back, trace your hoop onto a piece of felt and cut it out. Then you can hot glue the felt onto the back of the ornament, covering the voice recorder.
You should be able to still feel the play button if you feel very carefully.
But to make it easier to find in the future, you can stick one of the play button stickers that comes with the voice recorder over the spot where you need to press.
The voice recorder does use batteries, so there may come a time in the future when you need to replace the batteries. If that happens, you should be able to peel the felt backing off pretty easily to access them.
Replacing the batteries shouldn’t affect the sound recording in any way.
Add a hanger
Finally you can add the hanger – a piece of baker’s twine or other string tied through the top of the embroidery hoop works well.
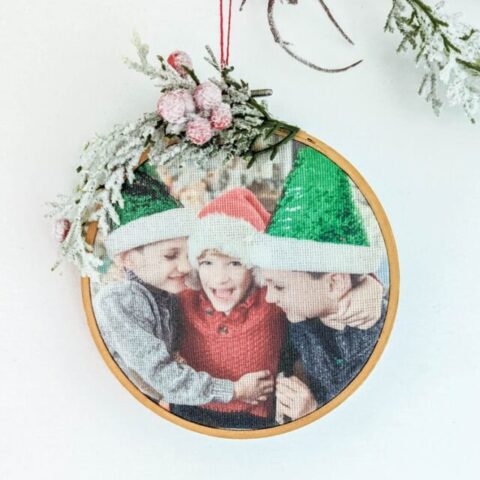
I also added a sprig of faux greenery to one of my ornaments just to make it a bit prettier. You could add tiny pinecones, a bow, berries, faux greenery – basically anything you think looks nice.
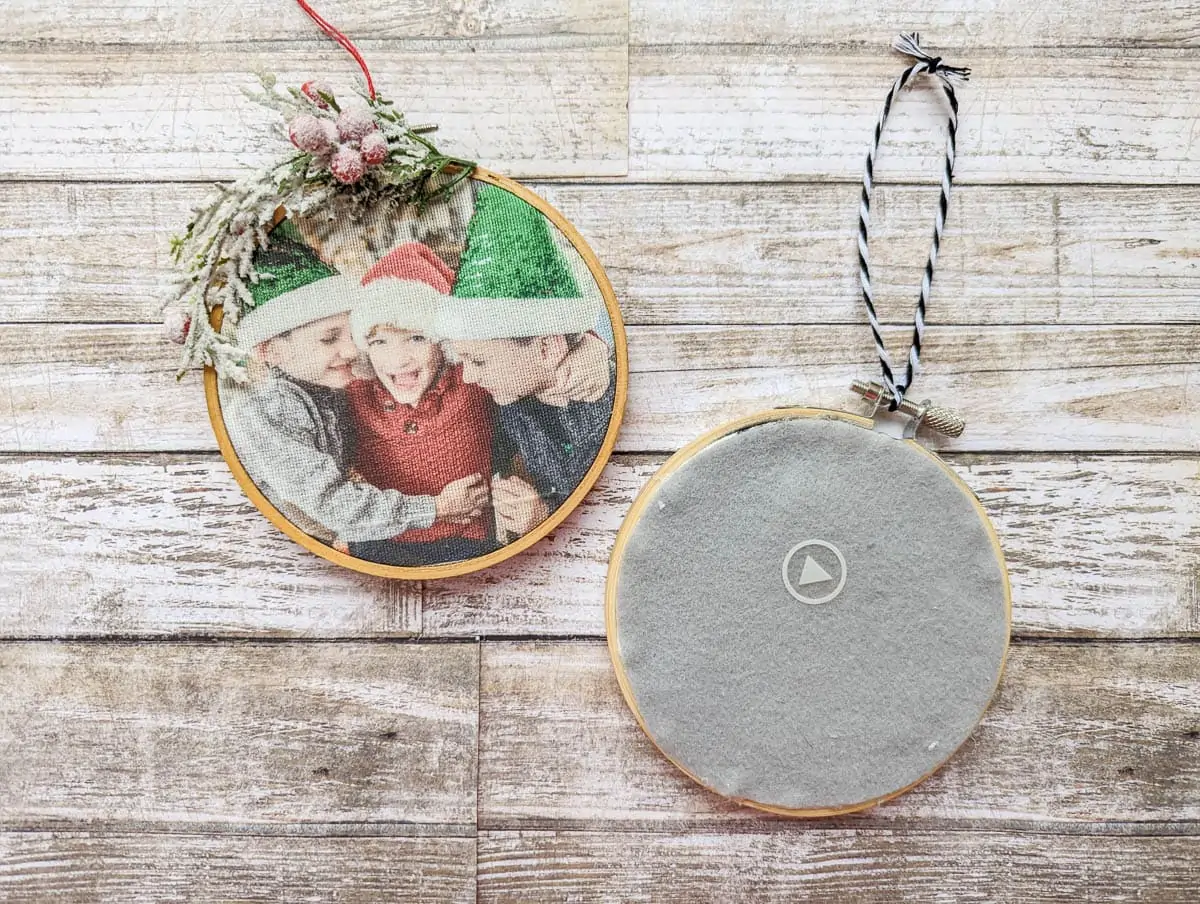
Finished ornaments
And now the finished ornaments are ready to hang on the tree!
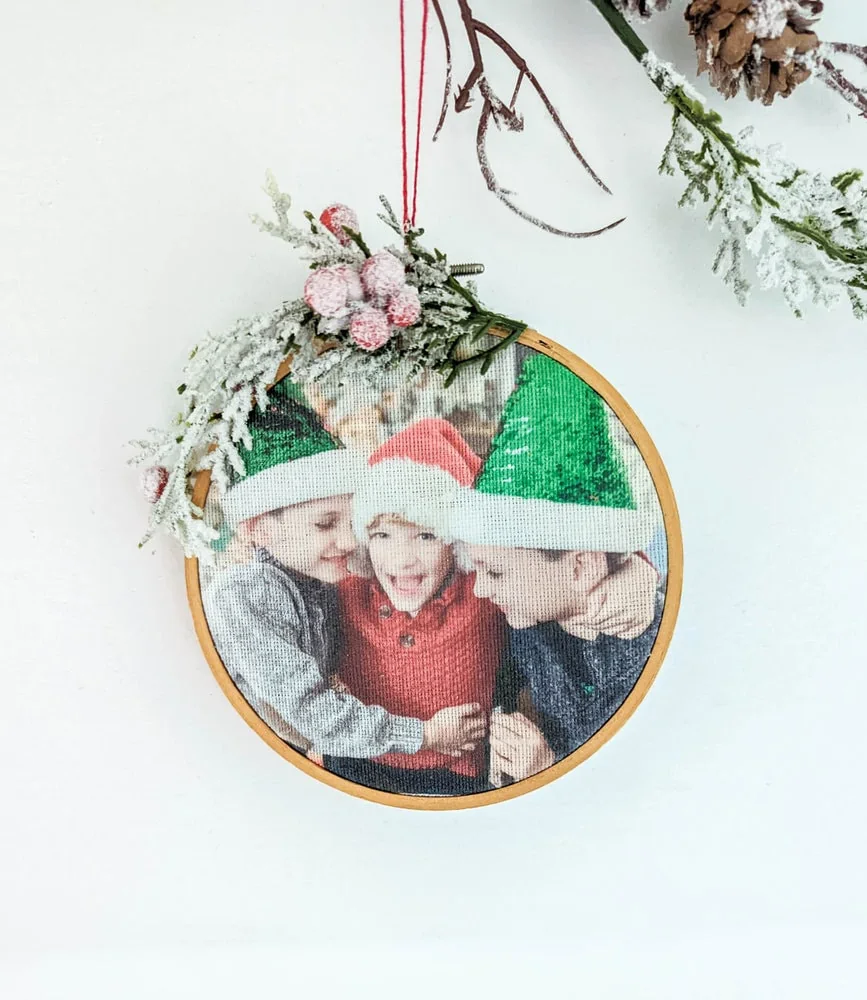
This photo ornament of my three boys plays the three of them telling all about Santa Claus and Mrs. Claus.
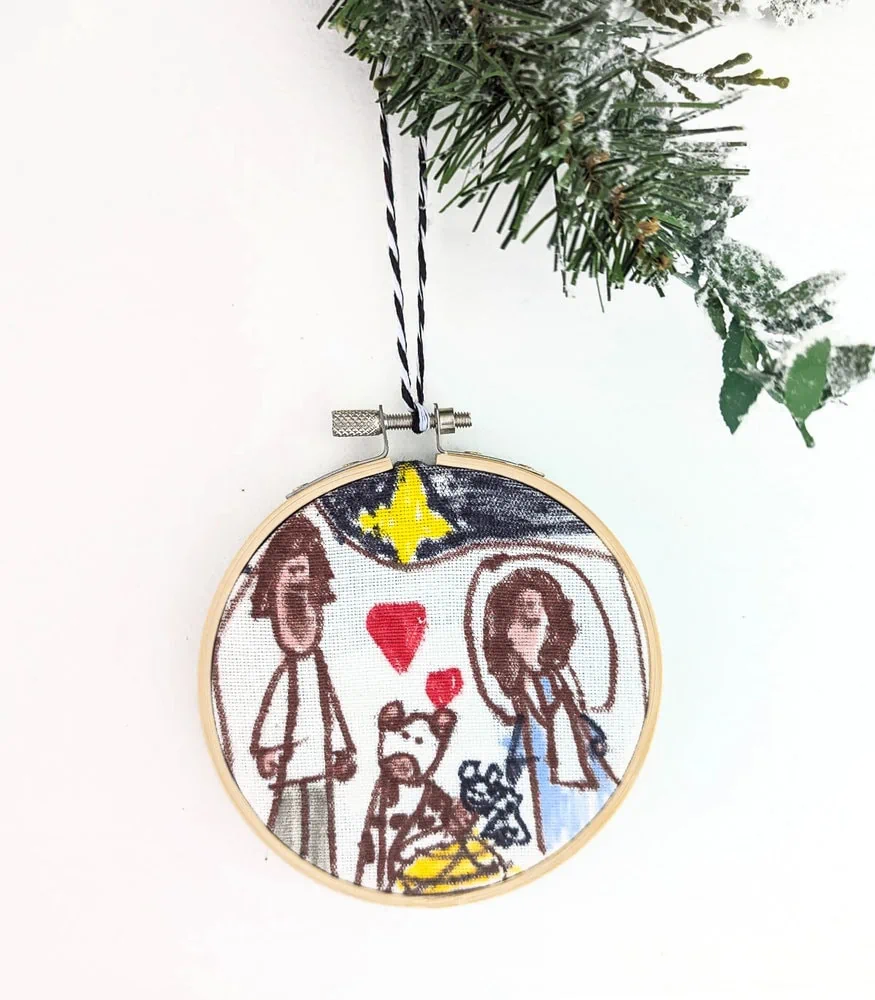
This second ornament features a drawing of the nativity by my ten year old and the recording is of him re-telling the story of Jesus’ birth.
I absolutely love how these turned out. They will be family keepsakes for sure and I’m already planning to make a few more to give as gifts.
Video Tutorial
Want more ideas for using your favorite photos to celebrate the holidays?
- I recently shared 19 fantastic DIY photo ornament ideas that anyone can make.
- I also shared a collection of 21 of the best DIY photo gift ideas right here.
- And I have lots more awesome handmade ornament ideas if you’re looking for more ideas.
I’d love for you to pin this post on Pinterest!

DIY Voice Recording Christmas Ornaments
Let me show you how to make a memorable DIY Christmas ornament with voice recording. This is a thoughtful gift to be enjoyed for years to come!
Materials
- Voice Recorder
- 4″ embroidery hoops
- Felt
Tools
- Hot glue gun
- Fabric Scissors
Instructions
- Remove the paper tab from the voice recorder to activate the battery.
- Press the tip of a pin into the hole where it says REC.
- As soon as you hear the beep, start recording your audio.
- Keep the pin pressed down until you are finished recording.
- Use either a photo printed on fabric, or let the kids draw directly on fabric.
- For a drawing, trace a line around the hoop so they know where to draw.
- They can use Sharpies or paint pens.
- For pictures, it's easiest to use printer-ready fabric.
- You can also use freezer paper to transfer a photo to fabric.
- Once you have your photo, place the hoop around it and trim any excess with fabric scissors.
- Add the voice recording you made earlier with the included mounting square. Just attach it to the back of the ornament.
- Finish the back of the ornament with a piece of felt.
- Attach one of the play stickers for the press button.
- Add a piece of twine or thread and it's ready to hang or gift!
Recommended Products
As an Amazon Associate and member of other affiliate programs, I earn from qualifying purchases.
-
 Caydo 12 Pieces 4 Inch Round Embroidery Hoop Bulk Wholesale Bamboo Circle Cross Stitch Hoop Ring
 -
LIVINGO Premium Tailor Scissors Heavy Duty Multi-Purpose Titanium Coating Forged Stainless Steel Sewing Fabric Leather Dressmaking Comfort Grip Shears Professional Crafting (9.5 INCH)
-
Mr. Pen- Glue Gun, Hot Glue Guns, with 10 Glue Gun Sticks, Glue Gun Kit, Mini Glue Gun, Mini Hot Glue Gun, Hot Melt Glue Gun, Craft Glue Gun, Hot Glue Gun with Glue Sticks, Small Glue Gun, Gun Glue
-
42pcs Felt Fabric Sheet 4"x4" Assorted Color DIY Craft Squares Nonwoven 1mm Thick
-
VoiceGift Voice-Over® 60 Second Voice Recorder Insert for Personal Messages, Audio Recording Device for Picture Frames, Albums, Scrap Books, Books, Blankets and Quilts