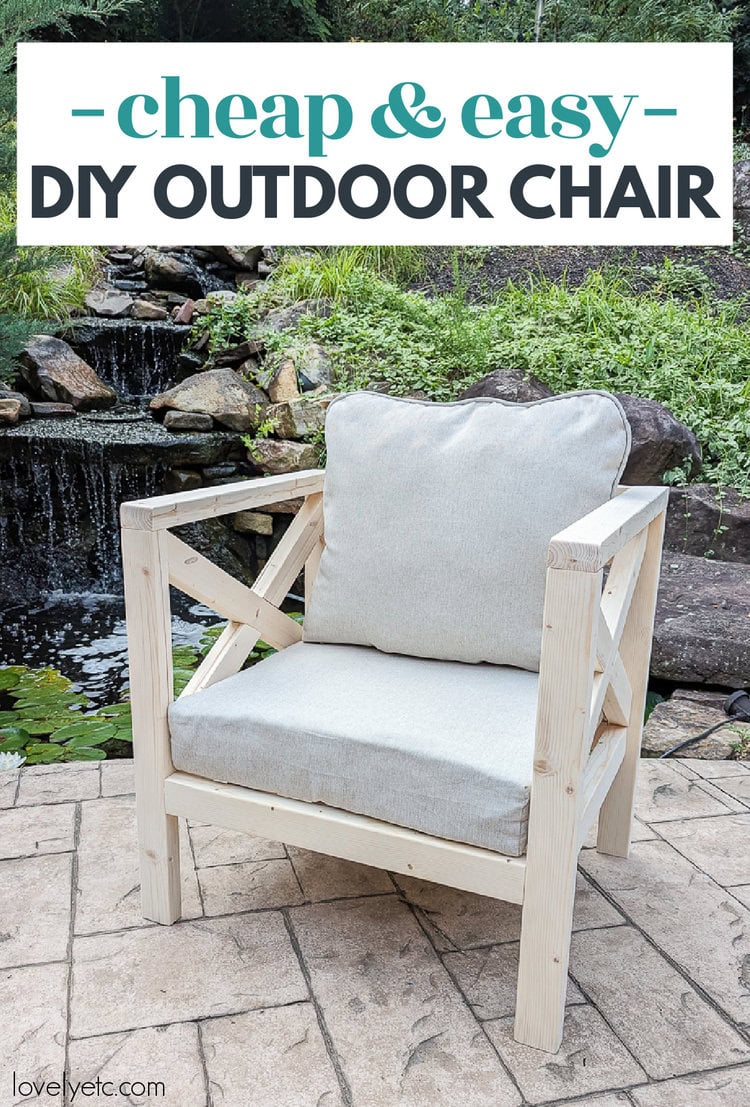
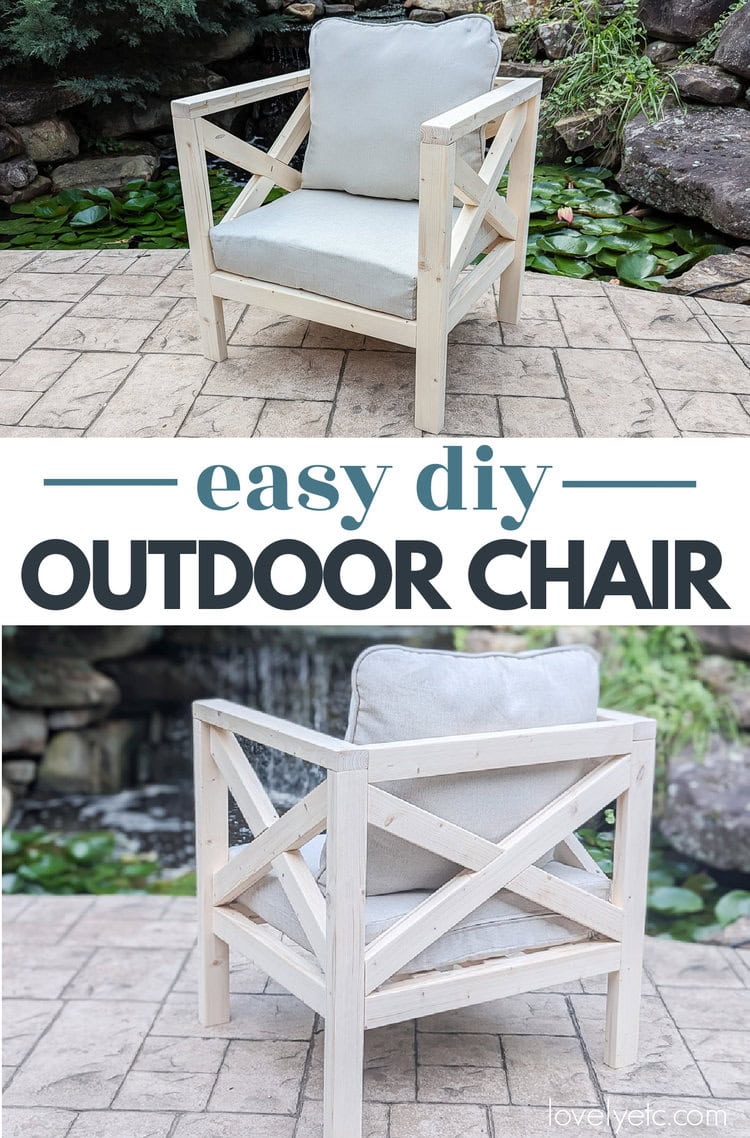
Cheap and Easy DIY Outdoor Chair with Build Plans
Learn how to build an easy DIY outdoor chair with this step-by-step tutorial and printable build plans.
This spring when I started working on the back porch and patio of our new house, I knew I wanted to build some new outdoor chairs. I love hanging out in our back yard and we really needed more seating.
I had big goals for these chairs. I wanted them to be comfy enough to curl up with a good book. I wanted them to be light enough to easily move around to different spots. I wanted them to be sturdy enough to feel solid. And I wanted them to be quick and easy to build. And I think I nailed every one of those goals!
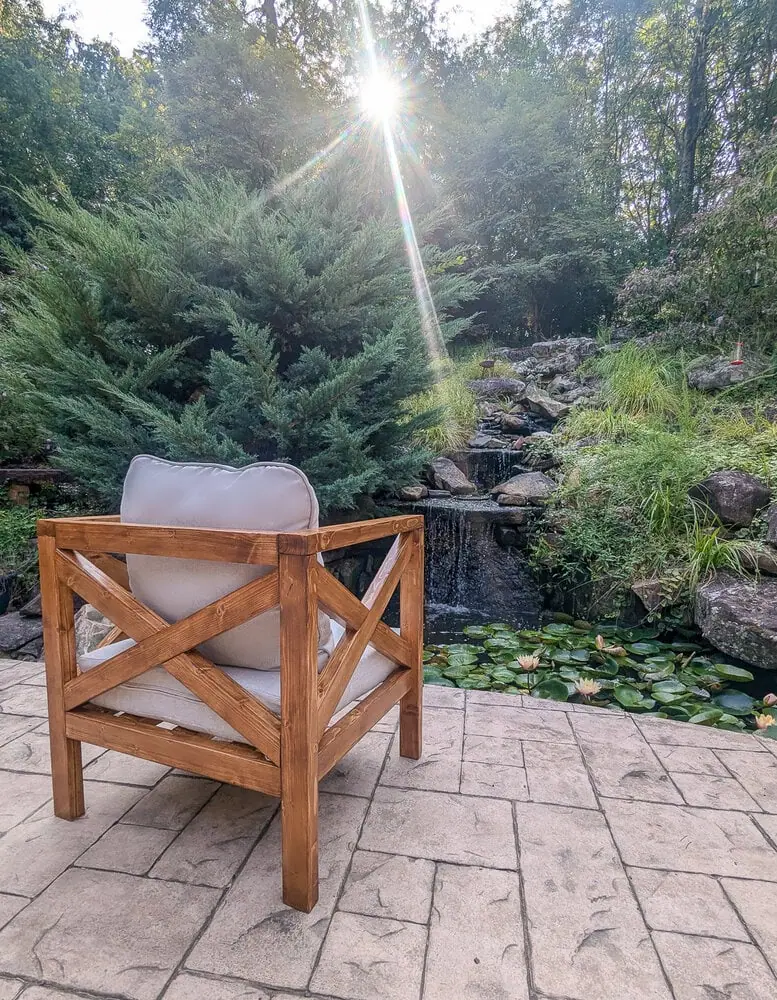
These outdoor chairs may just be my favorite piece of furniture I’ve made yet. They hit the ultimate trifecta for a DIY project – they’re super cheap, they were pretty easy to make, and they look great.
- These chairs are made from super cheap 2×3 framing lumber. I was able to buy all the wood for one chair for less than $20!
- This is a simple build that is put together primarily using wood glue and pocket holes.
- You really only need a few basic tools for this build – a miter saw, a drill, and a pocket hole jig.
- This is a great beginner project and can be built in just a few hours.
- This chair is designed to perfectly fit the widely available 24″x24″ deep seat cushion sets.
When designing these chairs, I didn’t want them to look too modern. I love clean lines on furniture but I also love just a bit of added detail. So I chose to use an X design on the arms and back.
The added bonus is these chairs now perfectly coordinate with the DIY daybed I built a few years ago to use as an outdoor sofa. And they also work really well with the X legs of the outdoor dining table and bench I built as well. Clearly I have a thing for Xs in furniture!
But if you want to make these chairs with a simpler, cleaner look, you can easily leave the X details off the arms and finish the back with simple horizontal slats instead.
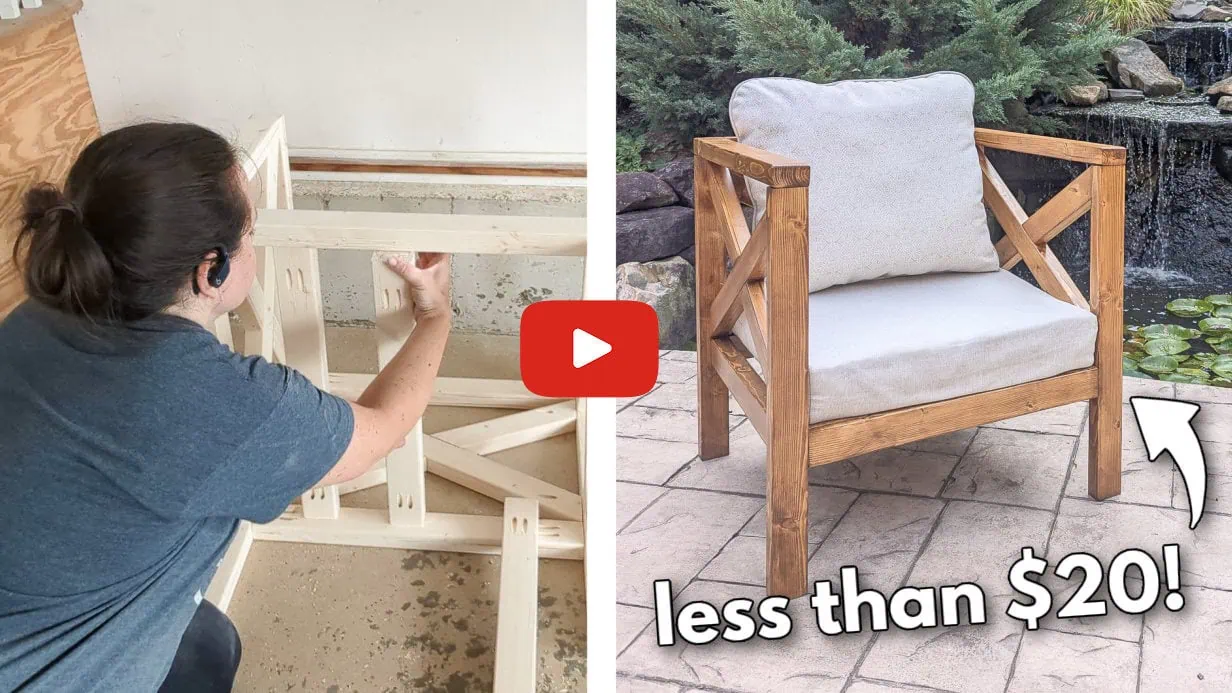
I’m sharing a full step-by-step tutorial below and I also have detailed printable build plans that make this a super easy furniture build. And for those who prefer video, there’s also a video tutorial at the end of this post.
This post contains affiliate links which means if you make a purchase after clicking a link I will earn a small commission but it won’t cost you a penny more. Click here to see my full disclosure policy.
Outdoor Cushion Options
This outdoor chair is designed to perfectly fit most standard outdoor cushion sets. Often called deep seat cushions, these usually come in a set of two cushions. The seat cushion typically measures 24″x24″ and the back cushion is usually around 24″x21″.
You can find cushions like this anywhere outdoor furniture is sold. I purchased my own cushions from the Home Depot. Here are a few other great cushion options:
- These cushions from Amazon come in quite a few colors and have great reviews.
- This set has a great neutral option and great reviews.
- This outdoor cushions set comes in a ton of colors and fun patterns.
- This cushion set is perfect if you want a more tailored look.
Wood Options for Outdoor Furniture
There are a few different types of wood you can use when building outdoor furniture.
Untreated pine
The cheapest option is using regular untreated pine. I chose to use regular 2x3s to build my chair, mainly because they are super cheap and also easy to work with. The only wood used in this chair are six 2x3s, which put my total cost for wood at less than $20! Talk about ridiculously cheap!
Of course, there are downsides to using pine. Pine on it’s own isn’t great for the outdoors. It’s extra important that you use a proper exterior finish on outdoor furniture built with pine and it still may not last as long as furniture built with other woods. That being said, I’ve used pine for several outdoor pieces of furniture (including this daybed, this table, and this bench) and they are still going strong 5+ years later. However, my pine furniture has been kept on a covered porch so it’s a bit more risky if your furniture will be more exposed to full sun or rain.
Pressure Treated Pine
Another option is to use pressure treated wood. This is wood that has been chemically treated to hold up well outdoors. Even though pressure treated wood is specifically meant for outdoor projects, I don’t like to use it to build outdoor furniture. It tends to have a greenish tint, it can be very heavy, and I really don’t like the idea of working around all of those chemicals.
Rot-resistant wood
A third option is to use a wood that is naturally rot-resistant and insect-resistant like cedar, redwood, or teak. These are all fantastic options for building outdoor furniture and should hold up really well over time. The downside is they can be quite expensive and they can also be hard to find in the sizes you need.
How to Build a DIY Outdoor Chair
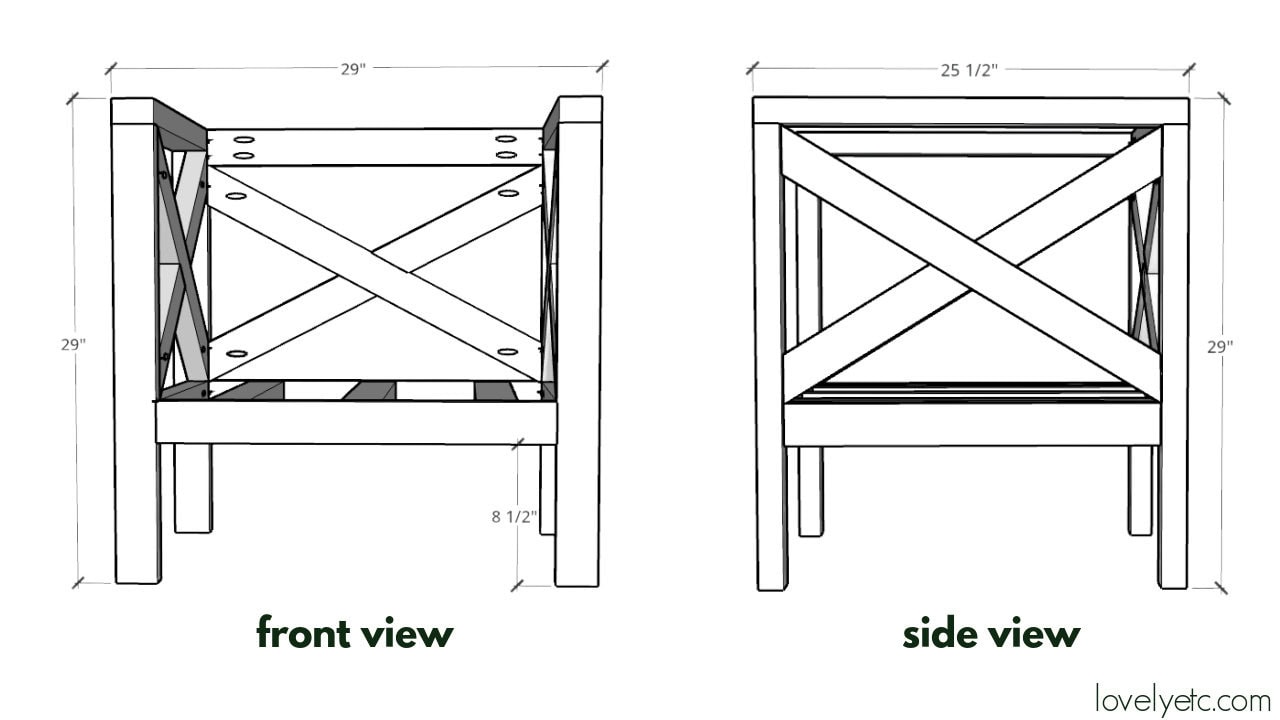
The finished chair is 29″ high, 29″ wide, and 25.5″ deep. It perfectly fits a standard 24″x24″ cushion.
You can find a detailed cut list and full visual cut list along with step-by-step instructions with 3D renderings in the printable build plans in my shop.
Materials
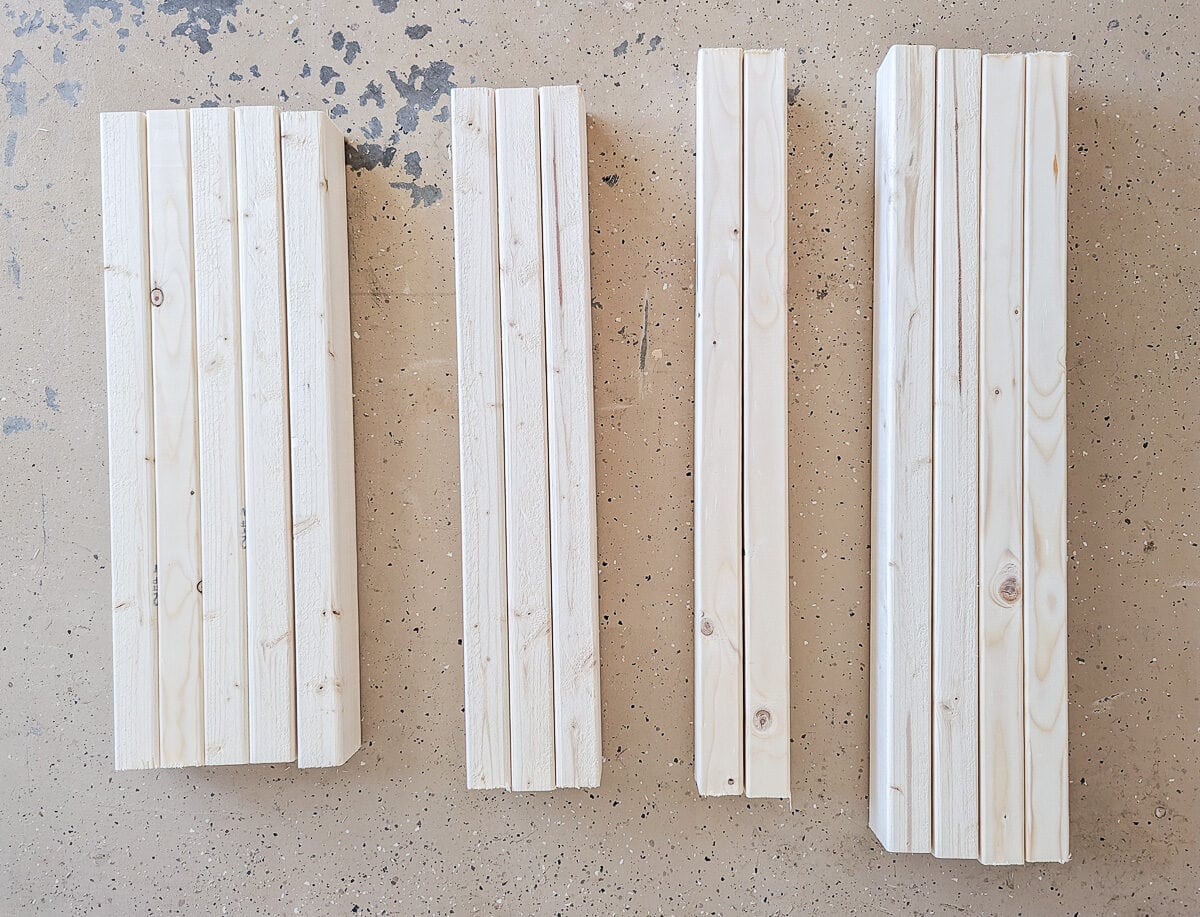
- (6) 2x3s @ 8 ft (framing lumber)
- 2.5″ Kreg exterior pocket hole screws
- Wood glue – be sure to use a waterproof wood glue for outdoor projects
- 2″ exterior screws – for attaching the armrests
- Wood filler – for filling the pocket holes and screw holes. You can buy wood filler or make your own stainable wood filler using sawdust from your project and polycrylic
- Pocket hole plugs and wood plugs – optional. These are another option for filling in pocket holes and screw holes. I usually just use wood filler, but plugs do give a really nice, clean finish.
- Paint or stain and sealer of your choice – If you are using your table outdoors, be sure to choose exterior paint and a sealer that can stand up to exterior use. I used General Finishes gel stain in Colonial Maple followed by Minwax Spar Urethane.
- Set of deep outdoor cushions – these are the cushions I used.
Tools
- Miter saw
- Drill and drill bits
- Kreg Jig – I have and love the Kreg R3 – it’s a smaller, less expensive Kreg Jig that is still pretty easy to use. If you are new to woodworking and don’t want to make a big investment, the Kreg Jig mini is an even cheaper option though the Kreg R3 is a bit faster to use.
- Hammer or Nail gun – For this project, we are only hammering a couple of nails so a hammer will work just fine. But if you have been considering adding a nail gun to your toolbox, I use and love this Ryobi brad nailer. It is easy to use and I love that it doesn’t require an air compressor.
- Orbital Sander – because sanding is one of the keys to making any woodworking project look amazing
- Tape measure
Cut the wood for the outer chair frame
Use a miter saw to cut your 2x3s according to the cut list in the printable plans. (The cut list in the plans is for one chair – if you want to build a pair, be sure to double it.)
Drill your pocket holes
Set your Kreg Jig for 1 1/2″ thick wood and drill pocket holes as detailed in the printable plans.

(If you’ve never used a Kreg Jig before, it’s a simple way to make really strong joints for woodworking. I think this tutorial on using a Kreg Jig from DIY Candy is helpful if you need some help getting started.)
Sand your wood
I’ve found it is way easier and faster to sand my boards before assembling. 2x3s can be pretty rough, so whether you plan to stain or paint your chair, a good sanding is definitely in order.
I sanded each of my boards with 100, 150, and 220 grit sandpaper.
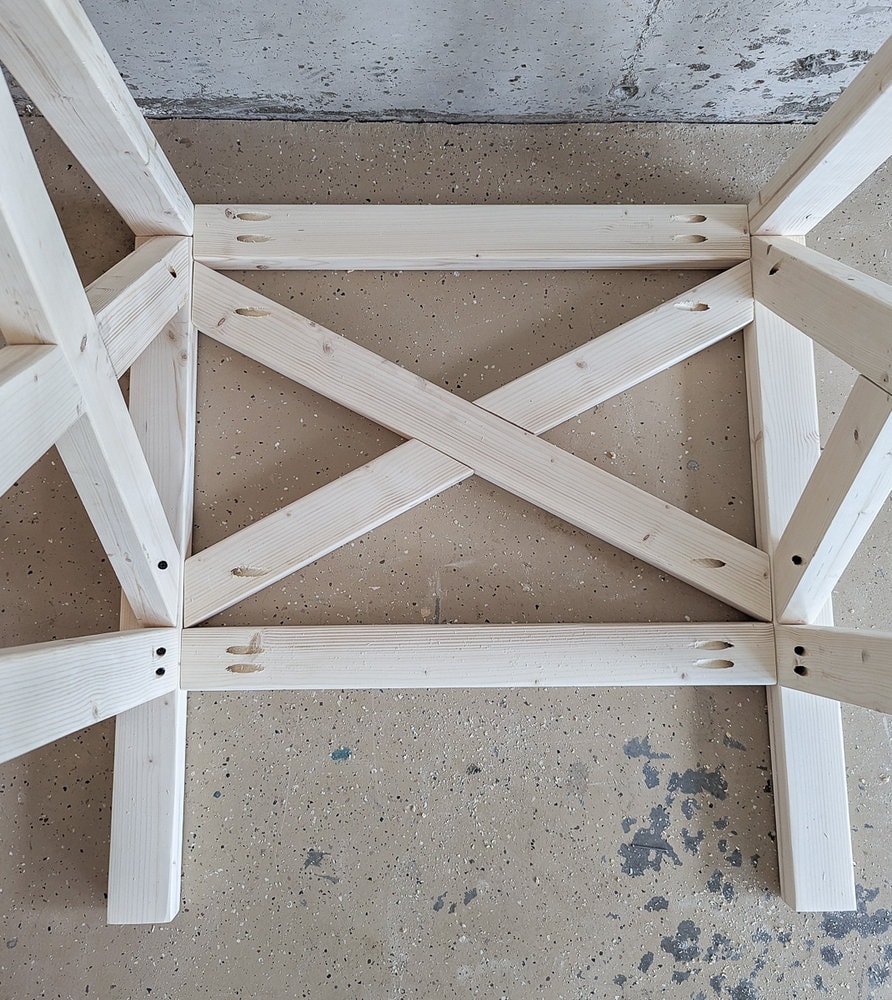
Assemble the two sides of the chair
First, use 2″ exterior screws and water-proof wood glue to attach one arm piece on top of two of the chair legs. Be sure to countersink these screws so you can fill the holes with wood filler or wood plugs later.
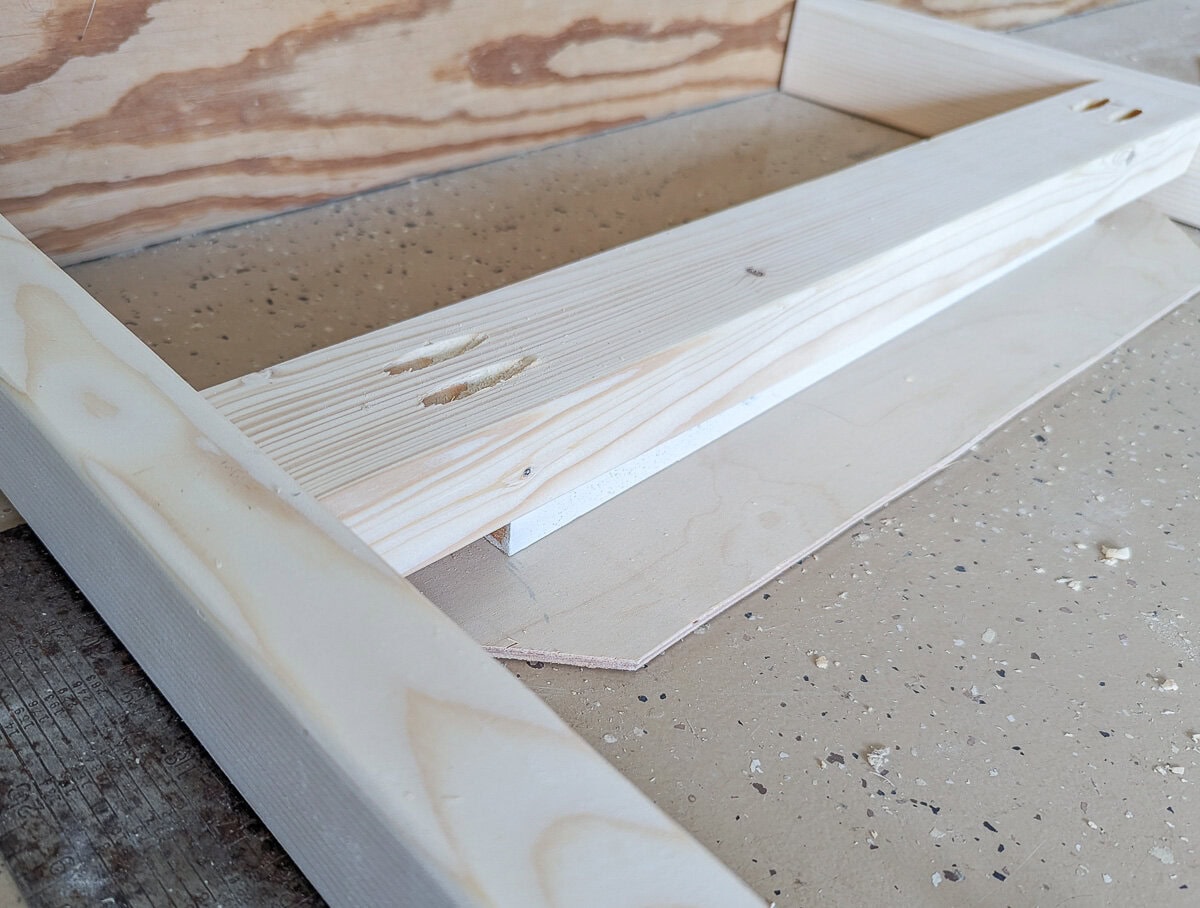
Next mark 11″ from the bottom of each leg. Use 2.5″ pocket screws and wood glue to attach a 24″ board between the two legs, with the top edge lined up with the mark you made.
This board will be flush with the inner legs of the chair. You can use a piece of 1″ thick scrap wood underneath to position it while attaching it.
That completes the outer frame of the chair side. Repeat for the second side.
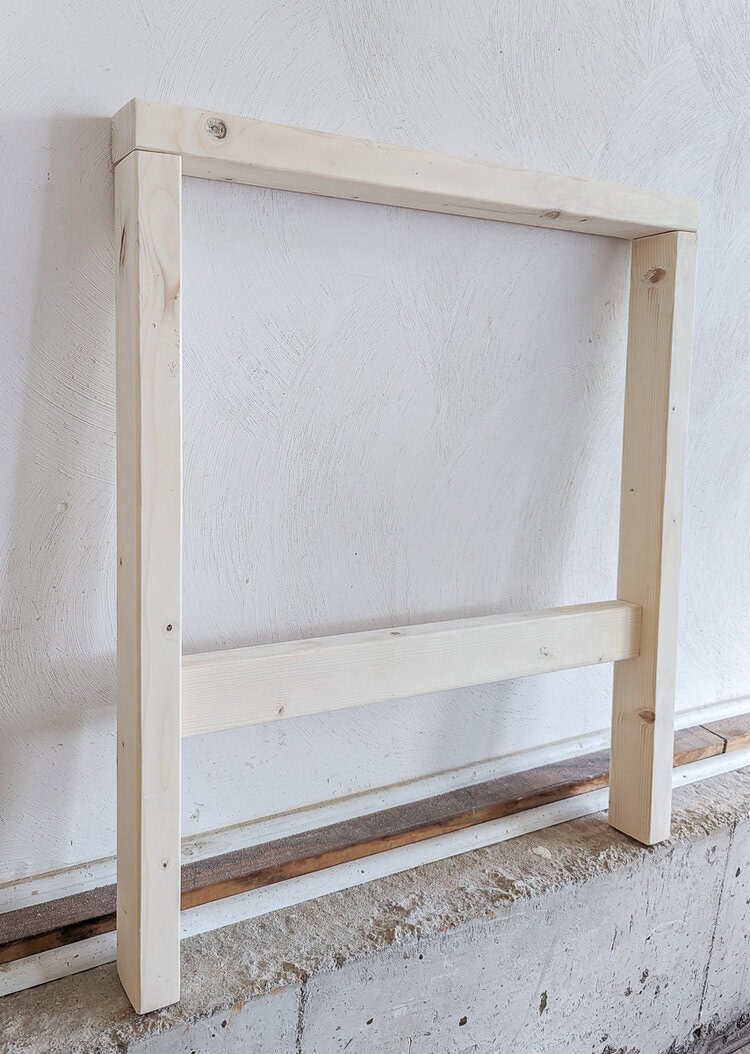
If you prefer a very minimalist look, you can leave the arms open like this. But I wanted these chairs to be a bit more cozy and also coordinate with my DIY daybed, so I added an X to the arms.
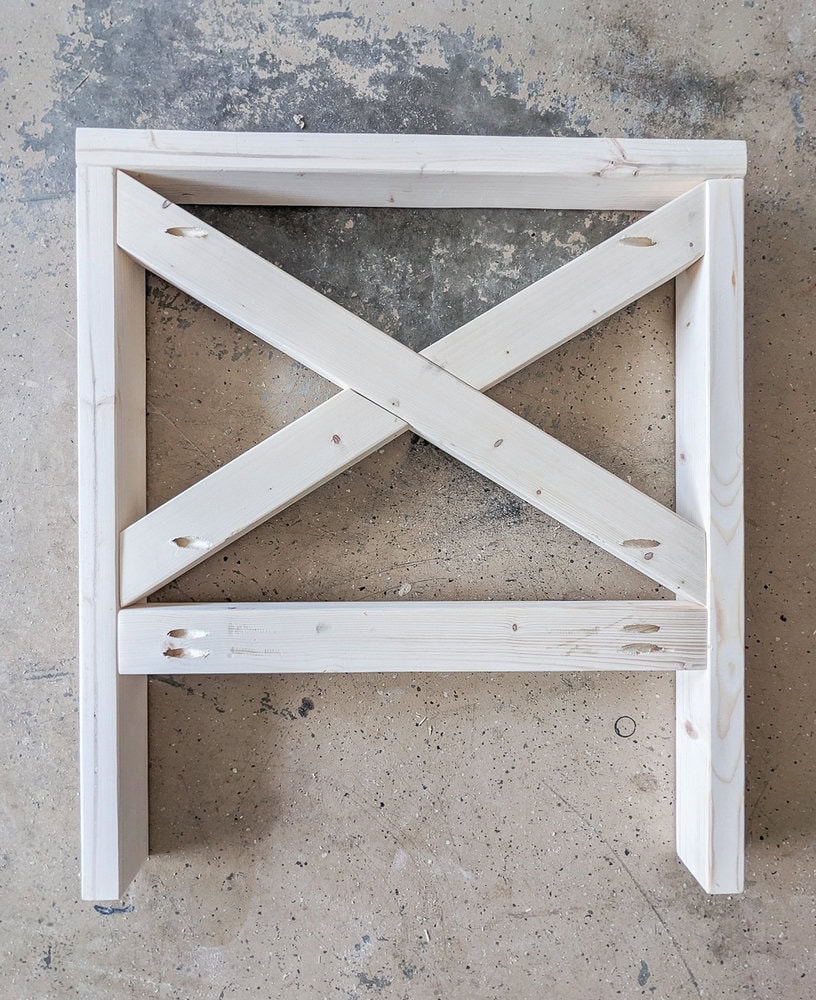
Add Xs to the sides
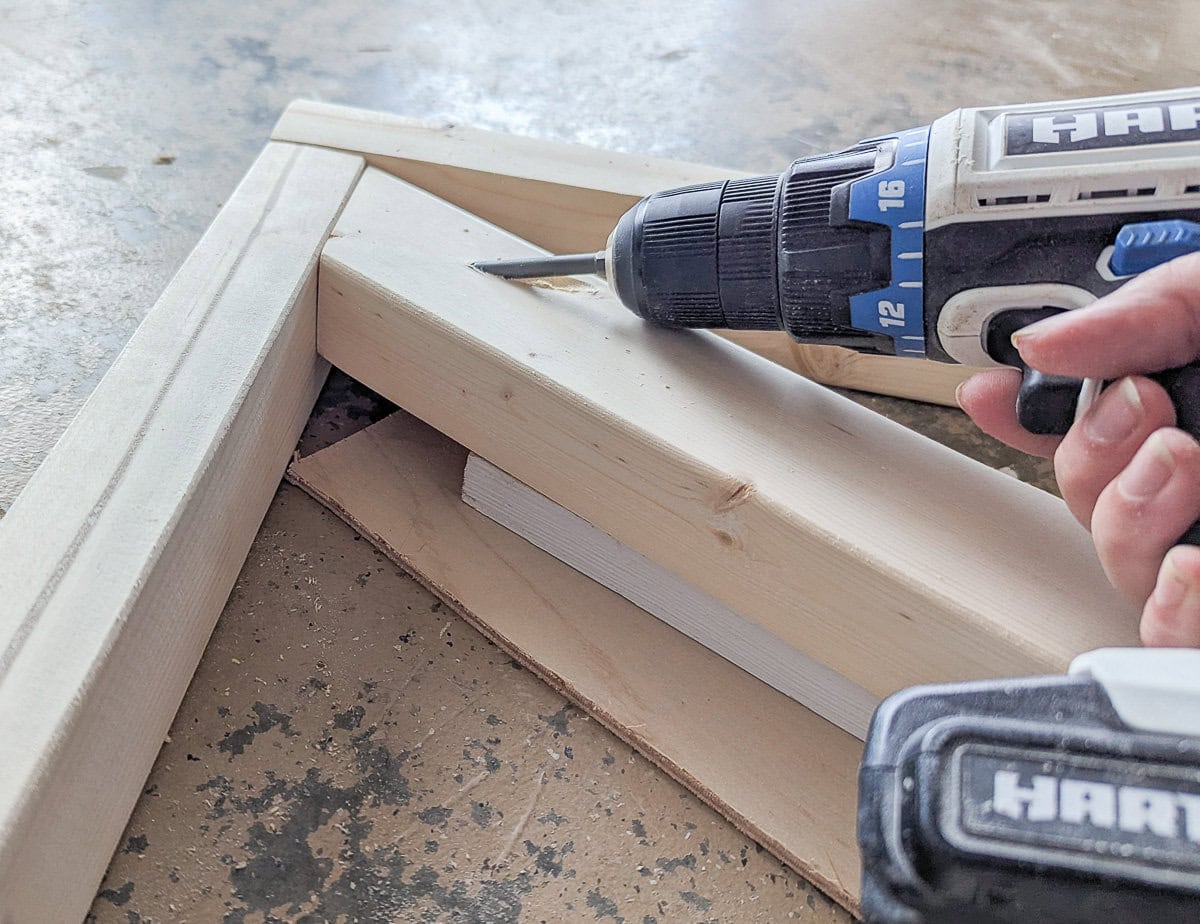
You’ll notice that we didn’t cut the wood for the Xs earlier when we cut the rest of the pieces.
I’ve found that when working with angled cuts on furniture, it works best to measure and cut each piece individually. As you assemble your furniture, if anything is even a tiny bit off from square, your angled cuts can be affected. Measuring and cutting these as you go will help you get the best possible fit.
Start by cutting a 31.6 degree angle at one end of a 2×3 board. (31.6 degrees is a common angle and is marked on most miter saws).
Set this in place inside one of the frames you made and mark where the other end needs to be cut. This second cut should also be around 31.6 degrees, but you can get a more perfect fit by manually fitting it this way. Use a miter saw to cut along the mark you made.
Next cut the two shorter crosspieces. Cut a 31.6 degree angle on one end of each. Then fit them in place and mark where the inner side needs to be cut. Make the cut using your miter saw. (My second cut was at 27 degrees – yours may need to be slightly smaller or larger).
Sand these boards and use your Kreg jig to add pocket holes to the outer ends of each piece. Attach these to the frame using wood glue and 2.5″ Kreg screws.
The X will be flush with the inner edge of the chair frame (this is the side where the pocket holes are). You can use a scrap 1″ thick board to position your boards while attaching.
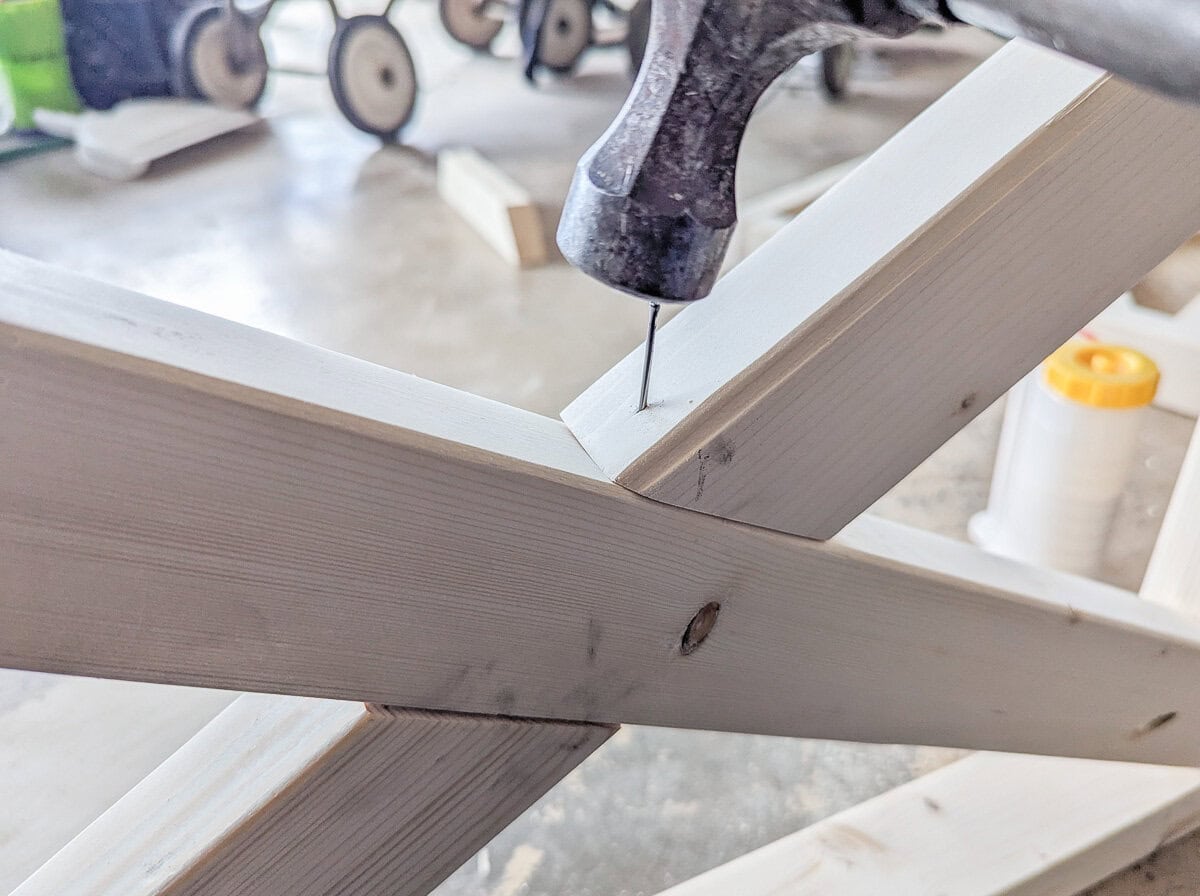
I chose to use a small finishing nail and wood glue to attach the two smaller crosspieces at the center of the X rather than pocket holes for a cleaner look.
Assemble the back of the chair
Next you will create the back of the chair using one board across the top and one board at the seat, in line with the lower boards on the sides.
Attach these using 2.5″ pocket screws and wood glue.

Add the back X
We’ll create the X for the back the same way as the sides, but the angles for the back will be different because the dimensions are slightly different.
Cut a 27 degree angle in one end of a 2×3 board. Set this board in place and mark where the second end needs to be cut.
Next cut the two shorter crosspieces starting with a 27 degree angle cut. (The second end for these pieces should be around 34 degrees.)
Attach these pieces the same way as the previous X sides.
If you want to skip an X across the back of the chair, you can simply add a few more straight boards across the back to give support instead.
Assemble the seat of the chair
To complete your chair, you just need to assemble the seat.
Position a 2×3 across the front of your chair, in line with the rest of the seat boards. Attach this board with 2.5″ pocket screws and wood glue. (It’s easiest to flip the chair over so this board is flat on the ground while you attach it.)
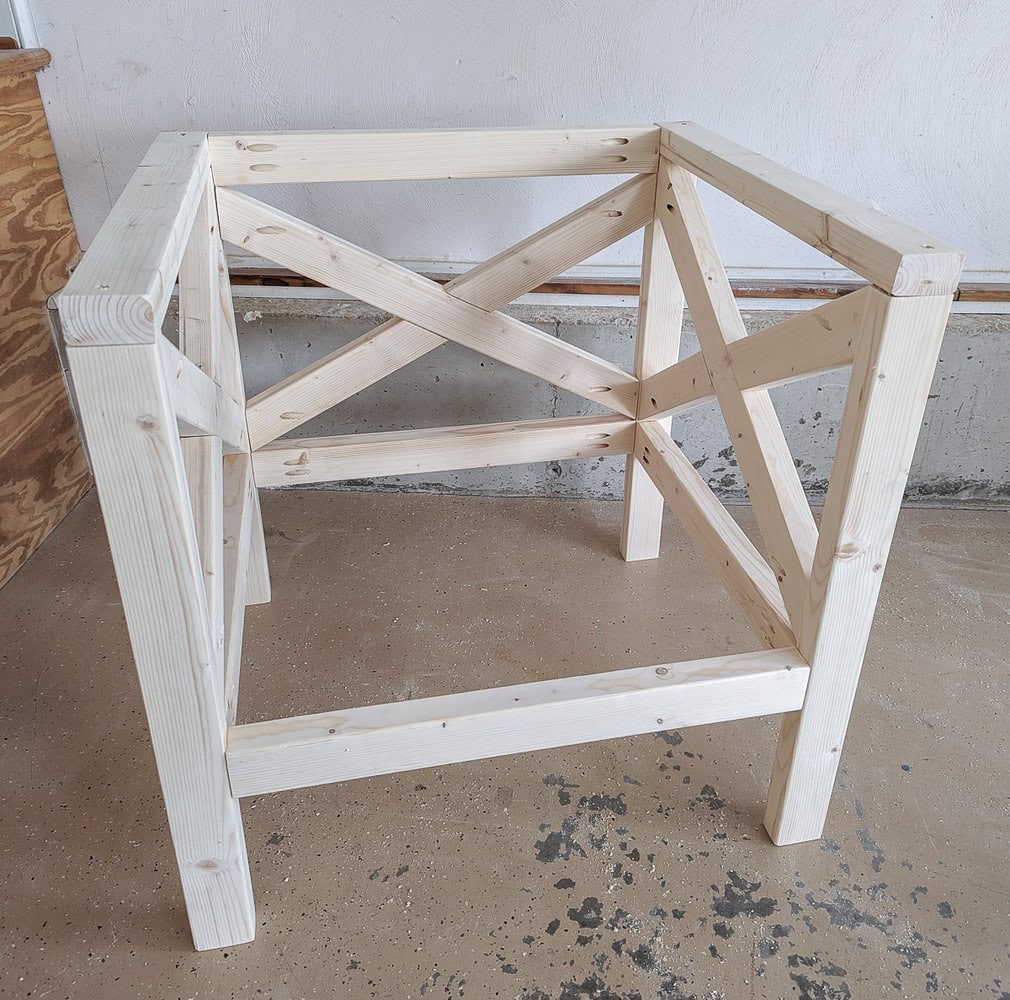
Finally add three slats to form the seat of the chair. Attach these to the front and back of the seat using pocket screws and wood glue.
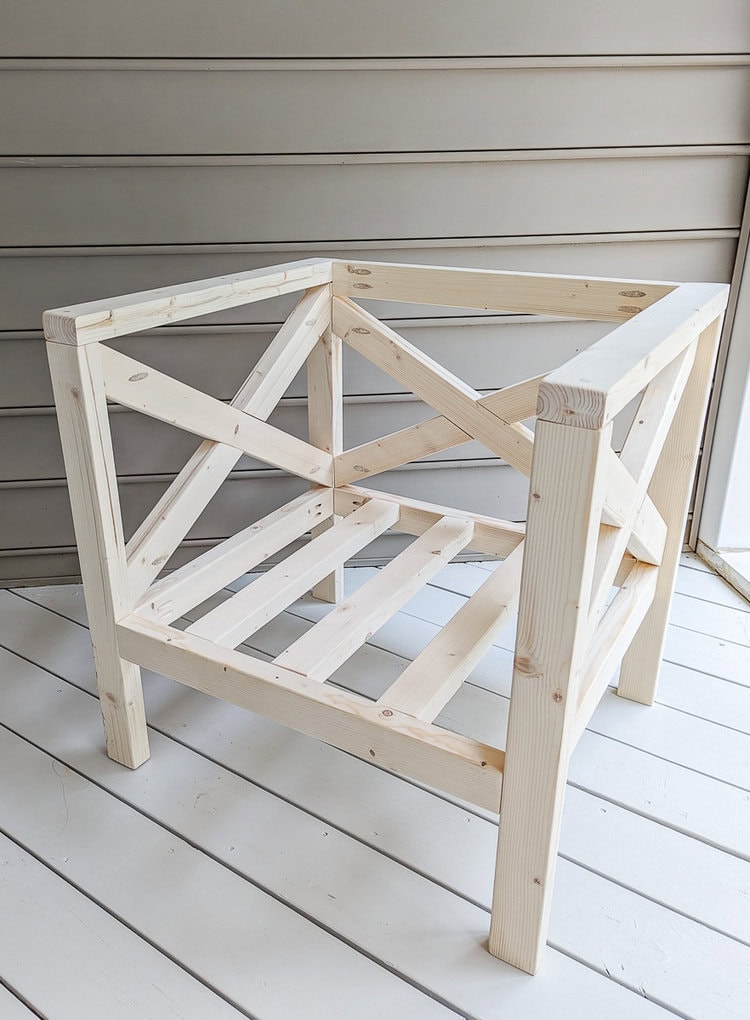
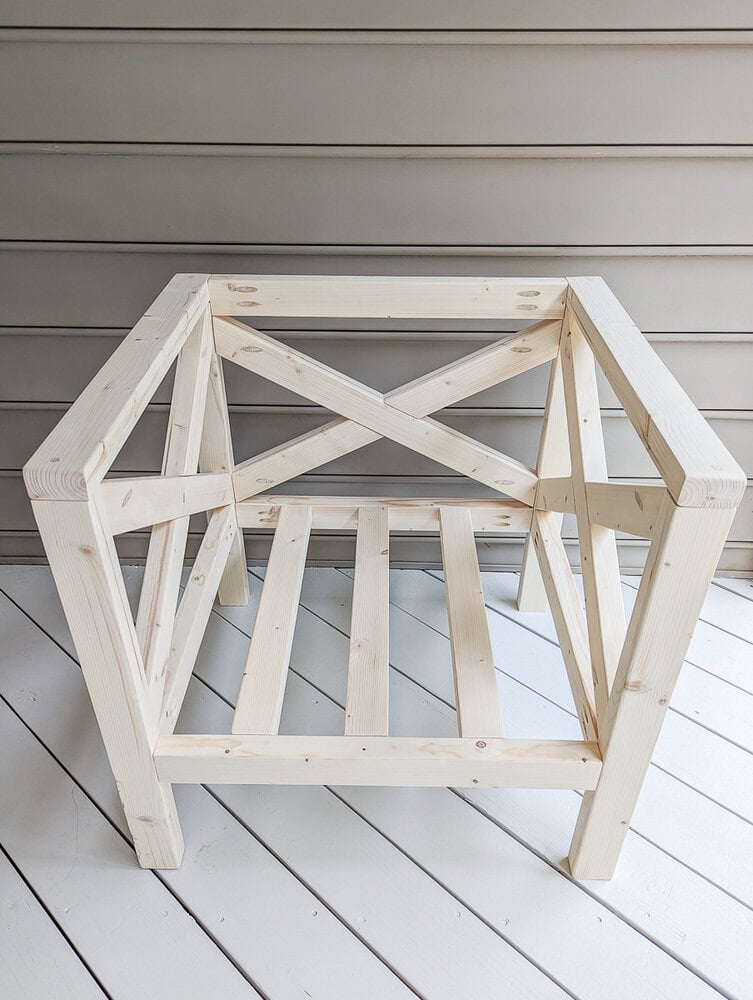
And your chair is assembled!
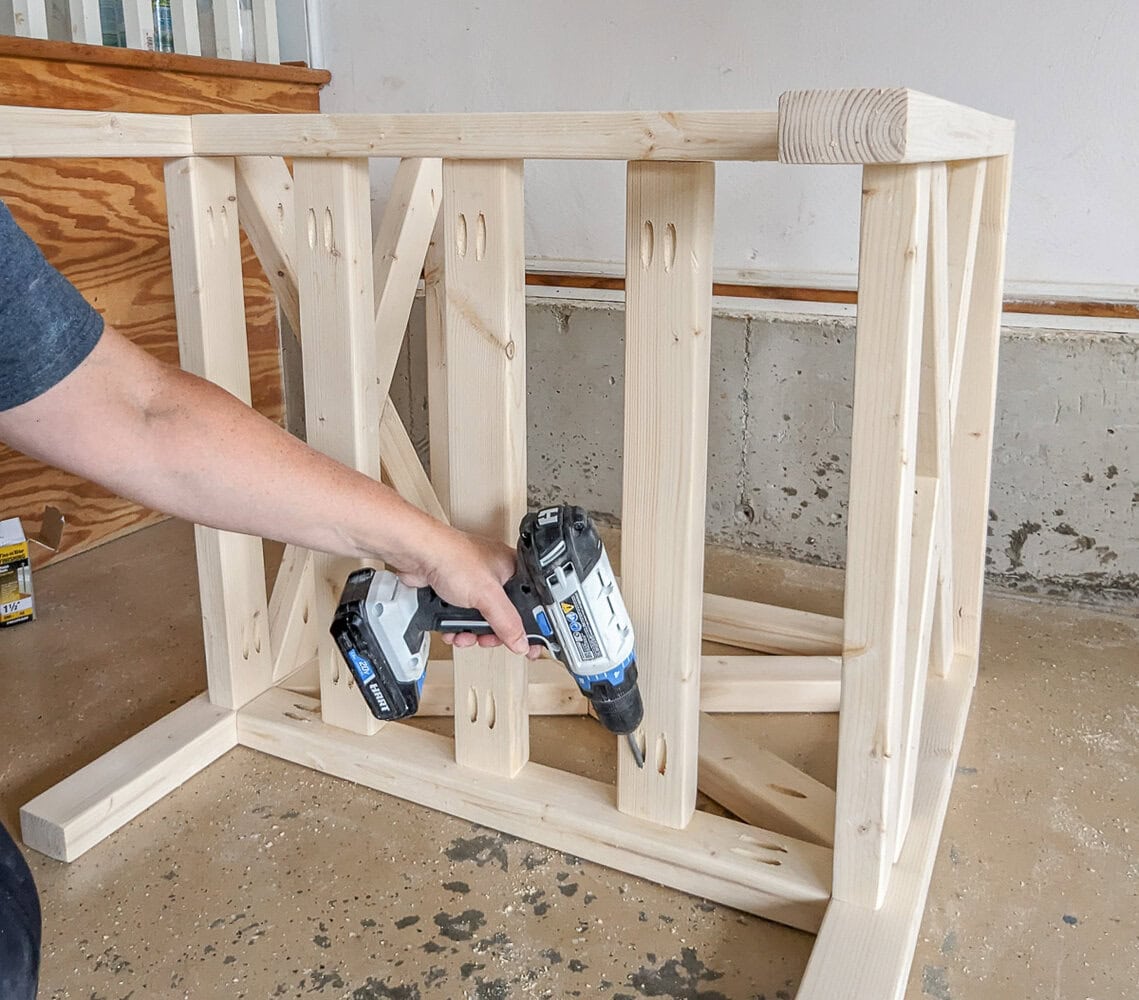
Optional: Round the arm rest edges
At this point, I decided to round out the front edges of my arm rests. The straight edges definitely give it more of a modern look, but rounding them off a bit is a lot more comfortable when you are actually using it. And when it comes to furniture, I pick function over looks any day.
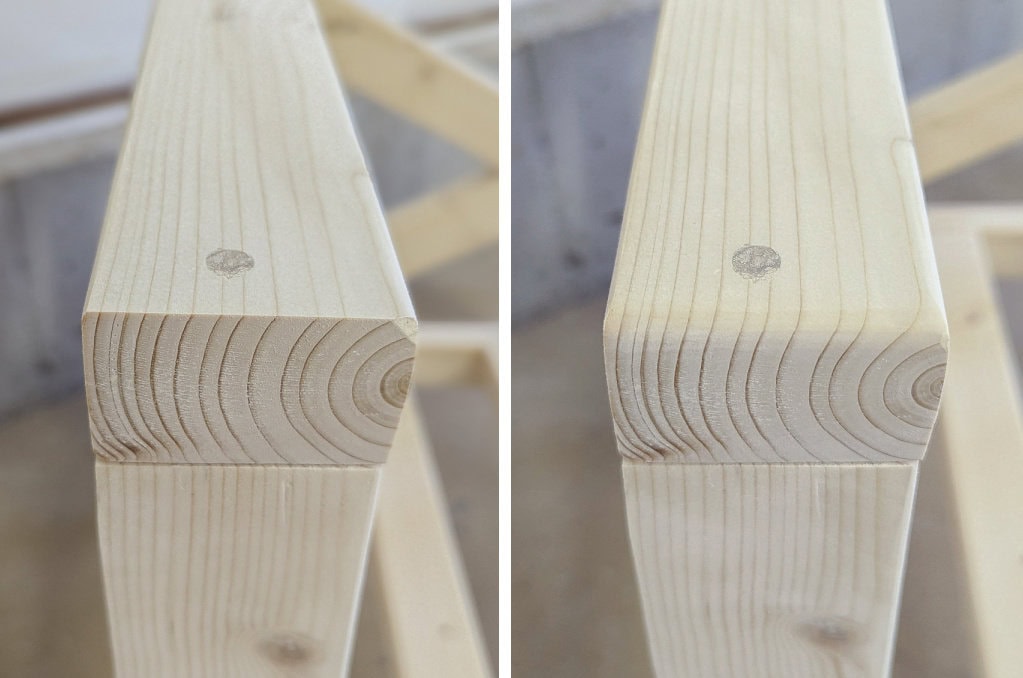
To round my edges I just sanded them a few times with my orbital sander.
Fill holes and imperfections
Before painting or staining your chair, be sure to fill in the top screw holes, the pocket holes, and any other imperfections in the wood. (Once your cushions are in place, only one pocket hole will be visible on each side X.)
I chose to use wood filler for this. I used my favorite DIY wood filler recipe: polycrylic + sawdust. I’ve found that this tends to blend in the best on stained wood.
Another option is to use pocket hole plugs to fill your pocket holes and wood plugs to fill the holes from your countersunk screws. Pocket hole plugs are solid wood, come in a variety of wood types, and are cut to perfectly fill pocket holes. Wood plugs do the same for regular round screw holes. (And they are actually pretty affordable.)
Finish with paint or stain + sealer
The final step is to finish your chair so that it is protected from the elements. If you are using this chair outdoors, be sure to use a finish that will hold up well to temperature fluctuations, moisture, and UV rays.
It’s important to protect any wood furniture you build, but it’s extra important any time you are using untreated pine to build outdoor furniture. I’ve built outdoor furniture using pine in the past and I’ve found that it can hold up really well as long as you use a good exterior paint or sealer.
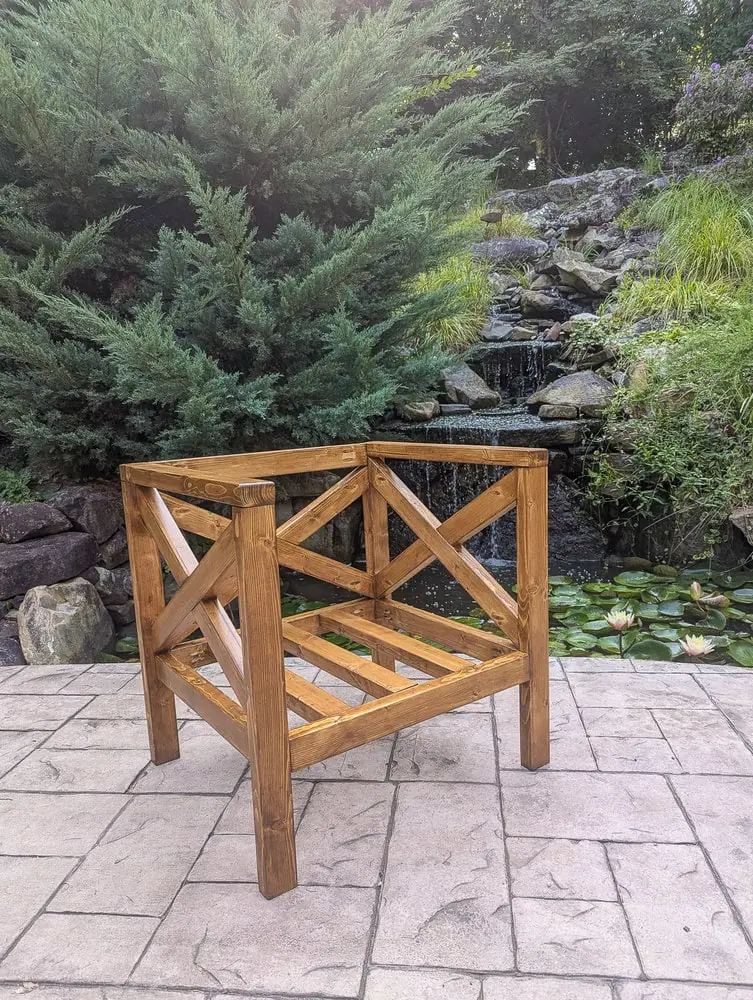
To finish this chair, I used General Finishes gel stain in Colonial Maple. The I protected the finish with my go-to exterior sealer for stained furniture, Minwax Spar Urethane.
If you choose to stain your chair, I highly recommend you check out my tips for staining pine wood so you can avoid a blotchy, uneven finishes. And if you are painting your chair, I shared my picks for the best outdoor furniture paint here.
Once your paint or stain is dry, you can add your cushions and enjoy!
The completed chair
And here’s my chair! I haven’t decided on a stain color yet, so for now my chair is still bare wood.
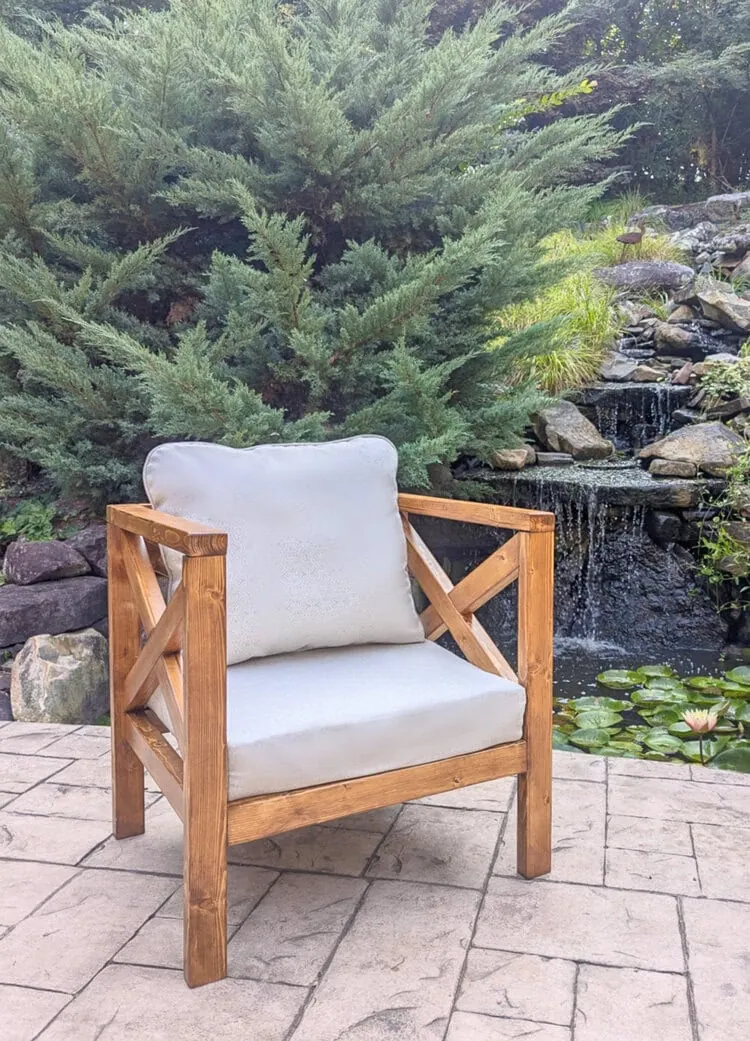
I’m loving how this chair turned out. It’s super sturdy and comfy and it’s the perfect size for tucking in a corner, making a conversation area with a couch, or sitting out on our patio. In fact, I know I’m going to be building a second one of these to make a matching pair, but now I’m considering if I want to make even more!
Don’t forget to check out the coordinating DIY daybed. It’s a great alternative to an outdoor sofa with lots more room for lounging and even napping outdoors.
Printable Plans
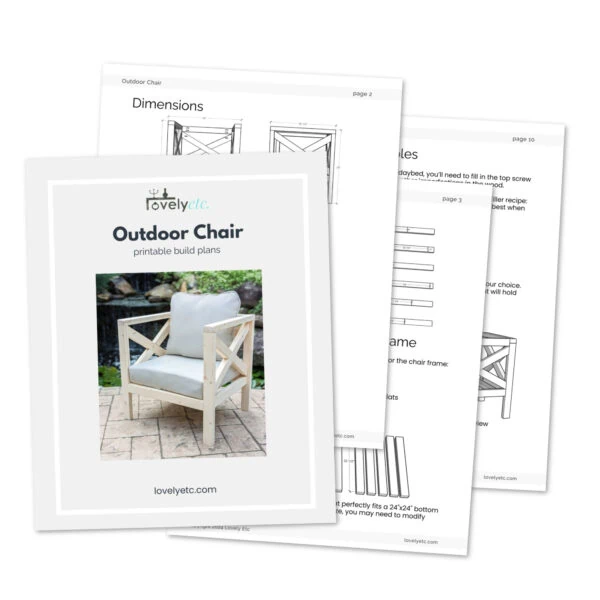
If you’re ready to build your own chair, don’t forget to grab the printable build plans. These plans include a shopping list, a detailed cut list, step-by-step instructions, and detailed 3D renderings of every step of the process.
If you build this chair, I would love to see it! Feel free to email photos to me at [email protected]. I can’t wait to see what you build!
Video
Just hit the play button below to watch my Youtube video of this project.
Ready for more DIY furniture ideas?
If you are looking for more furniture ideas, I’ve got you covered! Any of the posts linked below are a great place to start.
- 51 DIY Outdoor Furniture Ideas
- 21 Fabulous DIY Benches you can build for Cheap
- How to Build a DIY Daybed for Cheap
I’d love for you to pin this post on Pinterest!

This is lovely! I’d love to get my son to help me make one as I’m a little scared of power tools. Thanks for sharing!
Hopefully he can help you and you can get more comfortable with power tools!