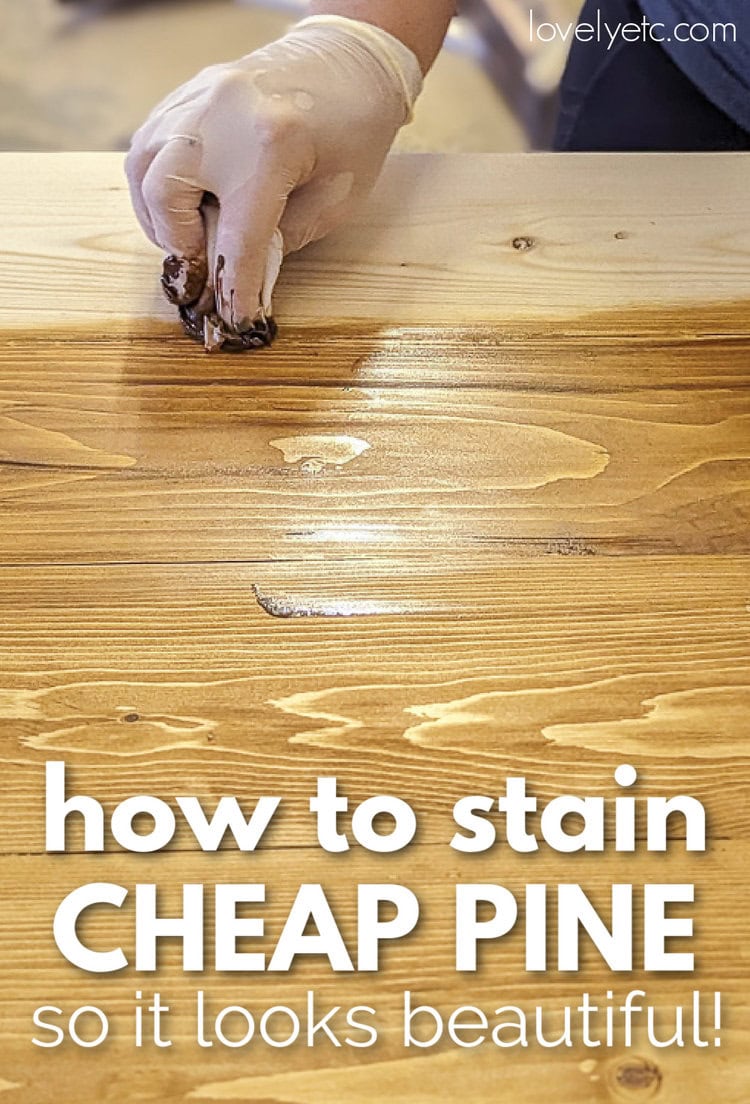
How to Stain Cheap Pine so that it Looks Amazing
This step-by-step tutorial will show you how to stain pine with beautiful results while avoiding the blotchy unevenness pine is notorious for.
The first few times I tried to stain projects I had made from pine, I could not figure out what I was doing wrong. I was applying the stain just like the instructions said, but it was not looking anything like the beautiful wood finish I had pictured in my mind. The stain looked blotchy and uneven and every imperfection in the wood was highlighted like crazy. It was a mess.
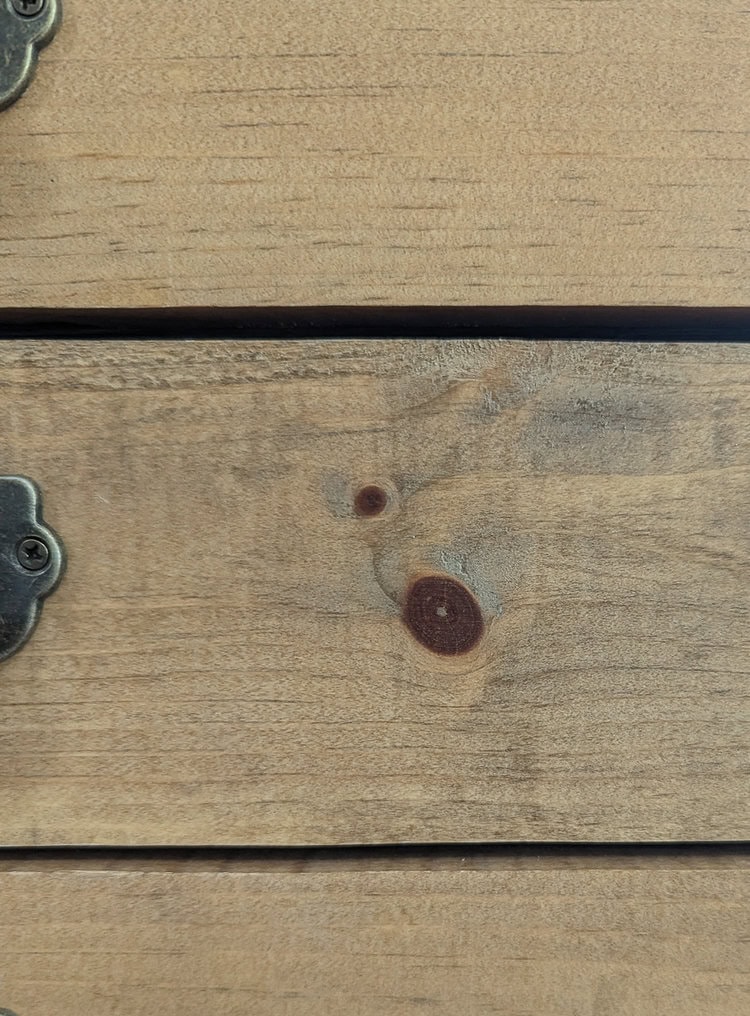
To be honest, my solution for awhile was just to use super dark stain on all my pine projects so that the imperfections would be covered. (That’s why this headboard is so crazy dark!)
Since then, I’ve learned a lot about how to stain pine so that it actually looks good. In my part of the world, pine wood is always much, much cheaper than any other type of wood so I use it for a lot of my projects. And thankfully, after lots of research and experimenting, I’ve figured out how to stain pine so that it looks beautiful (without having to make it super dark every time!)
In this post I’m sharing exactly how to stain pine from start to finish so you get a beautiful wood finish rather than a splotchy mess.
This post contains affiliate links which means if you make a purchase after clicking a link I will earn a small commission but it won’t cost you a penny more. Click here to see my full disclosure policy.
The Best Stain for Pine
A few weeks ago, I did an experiment to see what type of stain actually works best for getting an even finish on pine. I tested a few different oil-based stains, water-based stains, and gel stains.
You can head to that post to see the full results, but I’ll go ahead and share that all three types of stain can work on pine, but they don’t all work equally well. Oil-based stains like Minwax penetrating stain are the most popular type of stain, but they’re actually the hardest to use on pine. They tend to look blotchy and really highlight the knots and other imperfections pine often has.
The water-based stains went on more smoothly than the oil-based stains, but I was surprised to find my top pick was actually a gel stain. After my stain test, I stained a pine table and bench using General Finishes gel stain in the color colonial maple and I’m really impressed with how even the finish turned out.
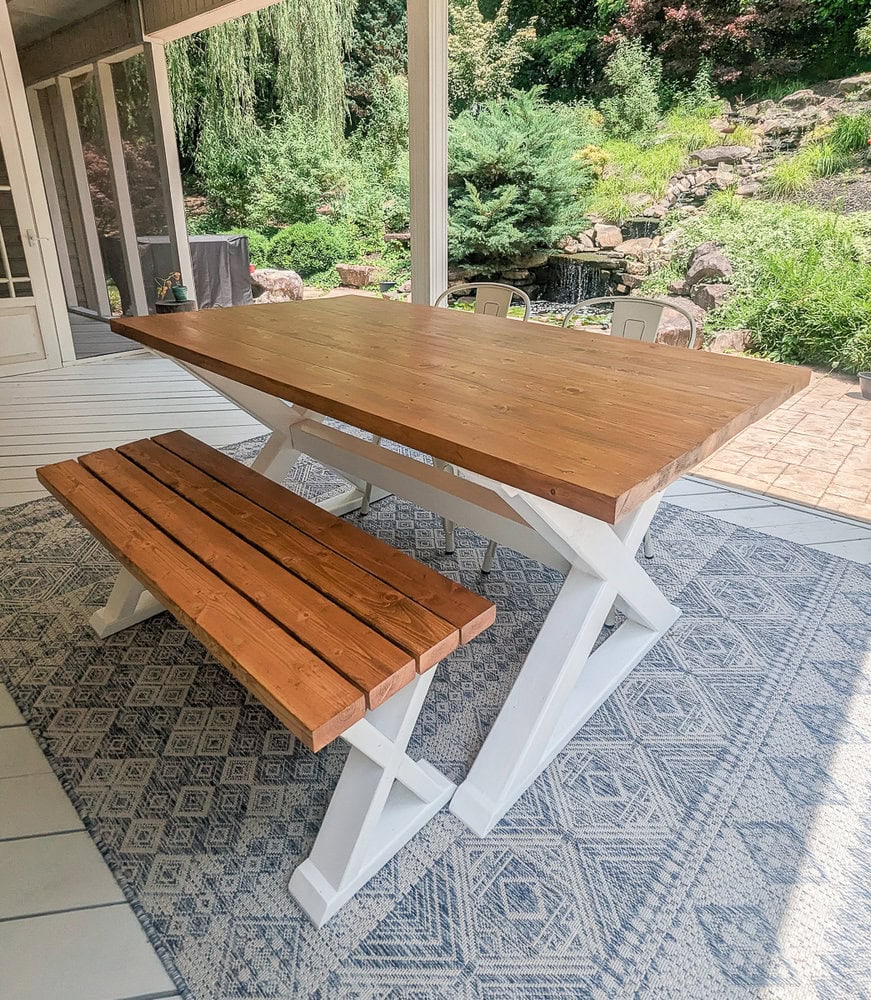
You can find the step-by-step tutorial for this table here and the matching bench here. Or head to my shop to grab the printable build plans.
General Finishes is well known to have some of the best wood-finishing products and their gel stain is particularly top notch. There are quite a few colors to pick from, but my favorites are Antique Walnut for rich dark brown and Colonial Maple for a medium tone.
You can see all the stains I tested on pine and the full comparison here. I also included a color test of several different gel stain shades on pine because I’ve found that stains tend to look completely different on pine wood than the color shown on the can.
How to Stain Pine
Any time you are staining wood, it’s important to take your time and not skip steps if you want a beautiful finish and this is doubly true when staining pine. But if you follow the steps outlined below, you really can get beautiful results.
The staining instructions below are largely the same whether you are using an oil-based stain, a water-based stain or a gel stain, but there are a few steps that are different for different types of stain. I will make sure to clearly point these out so that you know exactly how to apply whichever stain you choose.
Prep your wood for stain
When it comes to getting a beautiful finish on pine, it’s all about the prep. A lot of beginners think that the secret to a great finish is in how you apply the stain and sealer, but really it’s much more about how you prepare your wood for stain.
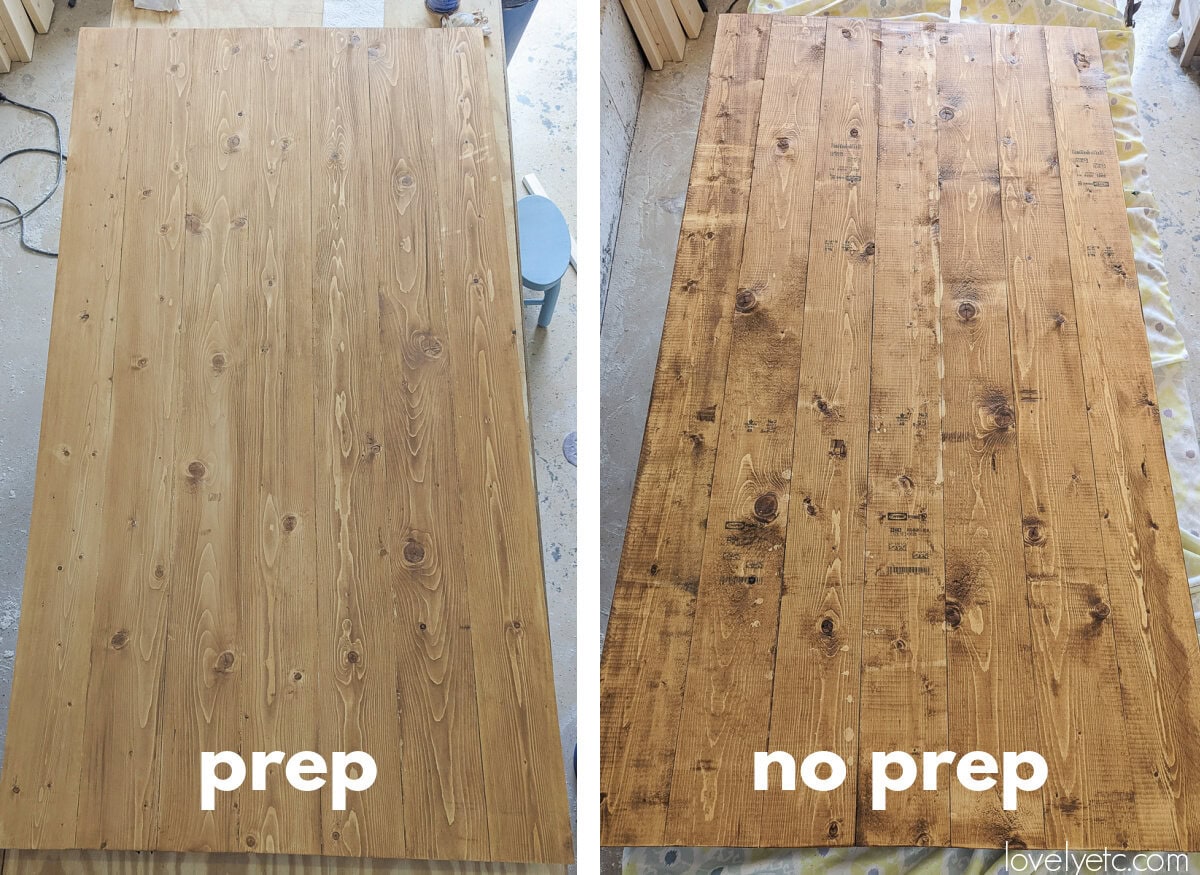
These photos are a great example of how important prep is. This is the pine tabletop from the table I shared above. The image on the left is the finished tabletop. I spent a lot of time prepping the wood before staining to get the best possible finish.
The image on the right is the underside of the same table – so these are the undersides of the exact same boards. I used the exact same stain and sealer, but did no sanding or other prep first since it won’t ever be seen. Clearly prep matters!
Any time you are working with wood, it pays to take your time choosing the best possible boards at the store. Look for boards that are straight and have as few major imperfections like knots, cracks, and gouges as possible. Your wood will be easier to build with and the finishing will go so much faster.
Start with sanding – lots of sanding
It’s tempting to want to rush through the sanding or even skip it altogether. I totally get it, sanding isn’t exactly fun. But sanding your wood well is probably the most important factor in getting a really great finish.
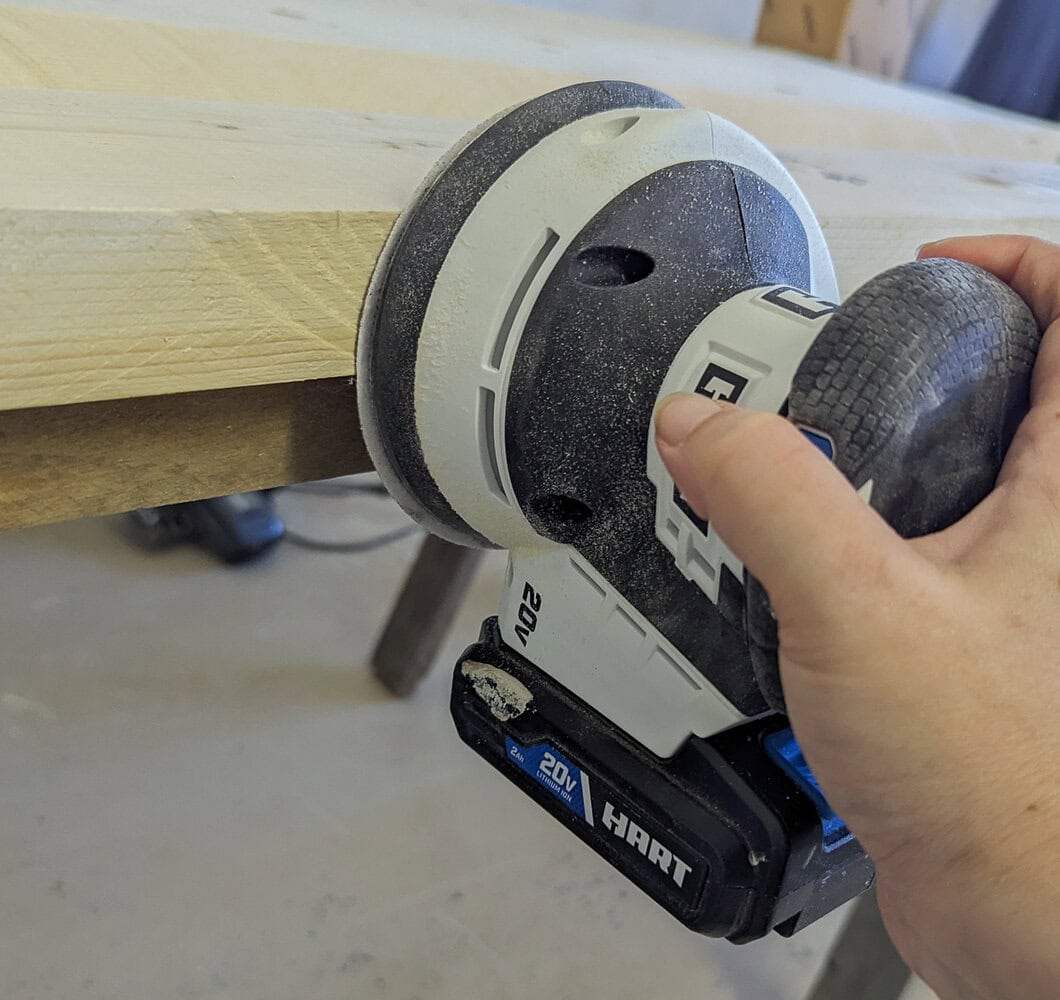
Inexpensive pine doesn’t always have the smoothest surface. It tends to have lots of imperfections like knots, cracks, and rough surfaces. Sanding helps smooth out these imperfections for a nice even surface.
Pine often comes with a bit of a coating or film over the boards. If you try to stain your pine without sanding first, that coating will prevent the stain from absorbing into the wood. In the photo below, you can see how some parts of this pine tabletop are super shiny when the light hits it. Those are the areas I haven’t sanded yet that still have a coating.
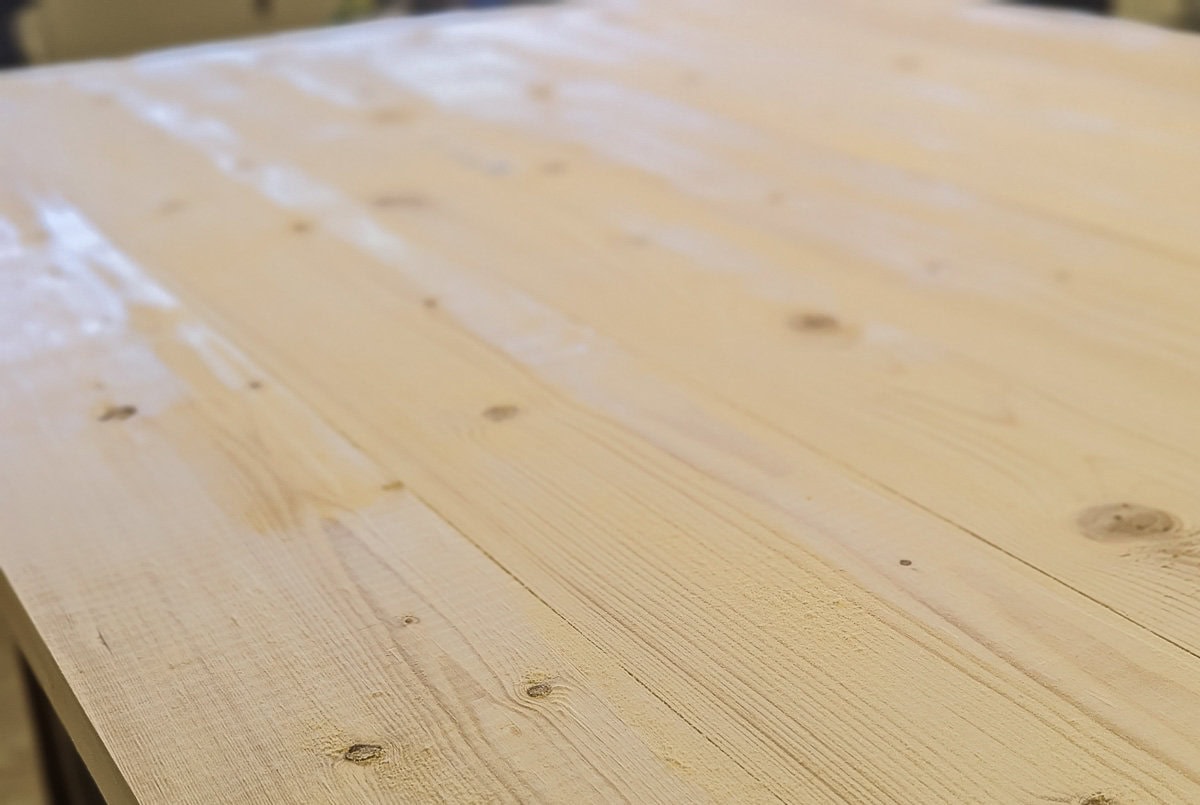
And finally, pine also tends to absorb stain very unevenly; this is why stained pine often ends up looking blotchy. Sanding your pine before stain will help even out the surface of the wood so that the stain absorbs a lot more evenly.
When sanding pine, I like to start with 80 or 100 grit sandpaper and work my way up to 220 grit for a smooth finish that stains well.
How to make the end grains match
If you’ve stained much wood before, you might have noticed that is very difficult to make the cut ends match the other stained surfaces. The open wood grain along the ends absorbs the stain much more easily. Because of this, if you prep and stain the ends the same way you prep and stain the faces of your boards, they will end up much, much darker. I used to get incredibly frustrated by this issue.
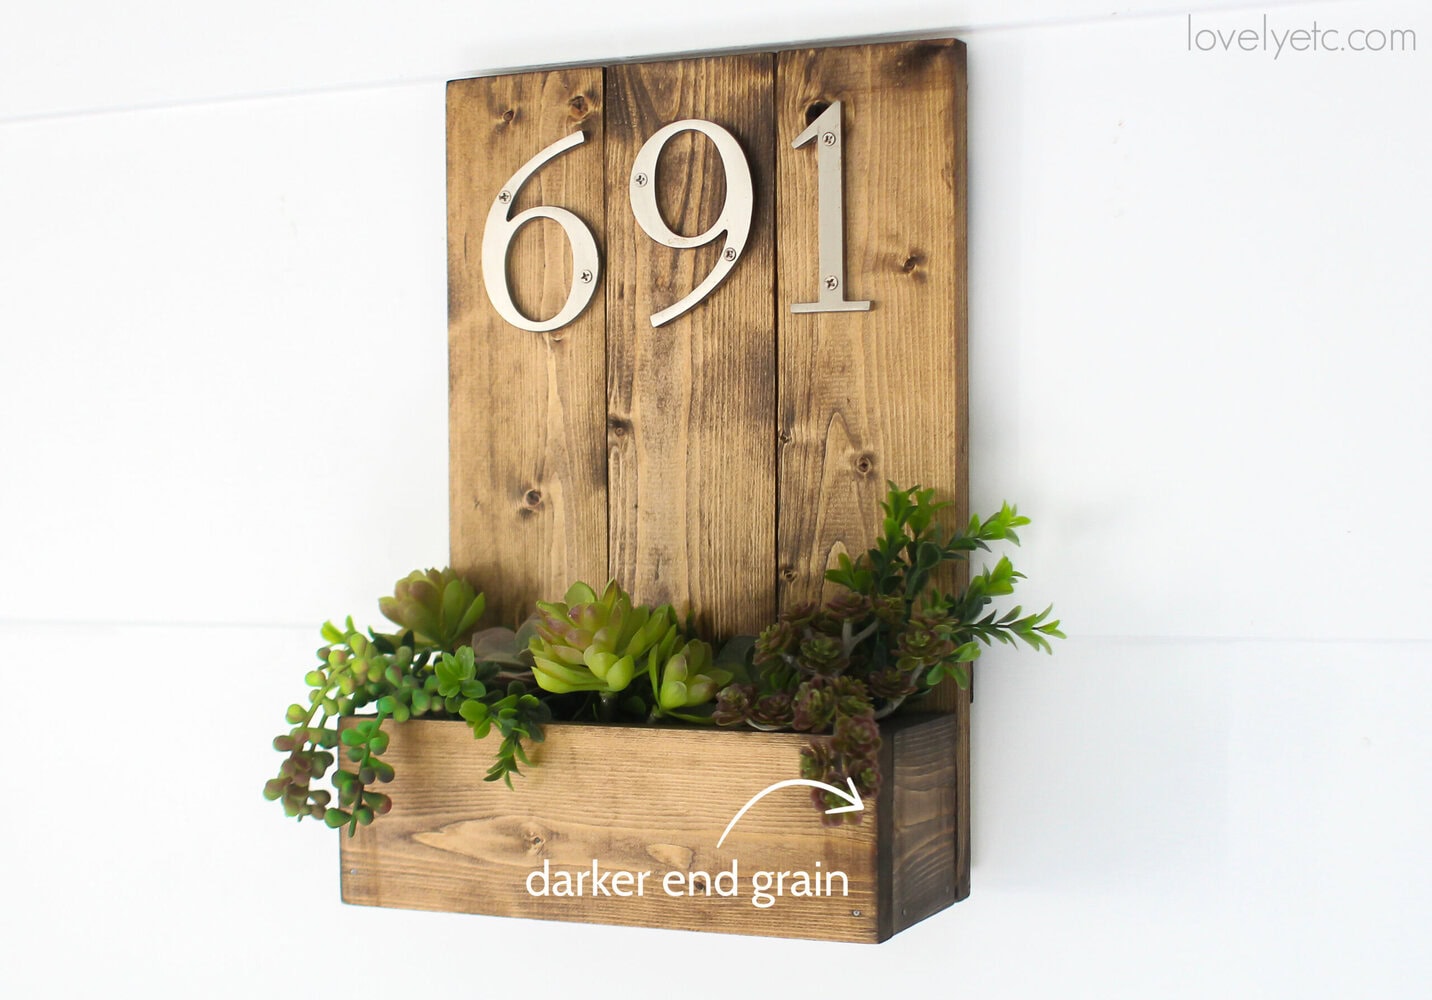
Over time, I have learned a few tricks to help prevent this huge color difference and the most important one has to do with sanding.
When you are sanding your wood to prep for stain, you’ll want to start out sanding the end grains just like the rest of the wood. But then, instead of stopping at 220 grit, continue sanding with 320 or even 400 grit. Sanding with a higher grit will help further smooth the surface and close the grain so that it doesn’t absorb as much stain.
(This is a trick I learned from Pine and Poplar. If you’re interested in going more in depth on how to sand wood for staining, I suggest you check out her post.)
The best stainable wood filler
When working with inexpensive wood like pine, there’s a good chance you’ll need to use some wood filler to fill in knotholes, cracks, and other imperfections.
There are stainable wood fillers that you can buy, but I’ve found that while they are technically stainable, the color of the stained wood filler often doesn’t even come close to matching the color of the stained wood. Instead, they stick out like a sore thumb. As a perfectionist, I often have to remind myself that it is okay if there are some small areas where the wood filler doesn’t match perfectly. Wood is an organic material and it isn’t meant to be perfectly uniform. That being said, I do want to get the closest possible match.
If you want to just buy a stainable wood filler, I recommend using Minwax stainable wood filler. It won’t match perfectly, but it’s easy to apply and gives decent results on stained pine.
My personal preference is to use a homemade wood filler. After testing a few different types, I’ve found that the best homemade wood filler is made using sawdust and water-based polyurethane or polycrylic. You’ll want to use sawdust that came from the same pine boards you are filling for the closest color match.
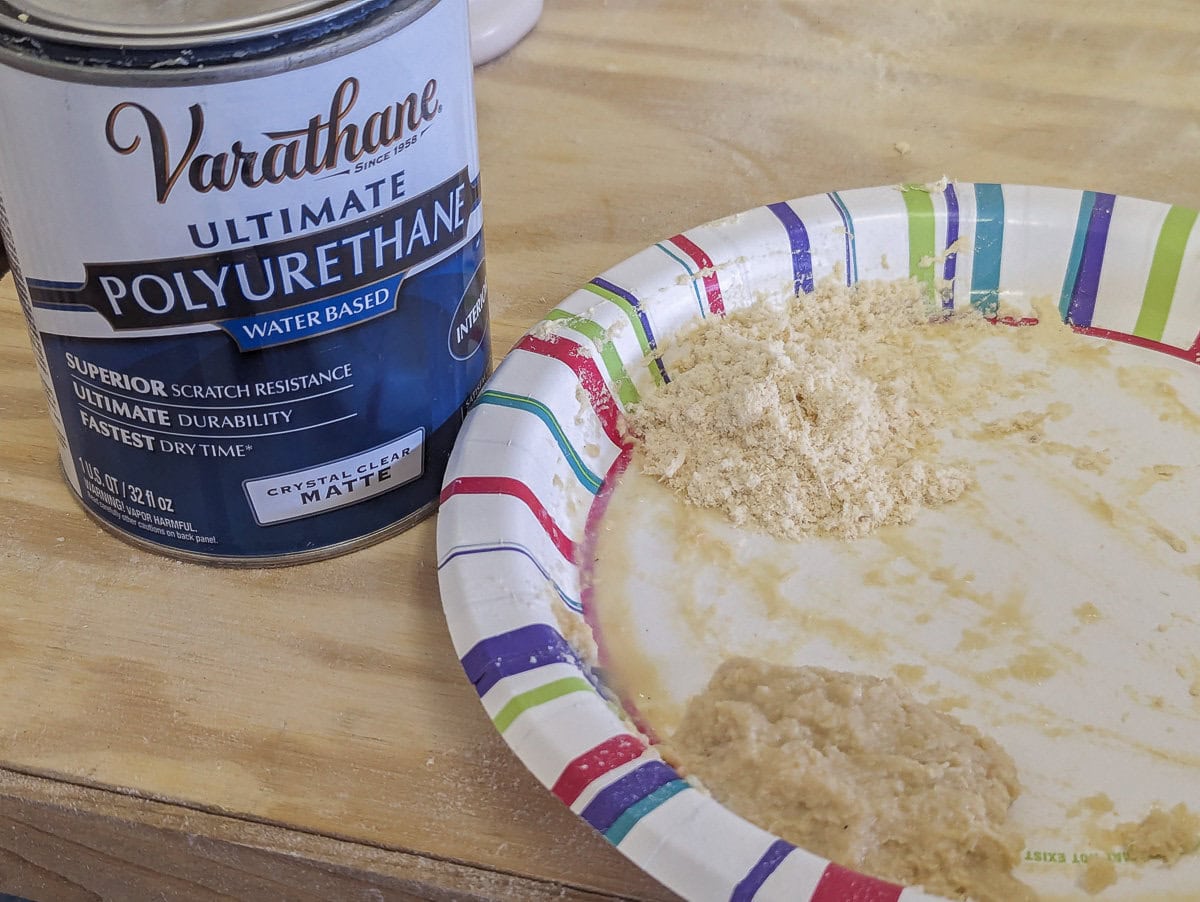
On a paper plate, mix a little polycrylic with a little sawdust. Stir them together until they form a paste that’s similar to regular wood filler (a bit looser than cookie dough). You can simply add a little more sawdust or a little more poly until it has the right consistency.
Then use your finger or a putty knife to apply it, wiping away any excess. Once it has fully dried, sand it smooth.
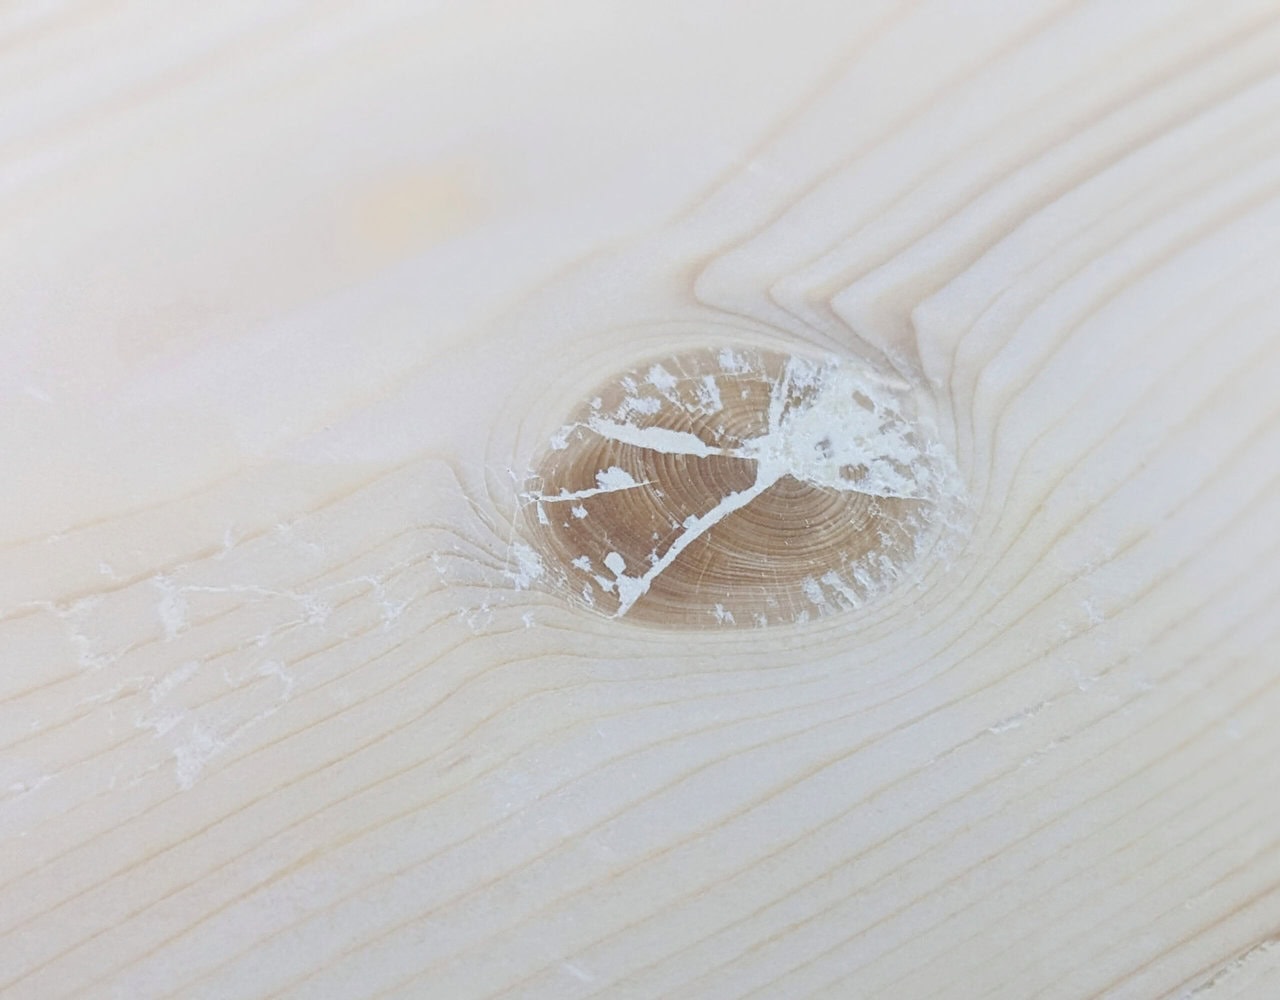
This type of wood filler still may not be a perfect match, but it is by far the closest I’ve found plus it sands smooth very easily.
Apply pre-stain wood conditioner
Pres-stain wood conditioner is one of those products that seems vaguely like it might just be a scam that isn’t actually doing much of anything. I used to be pretty skeptical myself. I mean, it goes on clear and doesn’t cause any visible difference to the wood – how can you know it is actually doing anything?
While it might seem questionable, I’ve found that using a pre-stain wood conditioner actually is really important when you are staining pine. The pre-stain conditioner helps even out the wood grain so that it can better absorb the stain. This helps the stain go on much more evenly and is key to preventing the blotchiness that stained pine tends to get.
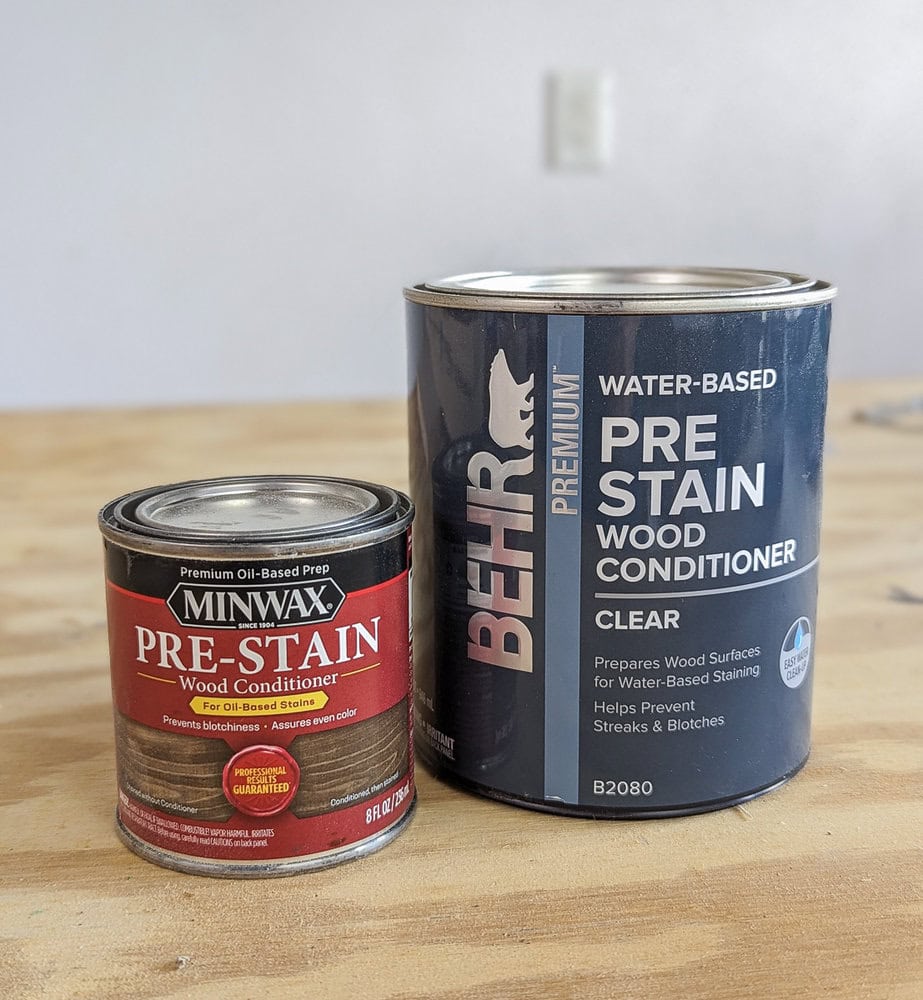
If you are using an oil-based stain, you’ll want to apply an oil-based pre-stain conditioner. If you are using a water-based stain, you need to apply a water-based pre-stain conditioner.
With either type you will wipe it on with a clean cloth, allow it to absorb, and then wipe off the excess. Be sure to read the instructions on your specific product as far as drying times.
If you are using a gel stain, you don’t have to use a pre-stain conditioner. Gel stain sits more on top of the wood rather than being absorbed, so conditioning isn’t really needed.
Instead when using a gel stain, you can wipe your wood with mineral spirits immediately before applying the stain to help your stain glide onto the dry wood more smoothly.
Applying stain to pine
And now finally, it is time to actually stain! As I said earlier, it really is all about the prep. You may find yourself getting frustrated with how long the prep is taking, but luckily once you get to the actual staining, it goes super fast.
There are lots of different ways to apply stain; you can use a paint brush, a foam brush, a staining pad, a roller, and sometimes even a paint sprayer. But no matter which type of stain I am using, I prefer to wipe it on using a clean rag. Often I use old t-shirts for this, but you can also buy clean lint-free cloths if you don’t have any.
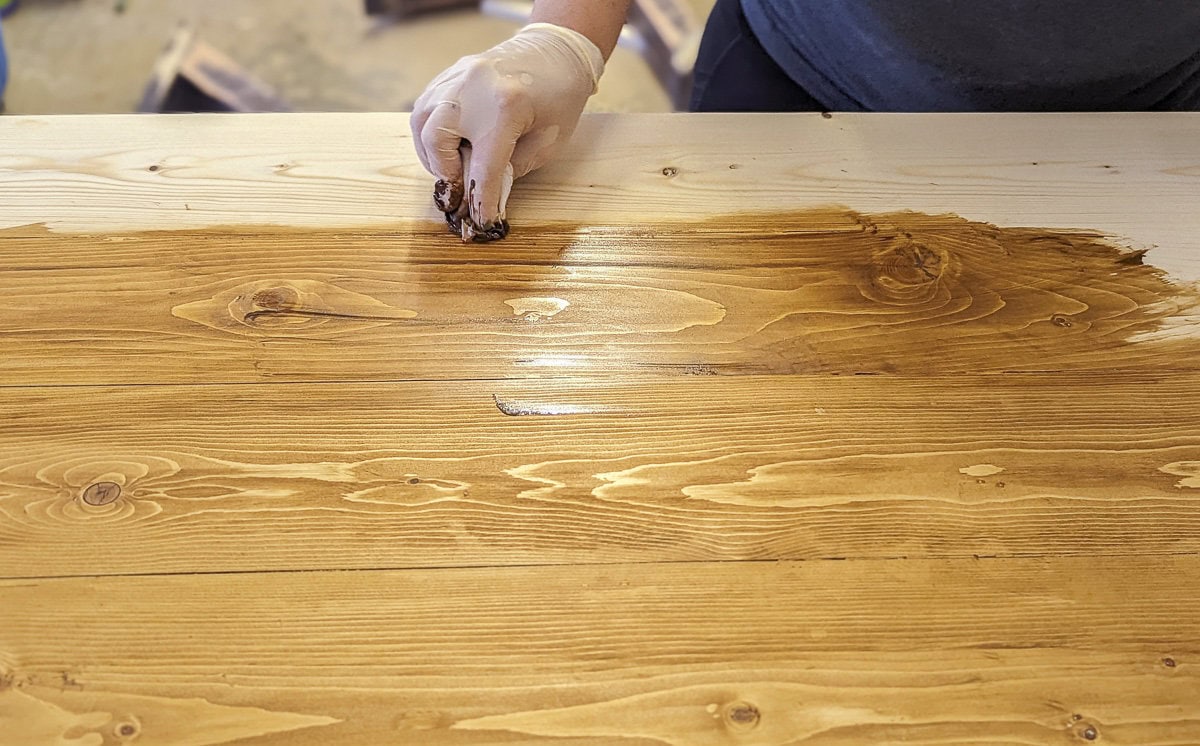
You want to wipe the stain on with long, even strokes, following the wood grain. Then use a clean, absorbent cloth or high quality paper towel to wipe off any excess stain, again following the wood grain.
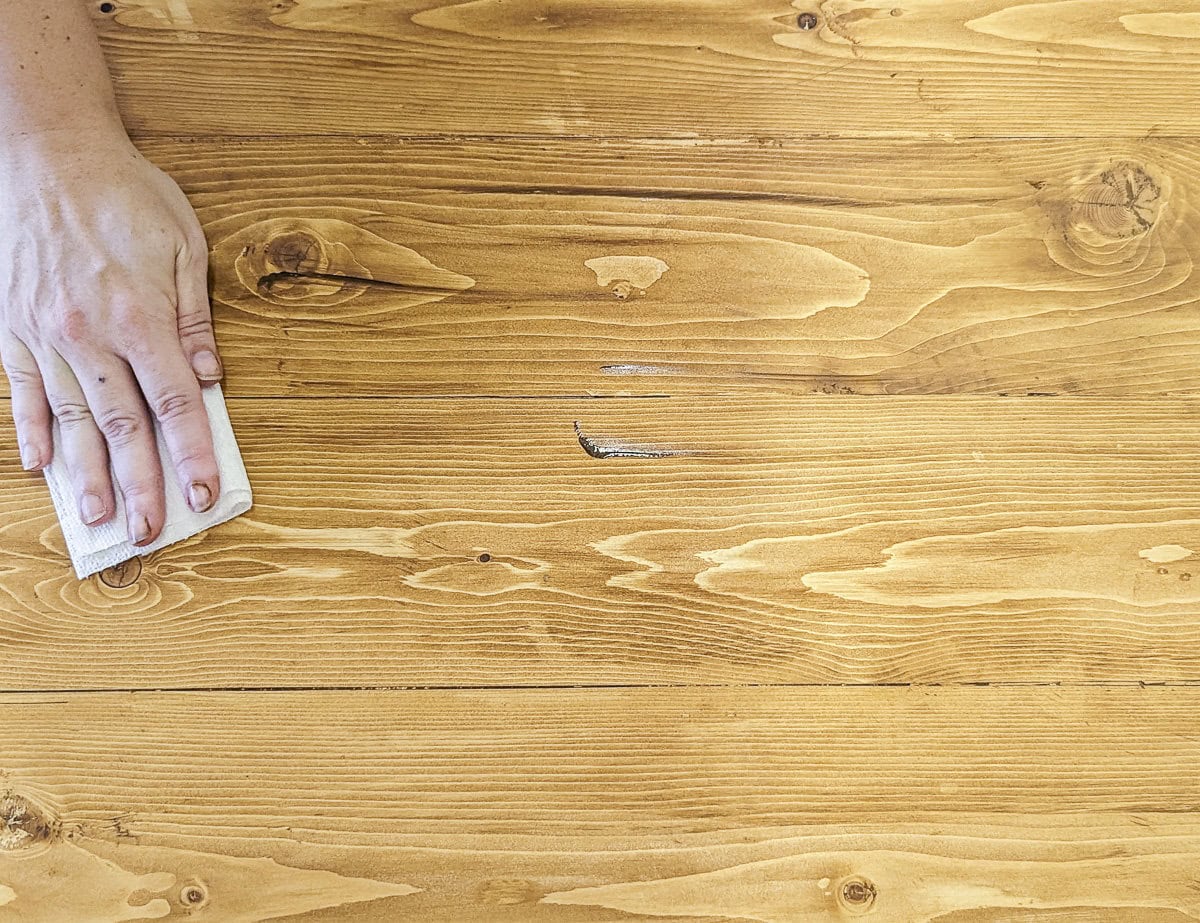
(Note: General Finishes doesn’t recommend using t-shirts to wipe off excess gel stain because they may not be as absorbent as paper towels.)
If you are staining something large, like a piece of furniture, it helps to apply the stain in sections. Water-based stains, in particular, dry very quickly. If you are staining something large using a water-based stain, you will want to work quickly.
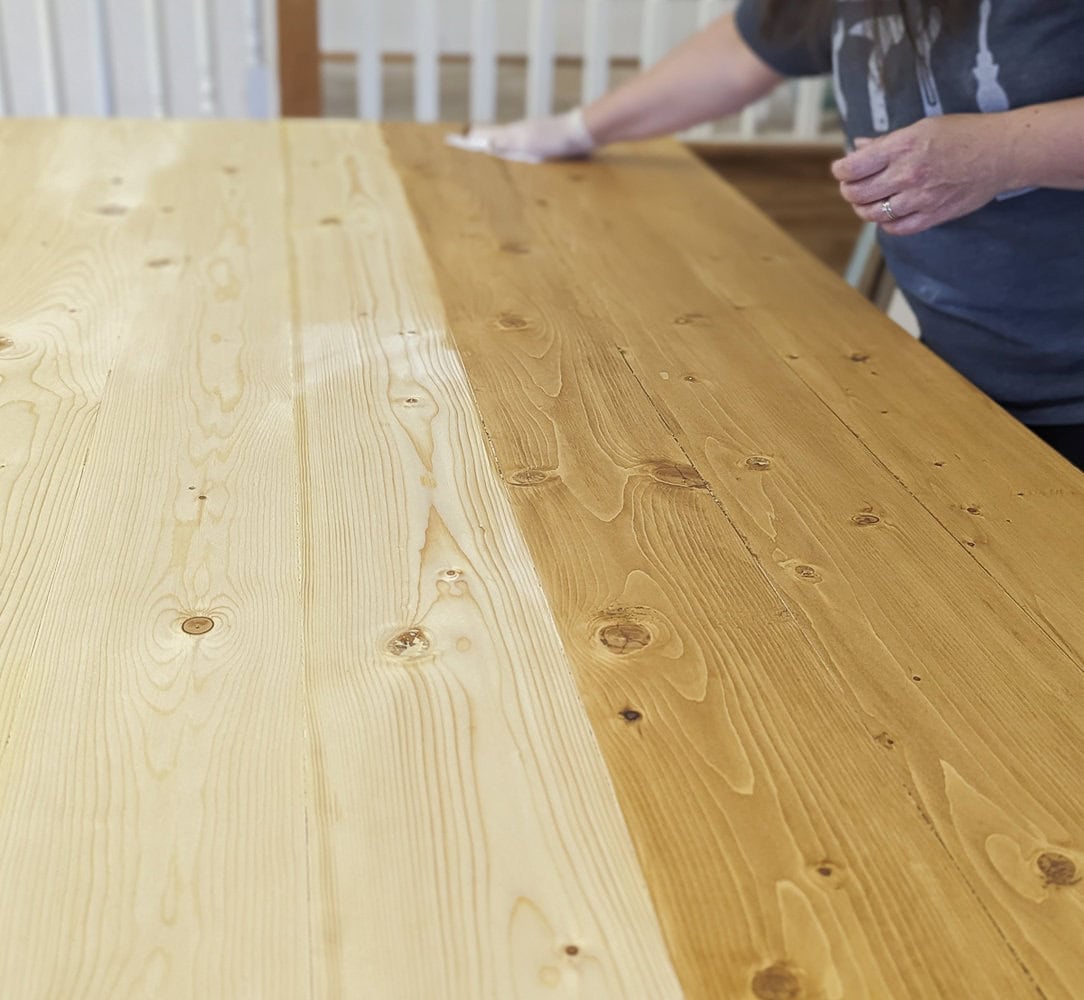
As you apply your stain, try to maintain a wet edge. This means you don’t want to let the edges of your stain dry before you have stained any adjoining areas. When you apply wet stain right next to dry stain, there can be a noticeable lines called lap marks once it all dries.
Apply additional coats of stain
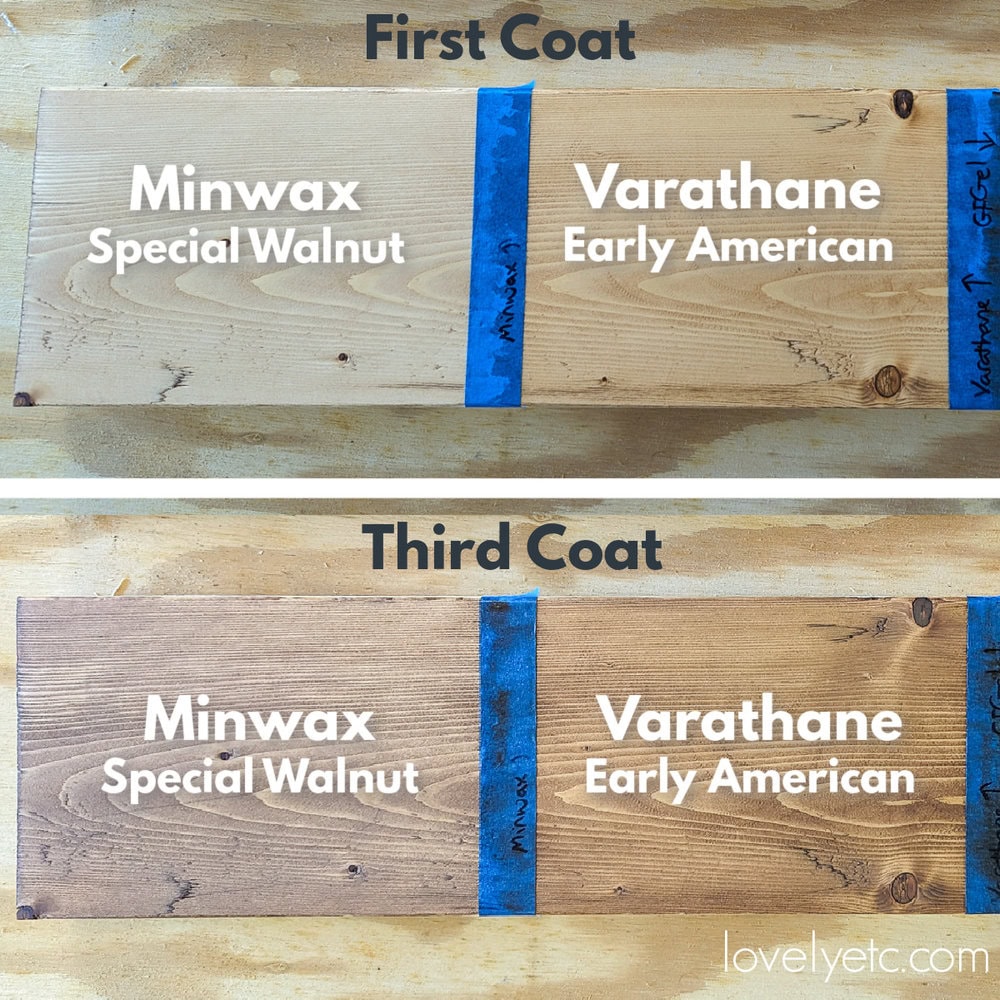
With oil and water-based stains, you can really build color by adding additional coats of stain. In fact it may take 3 or more coats of stain for the color to start to resemble the shade you were expecting.
I’ve found that oil-based stains often start out very light on pine and need several coats just to develop much color at all.
And water-based stains can look oddly green, yellow, or gray until several coats are added and they turn into a nice brown.
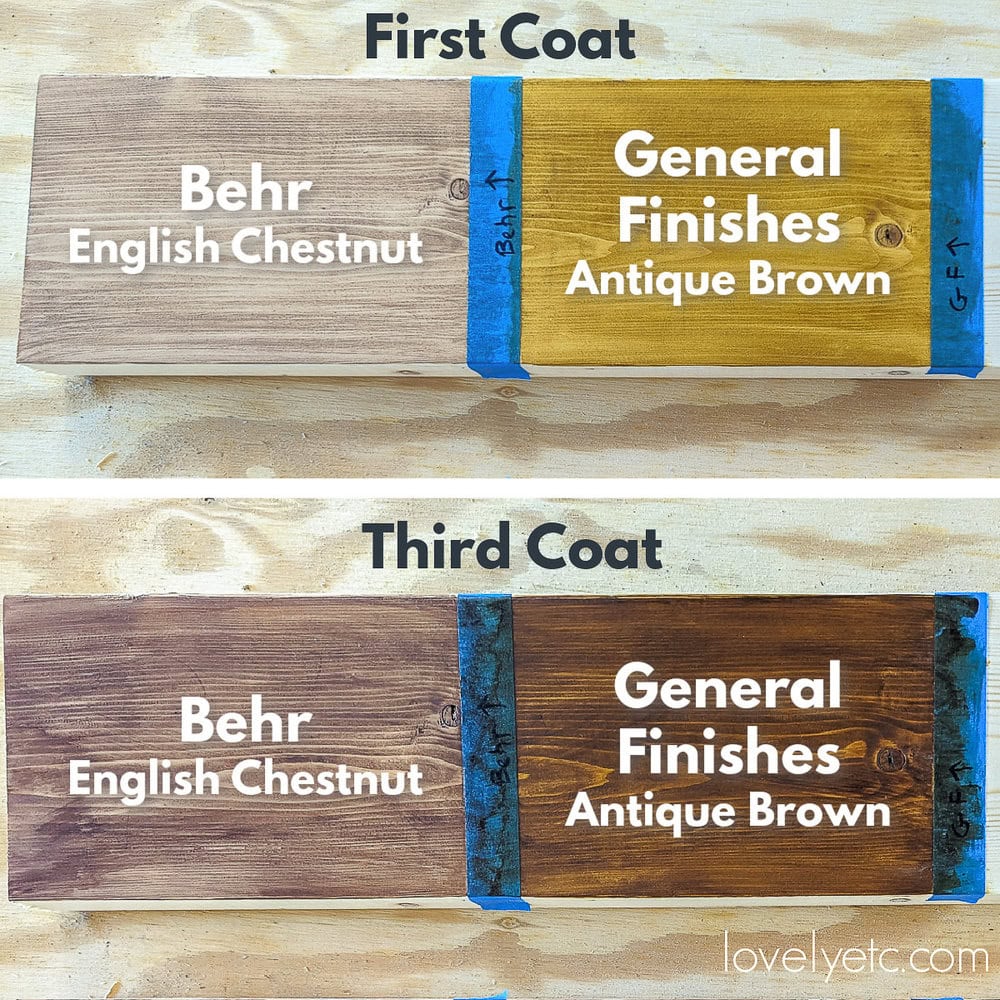
With gel stain, you can also add additional coats to try to deepen the color, but often additional coats of the same stain don’t make a big difference to the color.
Be sure to follow the instructions on your particular stain as far as how long to wait between coats of stain. Water-based stains are usually ready to recoat quite quickly, while other stains need more time.
Keep in mind you may only need one coat of stain on any exposed end grains, even if you do multiple coats on the rest of your project. Even with extra sanding to the end grains, you often won’t need as many coats of stain to get the same color.
Remember to Seal your Wood
Once you’ve finished staining your wood, be sure to seal it to protect the finish.
There are a variety of oil and water-based sealers that you can use to seal stained wood. General Finishes High Performance Topcoat is my favorite sealer for both stained and painted wood.
Of course you can use oil-based sealers over oil-based stains, but you can also use a water-based sealer over a gel stain or an oil-based stain. You will just need to let your stain dry a bit longer before applying the sealer. The instructions on your can of stain should tell you how long you need to wait. It may be as much as 72 hours.
Likewise, you can use an oil-based sealer like polyurethane over a water-based stain, but again check your specific stain for instructions on how long the stain must dry first.
If you are planning to use your piece outdoors, you’ll want to use a good outdoor sealer. I like to use Spar Urethane to seal outdoor wood projects. It gives a durable finish that will protect your wood from moisture as well as UV rays.
And now you’re ready to get out there and stain all your pine projects with confidence. No more splotchy pine finishes for us!
More helpful DIY posts I think you’ll like:
I’d love for you to pin this post on Pinterest!
