Repurposed Vintage Radio: How to Give an Old Radio New Life
This vintage radio upcycle is a gorgeous painted furniture makeover and a repurposed antique all rolled into one epic makeover.
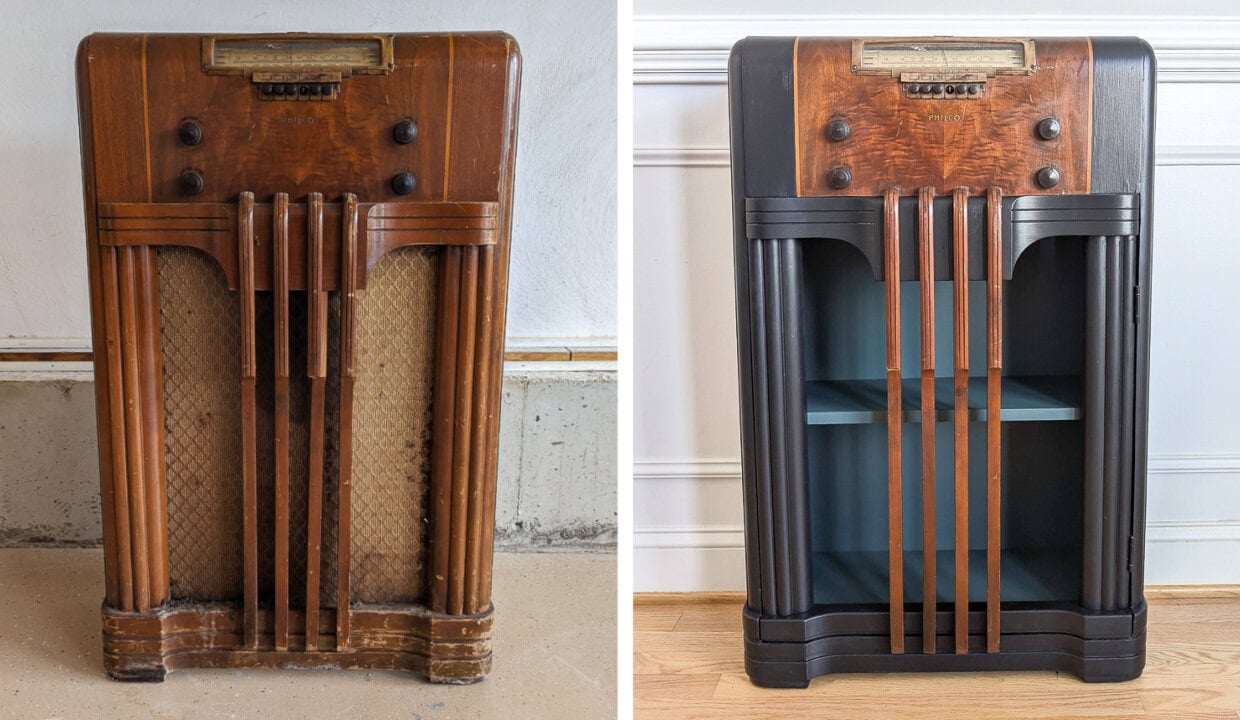
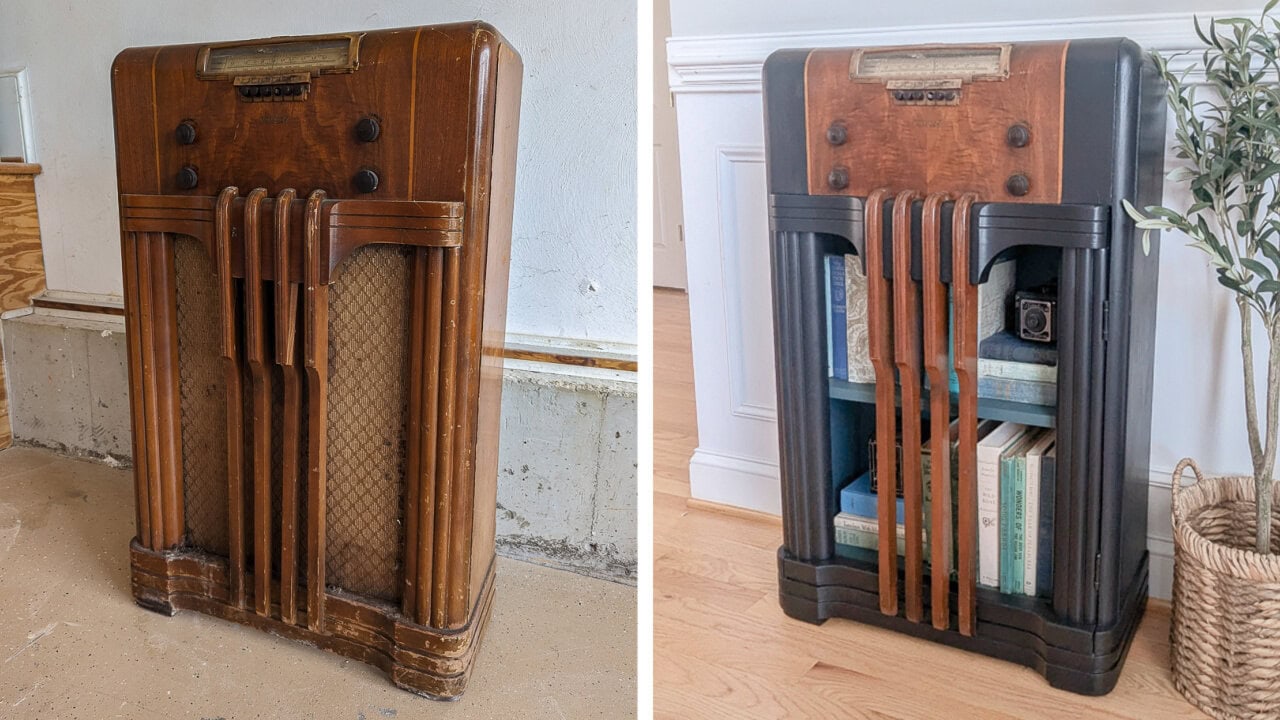
I’ve always loved vintage radios, so when I spotted this old radio at a church yard sale for $5, I snapped it up. It was in pretty bad shape – the wood veneer had a lot of damage, there was a big water ring on the top, and there was a pile of mouse poop on the bottom. But I knew it had major potential.
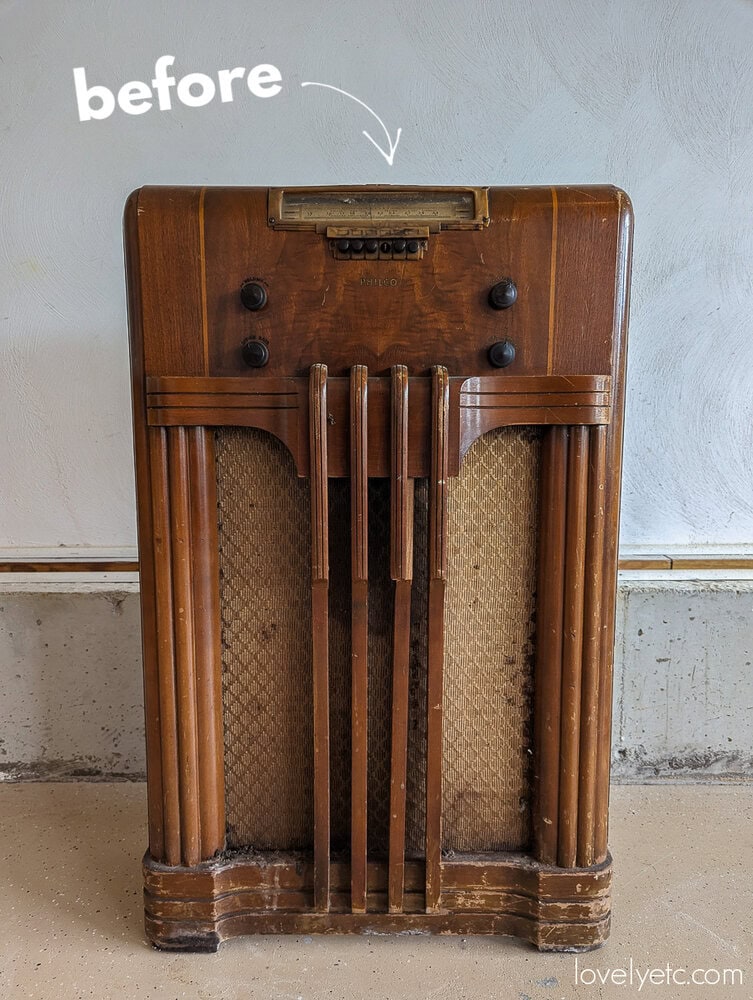
I love old radios. I love the art deco styling and I love the history. I love to think about how important this radio probably was to a family at one point. I know my grandmother has many stories about her family gathering around to listen to the radio after dinner when she was a child.
And while it would be great to restore this radio to it’s former glory, it just isn’t practical. My radio actually still has most of it’s radio guts but it isn’t in working condition and I definitely don’t have the time or knowledge to get it working again.
You may think I should have just left it alone for someone else to restore, but let’s be honest. This radio has been sitting in someone’s garage or basement for decades. It’s more likely to end up in the landfill than actually restored and I definitely wasn’t going to let that happen!
So I got to work. I had two main goals for this project:
- Make it beautiful again.
- Give it a new purpose.
And in the end, I’m really happy with how this radio turned out. I was able to upcycle it into a functional piece of furniture and give it a new look that still honors the original style.
In this post I’m sharing exactly how I updated this radio with a whole new look and purpose. And I also created a Youtube video of this project. If you’d rather watch the video version, you’ll find it at the bottom of the post.
This post contains affiliate links which means if you make a purchase after clicking a link I will earn a small commission but it won’t cost you a penny more. Click here to see my full disclosure policy.
Materials
- Howard’s Restor-a-Finish – this is a great product for restoring wood furniture without having to completely strip and refinish it. I used the color dark walnut because that’s what I already had on hand, but it comes in several colors including neutral
- Howard’s Feed-n-Wax – this is the recommended sealer to use with Howard’s Restor-a-Finish
- Beyond Paint – this is an all-in-one paint, no primer or sealer needed. I used the color licorice (black).
- Non-mortise cabinet hinges
How to Upcycle a Vintage Radio
Cleaning the radio
The first step for pretty much any furniture or upcycling project is a good cleaning. I cleaned the whole thing well using Dawn dish soap mixed with warm water. (And I scraped off all the mouse poop – gross!)
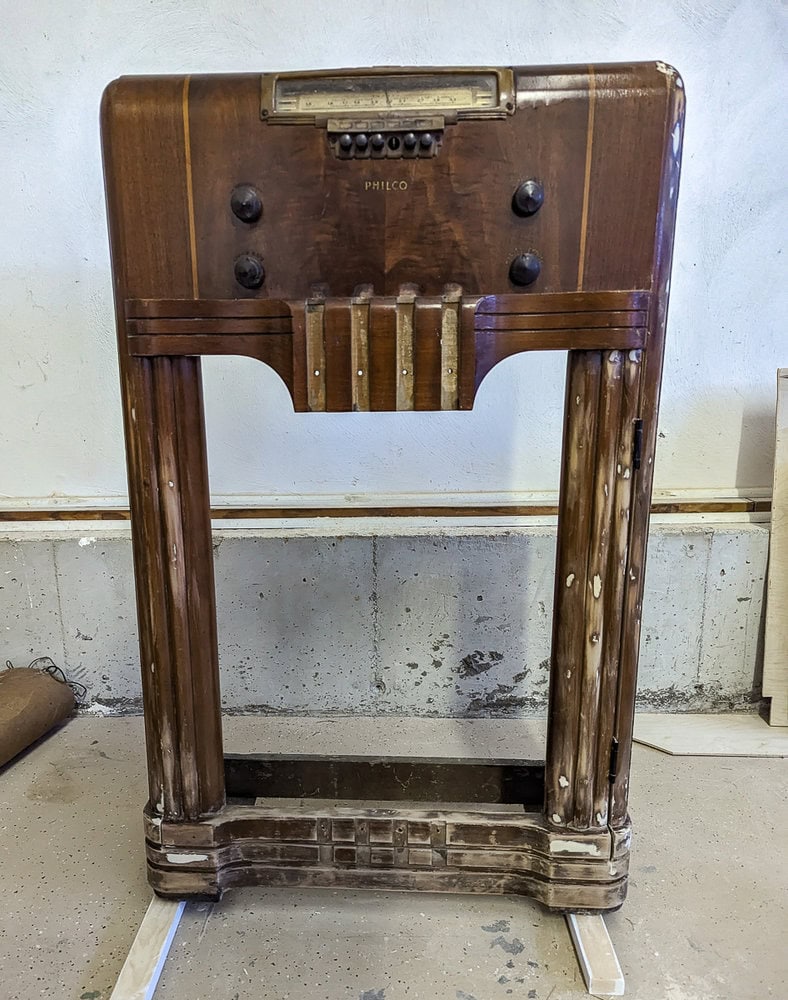
Disassembling the radio
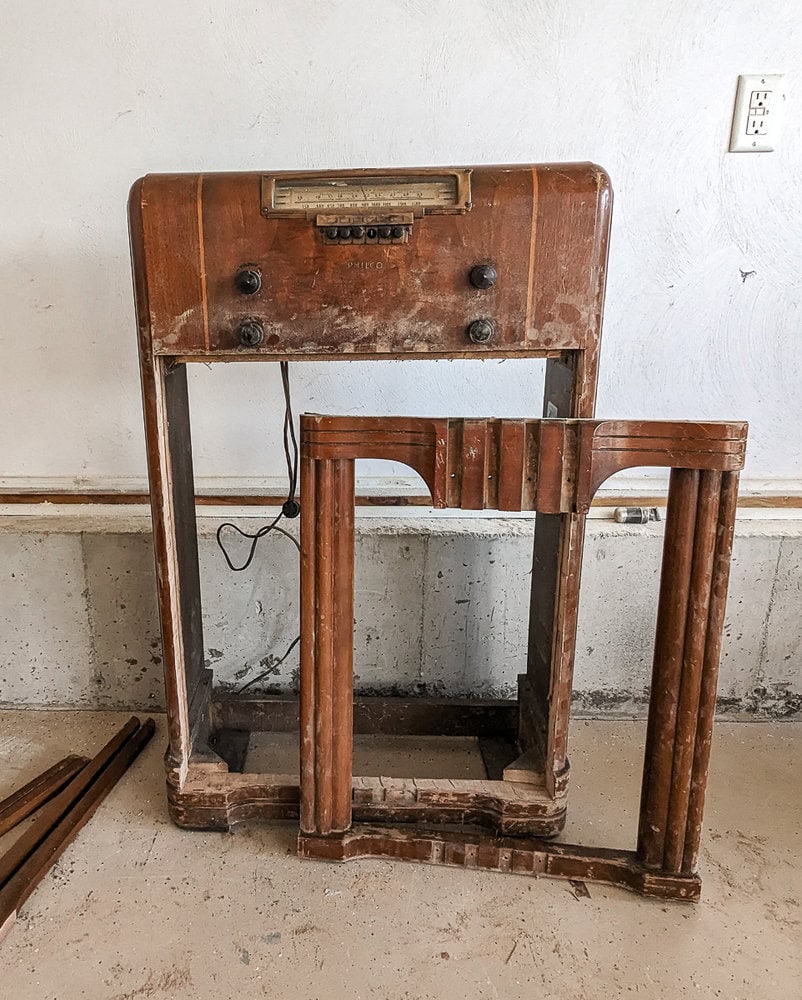
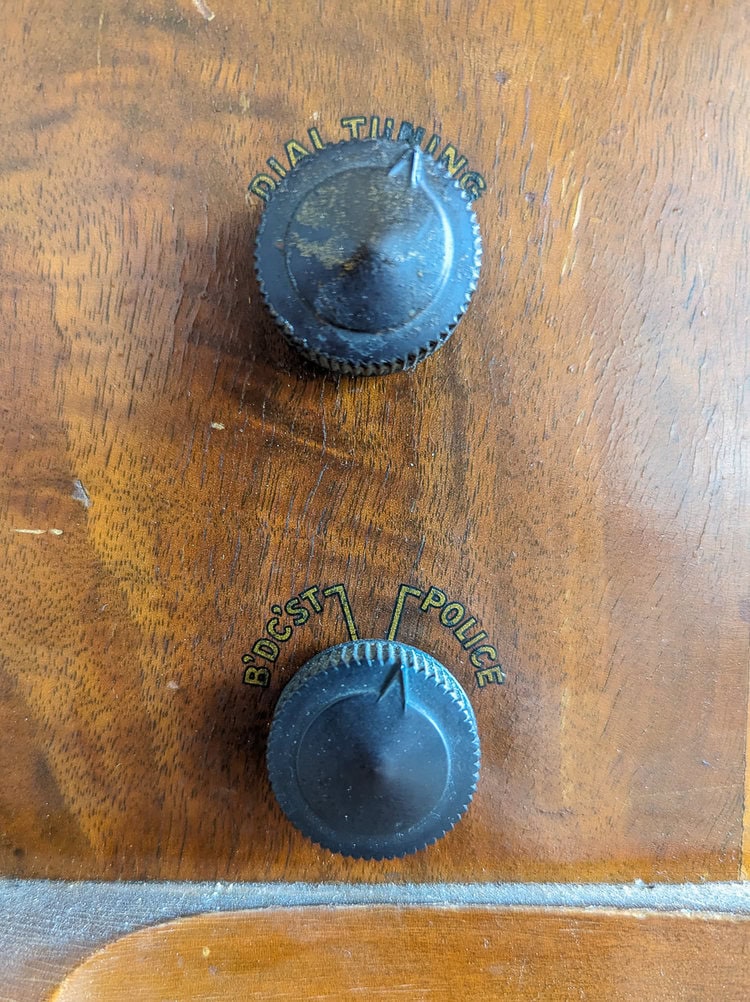
Once everything was clean, it was time for a little demo. I knew I wanted to add functional storage to the bottom of the radio, so I removed the speaker parts and the old fabric.
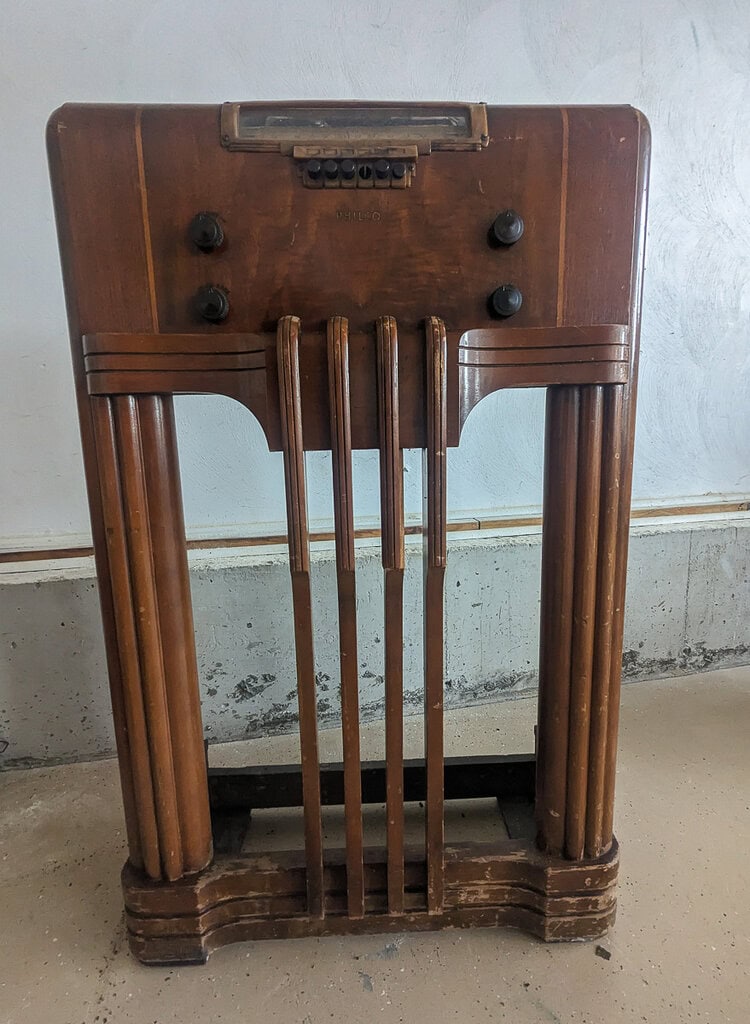
I also removed the wooden details from the front of the radio so I could repair and refinish them separately.
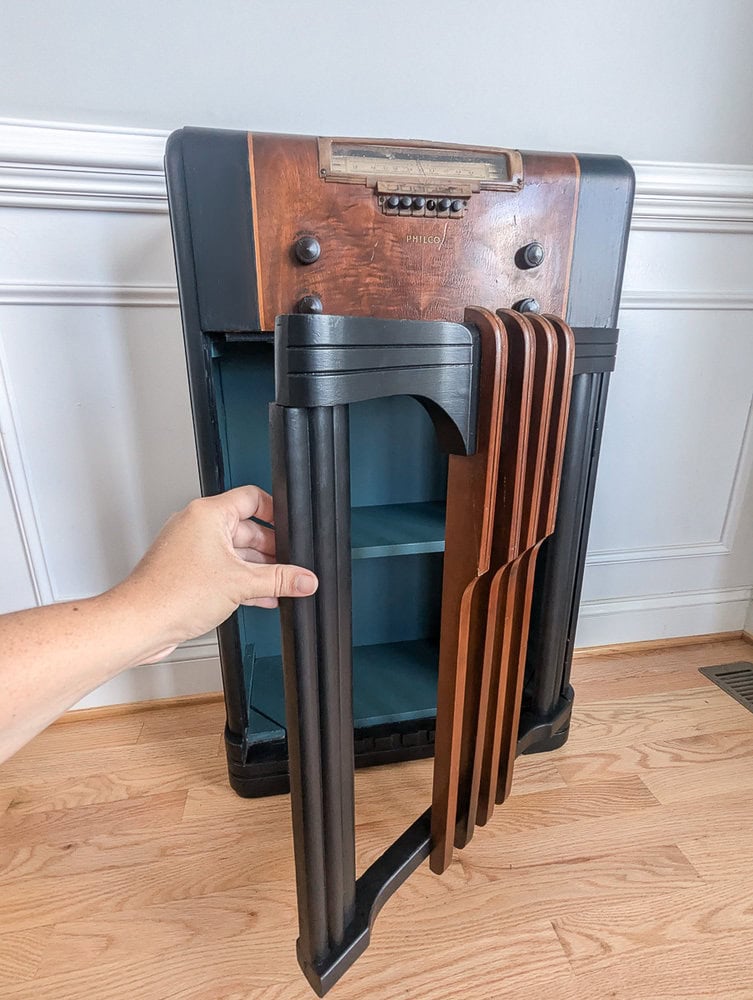
Creating a door
The next step was creating a cabinet door for the bottom of the radio. This isn’t 100% necessary because once the speaker fabric is removed, you could just reach in through the gaps to access the interior. But adding a door makes it a lot easier to actually store things in the radio. Plus, the door is camouflaged and a secret door is always a cool addition.
Before doing any cutting, I figured out where to cut the cabinet door so that it followed the original lines of the radio and could blend in seamlessly. Then I placed painter’s tape along each line where I would be cutting. This helps keep the wood from splintering and chipping as you cut.
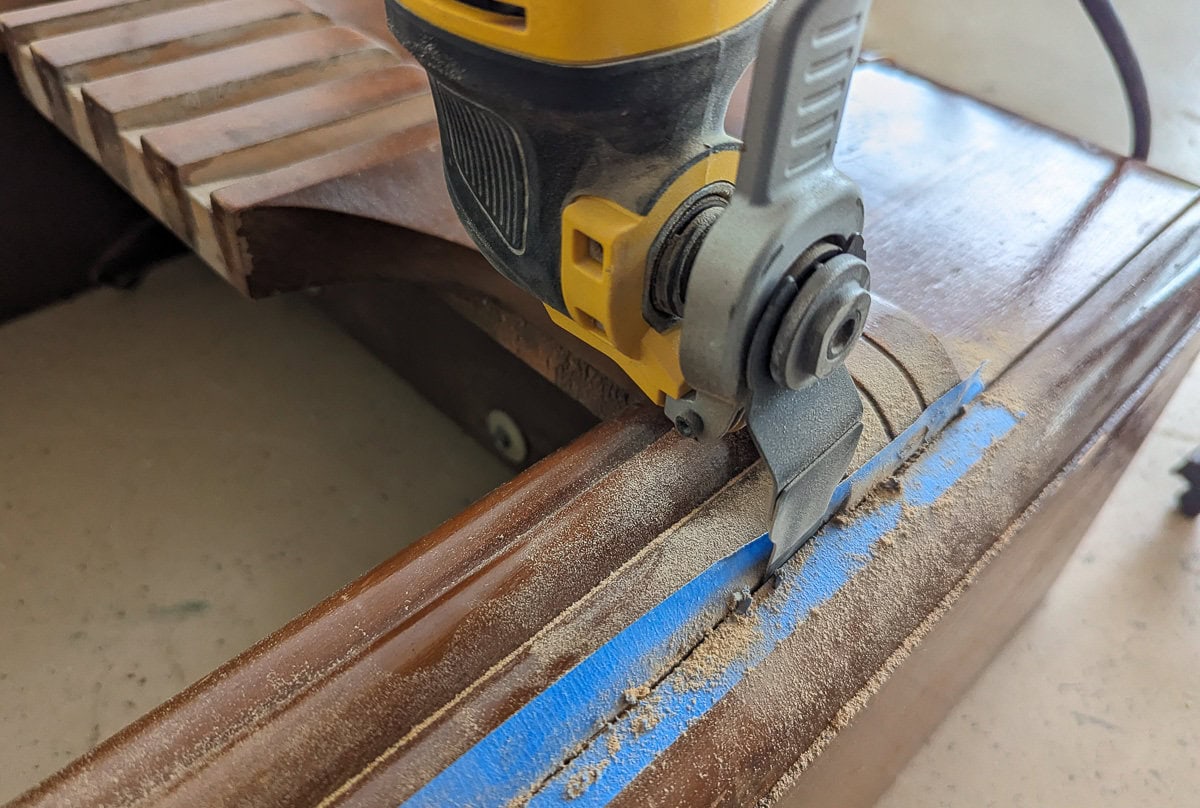
I used an oscillating tool to carefully cut out the outline of the cabinet door. Then I sanded down the cut edges to make everything nice and smooth.
This is the oscillating tool I use. I’ve also used a Dremel multimax in the past which was also great. This is one of those tools that I find myself using all the time for little projects around the house.
Refinishing the radio
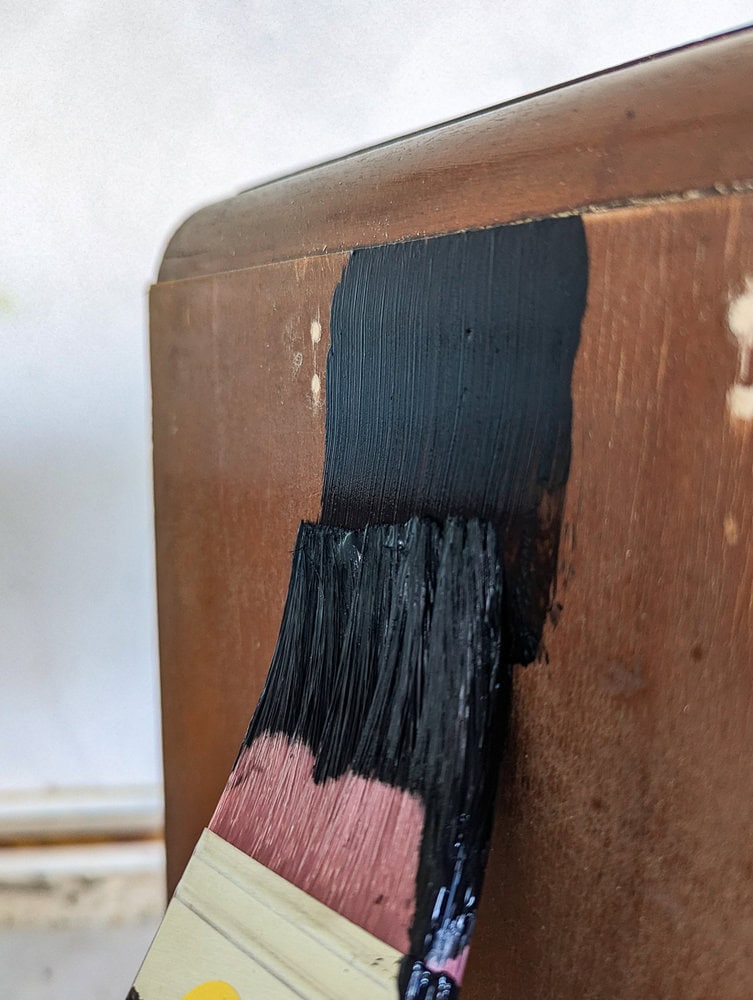
I decided to give my radio a two-toned finish. While I loved the beautiful wood grain at the top of the radio, some of the other wood was in really bad condition. So I decided to refinish just a few areas to highlight the beautiful wood and paint the rest of the radio black.
I was a bit torn about whether I should completely strip the old finish first.
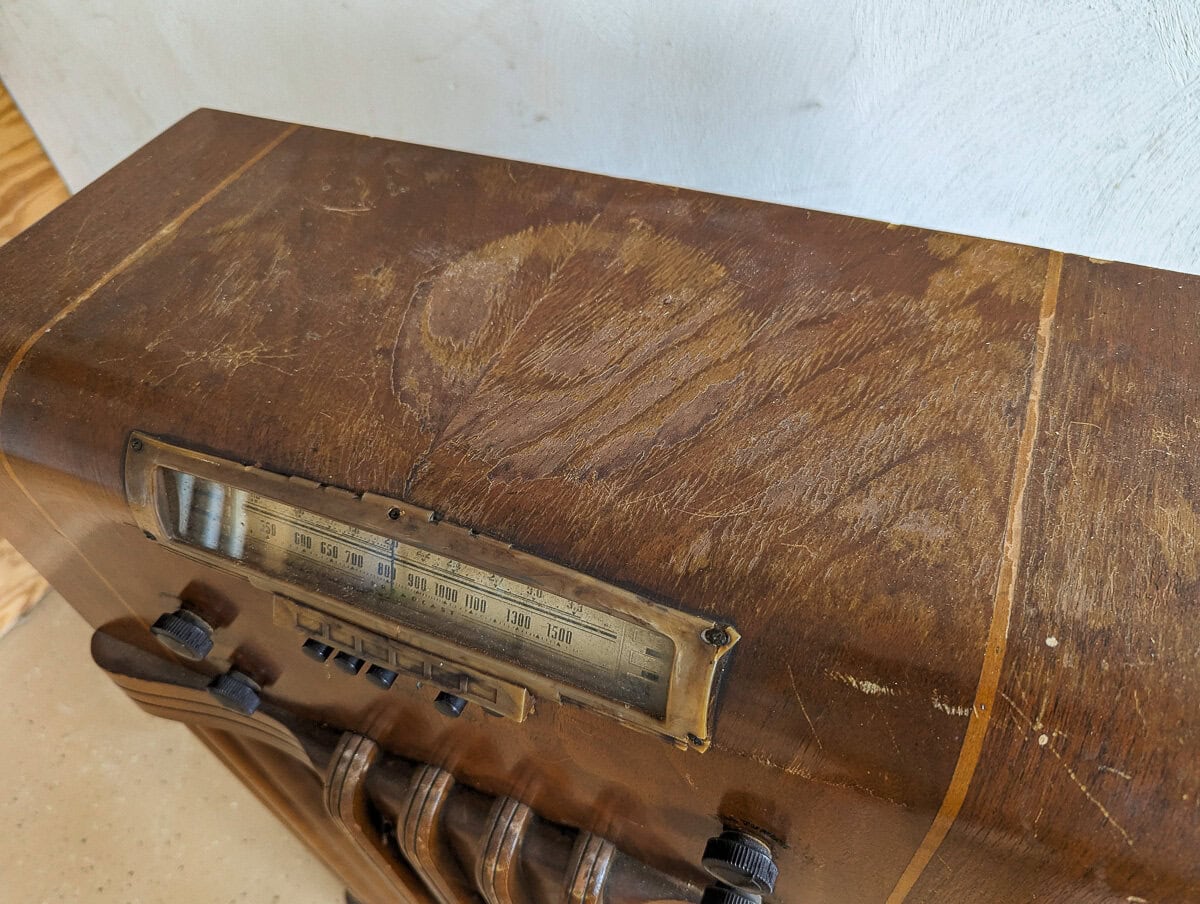
There was some water damage to the top of the radio that really needed to be stripped and refinished. But I didn’t want to strip away the lettering around the dials on the front of the radio.
In the end I compromised by using Howard’s Restor-a-Finish. Restor-a-Finish is a penetrating finish that restores old wood and eliminates minor cracks and damage. You don’t need to strip your furniture before using it; instead you apply it right over the old finish.
I wiped on Howard’s Restor-a-Finish with a clean cloth and then wiped away the excess.
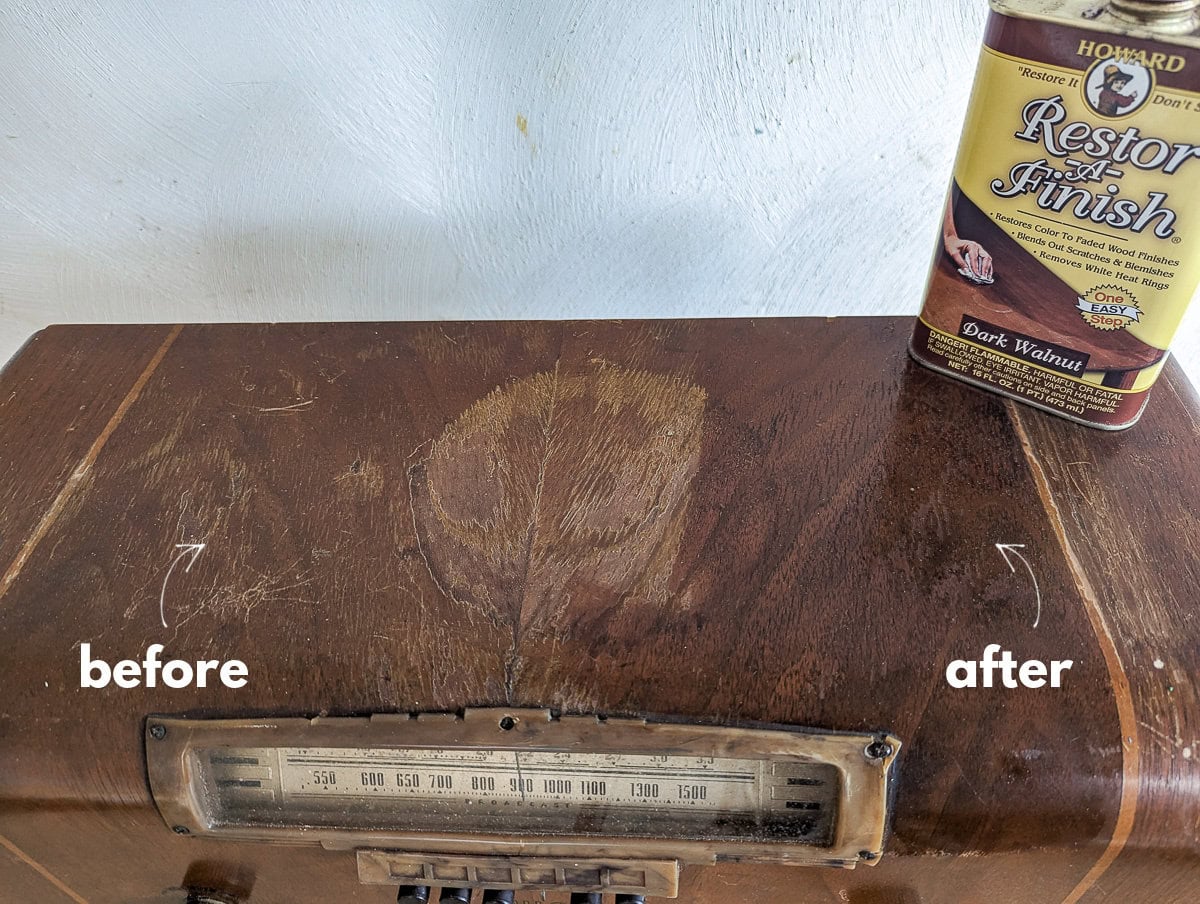
You can see in the photo above what a difference it makes. The product has already been applied to the right side, but not the left. It didn’t completely erase the huge water ring, but it came pretty close. I’ve used this product several times to bring old wood back to life and I’m always amazed at how well it works.
Once the Restor-a-Finish was completely dry, I applied a coat of Howard’s Feed-n-Wax. This wood polish and conditioner is the recommended sealer when using Restor-a-Finish. (Using a polyurethane or polycrylic over Restor-a-Finish is not recommended, so that’s something to keep in mind when decided what projects to use it on.)
Painting the radio
The next step was painting the rest of the radio. First, I used wood filler to fill in all the scratches and dings. Once the wood filler was dry, I sanded it with 220 grit sandpaper.
Once the surface of the radio was prepped, I pulled out my paintbrush.
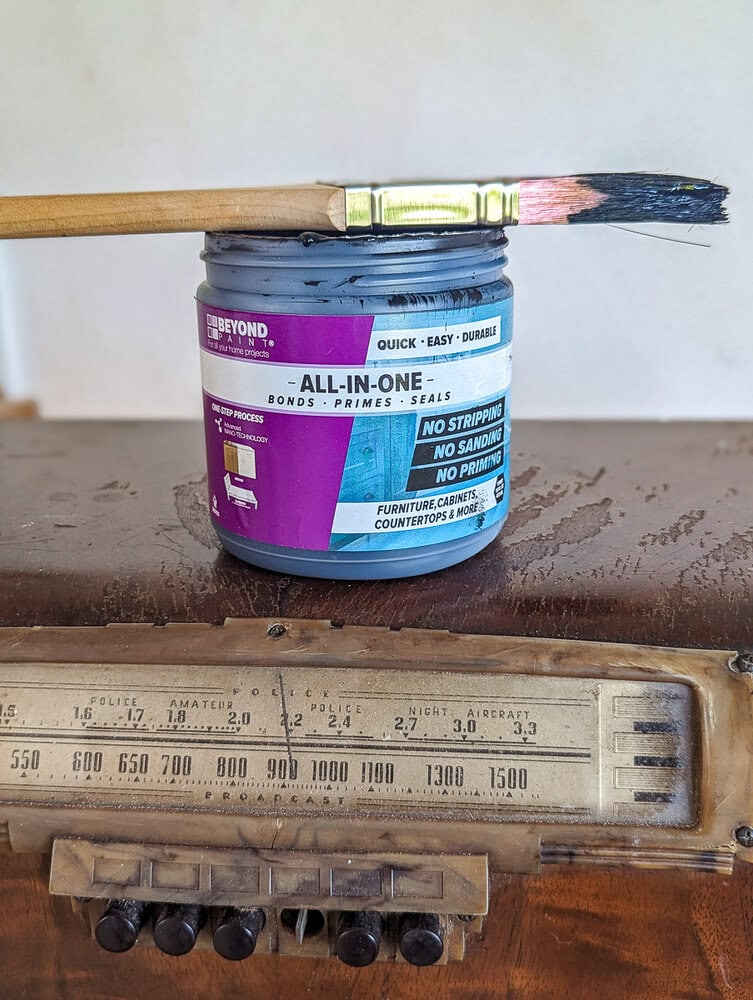
I used Beyond Paint to paint my radio. This is an all-in-one paint that I’ve used for several projects now. I need to do a full review at some point, but overall I really like it. It doesn’t require a separate primer or sealer and the coverage is fantastic.
Repairing and refinishing the wood slats
Most of the wooden slats I removed from the front of the radio were broken, so I glued them back together with wood glue. I used a few clamps to secure them while the glue dried.
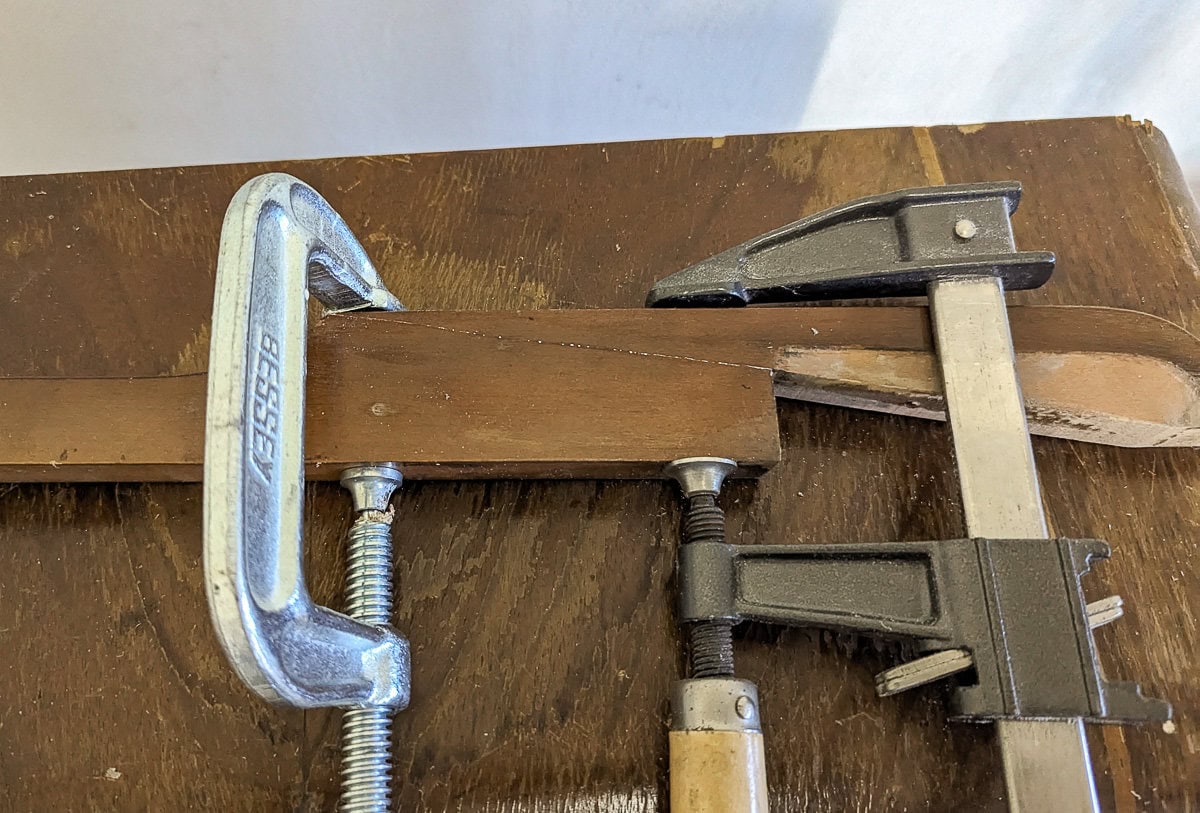
Then I refinished them with Restor-a-Finish and Feed-n-Wax as well.
Adding shelves and a back
Now that everything was starting to look great, it was time to focus on the functionality . I cut shelf supports from scrap wood and cut two shelves from 3/4″ plywood.
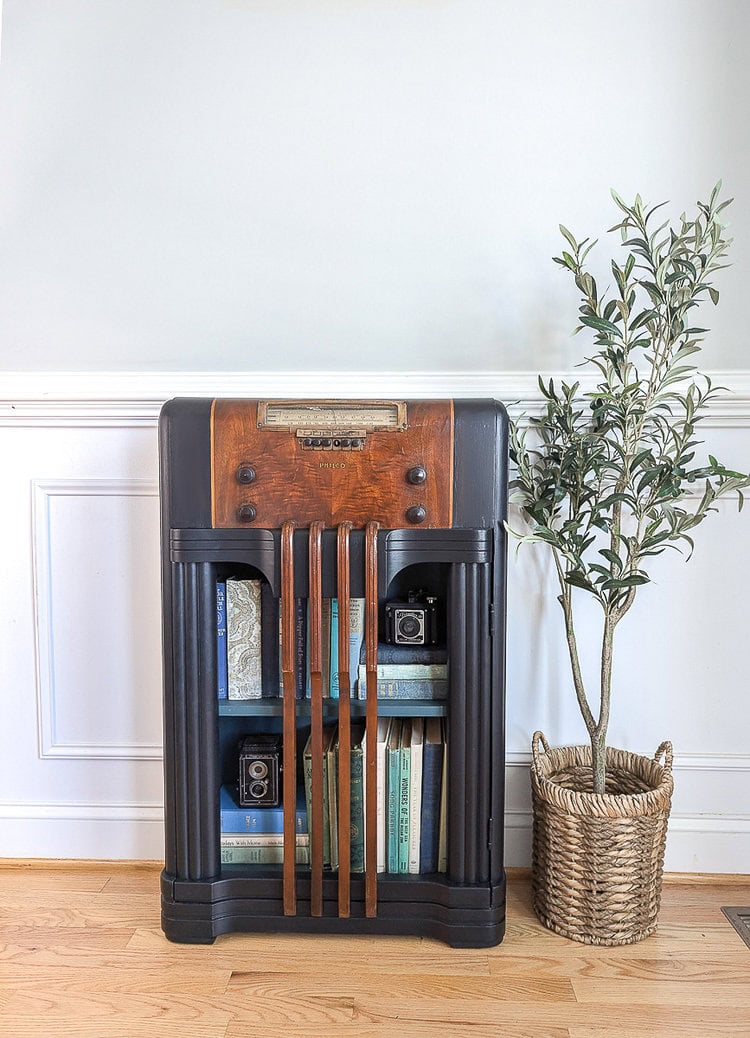
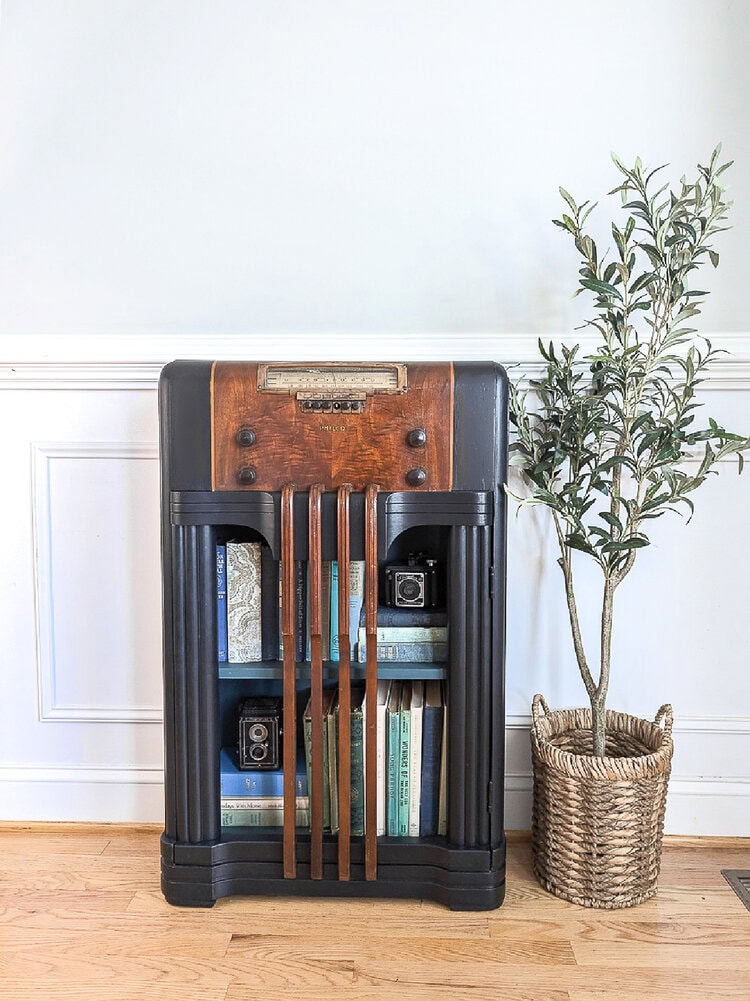
I also cut a back for the radio from 1/4″ plywood since originally, the entire back was open. I made the back a bit shorter than the radio so that it covered the storage area, but left the radio components exposed. Leaving this open doesn’t really serve a purpose since the radio isn’t functional, I just like that you can still see the inside of the radio.
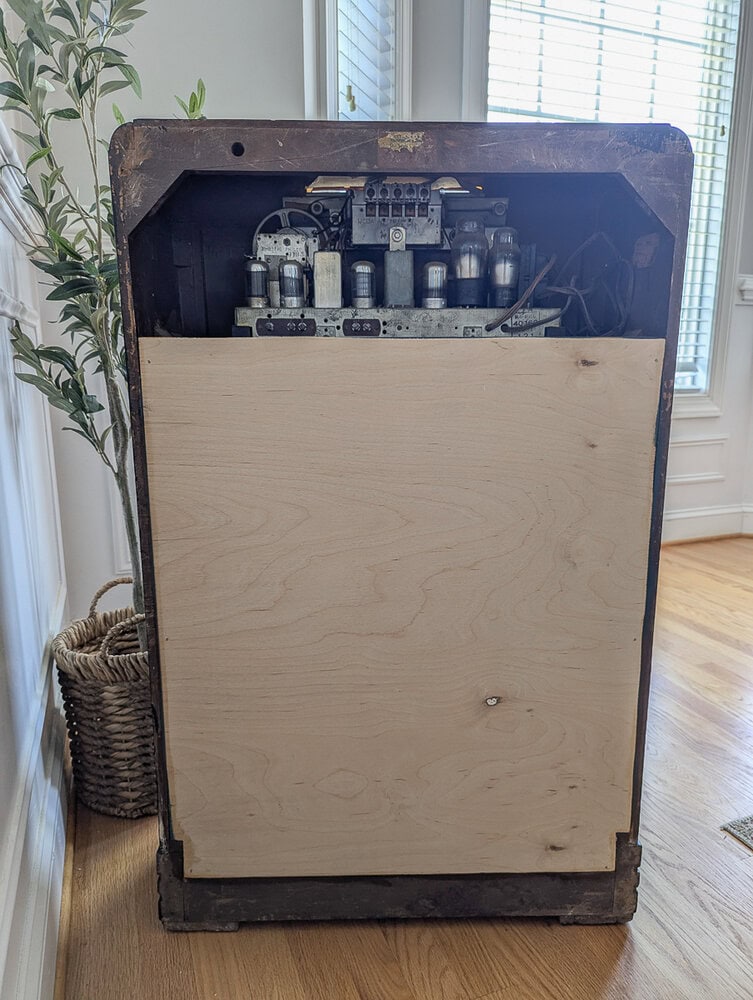
I screwed the shelf supports to the frame of the radio and set the shelves in place. Then I attached the back using finishing nails.
Finally, I painted the whole interior of the cabinet with a custom green paint I made by combing a few paints left over from other projects.
I painted each of the parts before attaching them but you could also do it after if you prefer. Painting first means you don’t have to contort yourself trying to reach all the little nooks and crannies.

Attaching the cabinet door
The last step was to attach the cabinet door and wood slats. I screwed the hinges into place and then screwed the wood slats back on.
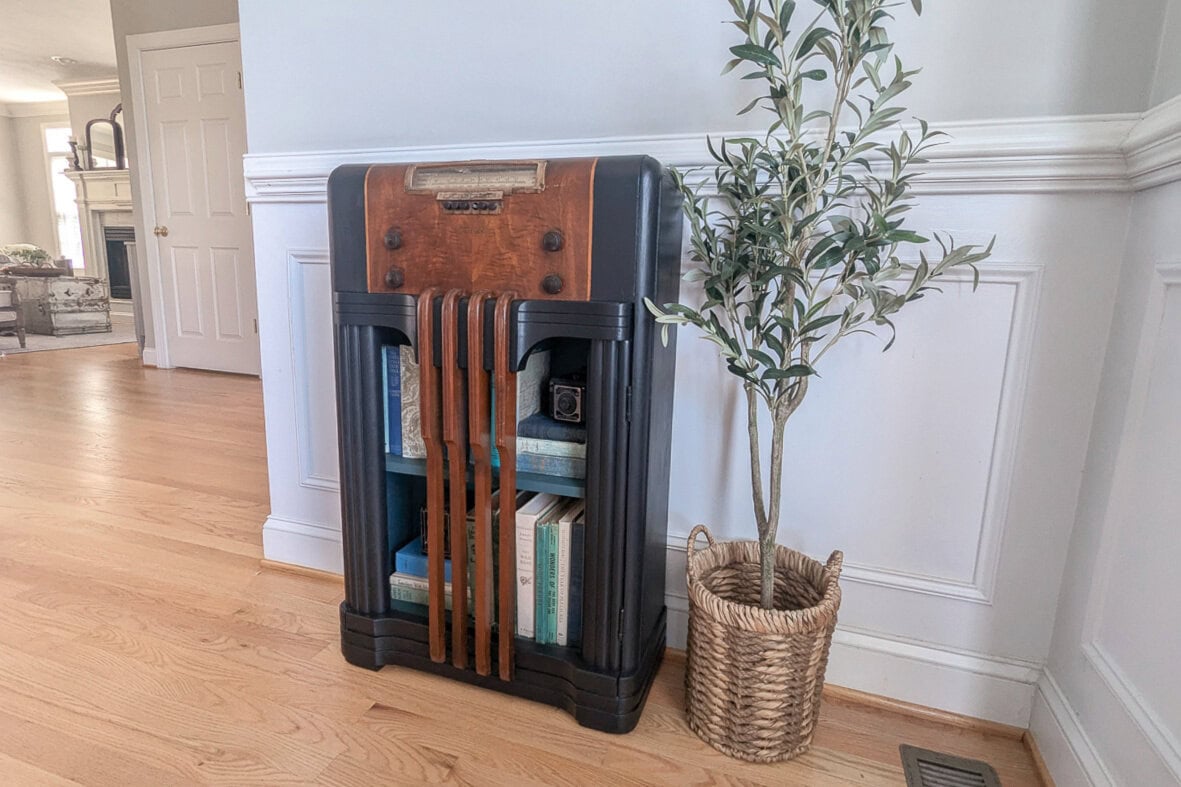
Finished Vintage Radio Makeover
Ready to see how it turned out?
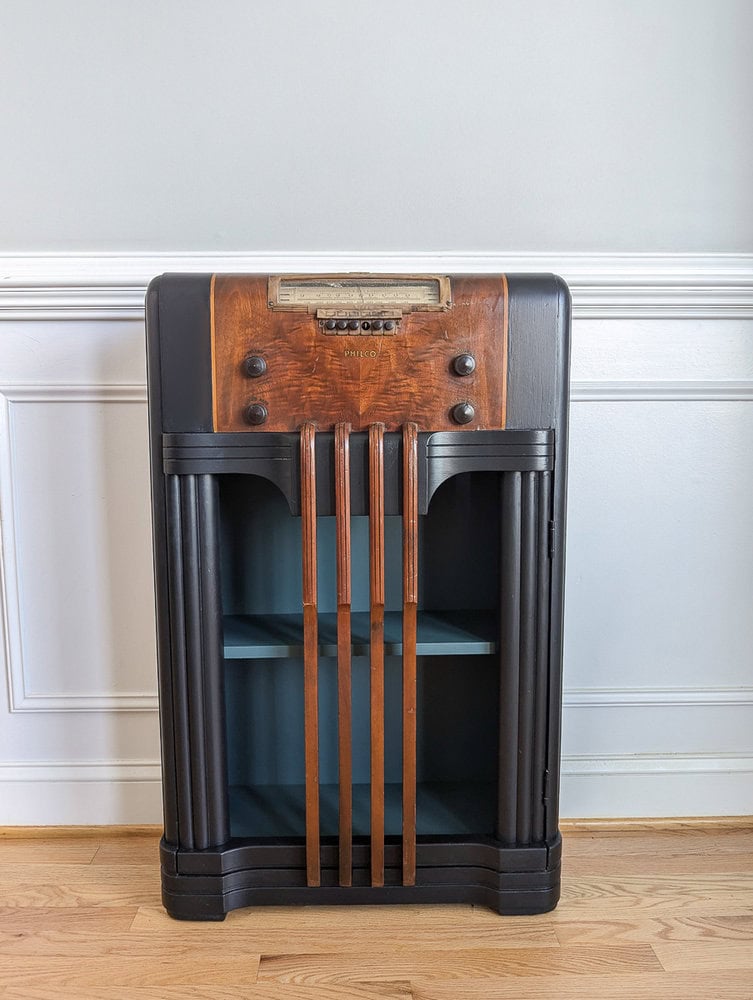
I really love how this radio came together. All the bones of the original radio are still there, but the beautiful parts have been highlighted while the damaged, less beautiful parts have been updated.
The colors I chose are a bit darker than I usually go for. (I may be one of the only people out there that just doesn’t love the color black.) But in this case, I think the darker colors really fit the age and style of the piece.
For now, I’ve decided to use my radio to store books. But I think it would also make an amazing bar or even a cool bedside table.
Here’s one last before and after. (Because they’re just so satisfying!)
No matter how many projects I do, upcycling old junk into something beautiful and useful is always my favorite.
Video
Want to see this makeover in action? Just hit play below to watch my Youtube video showing the whole process.
I’d love for you to subscribe to my Youtube channel!
More Upcycling Ideas
If you are looking for more upcycling ideas, I’ve got you covered! Any of the posts linked below are a great place to start.
- Trash to Treasure: 20 Top Upcycled Projects from Lovely Etc.
- A Totally Unique Upcycled Firewood Holder (this was also made from an antique radio!)
- How to Turn an Antique Dresser into a Bathroom Vanity: What you Really Need to Know
I’d love for you to pin this post on Pinterest!

Very cool makeover! I love how you kept all of the “pretty” parts original! It helps it maintain it’s charm!
Thank you! That’s what I was hoping to do!
I love it. Awesome job!
Thank you!
Wow! I mean, Wow! I love everything you do, but the radio is so awesome!! I love keeping things vintage and this project brought the past and present together. This is terrific! I want to find a vintage radio to make a, not as cool as, gift for my parents.
Thank you so much! I had so much fun with this project.
Oh.MY.GOSH! LOVE IT! I also have an old radio, but never restored it. Not a floor model, just a table top that was in my in-laws closet for years. Also have antique cameras like show on your shelves. Just an awesome job, girl!
Thank you so much!
Swoon!!! Such a lovely transformation
Thank you!
That turned out BEAUTIFUL !! Where did you get the tree? I want one :)
Thank you! The tree is a faux olive tree but it was actually a Christmas gift so sadly I have no idea where it is from.
Such a cool project, and a great result!
Thank you!
It turned out beautiful. Definitely a keeper
Thank you!
Great job . I have upcycled several of these myself and they are fun projects as there are so many possibilities. Your bookcase idea is great!
Thanks!
Hi Carrie,
I found your blog today when I was looking for tree topper ideas, and I’m seriously considering making the star and maybe the tree collar too. My dog loves to bury his toys in it so a collar would be so much neater! I’ve been here looking around for much of the day, and when I saw your radio I just had to comment. It’s a real showstopper! I’ve always thought these old radios were so cool, but had no idea what I’d do with it if I had one. I love your shelf/storage idea, and how it came out! It was pure genius to remove the front and turn it into a door! I’m impressed to the max! And if I ever come across one of these at a good price, I’m going to try to replicate it. Thanks for all the fantastic ideas.
Best,
Sheilla
Thank you so much for taking the time to share your kind comment Sheilla! I’ve always thought vintage floor radios were so beautiful and I was thrilled to find a way to make one more functional for today! Good luck if you decide to make the Christmas tree star and topper!