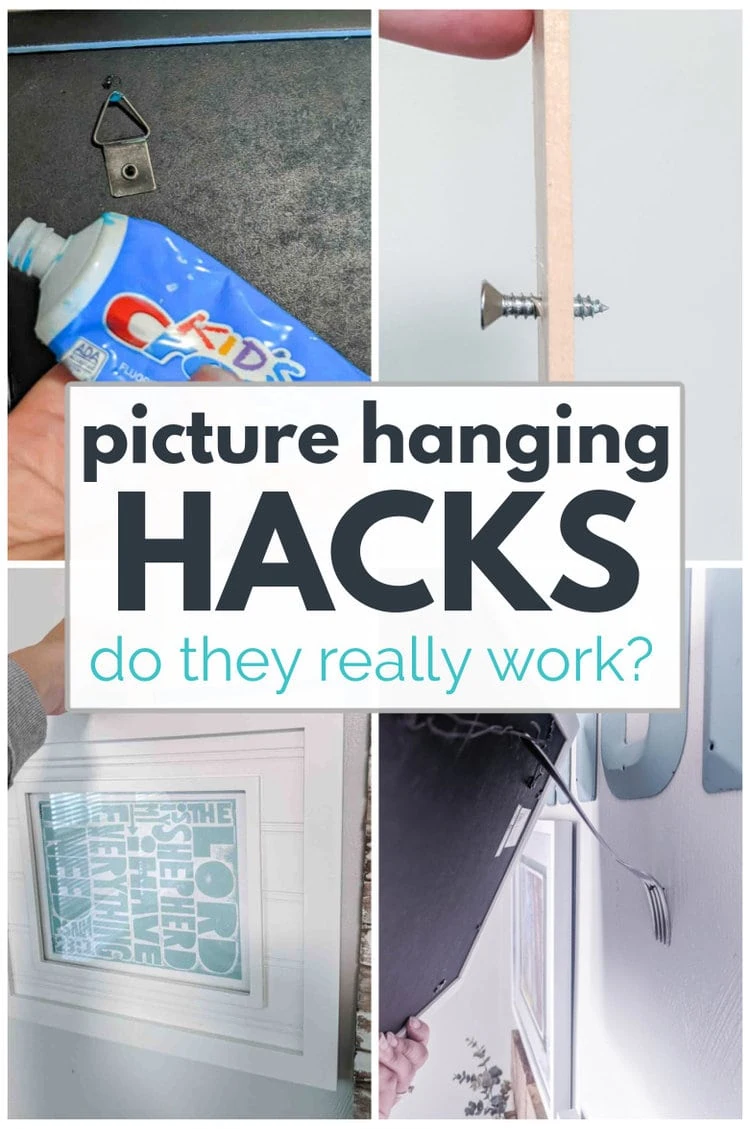
7 Genius Picture Hanging Hacks to Make Hanging Art Easier
I tested seven popular picture hanging hacks to see which ones truly help you hang art on your walls quickly and easily and found some real winners.
Hanging art on the wall is one of those tasks that seems simple enough until you actually try to do it.
Suddenly what seemed like an easy task feels unbelievably complicated. How are you supposed to hold your art up to see if it looks good and mark where to hang it at the same time? How do you get everything spaced just right without putting a dozen holes in the wall? And why does every frame have a different configuration of picture hanger at all different heights?
I’ve seen various picture hanging hacks floating around online over the past few years. So when it was time to hang a new gallery wall in my office, I decided it was the perfect time to test them and see if any of them really work.
I tested seven different picture hanging hacks, including some that I use all the time and some that are new to me, to see which truly works the best.
These hacks are supposed to make it easier to arrange gallery walls, mark the perfect spot for your art, figure out where the nail needs to be, and keep your pictures hanging straight. Some of them seem a little kooky – like the toothpaste and fork hacks – while others are more mainstream.
Keep reading to find out how to use each hack along with the lowdown on whether it’s really as great as it claims and what types of art it does and does not work for.
This post contains affiliate links which means if you make a purchase after clicking a link I will earn a small commission but it won’t cost you a penny more. Click here to see my full disclosure policy.
Hacks to help arrange gallery walls
These first two hacks are all about helping turn that stack of photos and art in the corner into a cohesive arrangement on the wall.
These hacks can work for full gallery walls as well as arrangements of just a few pieces of art.
If you’ve ever tried to create a gallery wall without any planning, you know it usually doesn’t turn out well. It’s just too hard to keep track of which art piece looks best where while also making sure the arrangement stays balanced and evenly spaced.
These hacks help simplify that planning so you can (hopefully) create gorgeous gallery walls and art arrangements on the first try.
Tip: When hanging a gallery wall, it looks best if you keep hang the individual pieces 1.5″-3″ apart and keep the spacing consistent throughout.
Hack 1: Use paper templates to plan a gallery wall
When you are hanging one piece of art on the wall, it isn’t a big deal to hold it up in a few different spots to see where it looks best.
But when you are trying to hang an arrangement of several pieces of art or an entire gallery wall, just holding art up to the wall doesn’t work so well.
One of the biggest keys to a great looking gallery wall is making sure the individual pieces are evenly spaced and this hack makes that much, much easier.
What you need
- a large roll of paper like leftover wrapping paper or kraft paper
- painter’s tape
How you do it
Gather the pieces of art you are considering using in your gallery wall and use your roll of paper to make a paper template for each piece. Just trace each frame or piece of art onto the paper and cut it out.
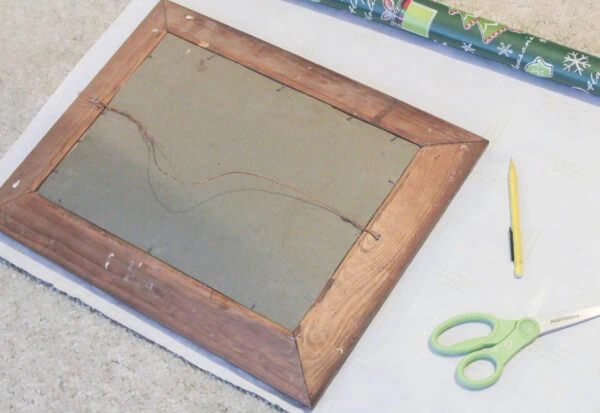
Once you’ve cut out your paper outline, you can save yourself a lot of work by marking where the nails need to be to hang each piece of art.
Just lay the paper template on the back of the frame and mark where the picture hangers are. (If your picture is hung using wire, this may not work quite as well).

Then you can tape your paper templates to the wall, rearranging them until it looks just the way you want it.
Then add your nails in the correct spots, remove the paper templates and hang your art.
Does it Work?
I’ve actually used this hack several times to hang gallery walls because it works so well.
It does take a bit of extra time upfront, but it makes hanging a beautiful gallery wall so much easier.
On the other hand, if you are hanging a single piece of art or an arrangement of just a few pieces, the extra time probably isn’t worth it.
Rating
10/10 – This one takes a little time, but the results are worth it.
Hack 2: Use painter’s tape to figure out art placement
If you don’t want to take the time to make full paper templates for your art, you can also just use painter’s tape to help place everything perfectly.
Painter’s tape is great because it is cheap, easy to use, and easy to remove without damaging anything.
What you need
How you do it
When using painter’s tape to lay out a gallery wall, I always start by laying out all of my pieces on the floor and trying out different arrangements until it looks good.
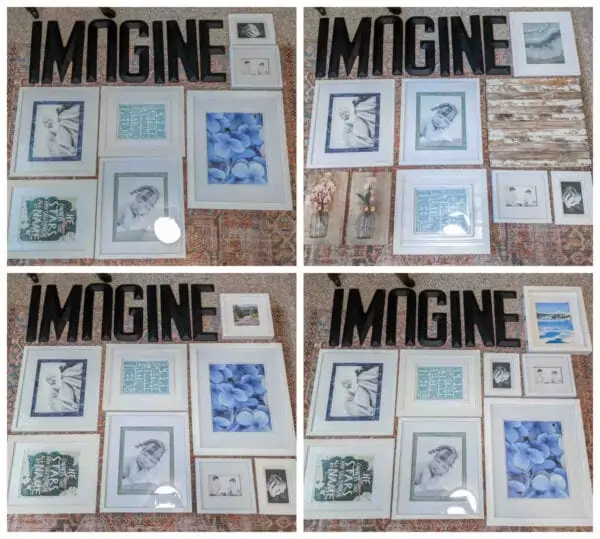
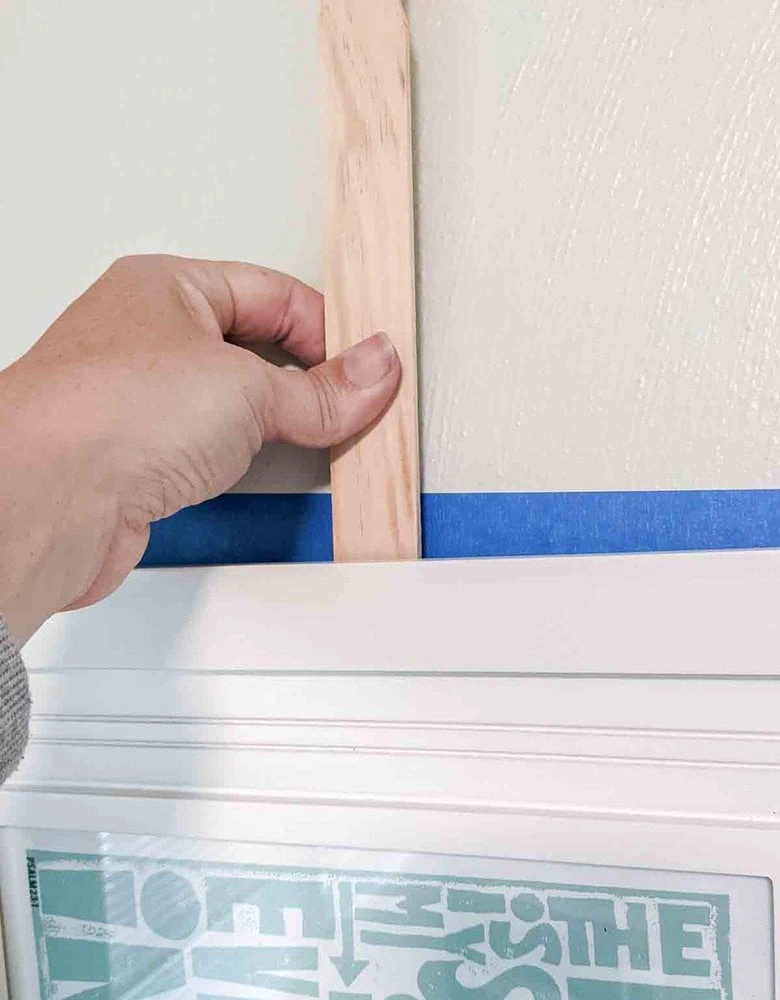
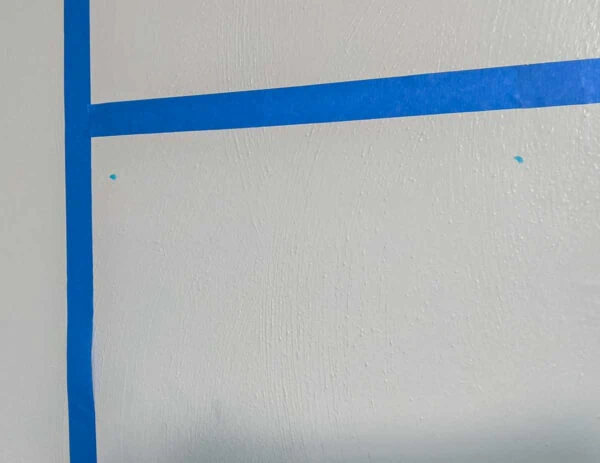
When you are ready to start hanging things, you can use painter’s tape to outline the area for your art arrangement to make sure the shape and proportion works well.
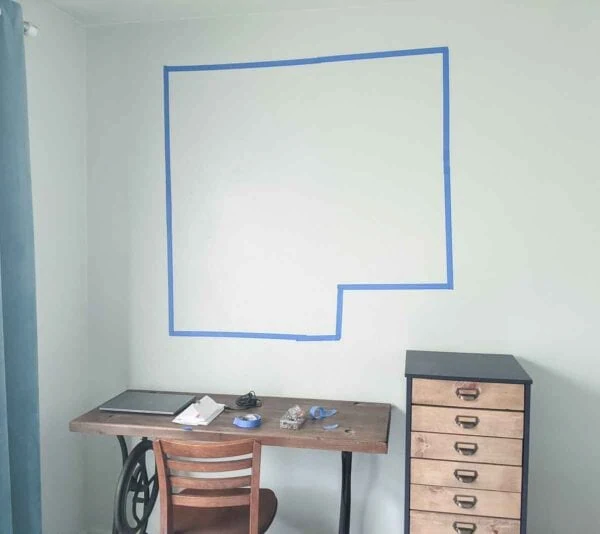
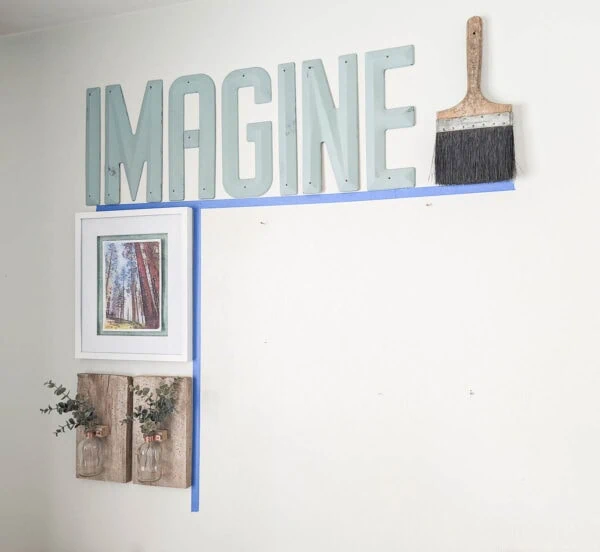
I also use painter’s tape when I am hanging several art pieces next to each other to keep everything straight and even.
I will add a strip of painter’s tape to the wall, using a level to make sure it is straight. Then I can align each of my frames to the line of tape to make sure everything lines up well.
Does it Work?
Painter’s tape isn’t quite as handy for hanging gallery walls. It isn’t as precise as making paper templates and you can’t easily figure out a whole new arrangement the way you can with paper.
But painter’s tape is much, much faster and if you already have a good idea of how you want your gallery wall laid out, it works well to keep everything in a nice, tight arrangement.
Painter’s tape also works great when you are just hanging a few things but want to make sure they are aligned correctly and level.
Rating
9/10 This makes hanging several pieces of art next to one another so much easier.
Hacks to help put the nail in the perfect spot
One of the trickiest parts of hanging pictures is figuring out where exactly on the wall the nail needs to go.
We usually start by holding our art against the wall to find the best spot to hang it.
But then once you’ve figured out the perfect placement for your picture – it’s at just the right height, centered over your furniture, exactly how you want it – how in the world are you supposed to know where the nail needs to be?
The picture hangers on every picture are different. Sometimes there’s one hanger in the center, sometimes there are two evenly spaced across the back. Sometimes the nail needs to be one inch from the top of the picture frame, sometimes it’s three inches lower.
There is no standard placement which can make it very tricky to figure out just where the nail needs to go.
These next three hacks are all about making it easier to place your nail in exactly the right spot.
Because yes, it isn’t the end of the world if you mess up and have to put a second nail hole in your wall, but nobody wants swiss cheese walls. So why not make it easy to get it right the first time.
*Note – Sometimes it’s best to hang art using nails and sometimes for heavier pieces, you need to use a screw with a wall anchor. For the sake of simplicity, I will be referring to nails, but all of the info below can apply to screws as well.
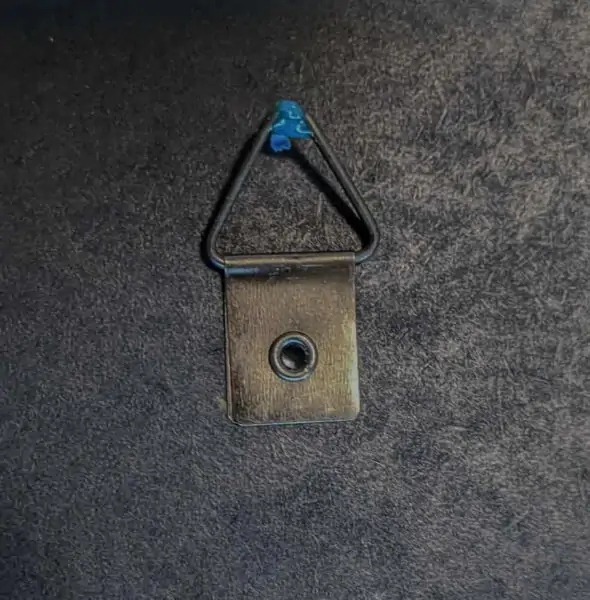
Hack 3: Make a picture hanging tool using a ruler and a screw
I’ve seen a few different variations of this picture hanging hack around the web.
The basic idea is you hammer a nail through a scrap of wood to create a tool for hanging pictures.
What you need
- a ruler, paint stick, or thin scrap of wood
- a small screw
- a drill
How you do it
Start with a long scrap of sturdy wood – two easy options are to use a wooden ruler or a paint stirring stick. I had tons of paint sticks on hand, so that is what I used.
All of the instructions I saw said to nail a small nail straight through the scrap of wood a couple of inches from one end. This is where I ran into trouble.
The nail needs to be perfectly straight for this trick to work, but my nail was moving all over the place and making all kinds of crazy angles. This makes the tool basically unusable.
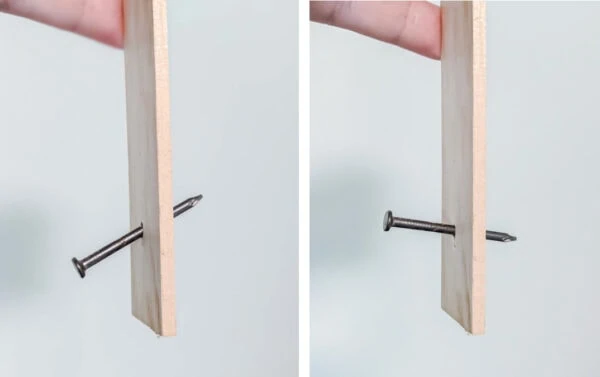
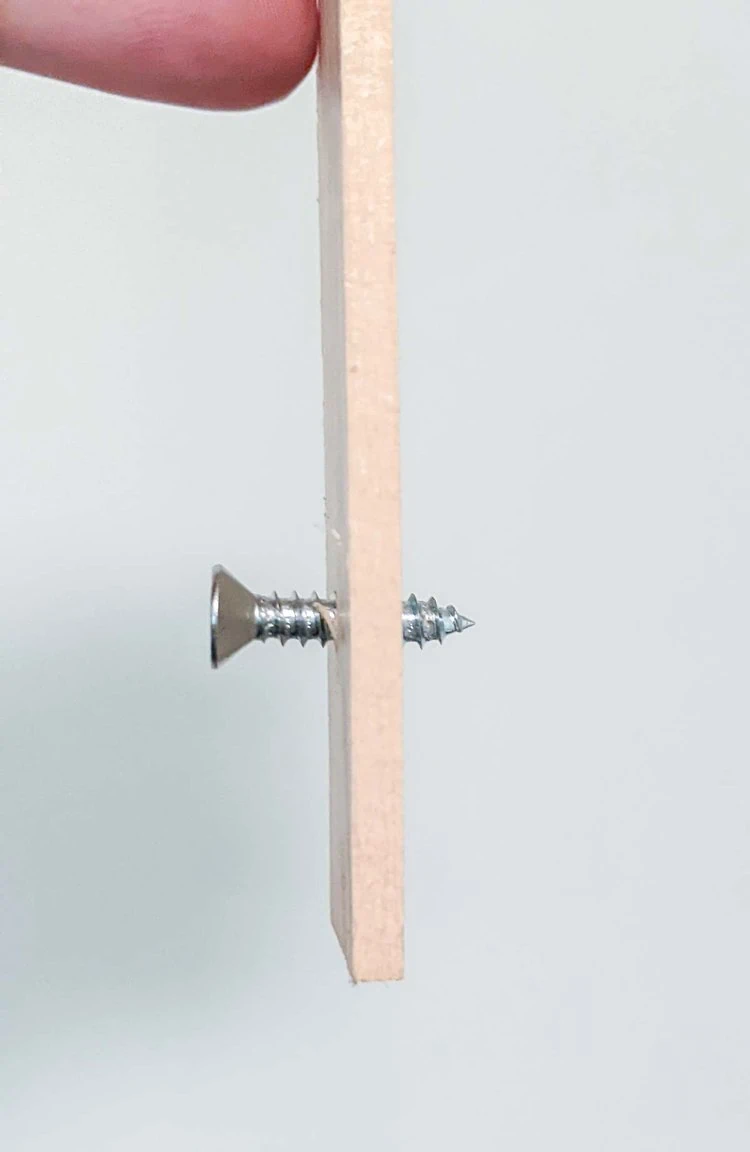
So I modified the instructions a bit. I got rid of the nail and screwed a small screw through the wood instead.
Soo much better. The screw has no chances of wiggling around and messing things up.
Once you’ve created your tool, using it is easy.
You simply hang your art on the end of the screw and hold it up by the wooden handle.
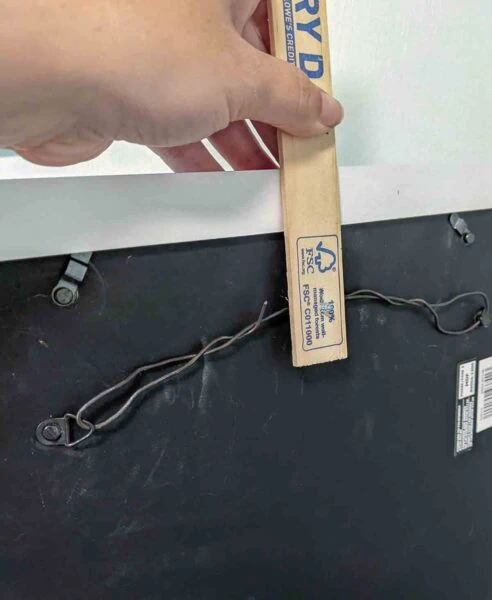
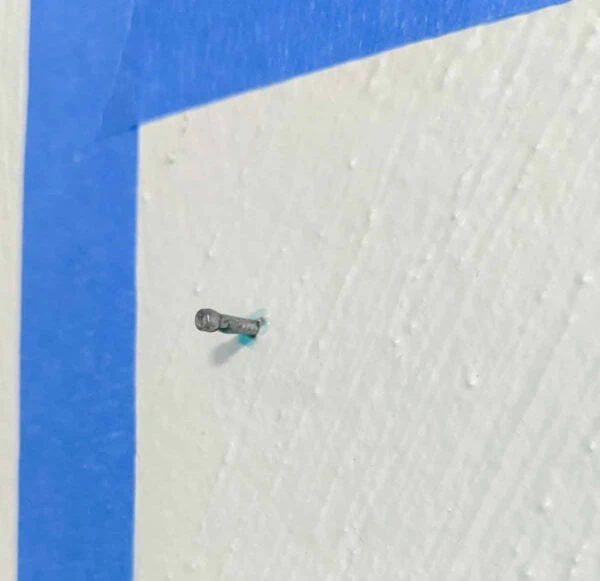
Position your piece of art exactly where you want it and then press it firmly against the wall near where the screw is located.
The tip of the screw will leave a small indentation in the wall exactly where you need to add a nail for hanging your picture.
Does it Work?
With a minor adjustment of using a screw rather than a nail, this one works really well!
But there are some limitations.
This hack works best for pictures with one central picture hanger or a picture wire that hangs over just one nail. It isn’t great for art with two picture hangers.
It also isn’t great for very heavy or large pieces of art since the wood with the screw through it is supporting all of the weight. But if you have another person helping, you could make it work for larger pieces of art if one person holds the stick with the screw in place while the other person holds up the actual art.
It’s also tricky to use this hack when placing several pieces of art in a gallery wall because if there is anything already hanging above where you are working, you won’t be able to move the stick/ruler into place.
Rating
7/10 – It works great for pictures with one picture hanger or a wire, but it’s hard to use for some types of art.
Hack 4: Use painter’s tape to hang art with two picture hangers
Finding the exact spot the nail needs to go to hang a picture is always tricky.
But when your frame has two picture hangers across the back instead of one, it is so much harder.
Not only do you have to figure out where each nail needs to go, you also have the added task of making sure the two nails are level.
This hack is meant to simplify this entire process.
What you need
How you do it
Start by tearing off a piece of painter’s tape about the same length as your picture.
Stick the tape across the back of the picture frame over both picture hangers.
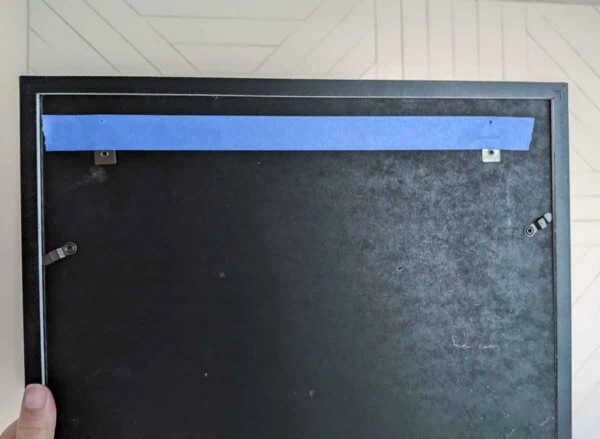
Use a nail or pencil to poke a small hole in the tape where each nail needs to be. You can also just mark this spot with a pencil if you prefer.
Use a tape measure to measure the distance from the top of your picture to the picture hanger.
Then remove the tape and stick it to the wall where you want to hang your picture.
When you place the tape on the wall, to make sure it is at the right height, remember to account for the distance from the top of the frame to where the nails go.
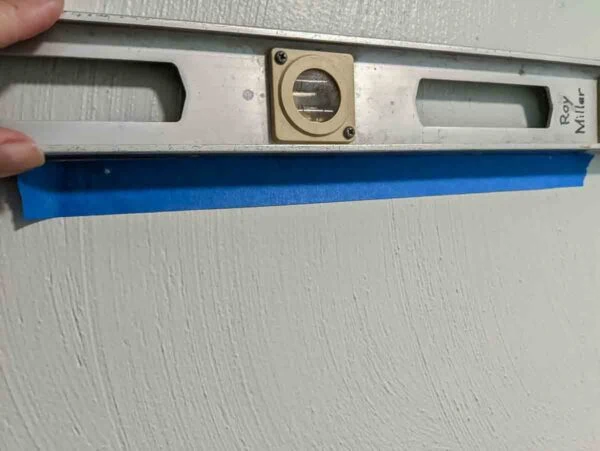
Use a level to make sure the tape is straight. And then add a nail at each marked spot.

Remove the tape and hang your picture.
Does it Work?
This one started off strong. I love any hack that involves painter’s tape and this is a great way to make sure your two nail holes are perfectly spaced and level.
But this hack falls apart when it comes to getting your art perfectly placed on the wall. Figuring out exactly where on the wall to put the painter’s tape so that your picture is at just the right height and is centered correctly is complicated.
To get it just right, you need to mark where you want the top of your frame, measure the distance from there to the picture hangers, and then place the tape exactly there.
This hack sounded easy, but when I actually tried to do it, it was a lot more complicated than I expected. If you are hanging a single piece of art and it really isn’t going to matter if it ends up a few inches higher or lower than you imagined, this works just fine. But if you are hanging a gallery wall or an arrangement of art where things really need to be perfectly placed, it’s not so great.
Rating
5/10 – Too complicated. Especially when you can accomplish the same thing using the next hack with a lot fewer steps.
Hack 5: Use toothpaste to mark exactly where the nails go
This is a super simple hack for marking exactly where your nail needs to go in the wall.
What you need
- toothpaste
How you do it
Just dab a tiny dot of toothpaste onto the back of your frame in the exact spot where a nail would be.
Then line up your frame on the wall where you want to hang it and press it firmly against the wall. The toothpaste will transfer to the wall in just the right spot for your nail.
Hammer your nail in place and wipe the toothpaste off the back of your art and your wall.
Does it Work?
I’ll admit I thought this hack was a bit strange at first. Who wants toothpaste all over their wall?
But it actually worked much better than the other hacks for finding the perfect spot for the nail.
It’s super quick and easy to do. It works well with any size art and any type of picture hanger.
It works whether your art has one picture hanger or two and it works great for hanging art in a gallery wall.
This hack works for most types of picture hangers including sawtooth hangers, keyhole hangers, and D-rings, but it does not work for frames hung with wires.
If you are using the toothpaste hack on a picture with two picture hangers, be sure to also use a level as you are holding your frame against the wall to keep things nice and straight.
Rating
10/10 – My favorite of all the hacks! I’ll definitely be using this trick to hang most of my art from here on out.
Hacks for hanging your art
Once you have your nails in place, these final two hacks will help you actually hang your art on your wall.
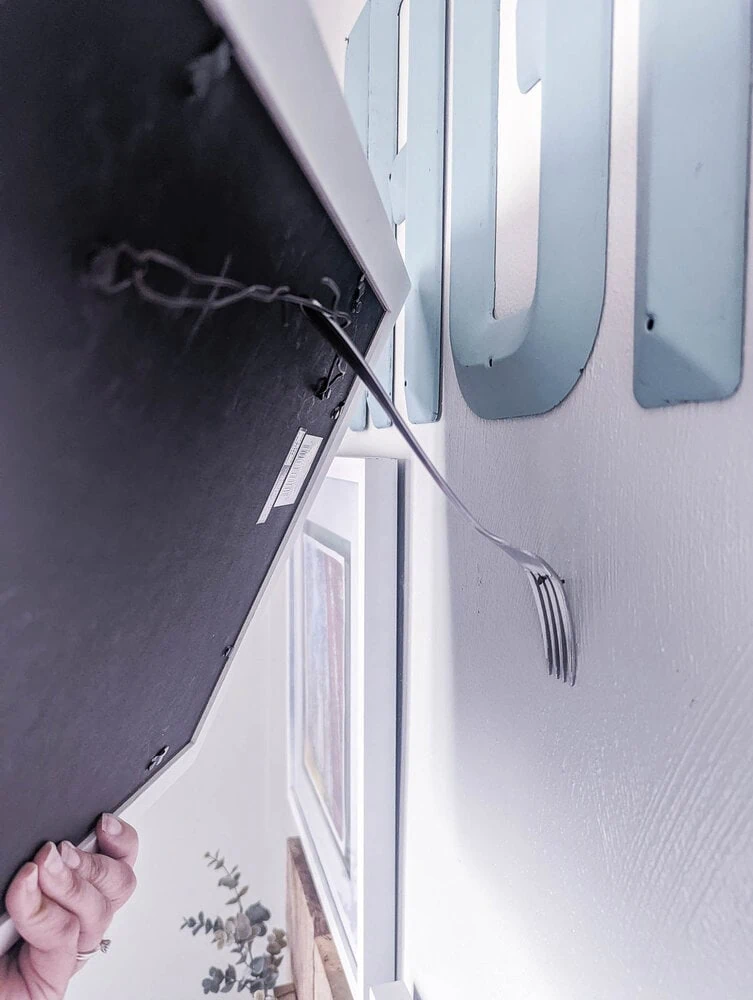
Hack 6: Use a fork to easily hang pictures with wire
A lot of larger or heavier pictures have wire across the back for hanging. And sometimes getting that little wire to slip over a tiny nail head is incredibly difficult.
This hack is meant to make the entire process easier.
What you need
- a fork
How you do it
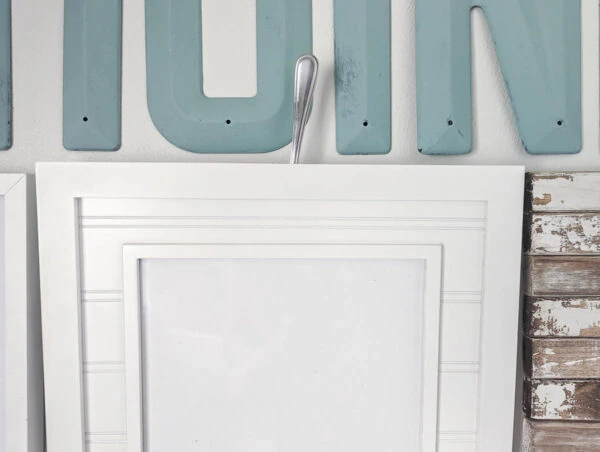
It’s pretty simple. Once your nail is in the wall, slide a fork over it so that the nail is resting between two of the tines.
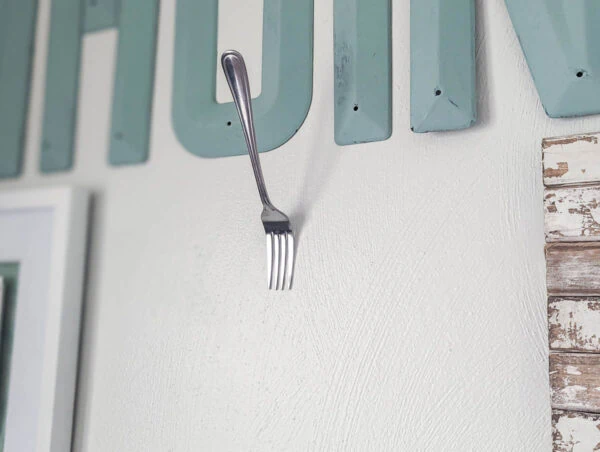
Pick up your picture and place the wire over the handle of the fork, sliding it down the fork until it is resting on the nail.
For this to work, the fork needs to be pretty securely seated on the nail. If it is a bit loose, you may need to either hold the handle of the fork as you slide your art in place or hammer your nail in a bit more securely to keep the fork in place.
Once your art is in place, remove the fork and you’re done!
Does it Work?
This is a fun little hack because it is so random. It does actually work pretty well – sometimes.
Sliding a picture wire over a fork handle is so much easier than trying to slide it onto a tiny nail. Plus the fork handle sticks up enough that it’s a lot easier to see what you are doing.
This hack works really well for small to medium sized pieces of art hanging on one nail.
It may be a bit trickier when you are hanging a larger piece of art. When you are hanging a large piece of art, it can be difficult to see the fork as you are sliding the art on and also difficult to reach it to remove it later.
This would also be trickier if you are hanging the wire on two nails. It could still work using two forks, but you would definitely need a helper to pull it off. Although to be fair, I have found that I often need a spare set of hands to hang large pieces of art from two nails anyway.
Rating
7/10 – It works great in some circumstances and not so great in others. If you are having a hard time getting your picture wire onto the nail, this hack is definitely worth a shot.
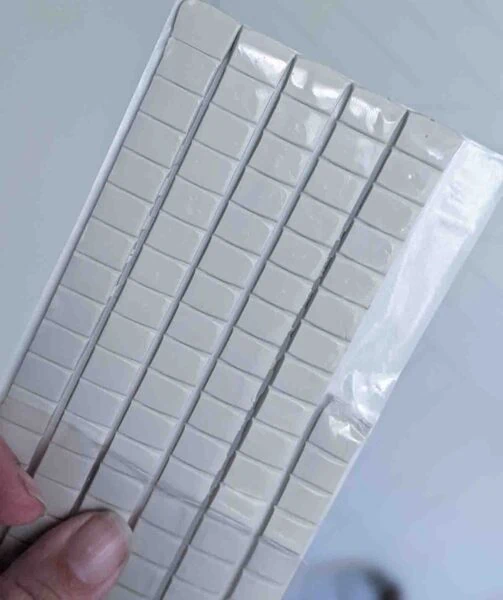
Hack 7: Use putty or command strips to keep art straight
This is a hack I have used many times before with great success.
Occasionally when I hang a picture on the wall, it just refuses to hang straight. No matter how many times I straighten it, every time I walk back into the room it is slightly crooked again.
This drives me crazy! Especially when it is part of a grid of frames or a gallery wall where even a slightly angled frame makes the whole arrangement look sloppy.
What you need
- mounting putty – I like this Gorilla Glue mounting putty
- small Command Strips
How you do it
This is a super simple fix.
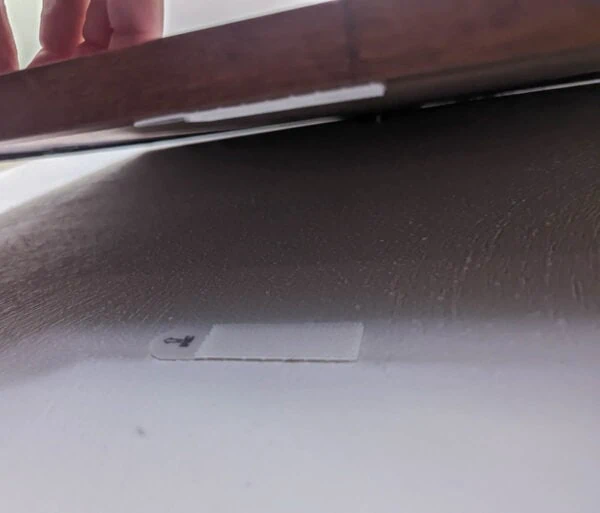
Just place a small ball of mounting putty in one or both of the lower corners of your art to hold it in place correctly.
Another alternative is to use a small velcro command strip. Put one side on the lower edge of the frame and one side on the wall. Then straighten your frame and press it into place.
Does it Work?
I use this hack all the time because it really works. I no longer have slightly crooked art driving me crazy every time I step into a room.
For larger frames I prefer to use a command strip because they are a bit stronger, but for very lightweight art, mounting putty works great.
Rating
10/10 This may not be the most mind-blowing hack, but it works every single time.
The Best Picture Hanging Hacks
Sometimes little hacks make life so much easier and sometimes they look cool but aren’t particularly helpful.
I’m so glad I tried out this bunch of hacks because there were some real winners I plan to use every time I hang pictures from now on!
Here’s a chart of all the picture hanging tricks I tested in order of best to worst.
| Hack | Purpose | Rating |
| Toothpaste Hack | To place the nail in the right spot | 10/10 |
| Putty/Command Strips | To keep art hanging straight | 10/10 |
| Paper Templates | To arrange a gallery wall | 9/10 |
| Painter’s Tape Guides | To place art on the wall | 9/10 |
| Wooden Tool | To place the nail in the right spot | 7/10 |
| Fork | To hang art with a wire | 7/10 |
| Painter’s Tape for Hanging | To place the nail in the right spot | 5/10 |
I’d love for you to pin this post on Pinterest!


Google Web Story: Best Picture Hanging Hacks
I have to tell you, the wooden picture hanging tool worked like a charm. We put a screw in one end and hung a fairly strong coat hook at the other end (with the hook opening DOWN) so that one could hold the tool with a finger, the picture strung up on the screw, then remove the picture and bang on the screw enough to make a mark. THANK YOU THANK YOU THANK YOU for such a simple and incredibly useful idea.
I must disagree with your comment about it not working if not vertical. As long as someone holds the picture where the tool sets it, you can turn the tool sideways and it will still work.
We also used the fork and that worked, too. The nice thing about your tips is how it made us look Sooooooooo clever…but we did give you credit.
Thanks so much for sharing your experience. The coat hook sounds like a great idea. And that’s a great point about being able to use the tool sideways – I hadn’t really considered that!
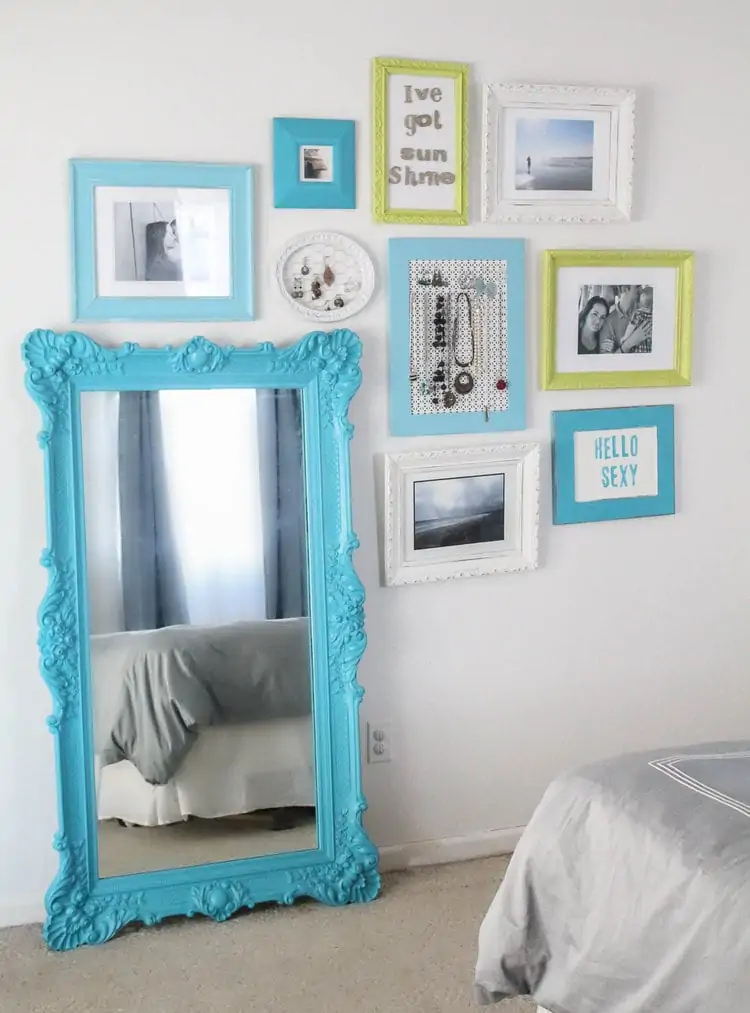
This is SO helpful, thank you so much! Quick question–where did you get those wall vase sconces? I am in love and am hoping to find these exact ones if possible! Thank you again!
I actually made the wall sconces. I don’t have a tutorial on my blog but there is a tutorial in my book Wood Plank Projects (you can find it on Amazon if you’re interested). But they aren’t complicated so you may also be able to look at the pictures closely and figure it out. They are made using reclaimed wood and small jars from Michaels.