Learn how to repaint furniture with a beautiful paint finish that will last, including how to deal with chipping paint, wax, possible lead paint, and more.
You might be surprised to learn that repainting a piece of painted furniture can actually be more difficult than painting wood furniture for the first time.
Part of the whole beauty of paint is how easy it is to paint over it again in the future for a whole new look. But when it comes to repainting furniture, it isn’t always that simple.
Is repainting furniture really different than just painting furniture?
Surprisingly, yes. Repainting furniture is a whole different beast.
When you are painting wood furniture that has never been painted before, you are more or less starting with a clean canvas. You can pretty safely assume you are dealing with a standard wood finish and you can generally follow the same set of steps to prep any piece of wood furniture.
When you are repainting a piece of painted furniture, you are adding onto someone else’s art project.
Unless you were the person who previously painted the piece of furniture, you probably have no idea what products were used to paint the furniture previously.
If it was sealed with wax or painted with an older non-water based paint, the repainting process gets a lot more complicated.
If the previous paint job is sloppy or chipping or yellowing or isn’t adhered to the furniture well, without proper prep, those same problems can continue through into the fresh coat of paint you are planning to add.
Repainting furniture is often more complicated than painting furniture the first time, but with a bit of planning and prep, it can still be done well.
Do I have to strip the old paint off first?
Some furniture painters won’t paint over old paint. If they want to paint a piece that was previously painted, they use a chemical stripper to remove every bit of old paint.
This is certainly an option.
If you remove all of the old paint, you won’t need to worry about figuring out what type of paint was used or whether it was applied well to begin with.
On the flip side, stripping paint is a LOT of work. It is time intensive and involves harsh chemicals and it’s something I generally try to avoid whenever possible.
You absolutely do not have to strip the old paint finish off your furniture before repainting.
But if you choose not to strip your furniture before repainting, taking some time to prep your furniture well before you get started will be extra important.
This post contains affiliate links which means if you make a purchase after clicking a link I will earn a small commission but it won’t cost you a penny more. Click here to see my full disclosure policy.
How to Repaint Painted Furniture
Materials
- Mineral Spirits – only needed if your furniture has a wax finish that needs to be removed
- Lead paint test – only needed if your furniture may have been previously painted before 1978
- Nail polish remover with acetone – to test if older furniture was painted with an oil-based paint
- Zinsser Oil based primer – if you need to use a primer on your furniture, this one is always a good choice. It sticks to basically any surface, including all types of paints.
- Sandpaper – for roughing up slick furniture so paint can stick, removing loose paint, and smoothing rough areas. I try to always keep a variety of sandpaper grits ranging from 60-300 on hand for various furniture refinishing needs.
- Orbital sander – this is optional, but it makes sanding off loose paint and sloppy finishes go much quicker
- Small foam paint roller + paint tray – for painting the furniture exterior, these small rollers are great for getting a nice smooth finish on large flat furniture surfaces
- High quality paint brush – I highly recommend a Purdy 1.5″ angled brush for painting furniture.
- Furniture paint of your choice – General Finishes Milk Paint and Dixie Belle Chalk Paint are two of my favorites
- Sealer – to protect your paint finish, General Finishes High Performance TopCoat is my top pick.
Evaluate your furniture
Before you can start repainting your furniture, you need to figure out exactly what you are working with.
You don’t have to know every little detail about what type of paint was used and when, but there are a few specific things you need to look out for.
If you are repainting something that you personally painted, this whole process is going to be much simpler. You will already know what type of paint and/or sealer you used so you can move straight to prepping for new paint.
But if you are working with furniture that was painted by someone else, you’ll need to start with a bit of detective work.
Check for a wax finish
With the popularity of chalk paint over the last decade or so, wax has become a popular topcoat for painted furniture.
Unfortunately, paint doesn’t stick well to wax, so you can’t just paint right over the old wax.
Some chalk paints say that you can paint directly over wax as long as the chalk paint and wax are both from their brand. But in general, painting directly over wax is a bad idea, even if you are using chalk paint. It just isn’t going to adhere well.
It is usually pretty easy to tell if furniture has a wax finish because it literally feels waxy to the touch. If you still aren’t sure, you can scrape a coin over the finish in an inconspicuous area and look for a waxy buildup on the edge of the coin.
If your painted furniture was waxed, you need to remove the wax with mineral spirits before repainting.
Use a clean cloth to apply mineral spirits all over the furniture piece. After a few minutes, you should start to see the wax begin to become cloudy and discolored.
Wait around ten minutes and then wipe all of the wax off using a clean rag.
You may need to repeat this process if the wax was particularly thick.
Check old paint for lead
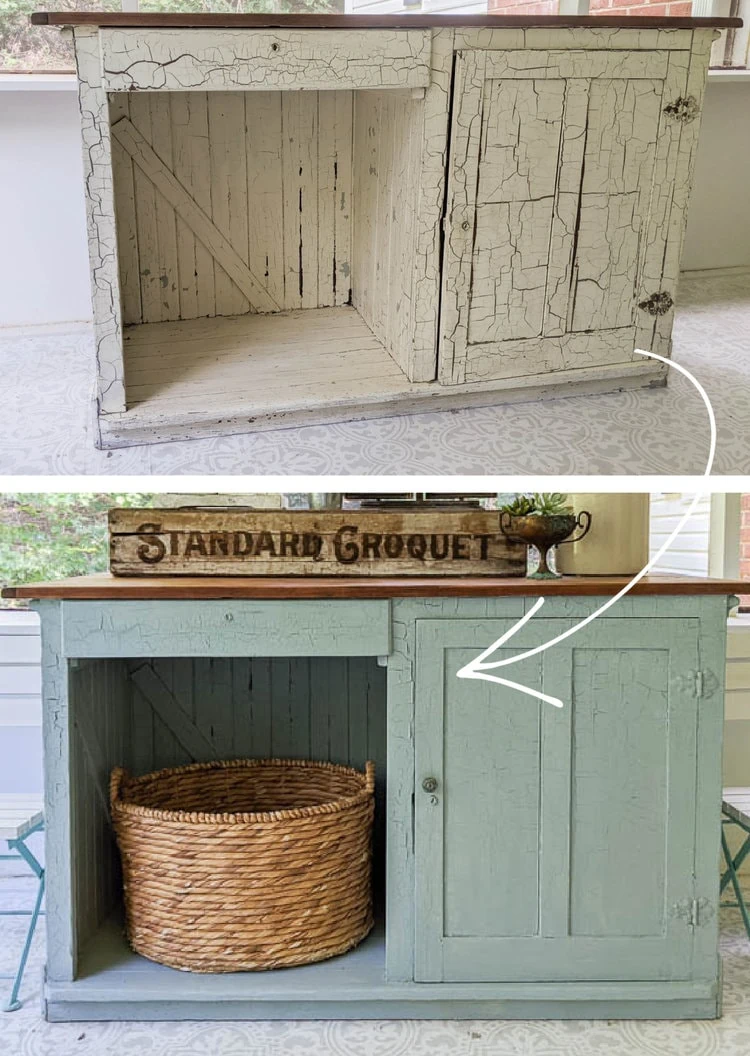
Painting furniture has been popular for many, many years, so if you are repainting a decades-old piece of furniture, there is a chance that the paint job is also decades-old.
This presents some unique challenges since paint formulas have changed a lot over the years.
If you are working on a piece of furniture with old paint, it’s a good idea to start by doing a lead test.
Before 1978, paints regularly contained lead. While simply touching lead isn’t considered dangerous, ingesting paint chips and inhaling lead dust is.
Most of us know that having chipping lead-based paint around small children is dangerous because they tend to put everything in their mouths. But we tend to forget that it is also incredibly dangerous for both children and adults to breathe in lead dust.
For this reason, you should never release lead dust into the air by sanding and scraping lead-based paint.
If there is even a chance your furniture was painted before 1978, you should do a lead test before working on it.
You can buy lead tests on Amazon or at most home improvement stores for just a few dollars.
These tests are super easy to use.
Follow the instructions on the particular test you buy, but the general ideas is you just rub the test swab over the painted area. If it turns red or purple, lead is present; if it stays yellow, there is no lead.
If your painted furniture contains lead, it can still be repainted, but the process for painting over lead paint is much different than painting over other types of paint. This article has more information on safely painting over lead paint.
Check for oil-based paint
Most furniture paints now are water-based, but older furniture pieces were sometimes painted with an oil-based finish.
To test if your furniture was painted with an oil-based paint, pour a little bit of nail polish remover (with acetone) or rubbing alcohol onto a rag. Rub it onto the painted surface that you want to test.
If some of the paint rubs off, it is latex paint. If no paint rubs off, it is oil-based paint.
Be sure to use a dark rag for light paint and vice versa, so it will be easy to tell if the paint is rubbing off.
If your furniture does have an oil-based finish, don’t worry, repainting is still a simple job.
Just apply a good oil-based primer first. Once the primer has dried, you can use any type of paint over it including water-based furniture paints.
Check for a shiny, slick finish
If your furniture has a very shiny, slick paint finish, if it is laminate furniture (like from IKEA), or if it has a factory paint finish, it will be tough for your paint to stick without a bit of help.
Start by lightly sanding the entire surface with 100-150 grit sandpaper. You don’t need to spend a lot of time on this, just quickly sand the piece. This will help roughen the surface just a bit so the primer and paint have something to stick to.
Next, apply a coat of a good primer. Primer can stick to all kinds of surfaces even when paint cannot. I like to use this oil-based primer for this as well because I haven’t met a surface yet that it can’t stick to (including laminate countertops.)
Once the primer has dried, you are good to go.
Check the condition of the old paint finish
Finally, you’ll want to take a good look at the current paint finish on your furniture.
Are there chips and peeling paint? Are there drip marks or rough areas? Does the paint finish look sloppy?
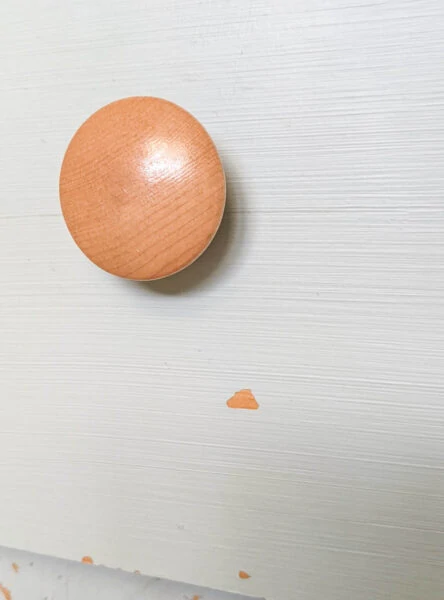
Any of these issues can cause problems when you repaint.
If the paint is chipping, peeling, loose, or otherwise just not adhered well, you’ll need to remove all of the loose paint before repainting.
If the loose/chipping paint is all over the piece, stripping the old finish is probably your best option. But if there are just a few isolated areas, you can just sand off the loose paint instead. A small orbital sander makes this job go much faster, but if you don’t have one, you can also sand off the loose paint by hand using 100 grit sandpaper.
Once the chips and loose paint are removed, check the surrounding area to make sure all of the remaining paint is well-adhered.
Then use 220-320 grit sandpaper to smooth the sanded area so that it blends seamlessly with the paint around it.
If there are drip marks, deep brushstrokes, thick paint build up or other rough areas, you’ll need to sand them smooth before painting. Any unevenness that is visible in the old paint will also show through into the new paint.
Repainting Furniture
Once you’ve dealt with all of the potential pitfalls that came with repainting furniture, it’s basically just like painting any other furniture.
Primer
You don’t have to use primer most of the time when you are repainting furniture. But there are a few exceptions to this.
If you are painting over very old paint or oil-based paint, it’s a good idea to start with a coat of a good oil-based primer. Also, if you had to remove a lot of the old paint finish to correct problems with the previous paint job, it’s a good idea to start with a coat of primer to give your paint a nice, even fresh slate.
Paint
I like to use a small foam roller to apply primer and paint to large, flat surfaces like table tops and the sides of dressers. Then you can use a high-quality paintbrush for smaller or more detailed sections.
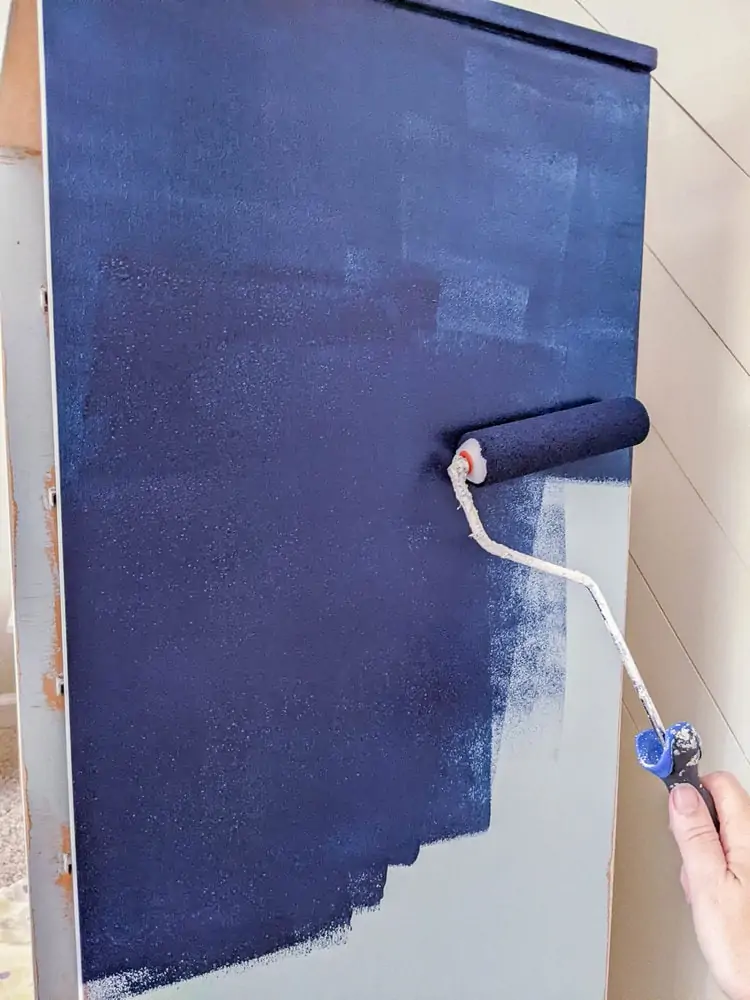
Any paint that can be used for painting furniture can also be used for repainting furniture. A few of my favorite furniture paints are
- General Finishes Milk Paint – I love this paint because it goes on smoothly, doesn’t require a separate primer, and holds up well over time.
- Dixie Belle Chalk Paint – If you love chalk paint, this paint comes in a huge range of colors in a variety of sizes and is fairly affordable. It also does not require a separate primer.
You will most likely need two coats of paint, but sometimes you may need more coats, especially if you are using a very light paint like white or a very saturated color like red or black.
Sealer
Once your paint has dried, you may want to protect your new paint finish with a topcoat or sealer. Not all paints require a topcoat, but if you are painting furniture that is going to get a lot of use, a topcoat is always a good idea.
A quality sealer will keep your new paint finish looking flawless and protect it from chips and stains.
If you want more information on topcoats, I have another post with all the details about topcoats including when to use them and how to choose the best one.
I’d love for you to pin this post on Pinterest!
More furniture painting tips I think you’ll find helpful:
- How to Paint Furniture for the Perfect Finish Every Time
- What is the Best Paint for Furniture?
- Repainting a Dresser: Third Time is the Charm
- The Best and Worst Sealers for Painted Furniture
- Painting Furniture White: Secrets to the Perfect Finish

Google Web Story: The Easy Way to Repaint Furniture
How to Repaint Painted Furniture
Repainting a piece of furniture that has already been painted can be difficult. I'm sharing some of my best tips to help make it easier.
Materials
- Mineral Spirits
- Lead paint test
- Nail polish remover with acetone
- Zinsser Oil based primer
- Sandpaper
- Small foam paint roller + paint tray
- High quality paint brush
- Furniture paint of your choice
Tools
- Orbital sander
Instructions
- Determine what type of paint was used. If it is an antique you will need to test for lead paint.
- You will also need to check for a wax finish. If t here is one you will need to remove the finish with mineral spirits.
- Test if your furniture was painted with an oil-based paint. Pour a little bit of nail polish remover (with acetone) onto a rag. Rub it onto the painted surface. If some of the paint rubs off, it is latex paint. If no paint rubs off, it is oil-based paint. oil based paint was used. If it is an oil-based paint you will need to prime with an oil-based primer first.
- Check the furniture for any chipping or damage. You’ll need to remove all of the loose paint before repainting. An orbital sander makes it easy, but you can also use sand paper. Once you've taken care of these steps, you can start painting just like painting any other furniture.
- If you are painting over old paint or oil-based paint, it’s a good idea to start with a coat of oil-based primer.
- Use a small foam roller to apply primer and paint to large, flat surfaces like table tops and the sides of dressers.
- Use a high-quality paintbrush for smaller or more detailed sections. You will most likely need two coats of paint.
- Once your paint has dried, you may want to protect your new paint finish with a topcoat or sealer. Let cure.
Recommended Products
As an Amazon Associate and member of other affiliate programs, I earn from qualifying purchases.


Leave a Reply