How to Make Easy and Beautiful DIY Clay Christmas Ornaments
Everything you need to know to make beautiful DIY clay ornaments including the best types of clay to use.
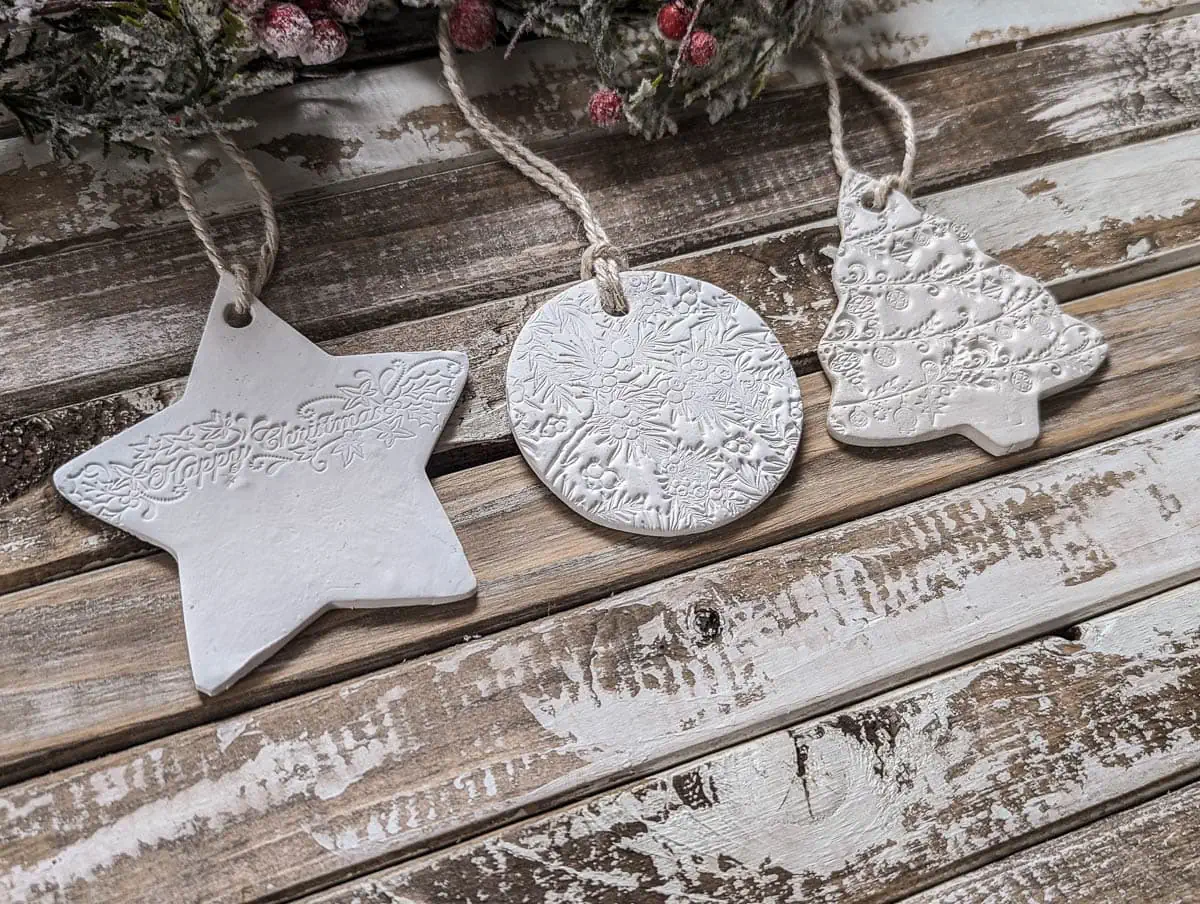
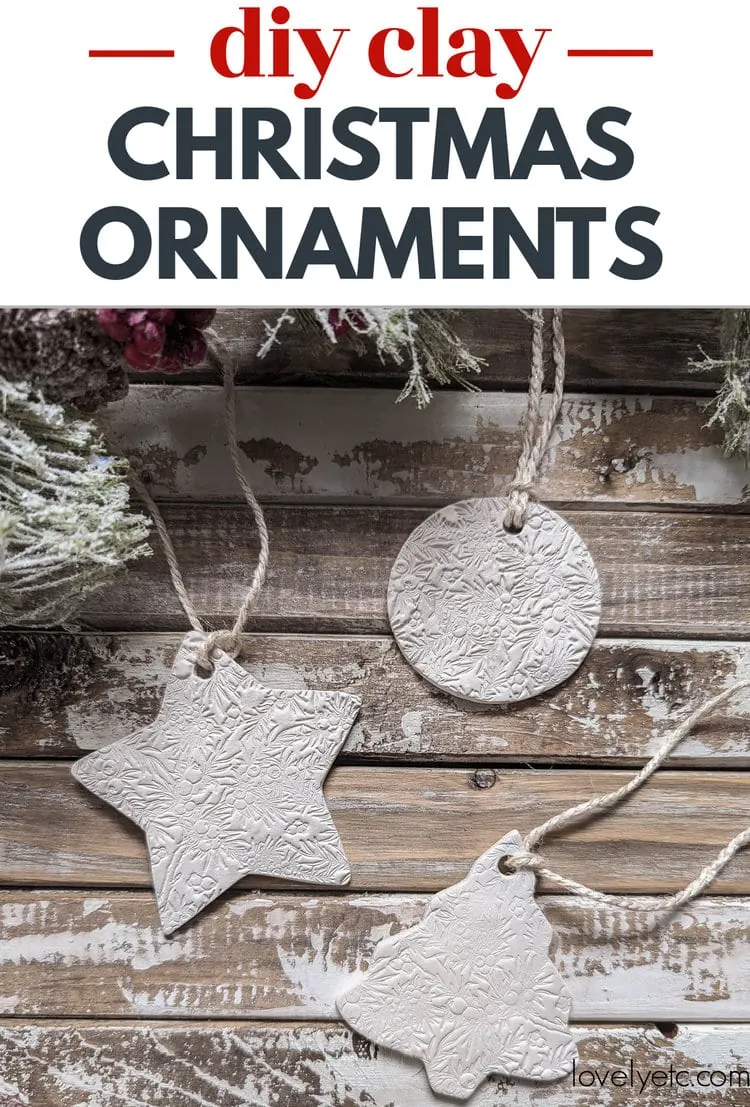
The other day as I was browsing in a cute little boutique, I saw the most beautiful white clay ornaments. They were simple and gorgeous and full of texture and I knew right then and there that I wanted to try to recreate them for my own tree.
I’m happy to report that my DIY clay ornaments turned out beautifully – and even better, they’re really easy to make!
To be honest, the first few times I saw white Christmas ornaments, I wasn’t all that sure I liked them. Christmas is usually all about color and sparkle, not boring neutrals.
But I’ve come around and now I love adding white ornaments to my tree each year. They brighten the whole tree and they help make those special colorful ornaments pop that much more.
Today I’m sharing a step-by-step tutorial for making your own beautiful clay Christmas ornaments as well as answering a lot of questions about the process like which type of clay works best.
This post contains affiliate links which means if you make a purchase after clicking a link I will earn a small commission but it won’t cost you a penny more. Click here to see my full disclosure policy.
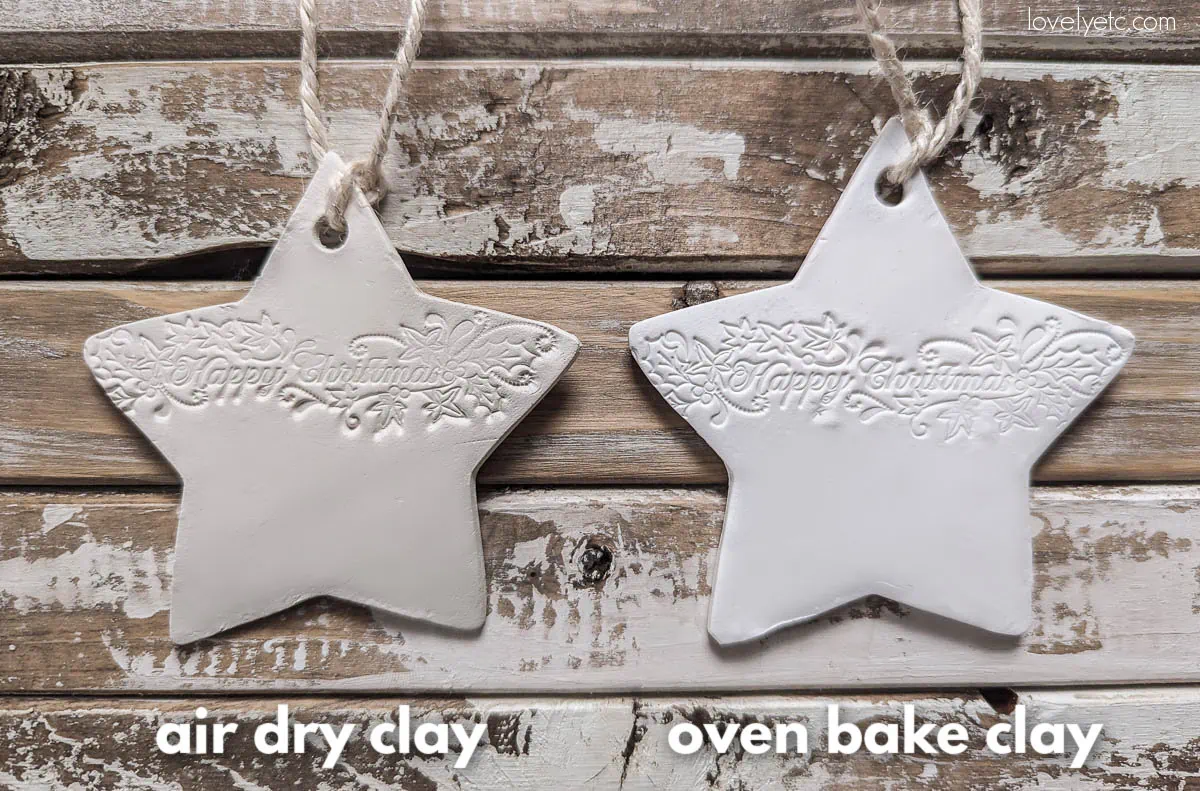
Which is better for ornaments – air dry clay or oven bake clay?
When I decided to make clay Christmas ornaments, my first question was whether I should use air dry clay or oven bake clay. I did a bit of research and didn’t find a clear answer, so I decided to try both and see for myself which works best.
I chose four different types of clay that were all available at my local craft supplies store. The four clays I tested were Fimo Air white air dry clay, Fimo Soft oven bake clay, Fimo Professional oven bake clay, and Sculpey III oven bake clay.
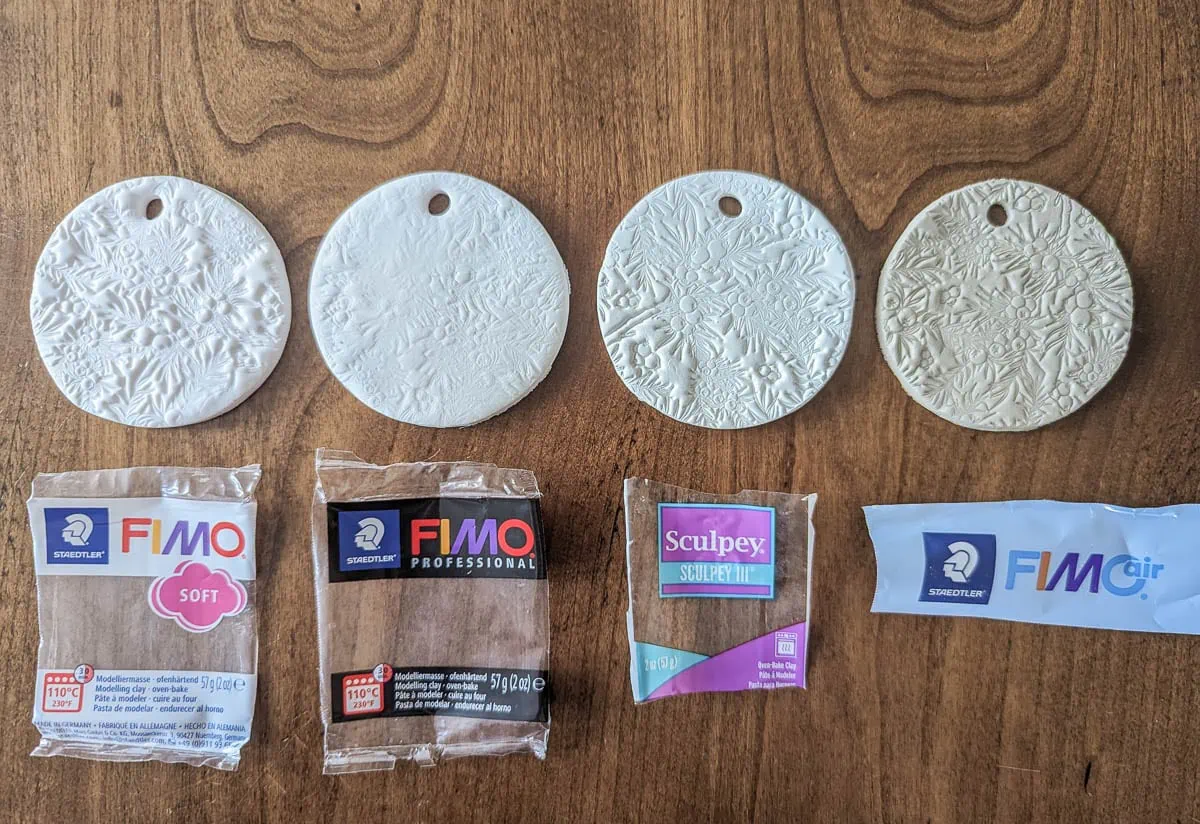
I immediately started seeing differences between the different types of clay. Of the three oven bake clays I tested, the Sculpey clay was by far the easiest to work with. The two Fimo oven bake clays I tried were very hard to sculpt and did not take detailing very easily.
So for the rest of this comparison, I am going to focus primarily on the Fimo air dry clay vs. the Sculpey III oven bake clay.
Air Dry Clay
- In general, air dry clay is a lot softer and easier to work with. It doesn’t really need to be warmed up to be soft enough to roll out and it is very easy to cut.
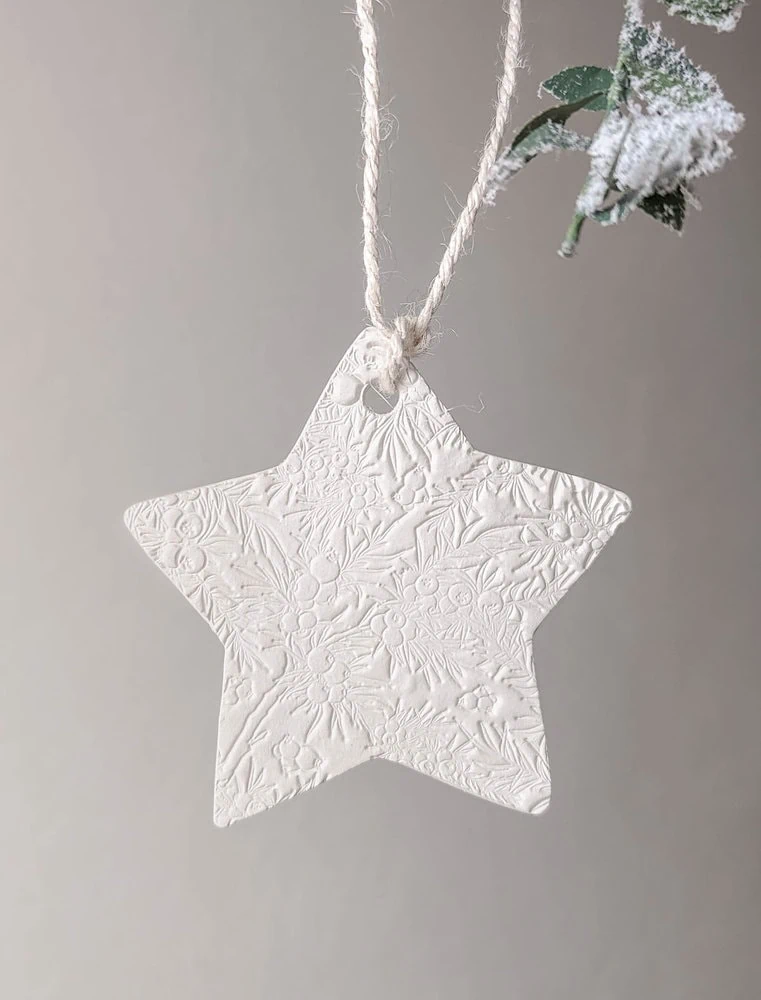
- Because the air dry clay is softer, it takes stamped textures very well. All the stamps I tried came through very clearly and with all the details intact.
- White air dry clay can be ‘natural white’ which is more of a putty color or ‘bright white’ which is more of a pure white. Some clearly label which they are and some do not.
- The air dry clay shrinks a bit as it dries and the edges can curl up if you don’t keep an eye on them.
- Air dry clay can take up to 24 hours to fully dry.
Oven Bake Clay
- All of the oven bake clays I tried were a bit more difficult to use. The Sculpey was by far the easiest, but I still needed to warm it up a bit before it was soft enough to roll out and stamp.
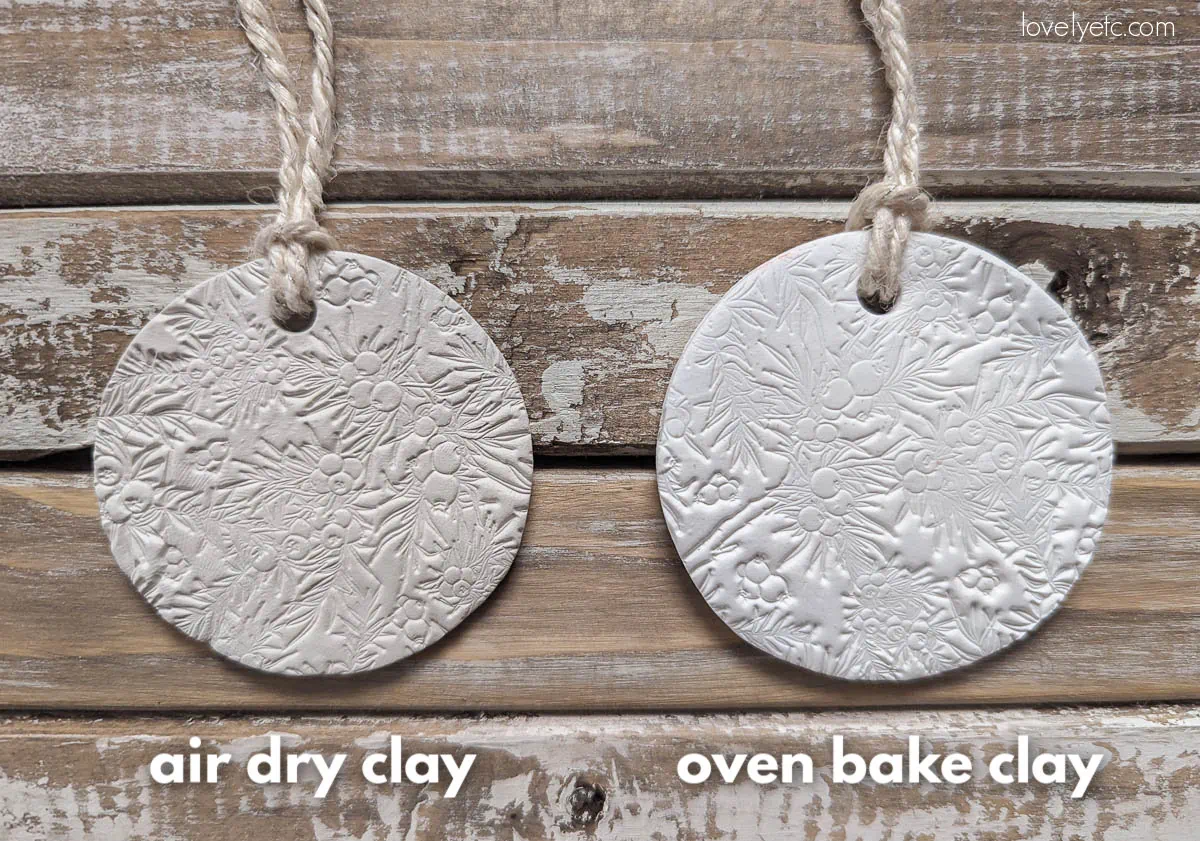
- The Sculpey clay took the stamped texture well, but it still wasn’t quite as crisp and detailed as the air dry clay.
- All of the oven bake clays I tried were a nice bright white color.
- Oven bake clay doesn’t shrink and holds it’s shape well.
- Oven bake clay can be completely dry in thirty minutes of less.
So which is better?
There isn’t really one clear winner. I really like the crisp white color and thicker finish of the oven bake clay, but the air dry clay is easier to work with and takes the stamped texture a bit better.
If you are looking for the best possible results or are in a time crunch, I would choose oven bake clay.
If you want the easiest option or are doing this with kids, I would choose air dry clay.
Materials
- White clay – This is my top choice for oven bake clay and this bright white air dry clay is what I will use next time I make ornaments.
- Stamps, Clay texture mats, or Clay rollers – I used this holly berry leaves stamp and this set of Christmas patterns stamps. Some of the Christmas patterns stamps worked well in clay but some were a bit too detailed. You can also find lots of Christmas clay texture mats and rollers on Etsy.
- Rolling pin or brayer – for rolling your clay out flat
- Cookie cutters – 3″-4″ cookie cutters in simple shapes like circles, stars, snowflakes, ornament shapes, and Christmas trees work best
- Parchment paper – to protect your work surface as you work and keep your ornaments from sticking while they dry
- A straw – to poke holes in the tops of your ornaments for the string
- String – for hanging your ornaments. Simple twine looks great on these ornaments as does thin leather cord.
How to Make Clay Christmas Ornaments
Roll out your clay
Before you start, it works best to protect your work area by spreading out some parchment paper.
If you are using oven dry clay, you’ll want to start by rolling the clay in your hands a bit to warm it up so that is easier to work with.
Then you can roll your clay out flat. A rolling pin or a brayer work great for this. If you don’t have either, you could also use a glass with straight sides in place of a roller.
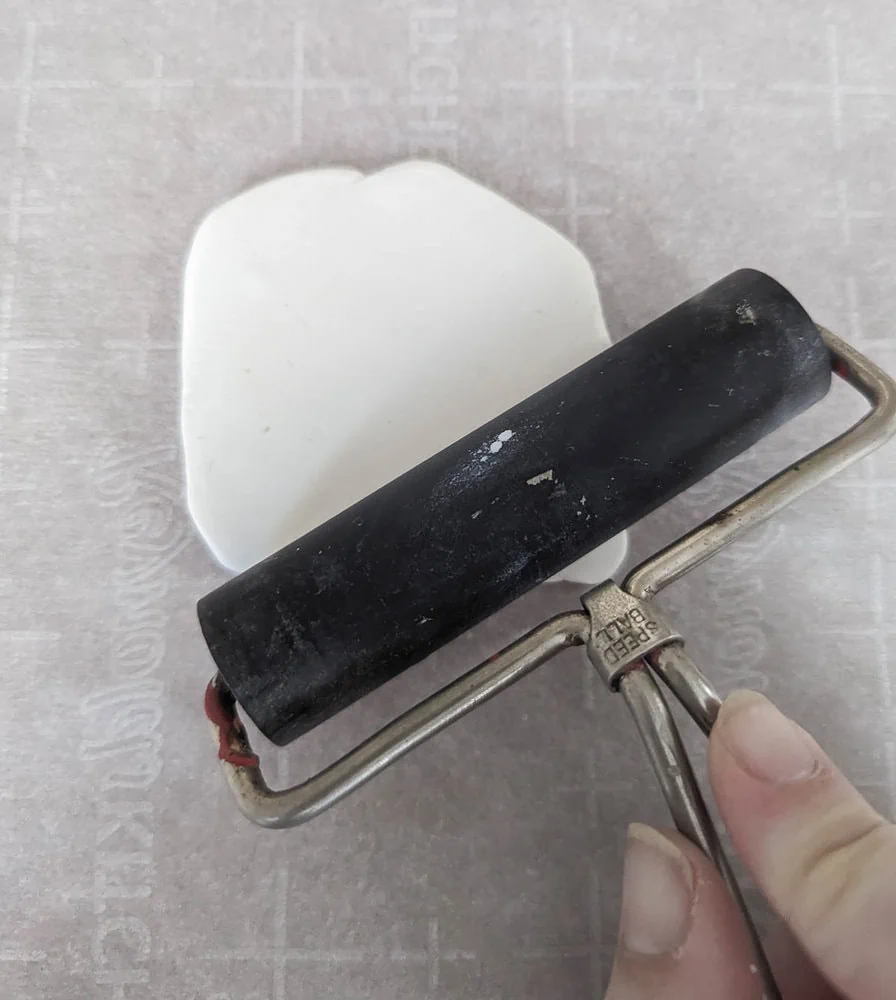
You want to roll your clay out to about 1/4″ thick. This doesn’t have to be exact, but 1/4″ is thick enough to look good and be strong, but thin enough that you can make quite a few ornaments from one pack of clay.
You want your clay to be as even as possible for the nicest looking ornaments.
Stamp your design into the clay
I chose to use stamps to add texture to my ornaments but you can also use clay texture mats or clay texture rollers.
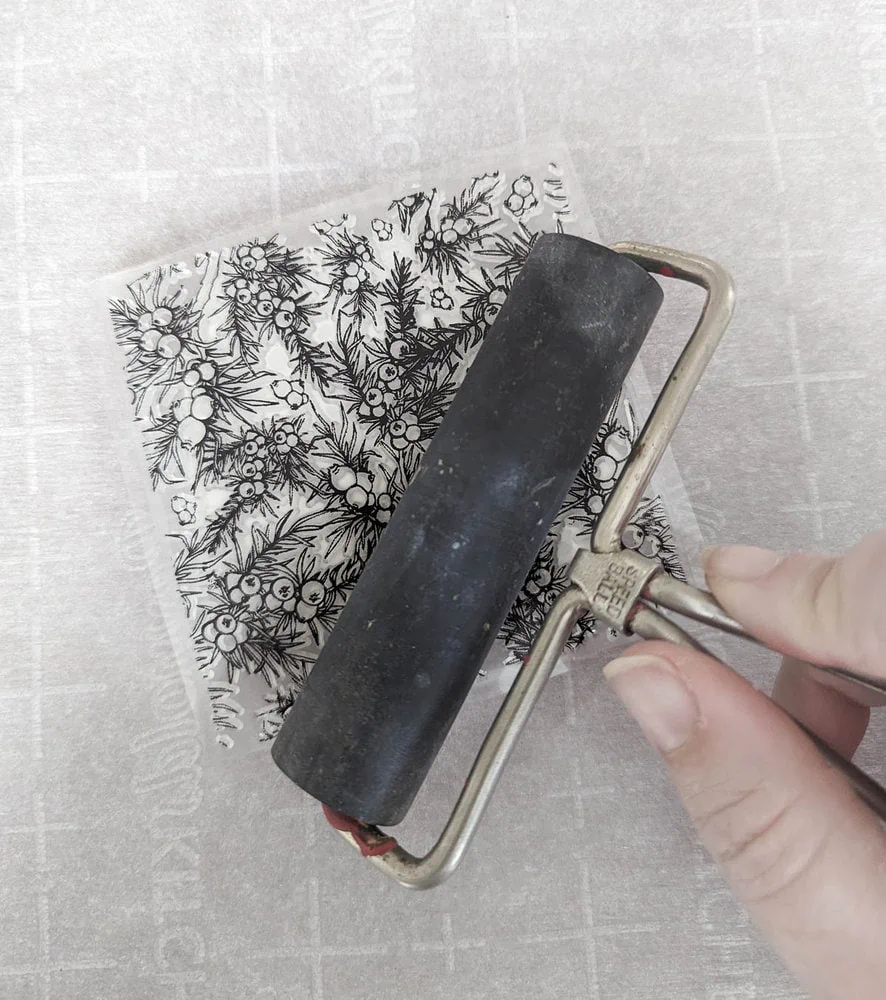
Once your clay is rolled out evenly, you can gently press your stamp or texture mat into the clay. You want to be sure to press the stamp straight down into the clay without wiggling it around so that the design stays nice and crisp.
You can then use your rolling pin to gently roll over the top of the stamp, making sure to cover all of the corners. This helps make sure the stamped design is evenly pressed throughout the clay.
Then peel up your stamp and see how it looks. Stamping the clay is pretty straightforward but if something does go wrong in the process, you can always re-roll out your clay and try again.
What kinds of stamps work well for ornaments?
Clay texture mats and clay texture rollers are made specifically for adding texture to clay.
On the other hand, stamps are often made for paper crafts rather than working with clay. Many stamps still work well on clay, but not all do.
Stamps with lots of tiny details may not show up well in clay.
Stamps that are supposed to look like something very specific also don’t work well. I tried a few stamps of images like Santa’s sleigh and a Christmas village and it was very hard to tell what they were once stamped into the clay. Simpler, more abstract designs tend to work better.
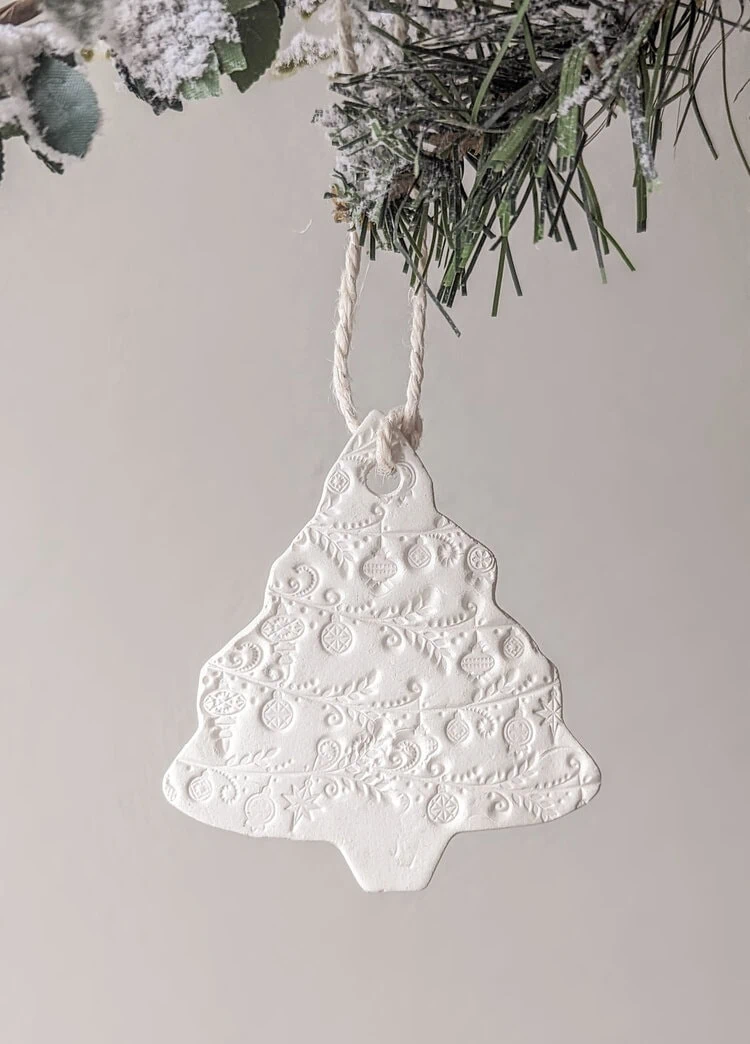
Stamps with all-over patterns work really well. Some great patterns for Christmas ornaments are snowflakes, holly, stars, swirls, branches, and ornament shapes.
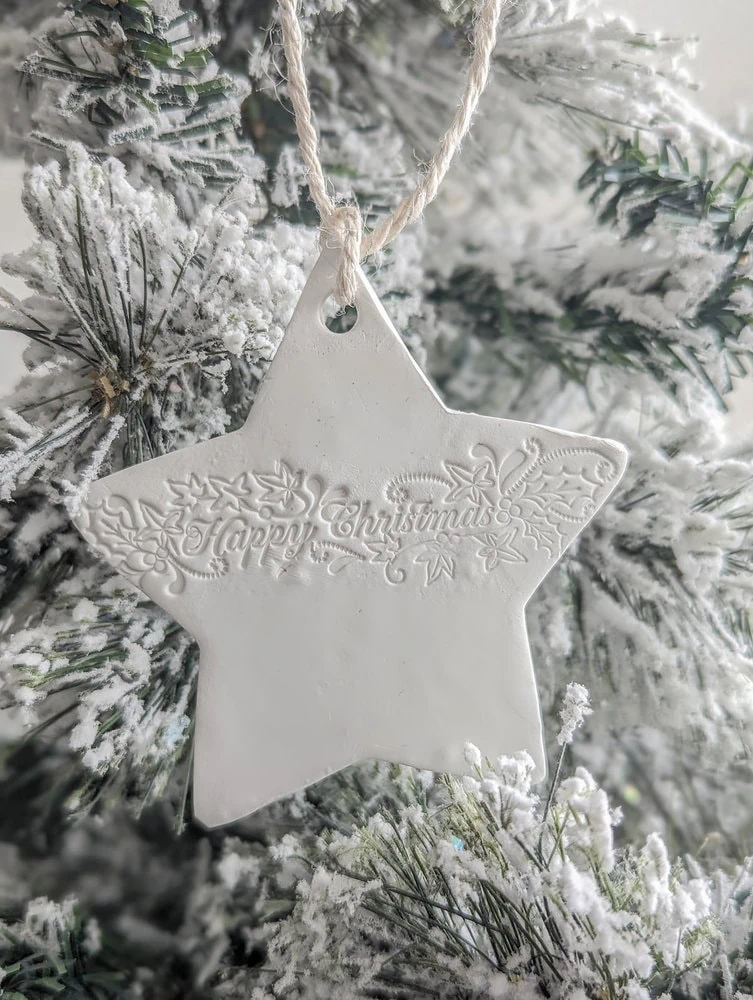
You can also add words or phrases to your ornaments using small alphabet stamps.
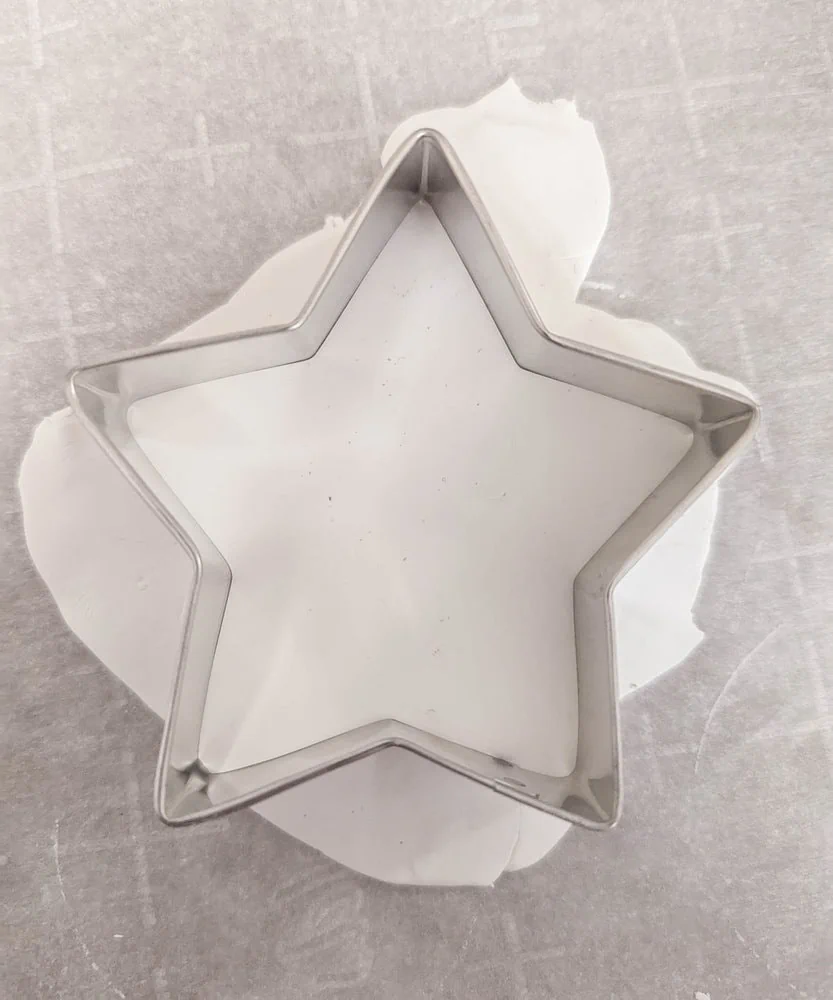
Cut out your ornament shapes
Once your design is stamped, you can cut out your ornaments using cookie cutters.
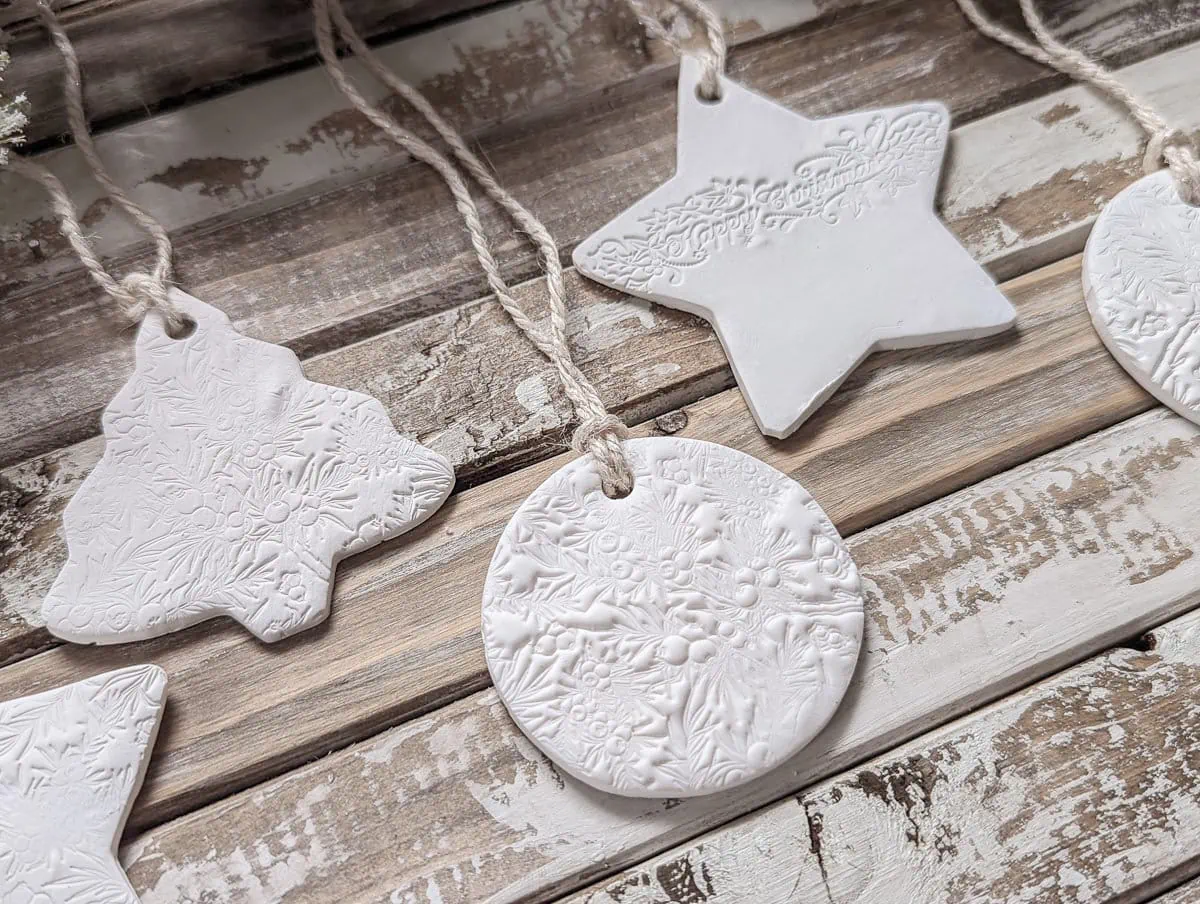
Simple cookie cutter shapes work best for these ornaments. I used a circle, a star, and a simple Christmas tree shape for my ornaments.
You can also cut your ornaments first and stamp second if you prefer. It’s really just a matter of what you find easiest.
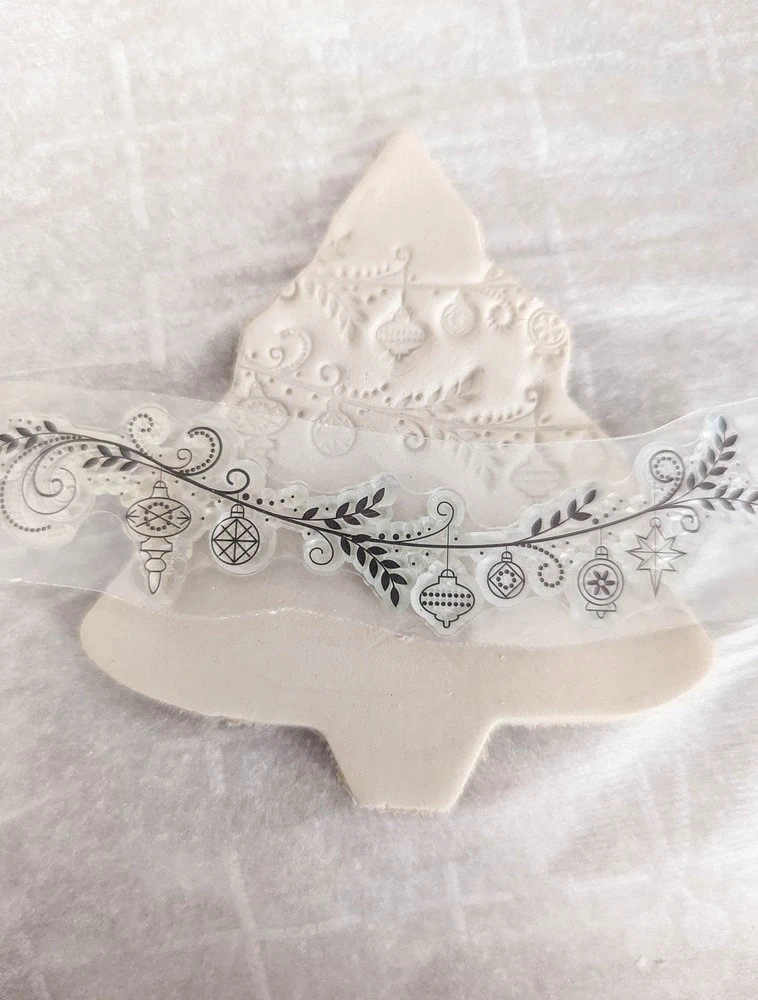
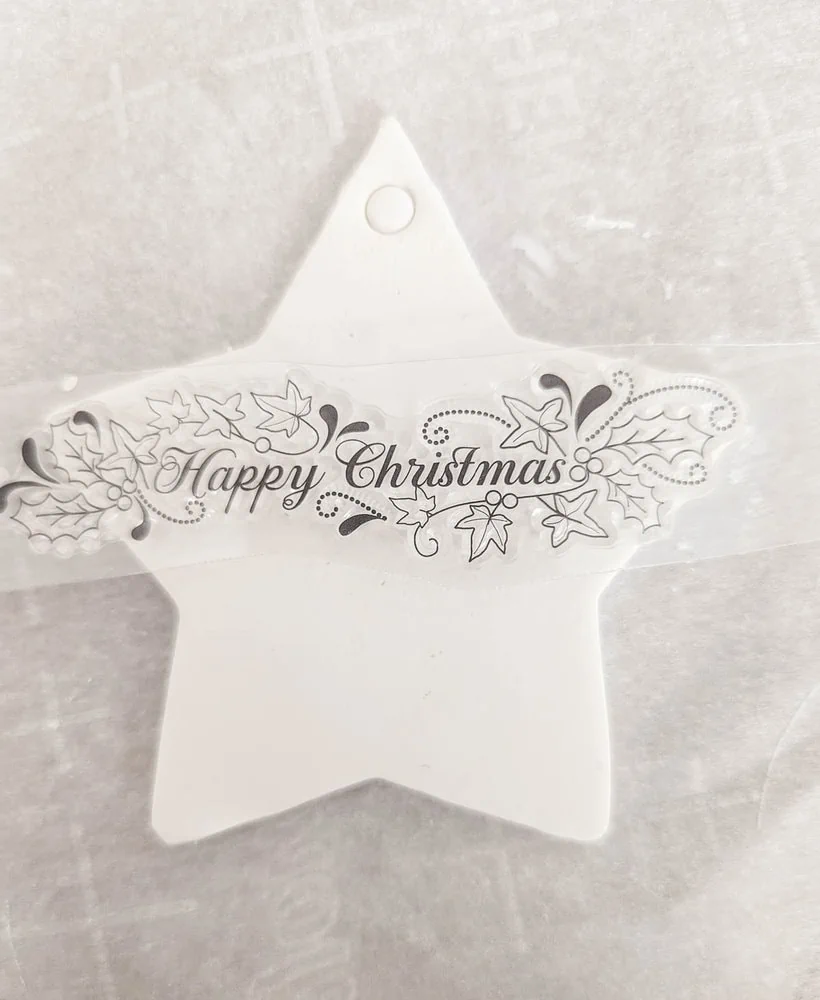
For a few of my ornaments, I stamped a smaller design onto a very specific part of the ornament rather than doing an all over pattern. For those ornaments, I found it easier to cut them out first so that I could place my stamp more precisely.
Poke a hole for hanging
Use a straw or a wood skewer to poke a small hole at the top of your ornament for hanging.
Dry your clay ornaments
If you are using oven dry clay, place your ornaments on a cookie sheet lined with parchment paper. You’ll want to follow the directions on your clay package as far as cooking temperature and time.
If you are using air dry clay, you can also lay out your ornaments on parchment paper. It will take around 12-24 hours for your clay ornaments to fully dry.
As they dry, you’ll notice that the clay starts to lighten, beginning at the edges and working inward. You may also notice that some of your ornaments begin to curl up around the edges as they dry. If you see this, you can gently flatten them back out as they are drying.
It’s a good idea to check on your ornaments a few times during the drying process because once they are fully dried, you won’t be able to flatten any curling.
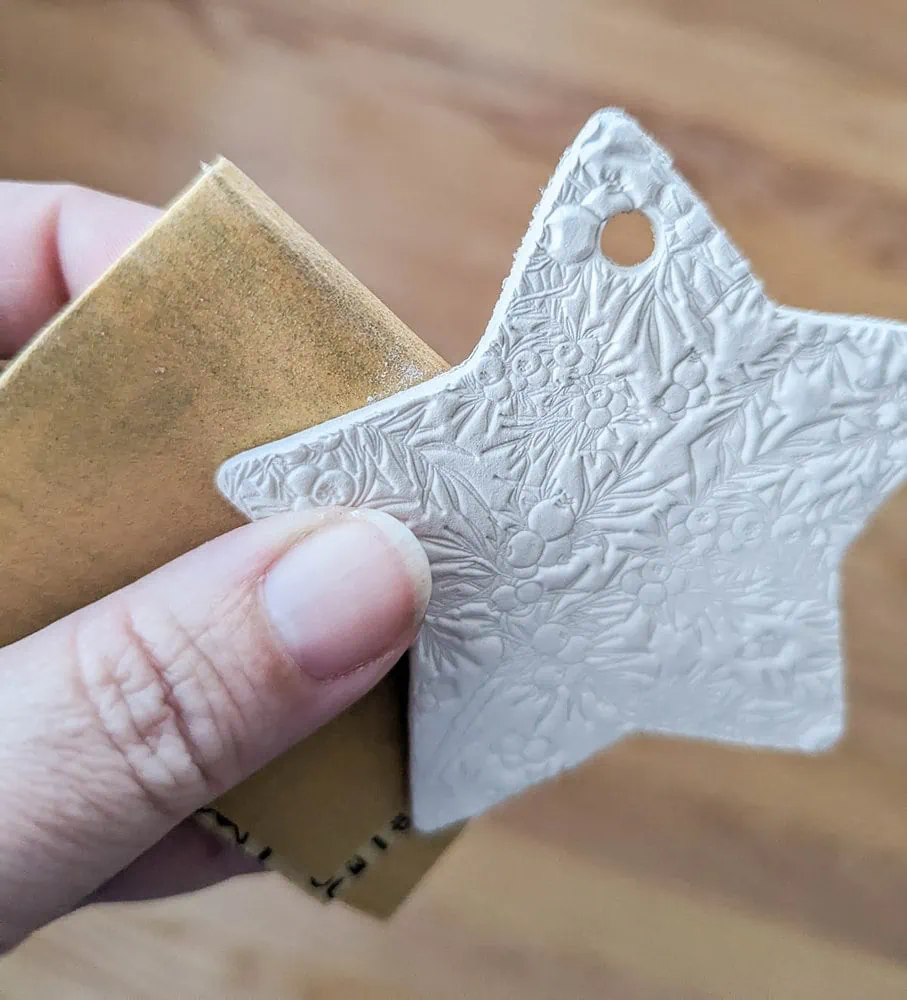
Sand any rough edges
Once your ornaments are fully dried, you may notice a few rough edges. Several of my ornaments had some rough spots while others were perfectly smooth.
If you do find some rough areas, you can sand them down gently using a high grit sandpaper. (Anything between 220 and 400 grit will work). If you don’t have any sandpaper, you could even use an emery board to smooth the edges.
Then string some twine or other string through the holes and they’re ready to hang!
Can you use ink or paint on clay ornaments?
I chose to leave my ornaments white because I like that look, but you can use colored clay if you prefer.
You can also add color to white clay using ink or paint. I have made ornaments and clay tags in the past using stamps with ink and it worked great. Just add ink to your stamp before stamping it onto the clay.
You can also use paint on the clay once it has fully dried. My 8 year old loves to make things with clay and he often paints his finished creations made from both air dry and oven bake clays. Craft paints, chalk paints, and acrylic paints should all work well.
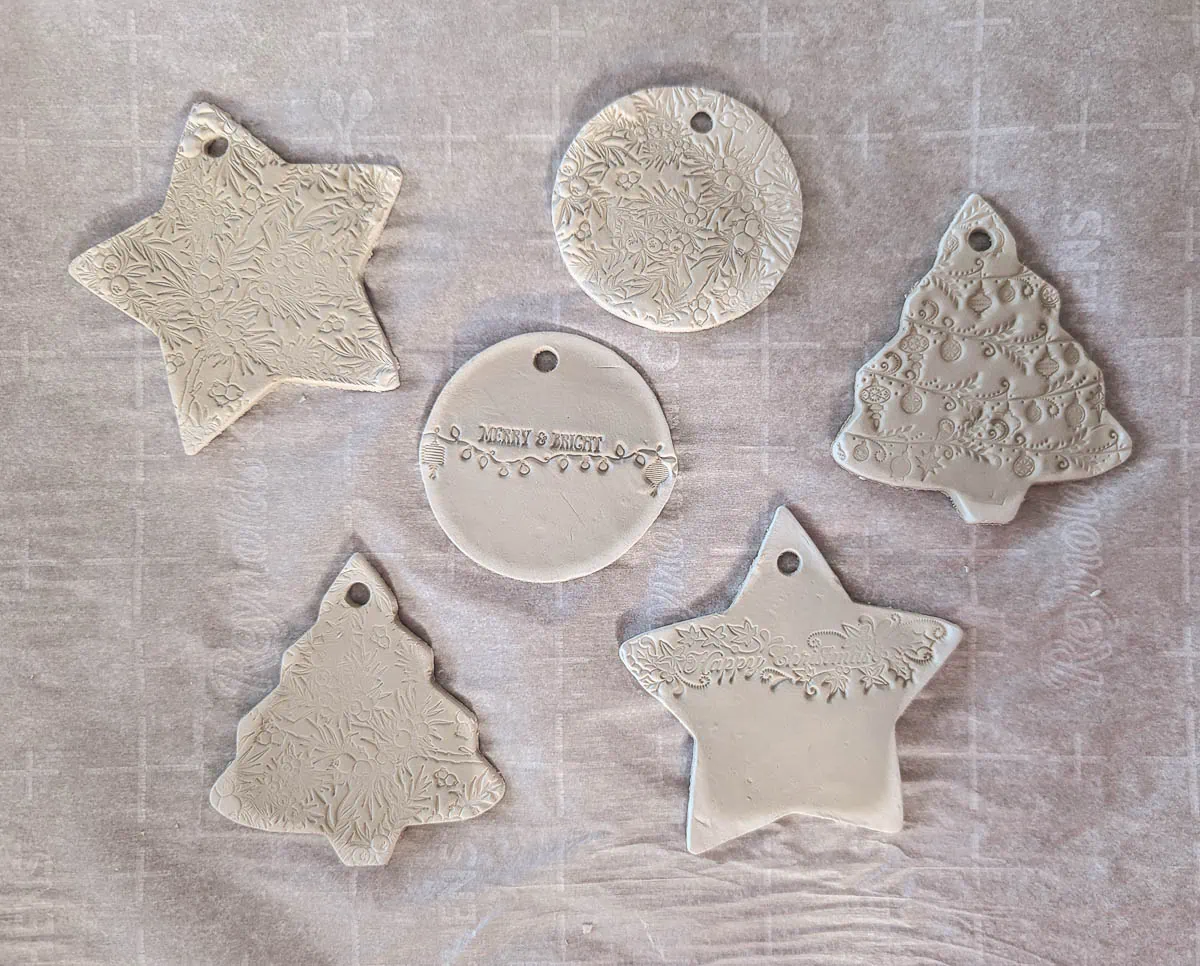
Finished Clay Ornaments
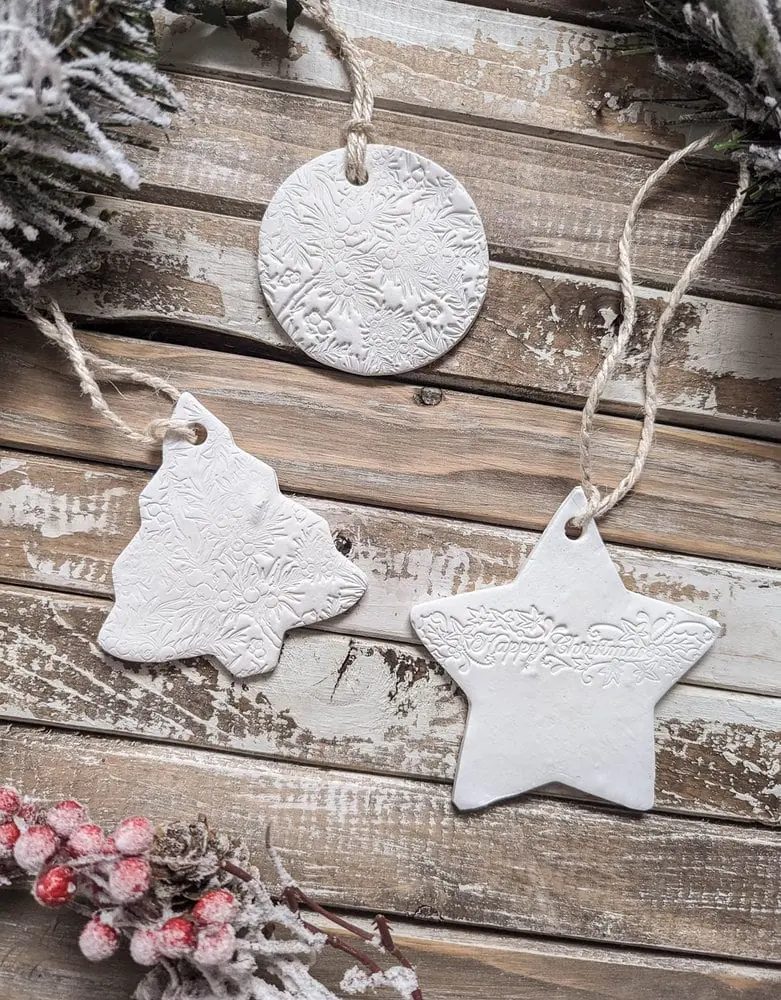
I love how these clay ornaments turned out and I’m already thinking about different shapes, colors, and textures to try on future clay ornaments!
If you love handmade ornaments like I do, I have so many more fantastic ornament ideas for you! You can see all my DIY ornaments right here and below are links to a few favorites.
I’d love for you to pin this post on Pinterest!
Have a Merry Christmas!
