How to Make an Easy DIY Christmas Tree Star
Learn how to make a beautiful (and super cheap) DIY Christmas tree star using this step-by-step tutorial and free printable template.
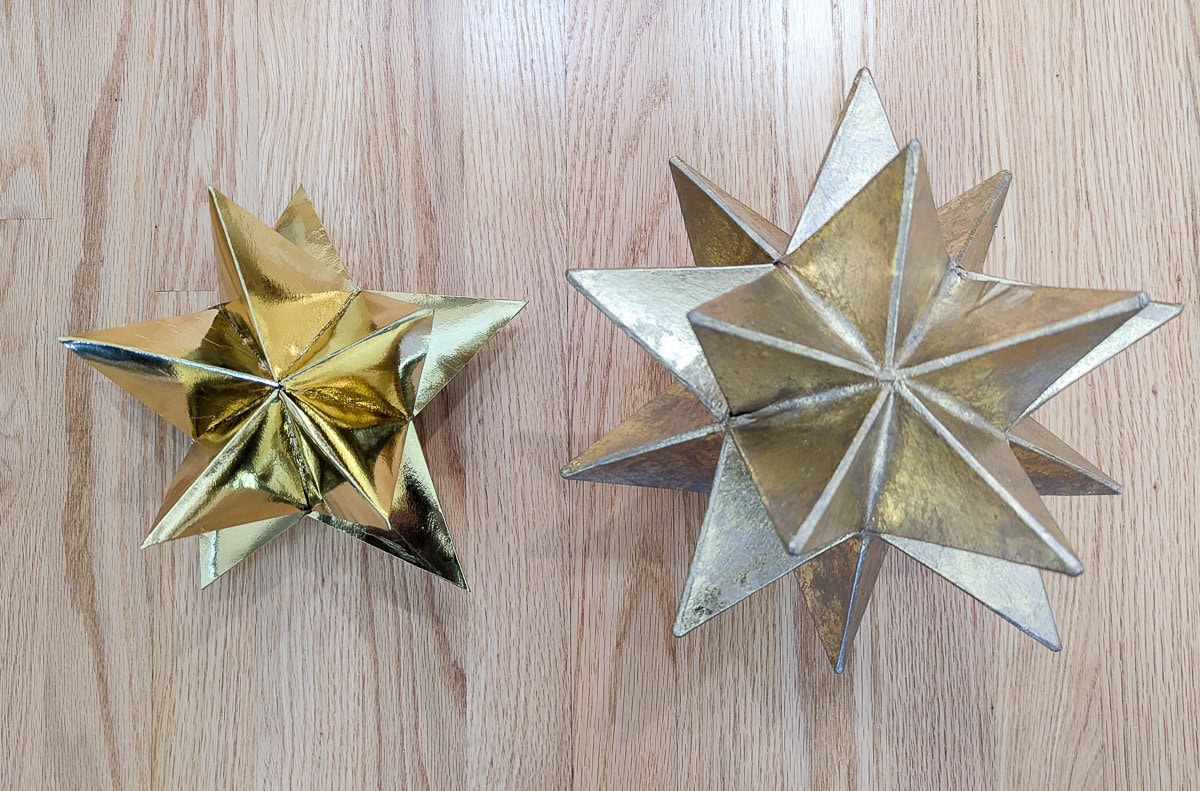
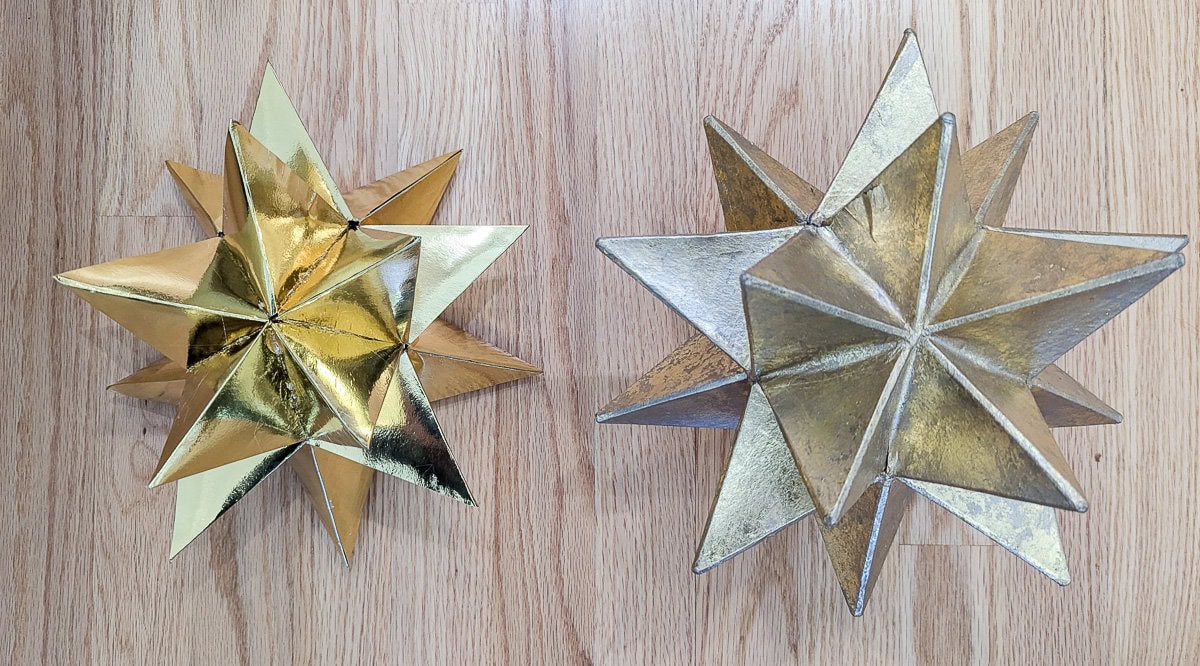
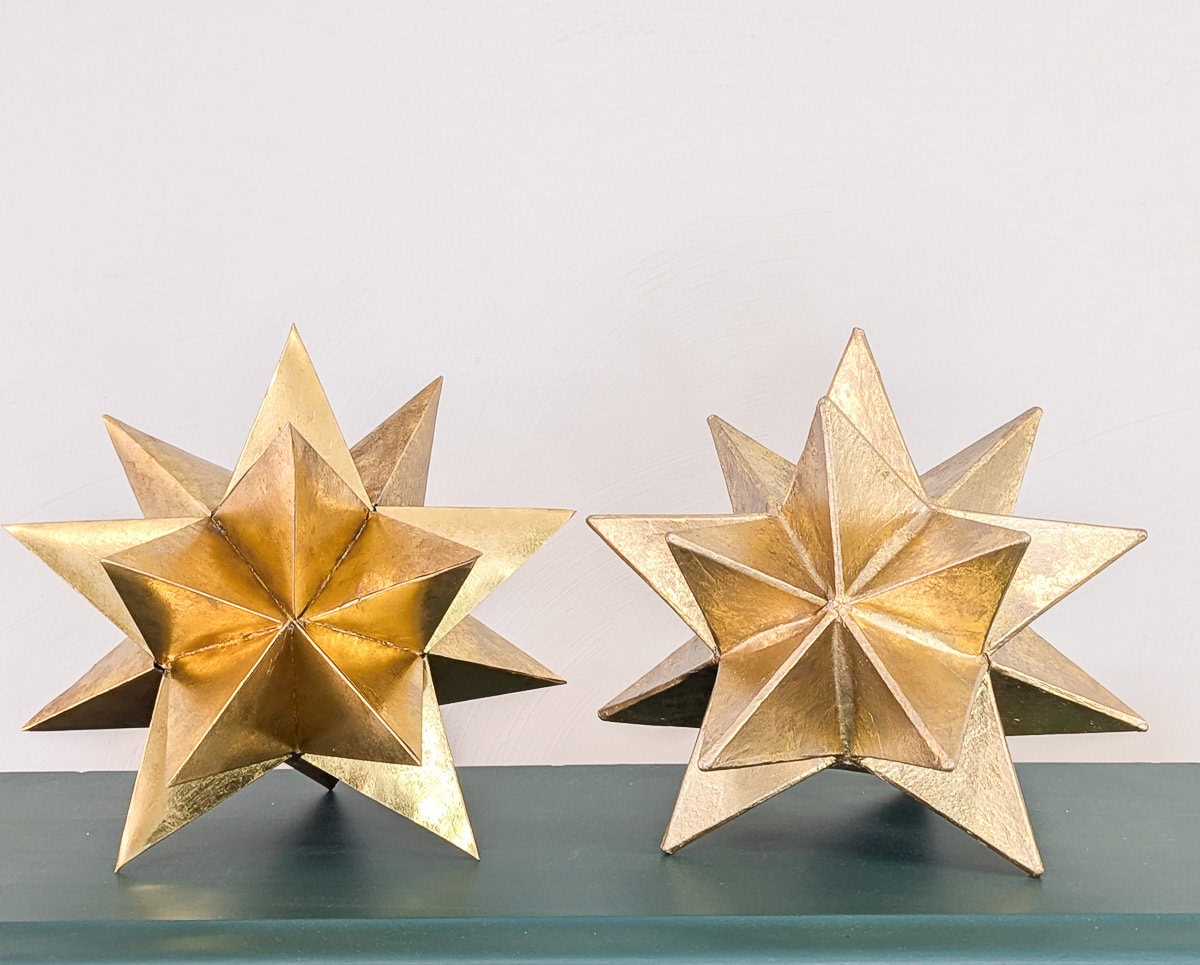
I always struggle to find a Christmas tree topper I really love. For a few years I actually just skipped the tree topper all together, but then I found the most beautiful gold Moravian star at an estate sale for just a couple bucks.
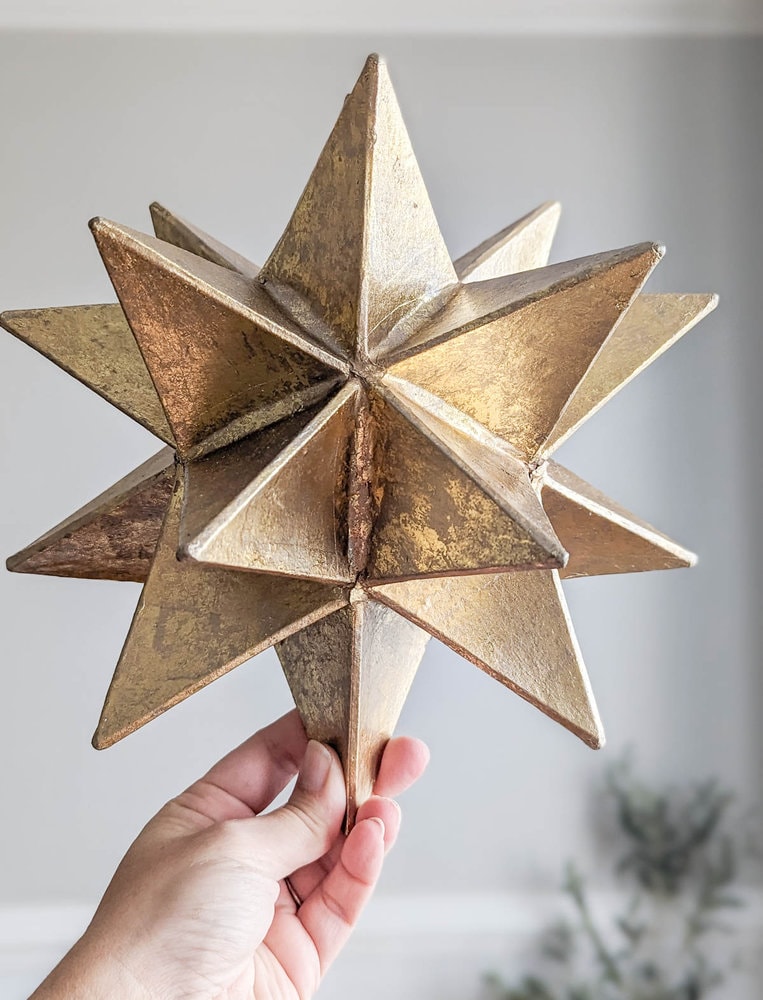
I don’t think it was actually meant to be a Christmas tree star at all, but I turned it into one and I love it.
I’ve shared my beautiful star a few times over the years and I’ve gotten quite a few questions about where to find a similar one. So I went searching online, but while I found lots of stars, none had the beautiful 3D shape my star has.
So this year I decided to finally sit down and figure out how to make a Christmas star just like mine. And I’m super proud to report that I did it! I did a bit of math and a bit of experimenting and figured out how to make a gorgeous Moravian star exactly like the one I found.
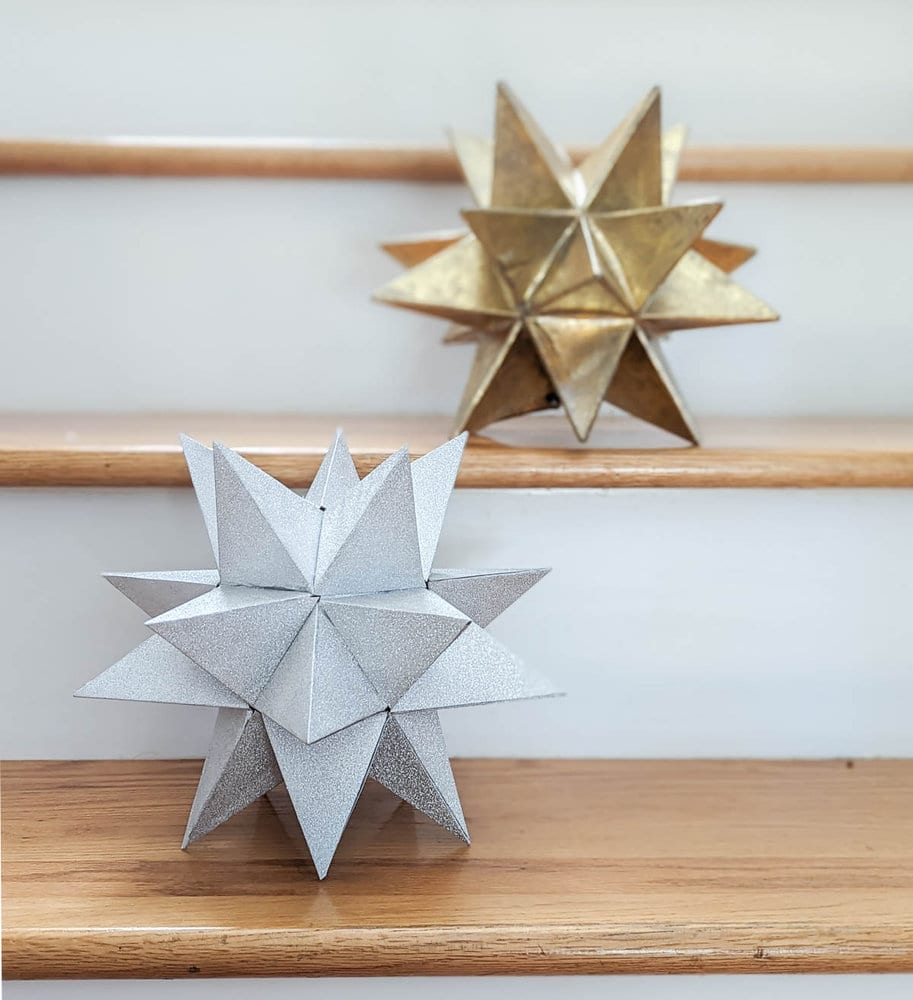
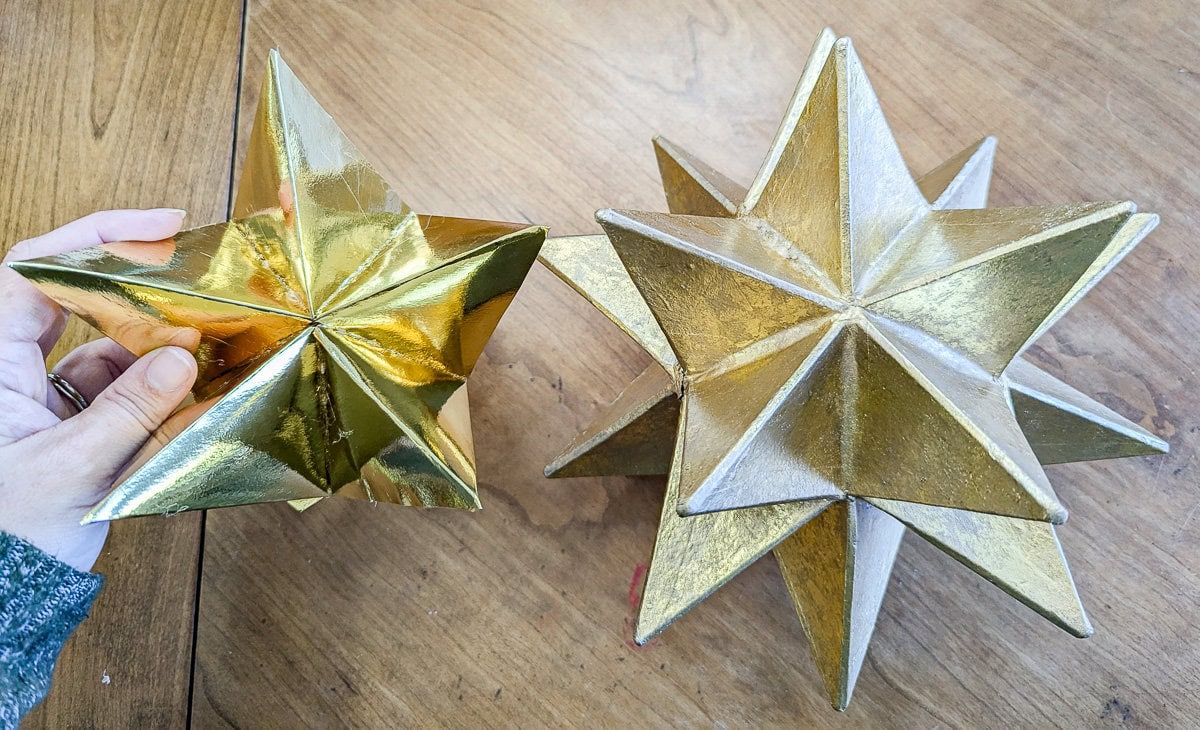
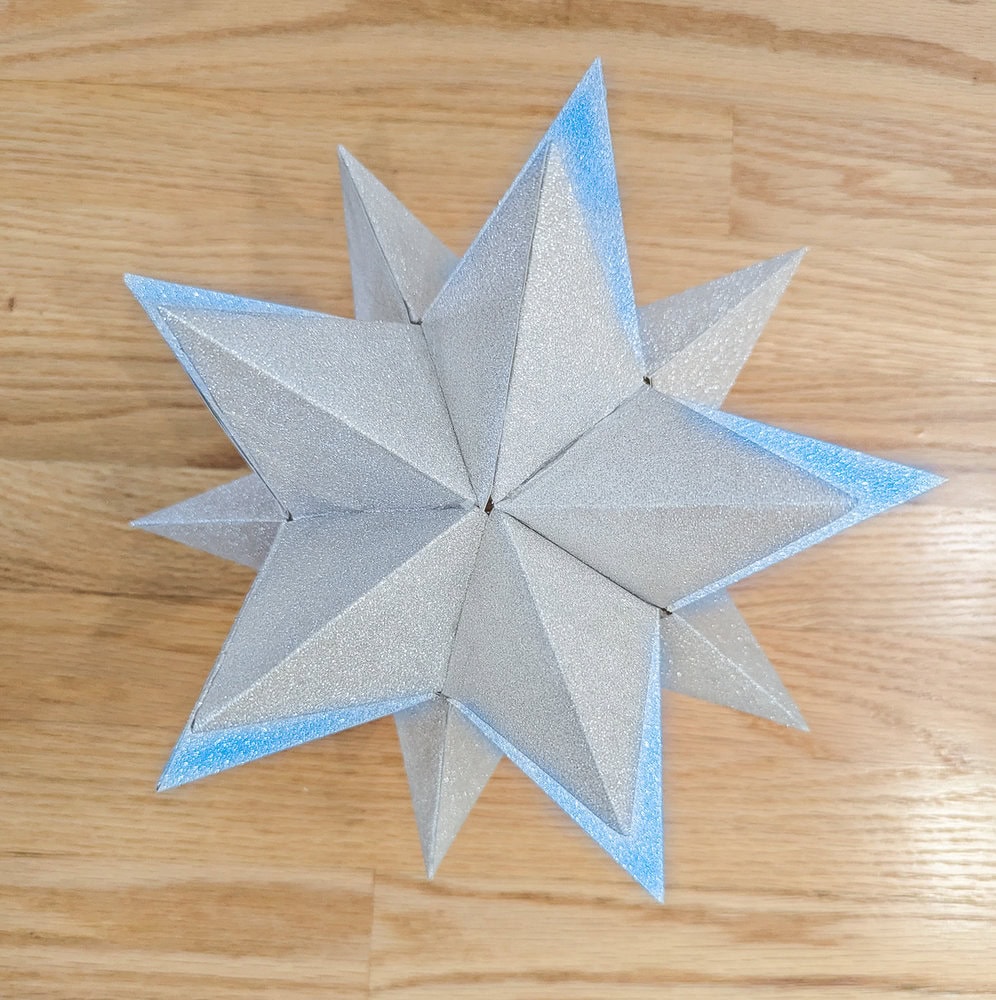
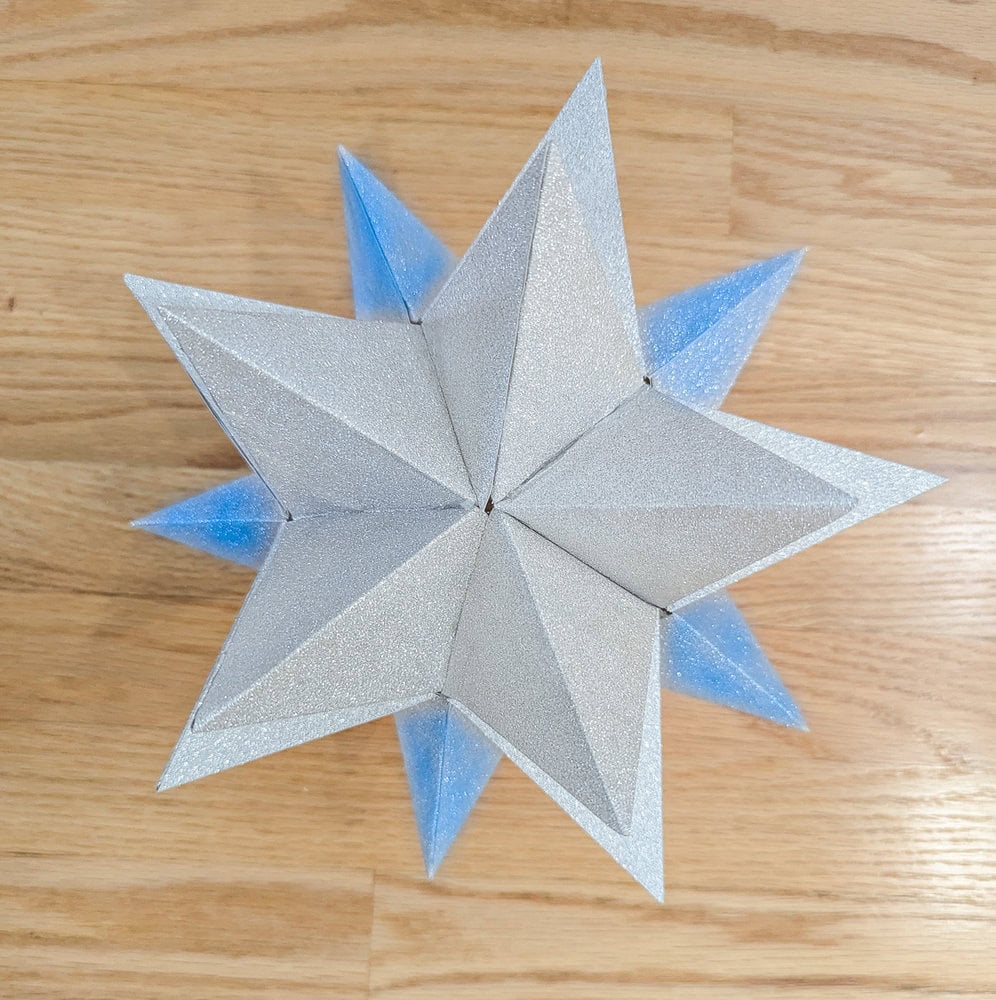
I made two new DIY stars – a glittery silver one and a pretty antique gold one just like the original inspiration.
This DIY Christmas star is super cheap and easy to make. You can make it using any color and type of paper you want to match your own Christmas decor. (But if you really love that gorgeous gold of the original, don’t worry, I’ve got you covered.)
And best of all, you don’t need a Cricuit or any other cutting machine to make it – just a pair of scissors and a hot glue gun!
I’m sharing the step-by-step tutorial for making this DIY paper star along with a free printable template that makes it super easy to put together.
Update: I got a few comments that the directions for constructing this star weren’t clear enough, so I have completely updated the instructions to be more fullproof. I’ve also included a tutorial for recreating that gorgeous gold finish as well as a full video tutorial which you can find at the bottom of this post.
This post contains affiliate links which means if you make a purchase after clicking a link I will earn a small commission but it won’t cost you a penny more. Click here to see my full disclosure policy.
Materials
- 10 sheets of 8.5″x11″ cardstock – You can use plain white cardstock or get fancy with gold glitter cardstock, silver glitter cardstock, or some other pretty pattern. If you want to create the antique gold finish of the original, you’ll want to use gold foil cardstock.
- Craft paint – To recreate the antique gold finish, I used champagne gold paint and bronze craft paint, I’ve linked the exact paints I used, but you may be able to get a similar look using other metallic paints.
- Decorative paper – This is optional, but if you are using plain cardstock, you may want to jazz your star up with wrapping paper, book pages, sheet music, scrapbook paper, or some other type of pretty paper.
- Glue stick or Spray adhesive – To attach your decorative paper to the cardstock.
- Printer – For printing the provided template onto your cardstock.
- Scissors
- Ruler – To help get nice, crisp fold lines.
- Hot glue gun – For assembling your star.
Want more DIY Christmas tree topper ideas? I have a post filled with 25 unique DIY tree toppers that you might want to check out next!
How to Make a DIY Paper Christmas Tree Star
Choose your paper
As I mentioned above, you have a few different options when it comes to picking paper for your star. The main body of your star needs to be made from cardstock. Cardstock is both flexible enough to fold into shape and strong enough to maintain that shape. But plain white cardstock doesn’t really make the nicest Christmas tree star.
Instead you can use a more decorative cardstock. You can order gold glitter and silver glitter cardstock online and you can also find lots of different fancy cardstock options at your local craft supply store.
Another option is to combine plain cardstock with a decorative paper to create your star. For one of my stars, I used a glittery silver wrapping paper along with plain cardstock. Along with the endless wrapping paper options out there, you could also use sheet music, book pages, old maps, or any other decorative paper.
How to get an aged gold finish
I really love that antique gold finish on my original yard sale star, so I did some experimenting to figure out how to recreate it. I tried several different methods including testing a few different gold card stocks and several metallic paints as well as sheets of gold leaf.
In the end I was able to get an almost perfect match for the original finish using gold foil cardstock and a few shades of metallic craft paint.
I built my star using the gold foil cardstock and then dabbed on champagne gold craft paint and brushed bronze craft paint when the star was finished. (The video tutorial at the end of this post shows a bit of this process.)
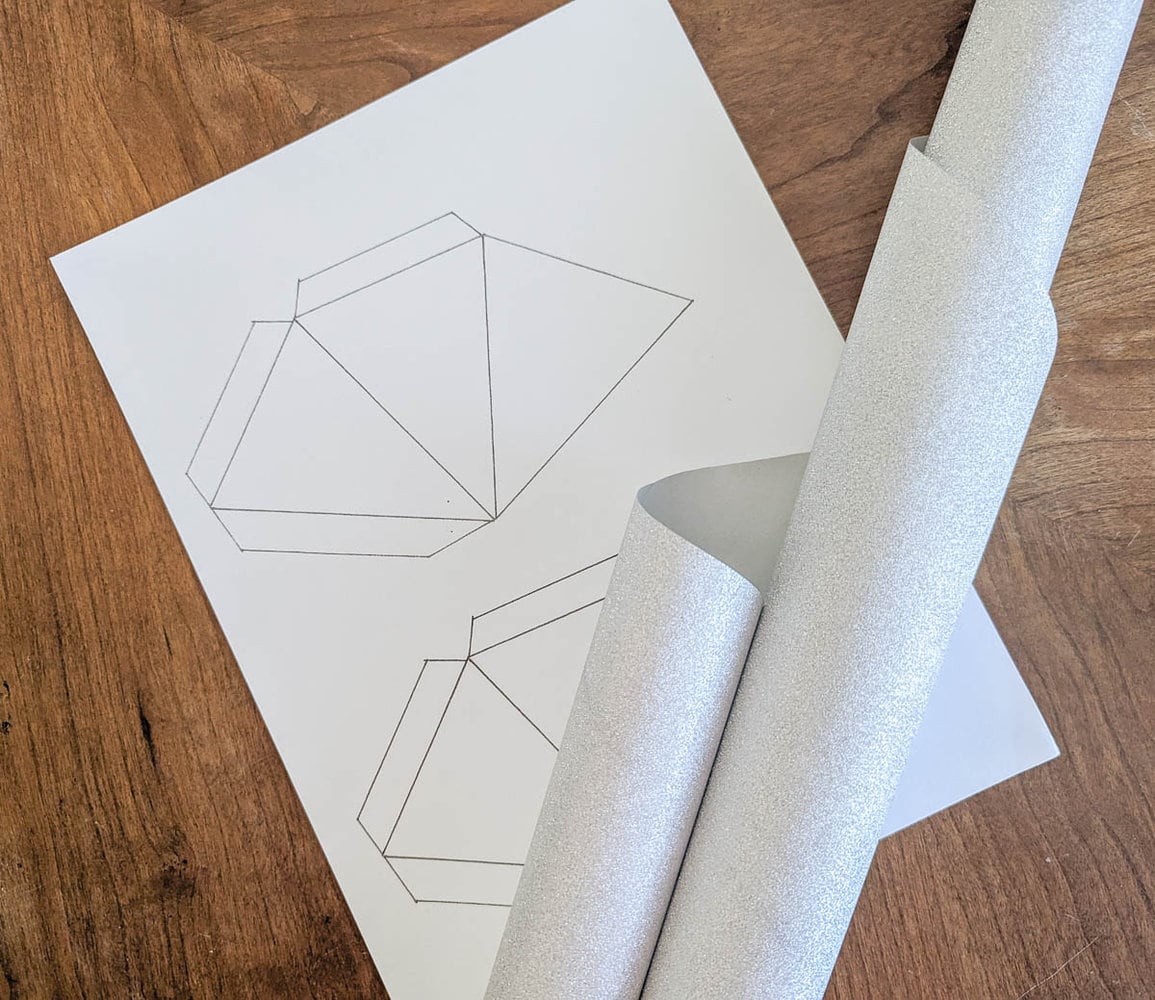
Print the free template onto your cardstock
What makes these stars so easy is I’ve already done all the work and figured out exactly what size and shape to cut your paper. All you need to do is print the free template onto your cardstock.
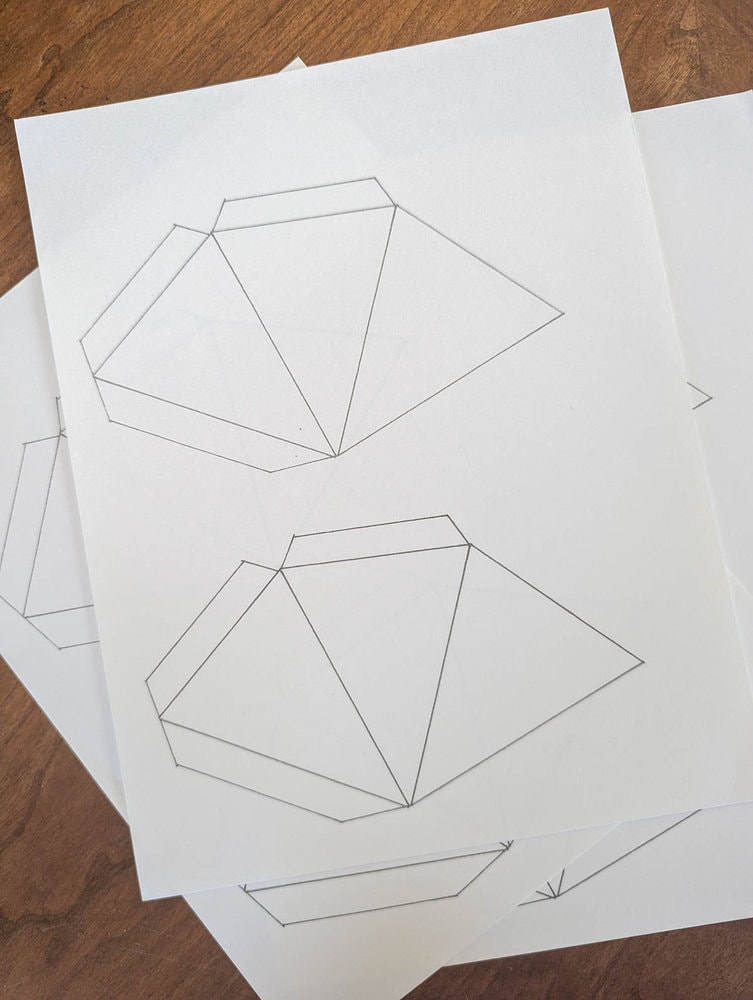
Download your free Moravian star template here.
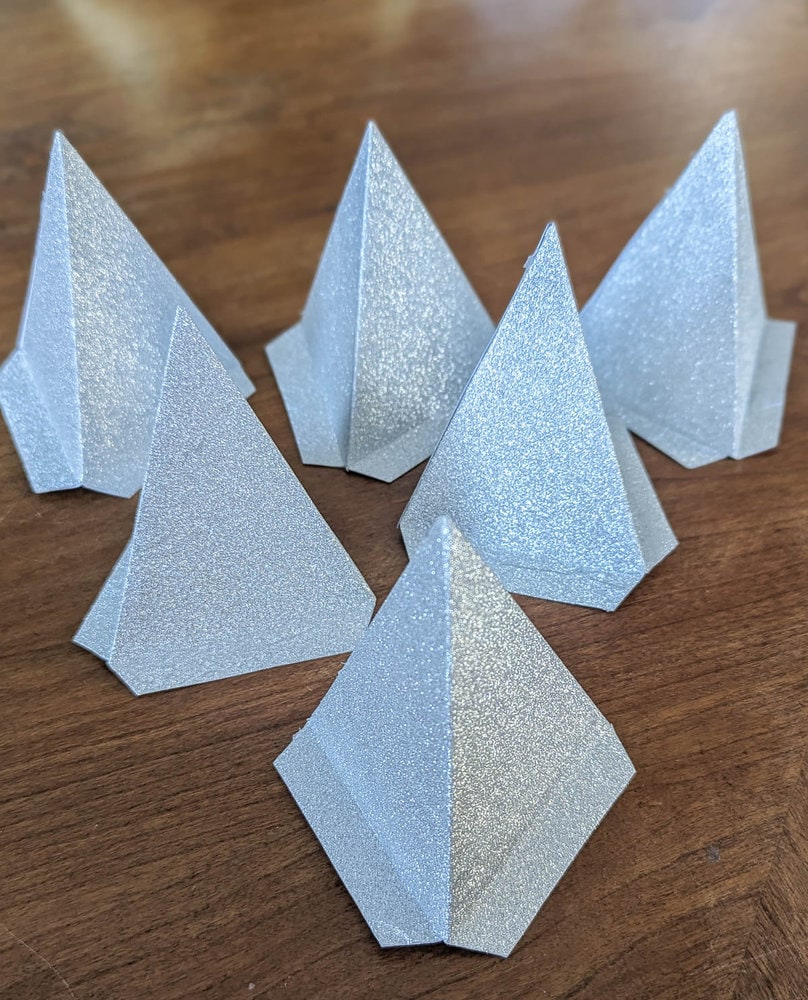
You will need 19 star points to form a Christmas tree star. The template includes two points per page, so you will need to print out ten copies of the template.
If you are using a decorative cardstock, be sure to print the template onto the plain, back side of the cardstock. That way the printed lines won’t show on the finished star.
If needed, attach your decorative paper to your cardstock
If you are using a separate decorative paper, this is the time to attach it to your cardstock. Using spray adhesive or a good glue stick, attach the decorative paper to the back of your cardstock. You want the printed template to show on one side and your decorative surface to show on the other.
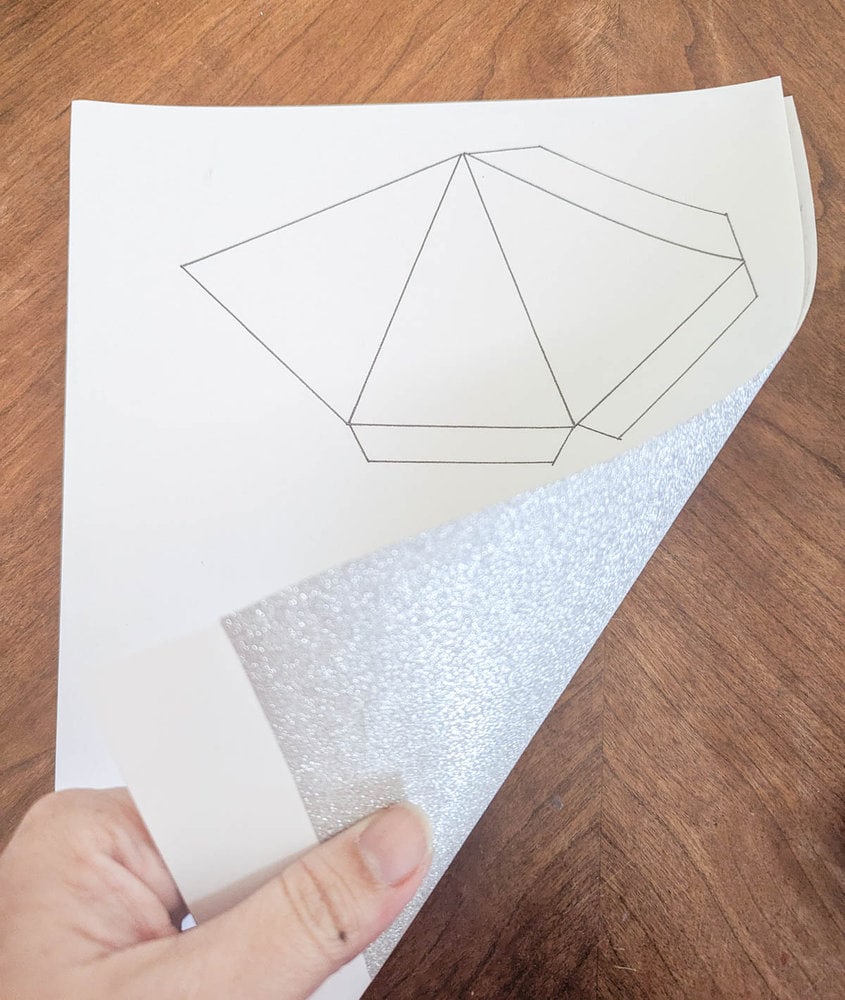
After gluing my wrapping paper to my templates.
Cut out and fold the star templates
Now you are ready to cut out each of your star points. Cut along the outer edges of each template.
You can then fold along the interior lines. It helps to use a ruler or other straight edge to help get nice straight fold lines.
Then run your fingers along each fold again to make sure you have nice, crisp folds.
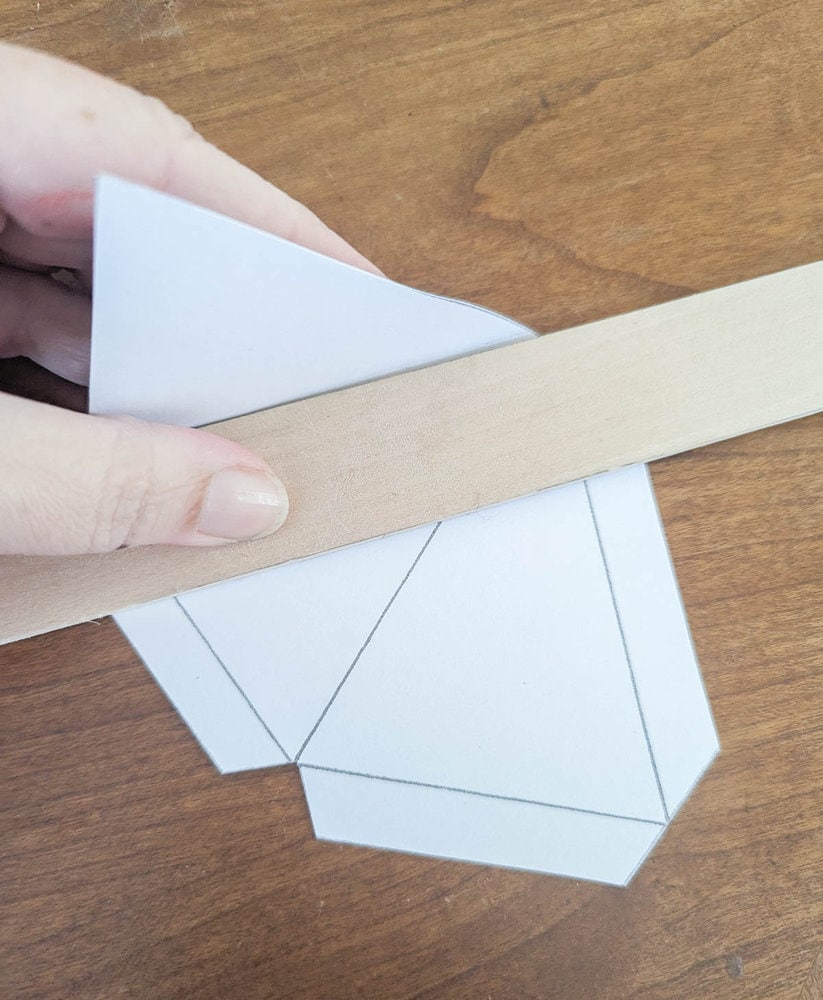
After taking these photos, I added instructions to the template showing where to fold in and where to fold out so it should be super clear.
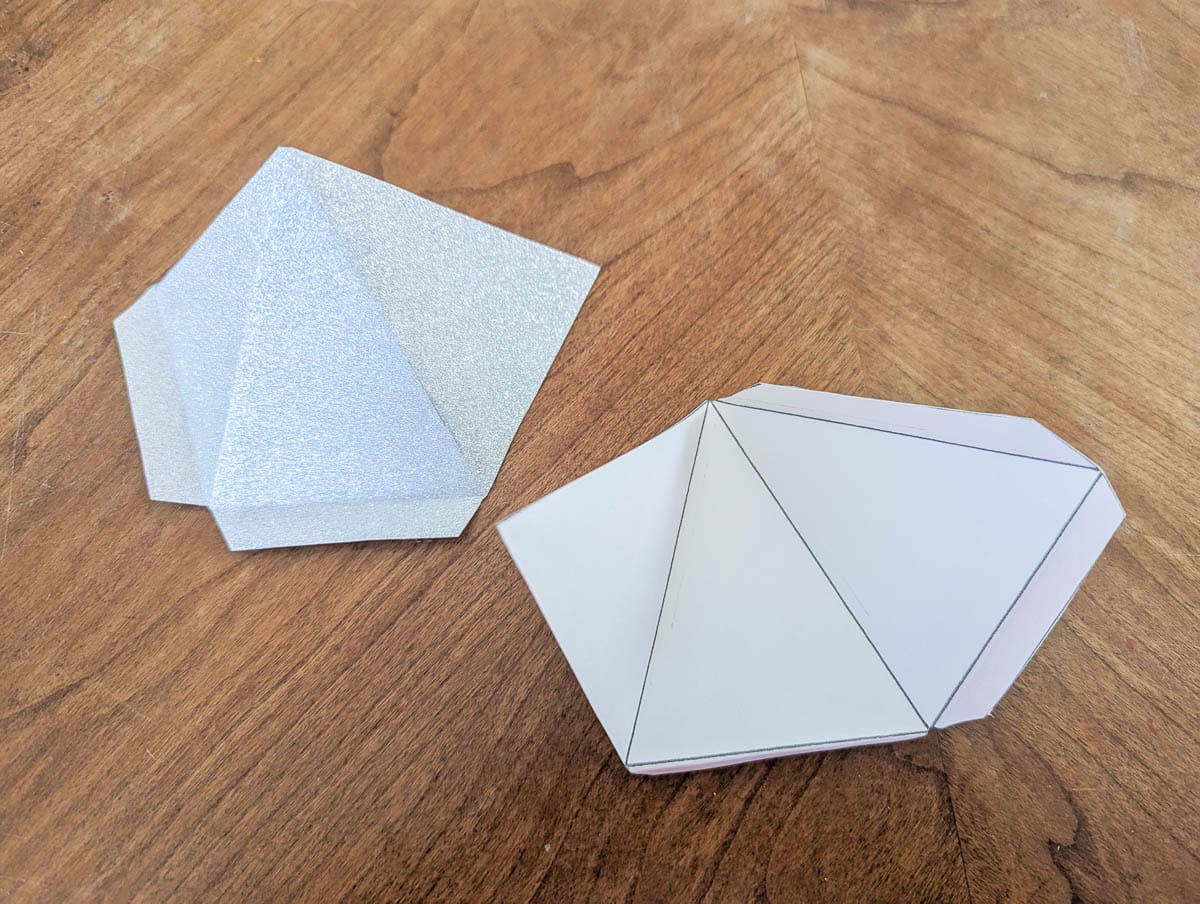
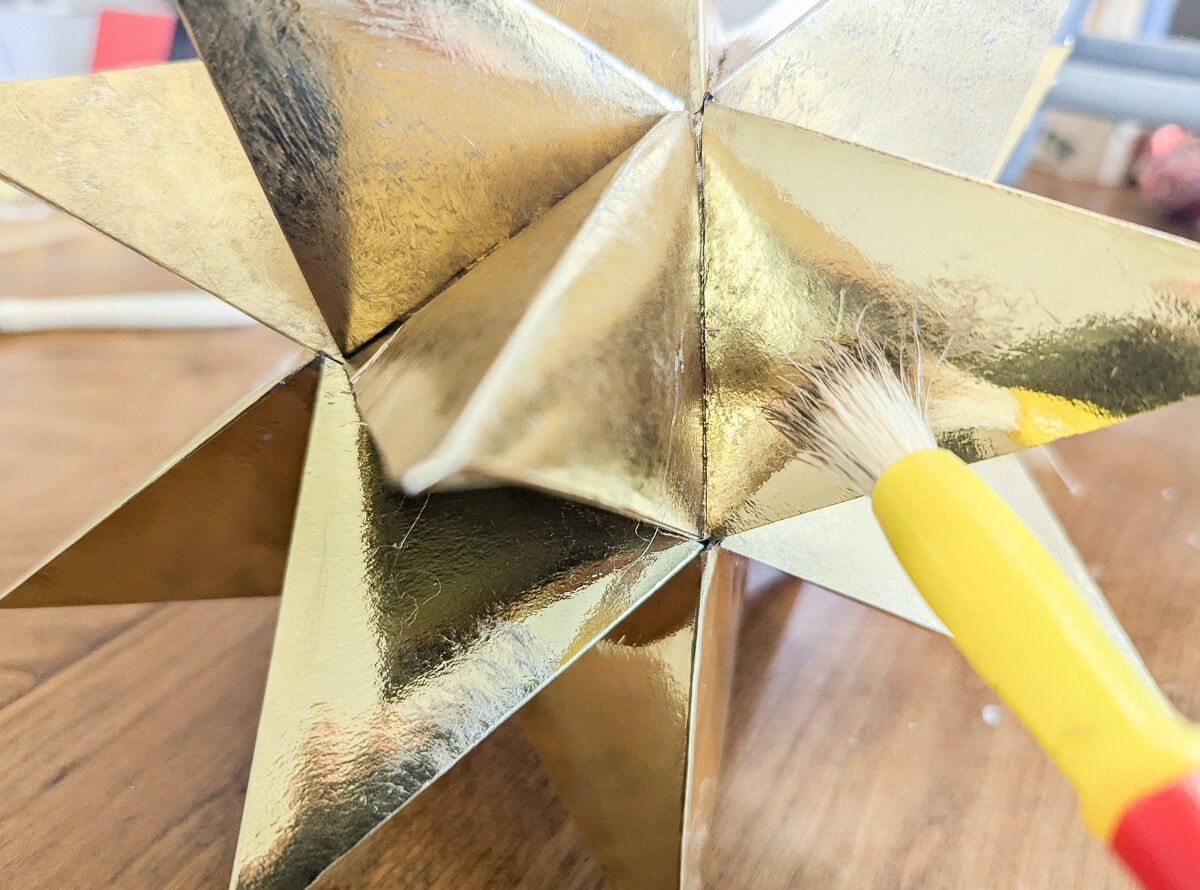
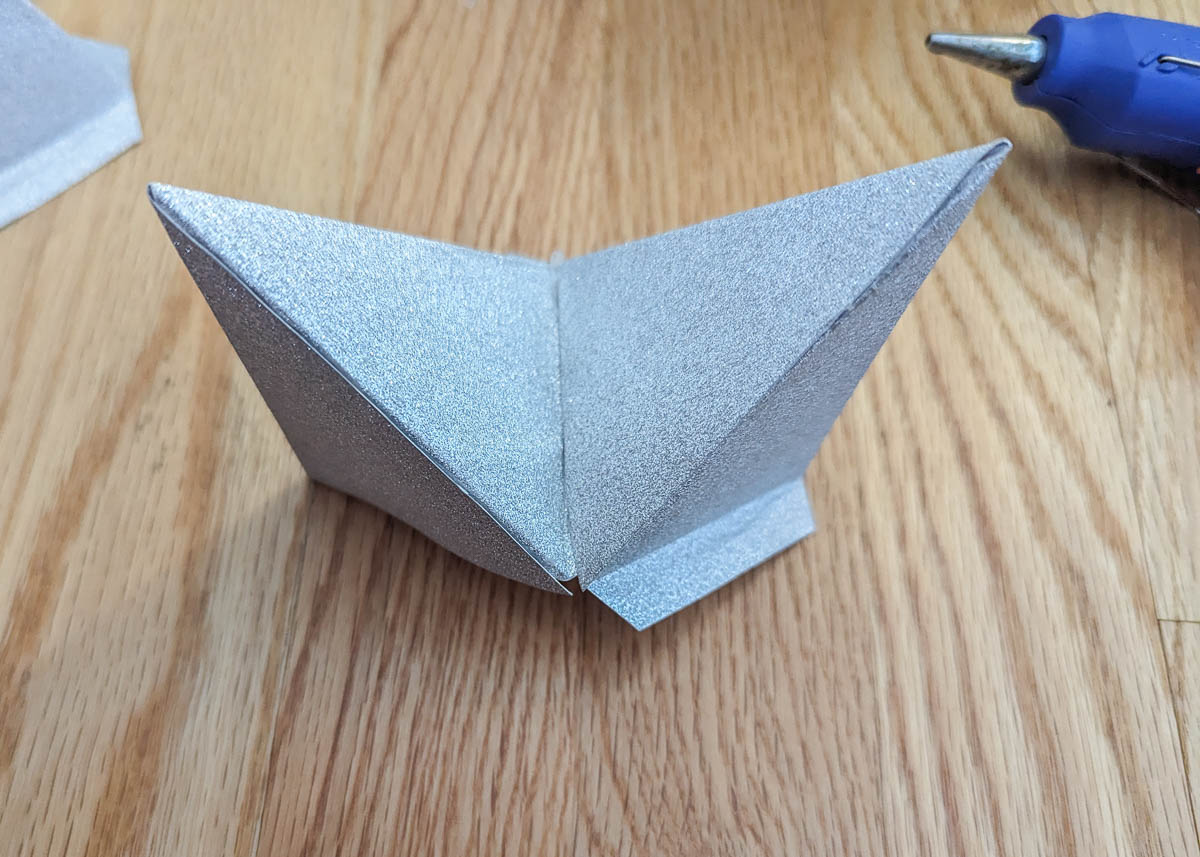
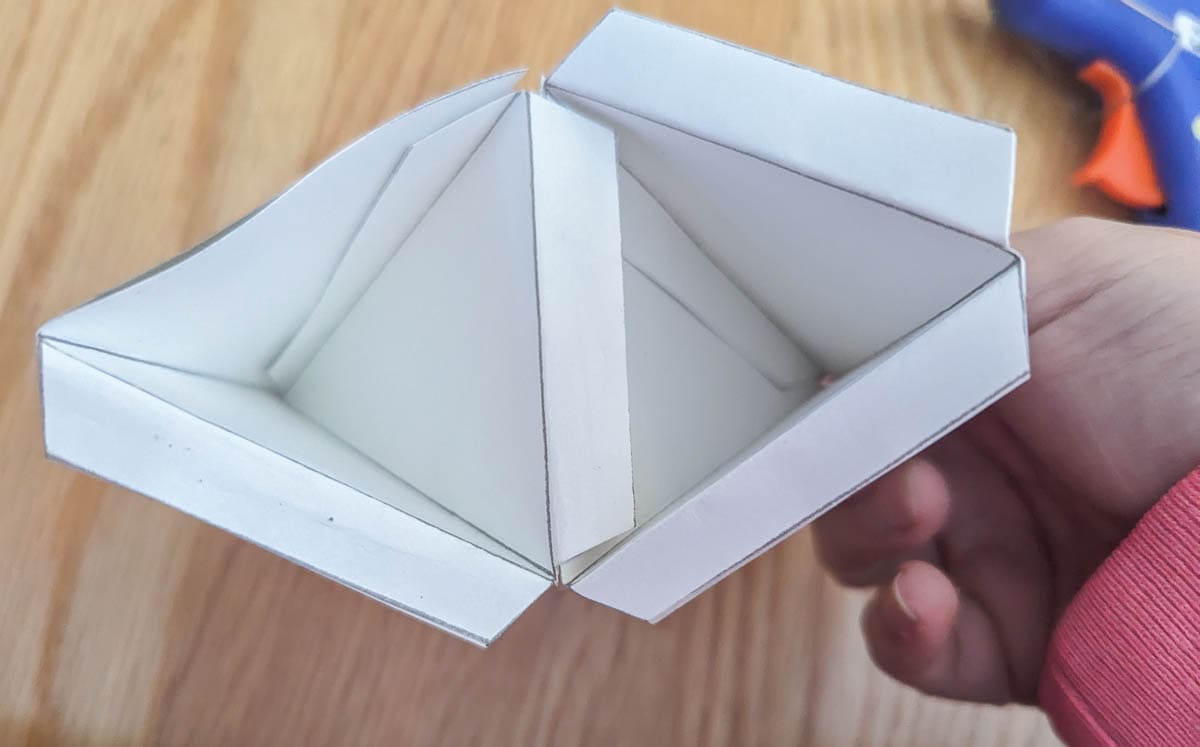
Hot glue into points
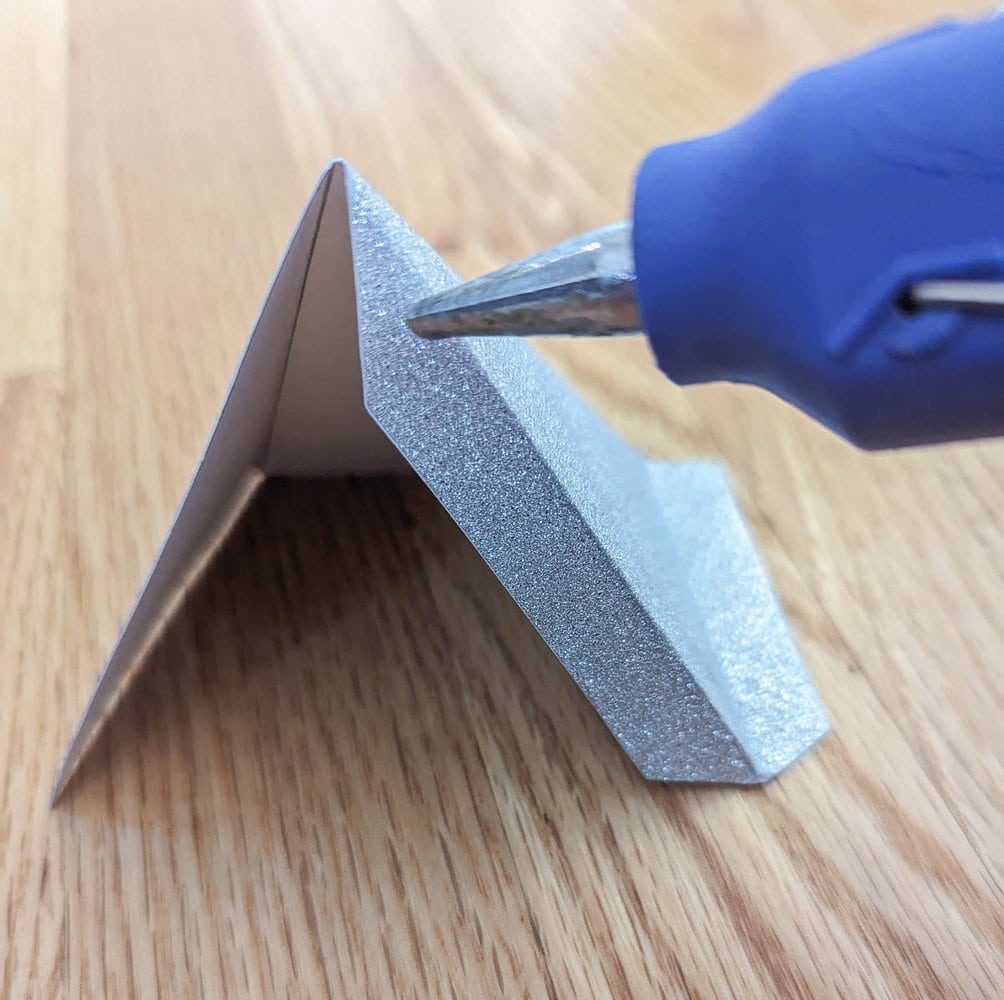
Next apply hot glue along the long side flaps and tuck them into place to form small triangular pyramids.
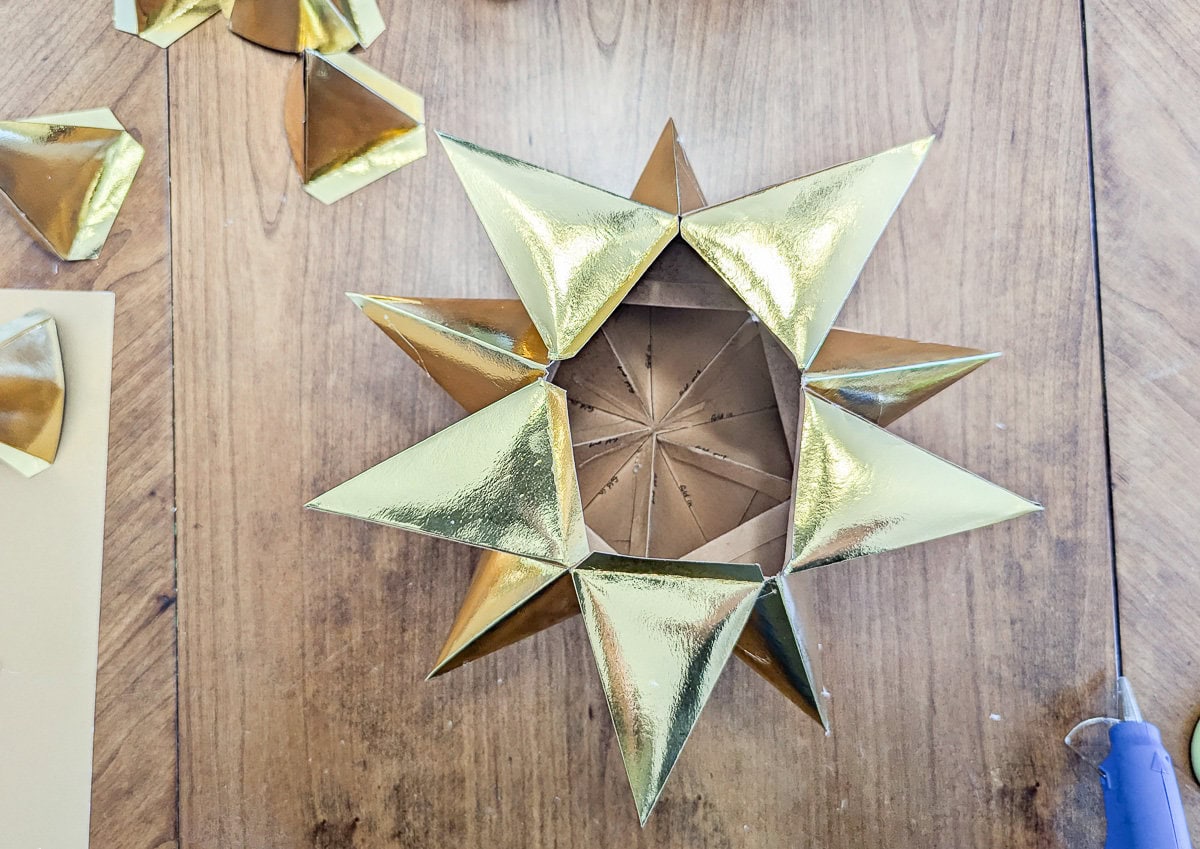
Build your star
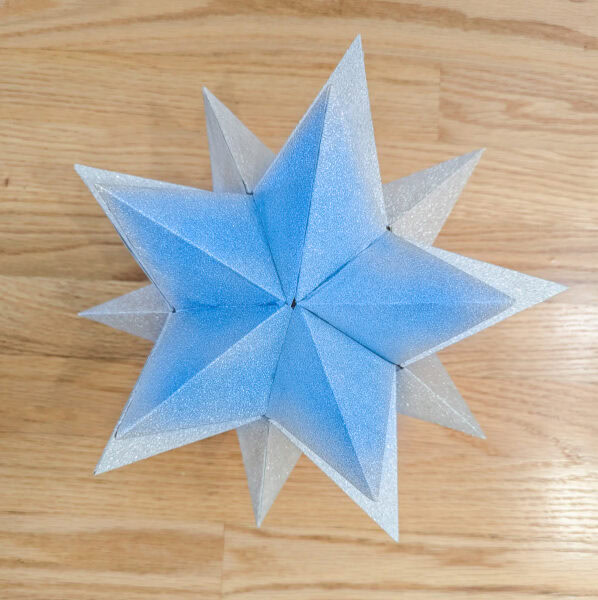
Now you are ready to put your star together. First, we’ll be creating the five pointed star highlighted below.
To connect two star points together, apply hot glue to one of the bottom flaps on your first star point. Then slide that flap into the free side of your second star point and press it into place.
Connect five of your star points together using the flaps to create the central star. It should look like this.
Add the second layer.
Next, we are going to add the second layer you see highlighted in the image below.
To create this layer, simply connect another star point to each of the five points in your original five pointed star.
Add the third layer
The third layer is a little different. We are going to be adding five points again, but this time they will show between the points of the stars we just made. Each point of the third layer will connect to two of the previous points. (This may seem confusing, but once you actually start constructing your star, it should be obvious where each point must be attached.)
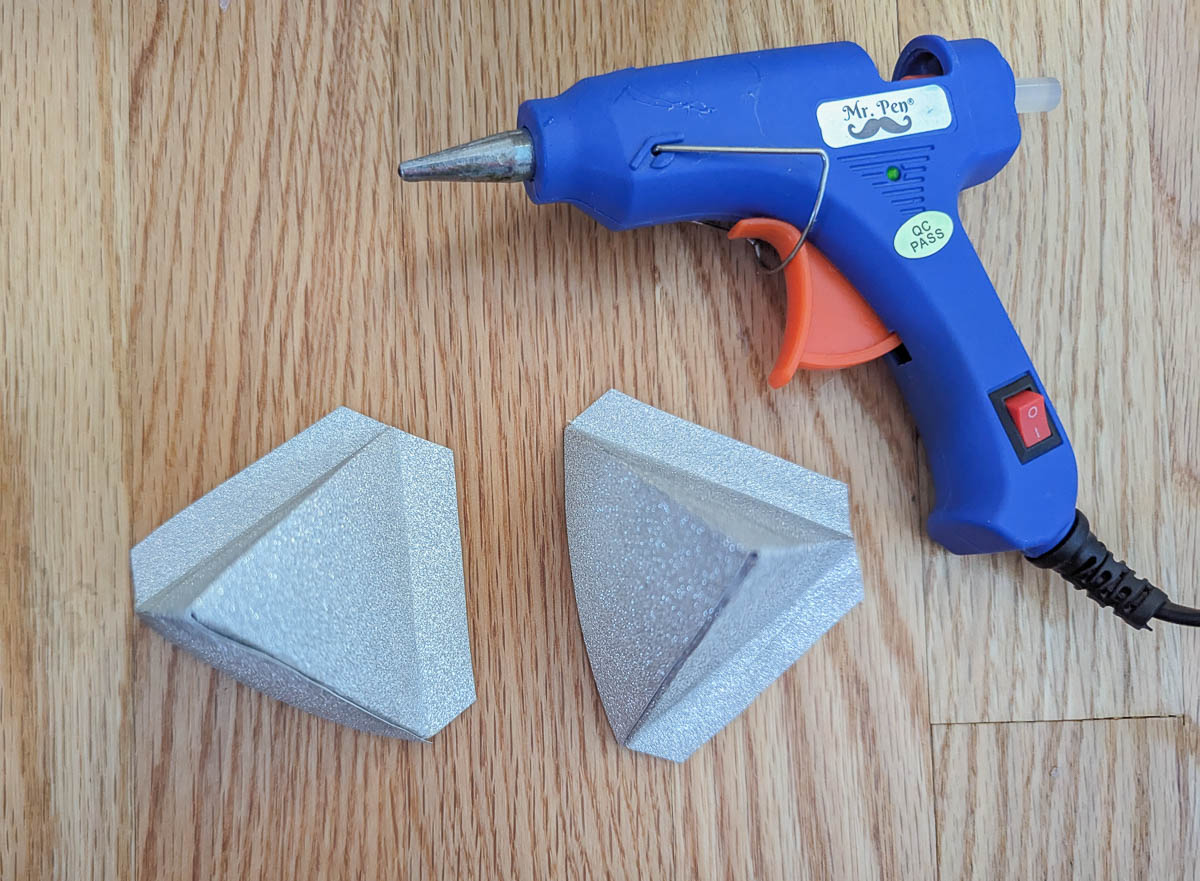
As you are attaching your points together, you may find that there are times when you end up with two flaps at the same connection point. If that happens, simply cut one of the flaps off with scissors so that everything can neatly tuck together.
This third layer will probably require you to snip off a flap from each of the points you are adding.
Completing the star
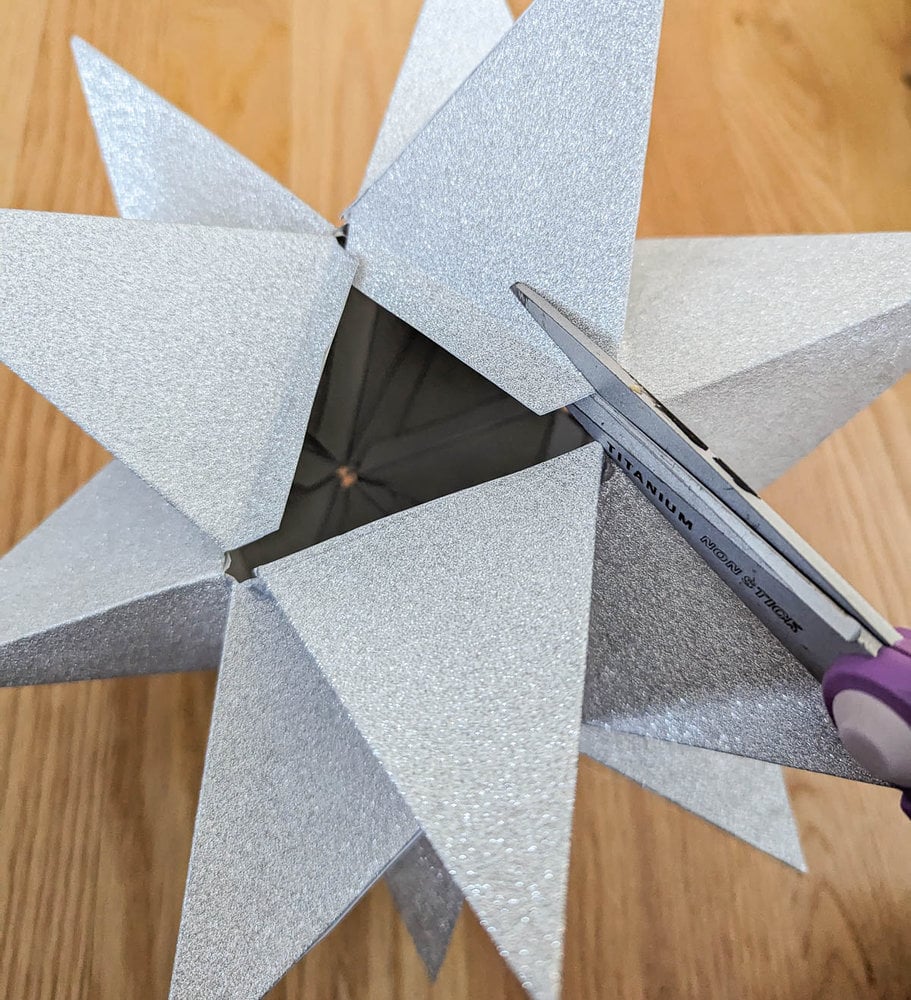
Flip your star over. You should see a pentagon shaped hole on the underside.
The last step is to add the final four star points as shown below. You will be left with one open triangle.
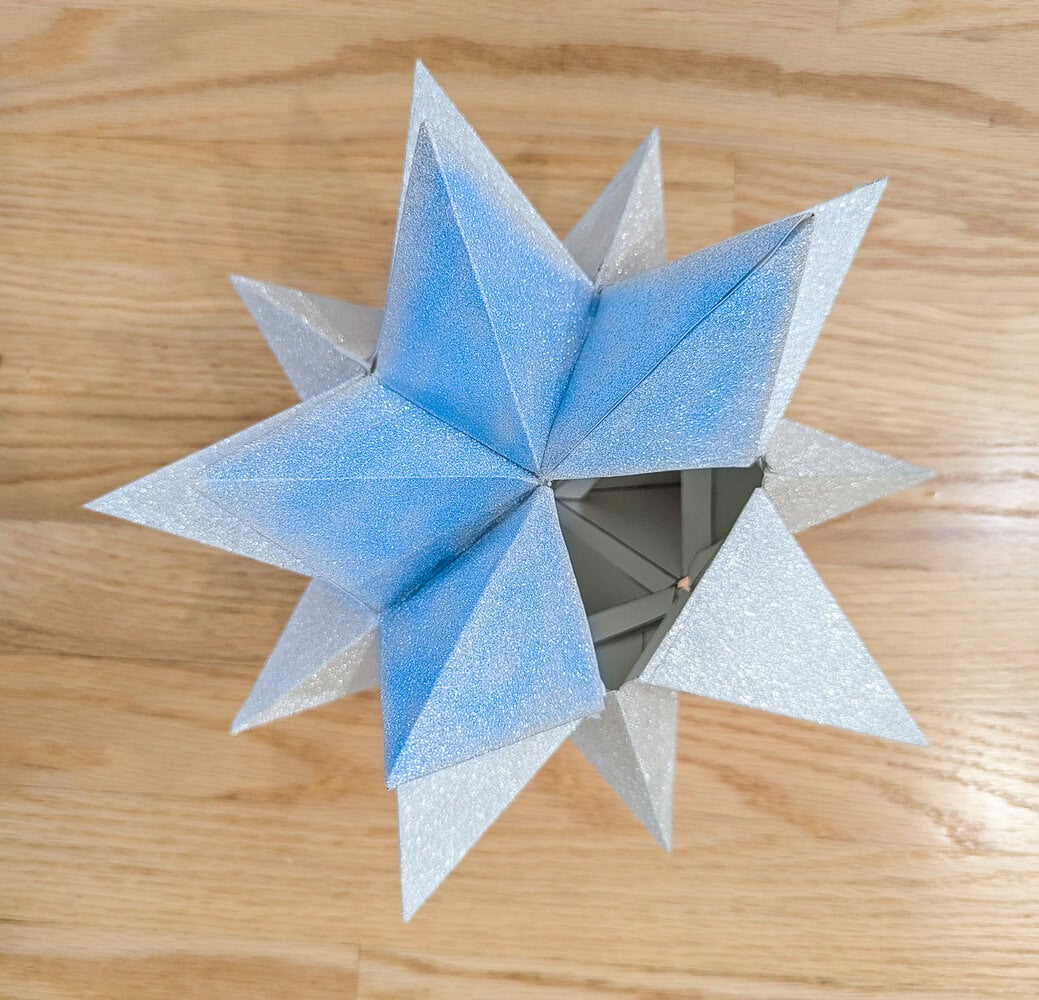
This opening makes it super easy to slide your star right over the top branch of your Christmas tree without having to add any extra wires or attachments. You can cut off the extra flaps around the opening to give a bit more room.

If you would like to make this a hanging star rather than a Christmas tree topper, you can simply add one final star point here to finish out the shape.
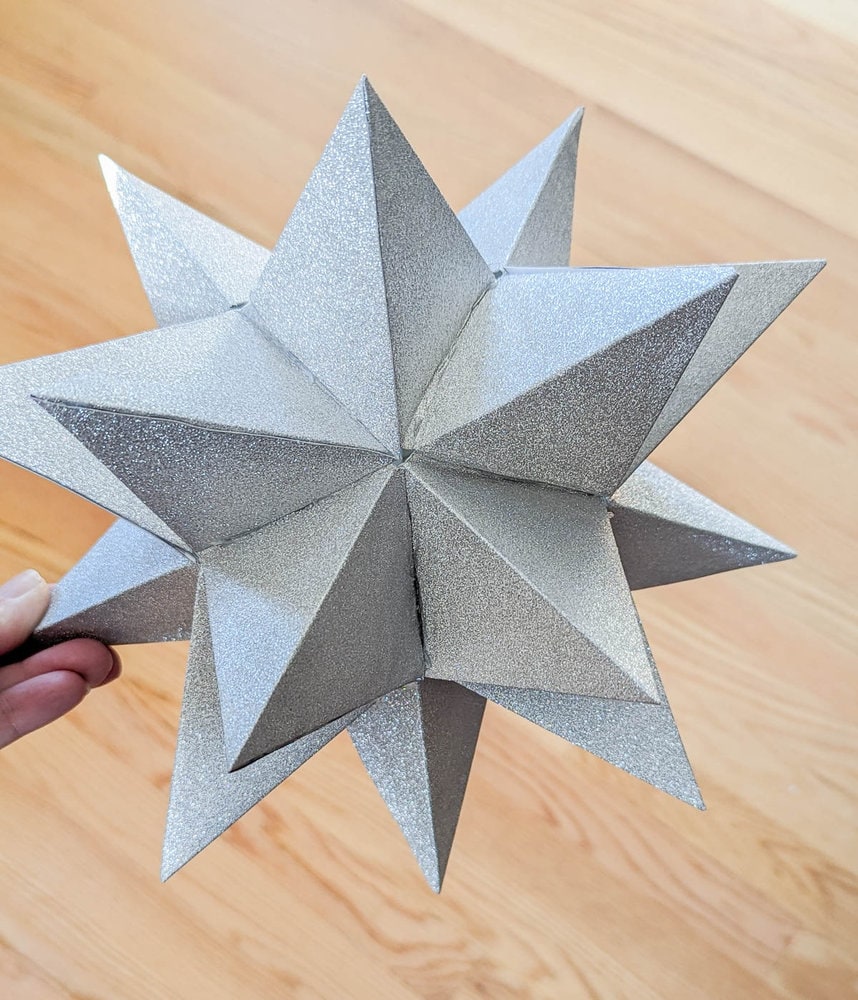
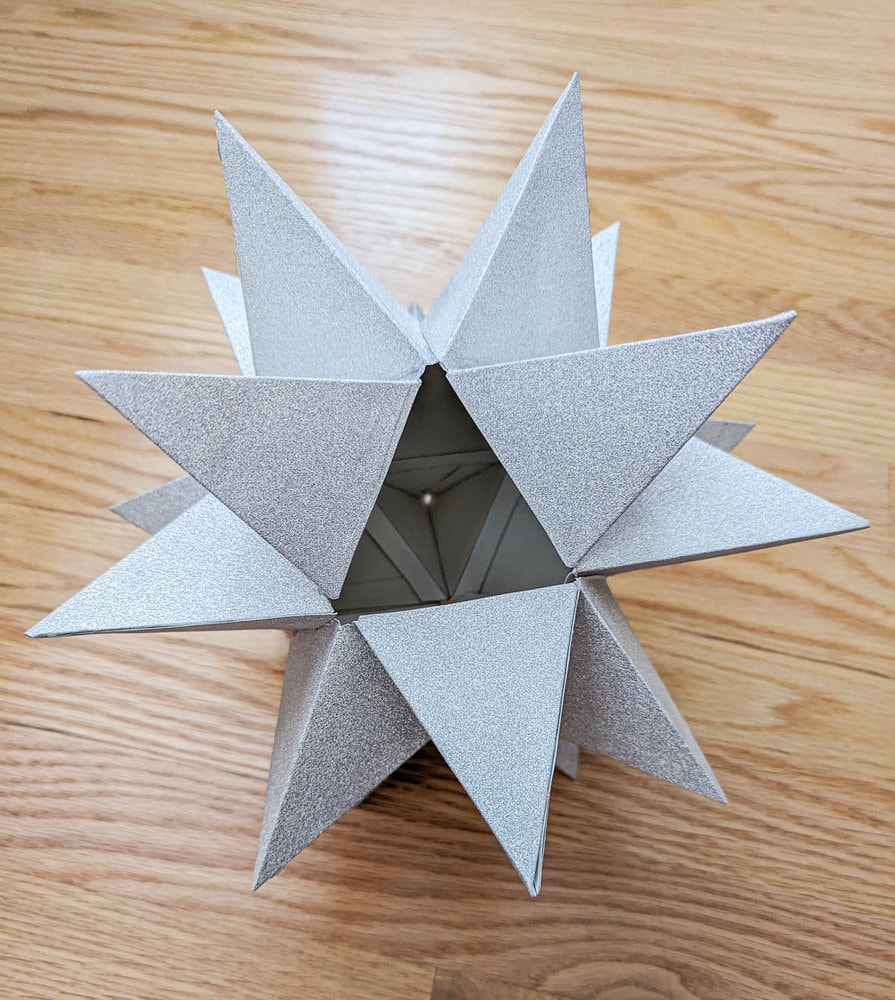
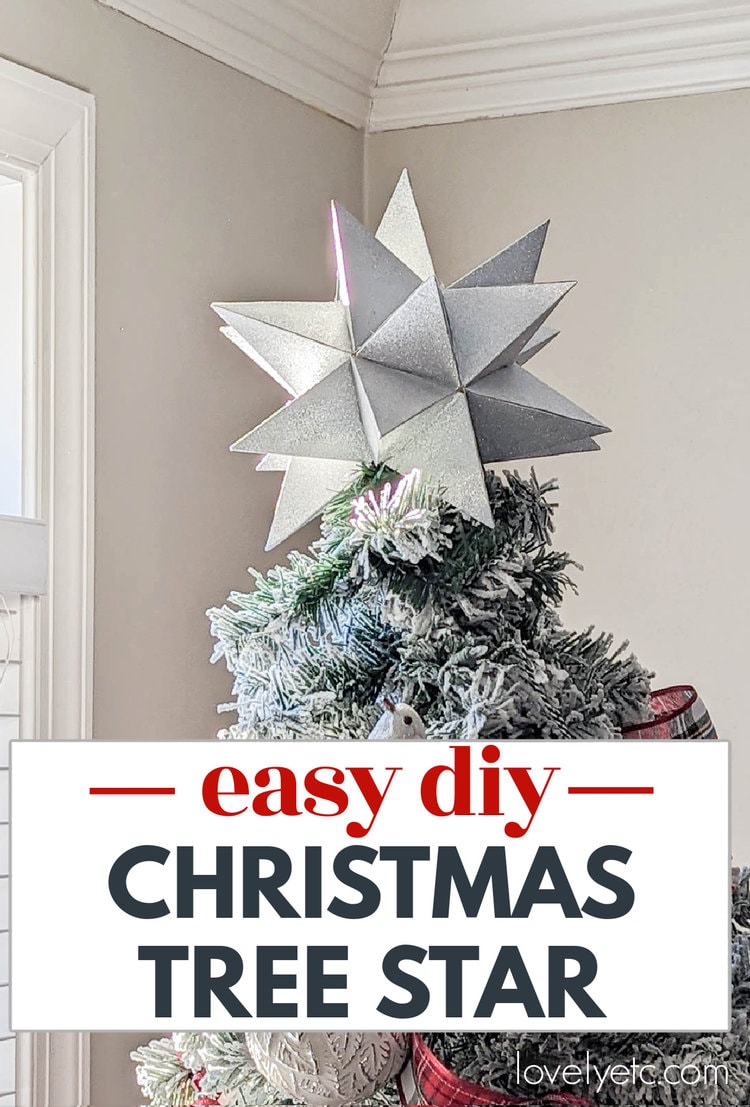
Finished DIY Christmas Tree Star
Here are my finished paper stars. I’m pretty thrilled with how similar the shape is to my original star.
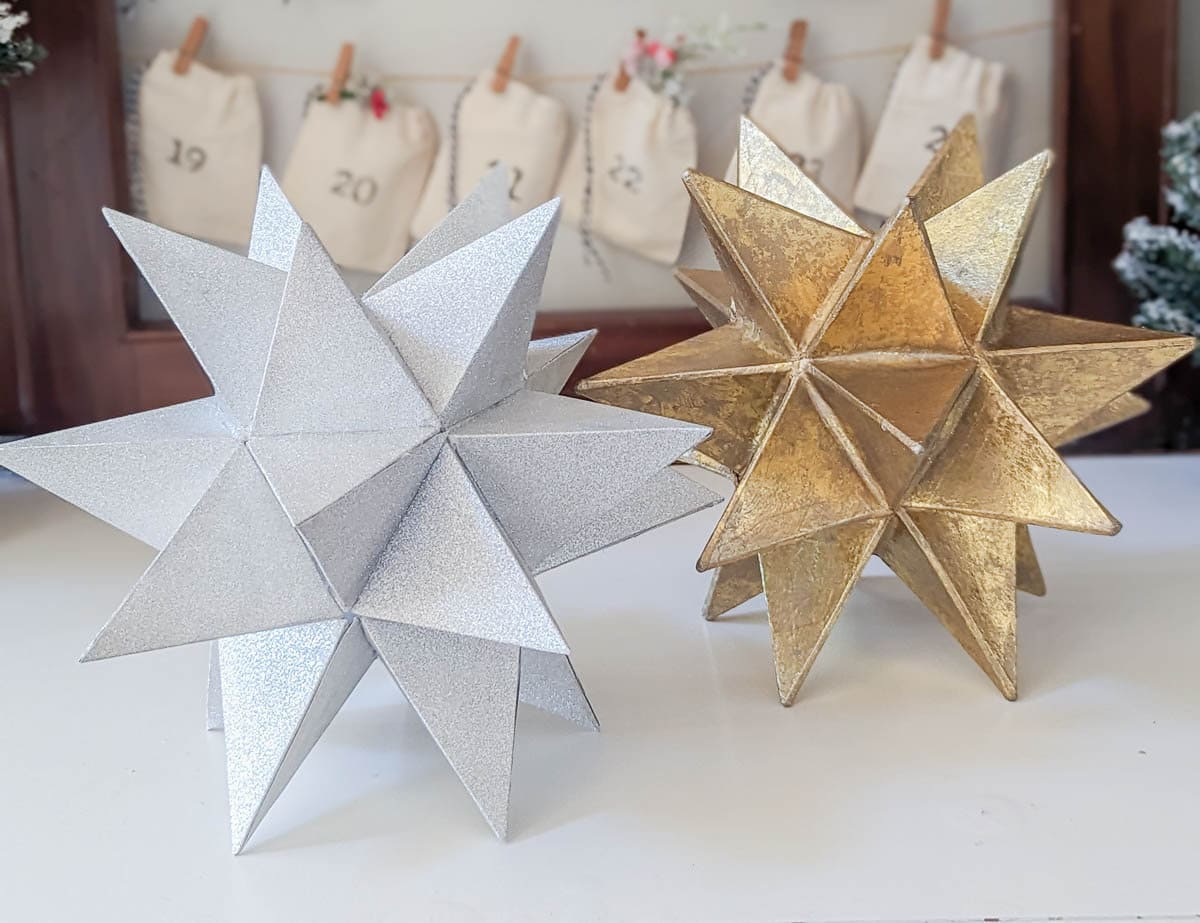
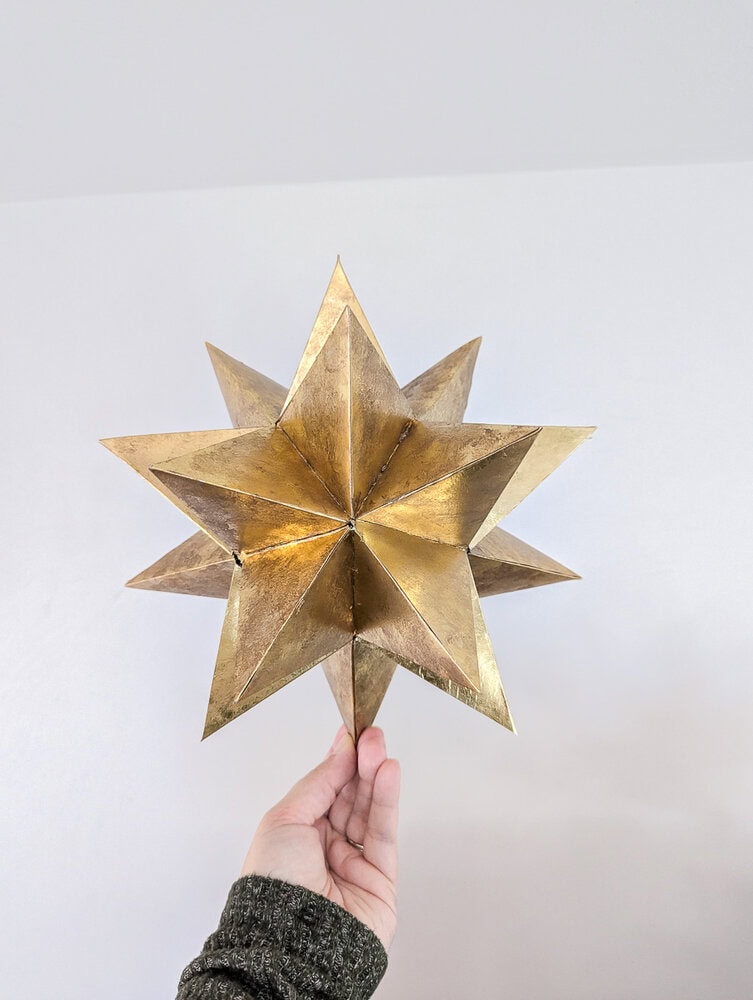
Here’s a photo of the DIY gold star side by side with my original. I love how that beautiful gold finish looks!
And here is my silver star in it’s spot on top of the Christmas tree.
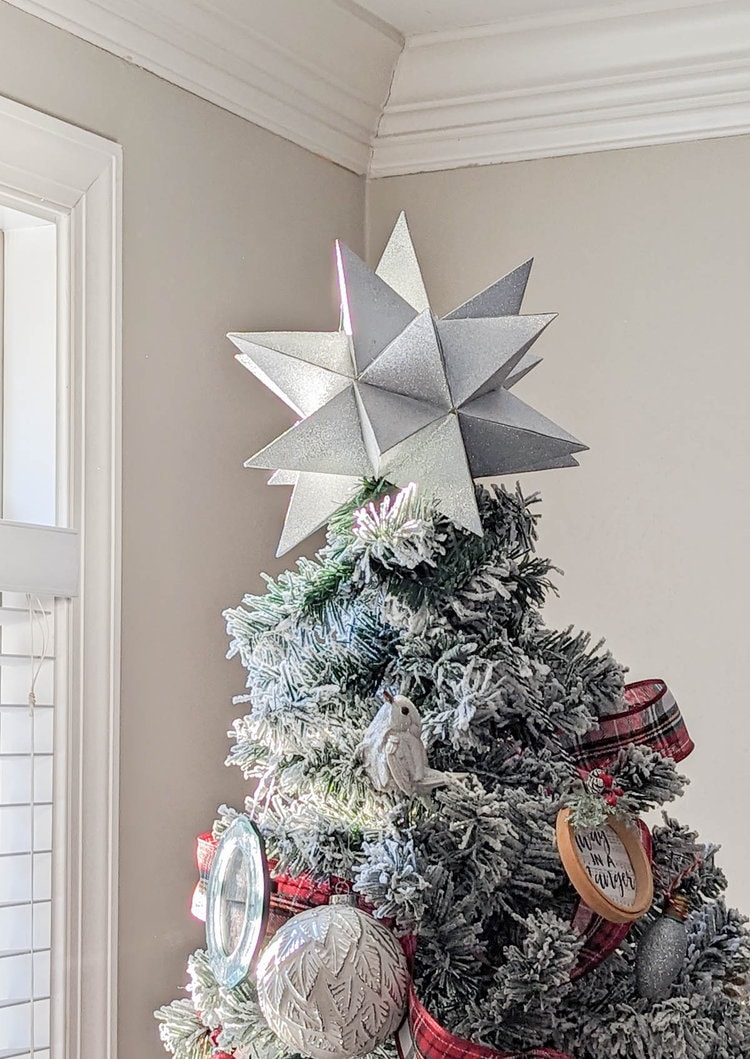
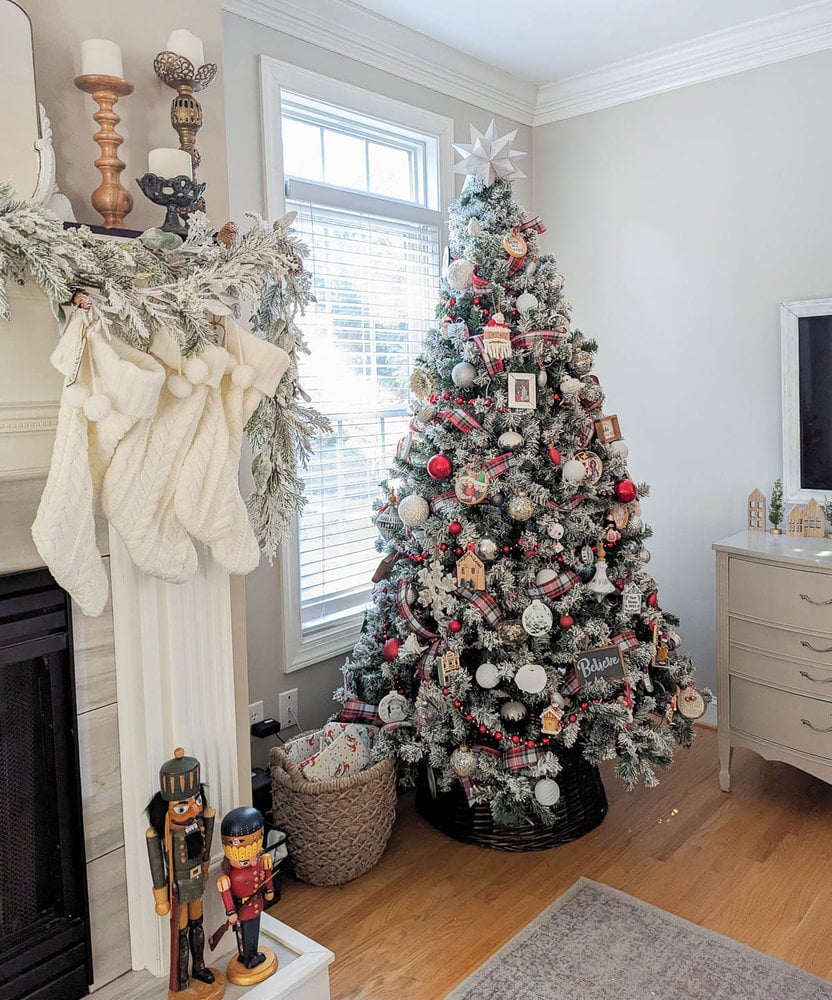
I think it looks pretty darn sweet considering it’s just made from cardstock, wrapping paper, and hot glue!
Video Tutorial
Want to see this tutorial in action? If you’re struggling with envisioning how the pieces all come together, I think watching the video will really help.
I’d love for you to subscribe to my Youtube channel!
Want more DIY Christmas ideas? You can see all my Christmas posts here or you can check out these posts next:
I’d love for you to pin this post on Pinterest!

Thank you! It’s beautiful! I’m really in to paper crafts the last couple of years. I want to try this one. Thanks for doing the hard part!
Merry Christmas!
All i have to say is you are amazing. I don’t think i could put this together even with the template. I get confused quite easily. This star is amazing. Bravo!!
Beautiful! Thanks for sharing! I’m going to make one
Question. Say you don’t have an avaliable printer. What would the ex̌act dementions of each triangle be?
The long sides of the triangles are 3.5″ and the bottom side is 2.5″. I hope that helps!
I am so happy to find your page! I have the same star you found at an estate sale. I bought it many years ago at Pier One and LOVE it! I put up 2 trees at Christmas and have been looking for another one for years. I just recently found one on eBay. Now I can make them for friends and family!
Thank you!
Thanks so much for sharing! I’ve been wondering where that original star came from and Pier One makes so much sense. Have fun making more!