How to Decorate a Christmas Tree: 10 Tips for a Beautiful Tree
Learn how to decorate a Christmas tree start to finish including ten simple Christmas tree hacks for a stunning tree.
Have you ever wondered why the beautifully decorated Christmas trees on Instagram and Pinterest look so amazing and yours just…doesn’t?
I’ve always loved decorating our Christmas tree, but to be honest, I haven’t always been great at it.
For years I just could not figure out why my tree didn’t look anything like the beautiful Christmas trees I saw in magazines or on social media.
Don’t get me wrong – In my opinion, there’s no such thing as a bad Christmas tree. Above all, decorating a Christmas tree is about celebrating the joy of the season.
I’m not trying to rain on anyone’s Christmas tree parade or put unrealistic expectations on anyone.
But for me personally, I wanted my Christmas tree to look beautiful. This tree was going to be the focal point of our family room for more than a month and I wanted it to be beautiful and festive and merry.
It was so disappointing to pull out all of my favorite ornaments and even buy new beautiful ornaments only to put them on the tree and realize it looks absolutely nothing like what I pictured.
So I started studying those gorgeous trees I admired. Every year I picked up a few more tips and tricks and tried a few new things and now I can say I’m finally really happy with how our Christmas tree comes together.
And it all came down to just a few small tweaks and hacks that made all the difference. (And no, you don’t have to invest a lot of money in a new tree or decorations to make these tips work.)
I’m going to take you step by step though how to decorate a gorgeous Christmas tree including 10 simple tricks that will take your tree from average to amazing. And I also have a full video tutorial at the bottom of this post if you prefer to see the whole process in action.
This post contains affiliate links which means if you make a purchase after clicking a link I will earn a small commission but it won’t cost you a penny more. Click here to see my full disclosure policy.
Decorations used on this tree
I’ve linked the exact items I used to decorate my tree when possible and have noted when I linked to something similar instead.
Of course, the beauty of this method is you don’t have to use the exact same things I used – you can use whatever decorations you love. The secret is in how you put it all together.
- 7.5″ Prelit Flocked Christmas Tree – this tree is beautiful in person and definitely on the less expensive end!
- Gold mesh wired ribbon – this roll holds a ton, so one roll is plenty
- White faux fur wired ribbon
- Christmas picks (similar)
- Basket tree collar (similar)
Choosing the right tree
We can’t really talk about decorating your Christmas tree without talking about the tree itself.
There are all kinds of Christmas trees out there from the super cheap to the very expensive and I’ve tried a pretty wide range of them. I’ve used a ten dollar Christmas tree I found at a thrift store. I’ve used mid-range trees from Amazon. And I’ve used a really nice (and pretty pricey) tree from King of Christmas.
If you have the budget for an expensive tree, there are some truly gorgeous options out there. But you really don’t have to buy a $700 Christmas tree to have a beautiful tree.
If your tree is looking a little tired but you don’t want to invest in a whole new tree, the decorating hacks in this post will make a huge difference.
Another thing that can really help a tired tree is adding flocking. I know a flocked tree isn’t for everyone, but I absolutely love them.
When my ten year old Christmas tree was starting to look droopy and sad, I added SnoFlock flocking powder and it’s amazing what a huge difference it made!
The flocking looked gorgeous, perked the whole tree up, and made it look much fuller. (I have a step-by-step tutorial on how to flock a Christmas tree if you’re interested.)
After using my DIY flocked Christmas tree for seven years, the stand and a few of the branches broke so I finally replaced it this year.
I bought this 7.5 foot flocked Christmas tree from Amazon and I’ve been super happy with it so far. It was easy to set up and the flocking was much less messy than I was expecting. (The price fluctuates on this tree but it was around $225 when I bought it.)
Fluffing your tree
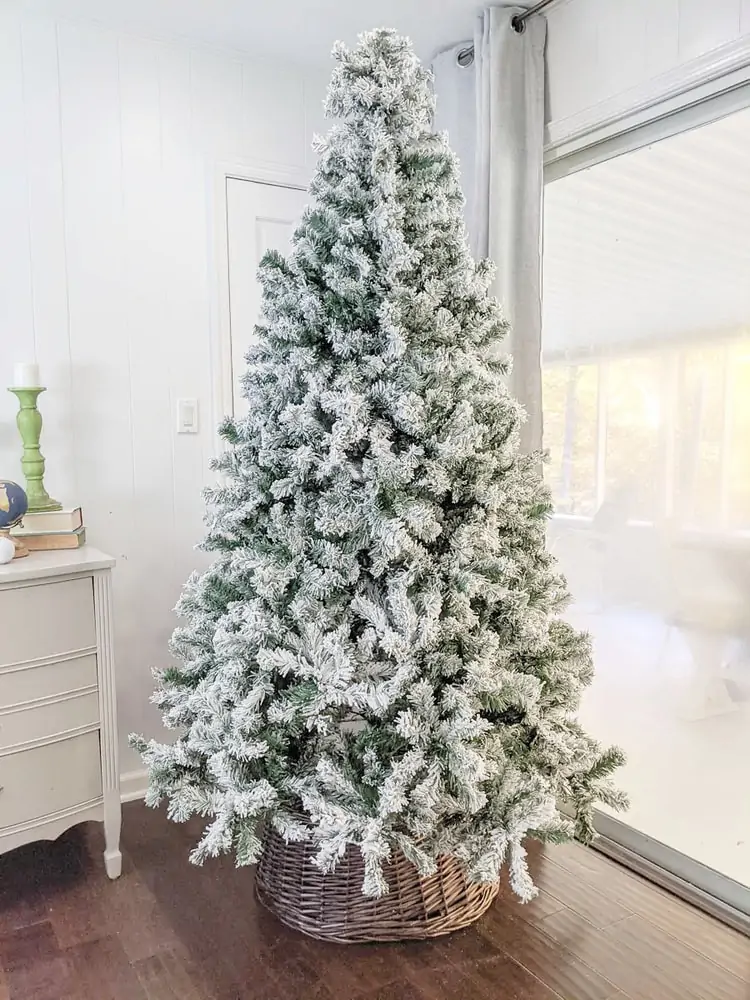
If you are using an artificial Christmas tree, the first step to making it gorgeous is always fluffing the branches.
You want to work around the tree, spreading the branches so that they are nice and full and fill any gaps.
Tip 1: Wear gloves to fluff your tree.
Fluffing up the branches makes a huge difference in how your finished tree looks, but it can definitely scratch your hands up.
This year I heard a tip to wear cotton gloves or even dishwashing gloves to protect your hands when fluffing up the tree and I think it’s genius!
Adding lights
When it comes to Christmas tree lights, more is more. I used to add just a couple of strands of lights to my Christmas tree and it really wasn’t enough to give that beautiful warm glow at night.
Now I am much more generous with the lights. I’ve even added more lights to a pre-lit tree that was a bit skimpy on the lights.
Aim for at least 100 lights per foot of Christmas tree. So for a 7.5″ tree, you’ll need at least 750 lights.
Tip 2: Use a special extension cord for plugging in Christmas lights.
When adding multiple strands of lights to an unlit tree, it can get messy trying to get all of the lights plugged in without overloading the fuses. I love this extension cord for plugging in Christmas tree lights.
You can feed it up through the tree along the tree trunk and instead of having all of the outlets at one end, there are places to plug in strands of lights all along the extension cord. Then at the bottom, there is a switch so you can easily turn all of the lights on and off with the push of a button.
Tip 3: Wrap the lights around each branch.
Years ago I used to add Christmas lights to the tree by wrapping them around and around the outside of the tree. Then I read a tip that it works better to add the lights vertically, moving up and down the tree which was slightly better.
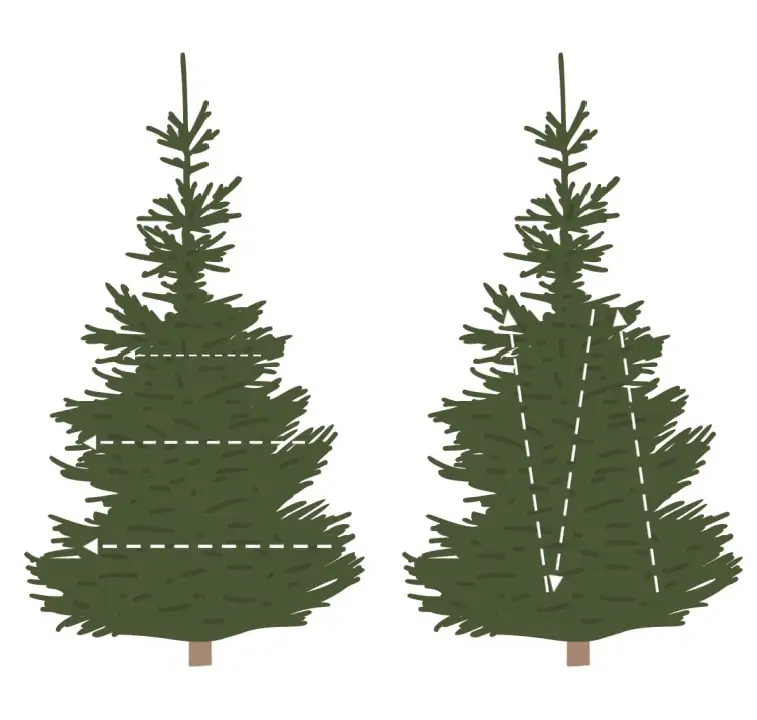
The problem with both of those methods is they keep all of the lights spread around the very edges of the tree.
If you look closely at a pre-lit tree, you can see that the lights wrap around each branch from the outer edges of the branches to closer to the center of the tree.
When you add strands of Christmas lights this way, you can add way more lights and the entire tree gets a beautiful glowy look.
Just wrap your lights around each branch moving from the tip back toward the trunk of the tree, then continue to the next branch.
Adding ribbon
I think adding ribbon is one of the trickiest parts of decorating a Christmas tree. I used to just use a simple bead garland on my tree and skip the ribbon altogether, but then I noticed that all of the gorgeous trees I loved had ribbon.
At first, I really struggled with figuring out how to put the ribbon on the tree. It seemed like it either looked overly simple, like a child wound some ribbon around the tree or the ribbon looked like a tortured, wrinkled mess.
But after studying how the pros do it, I finally understand how to put the ribbon on the tree without it looking like a mess.
After trying several different methods of adding ribbon to the tree, this is the method that I’ve found to look the best.
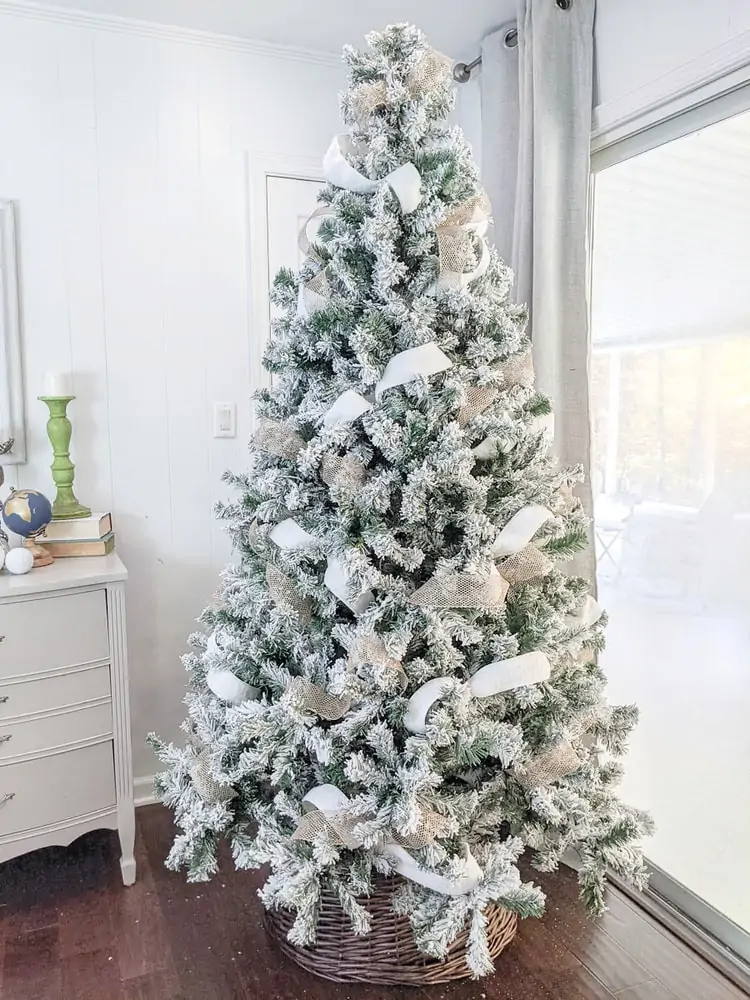
You want to be sure to use wired ribbon so that it can hold it’s shape. And using two different types/colors of ribbon really helps give the tree more color and interest.
You will need around 50 feet of each type of ribbon for a typical 7′ tree.
Tip 4: Add ribbon in small strips.
Start by cutting a piece of ribbon around 18-24″ long.
You can add the ribbon in a long continuous piece, but I find it much easier to work with smaller pieces of ribbon. And it also saves money since you won’t need to buy as much ribbon.
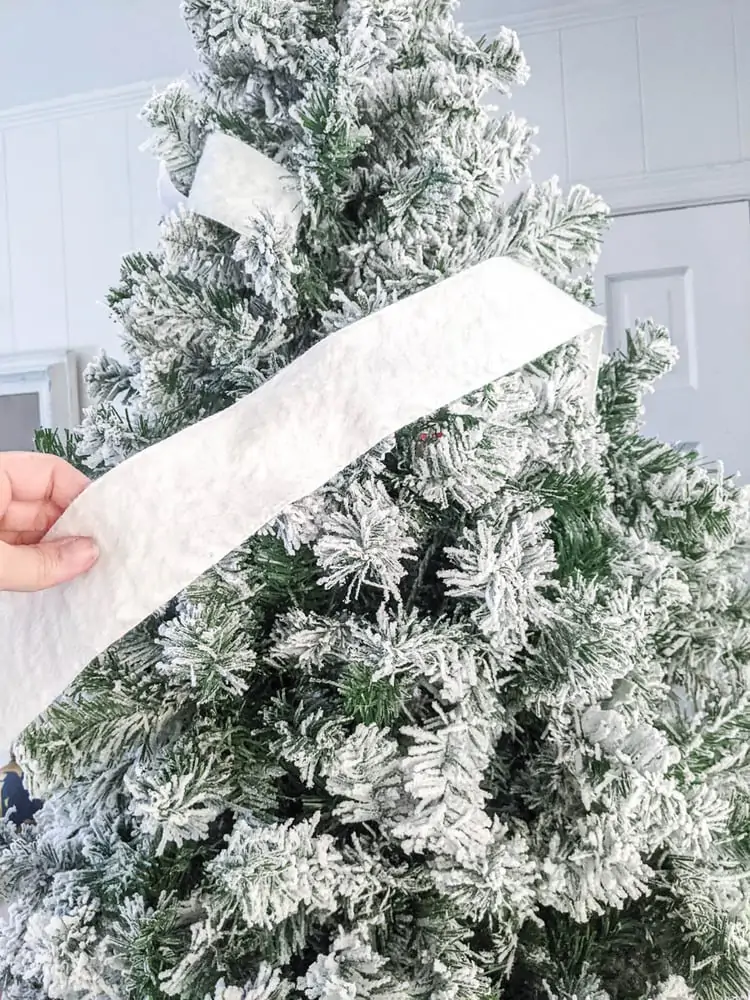
Tuck one end of your ribbon piece into the tree.
Then let the ribbon drape naturally over the tree.
The trick is to let the ribbon do what it wants to do. I used to try to force it to do what I wanted and that’s when it turned into a tortured mess.
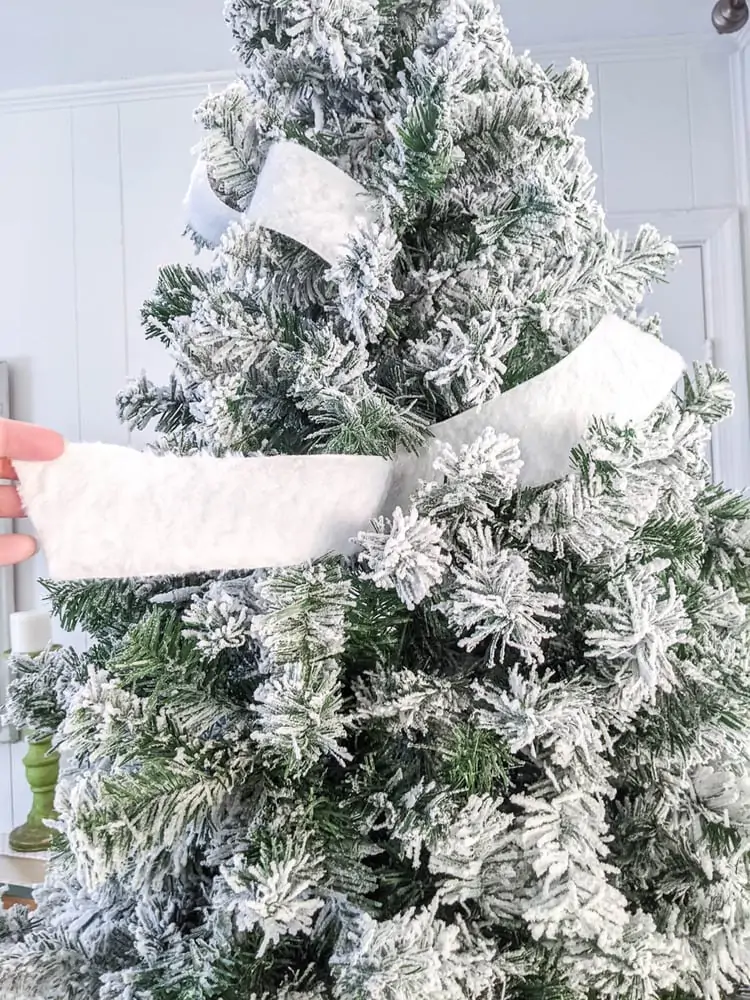
Let the ribbon drape over the tree and wherever it naturally curves inward, push the ribbon toward the center of the tree to form two loops or tufts of ribbon. Then tuck the free end of the ribbon in as well.
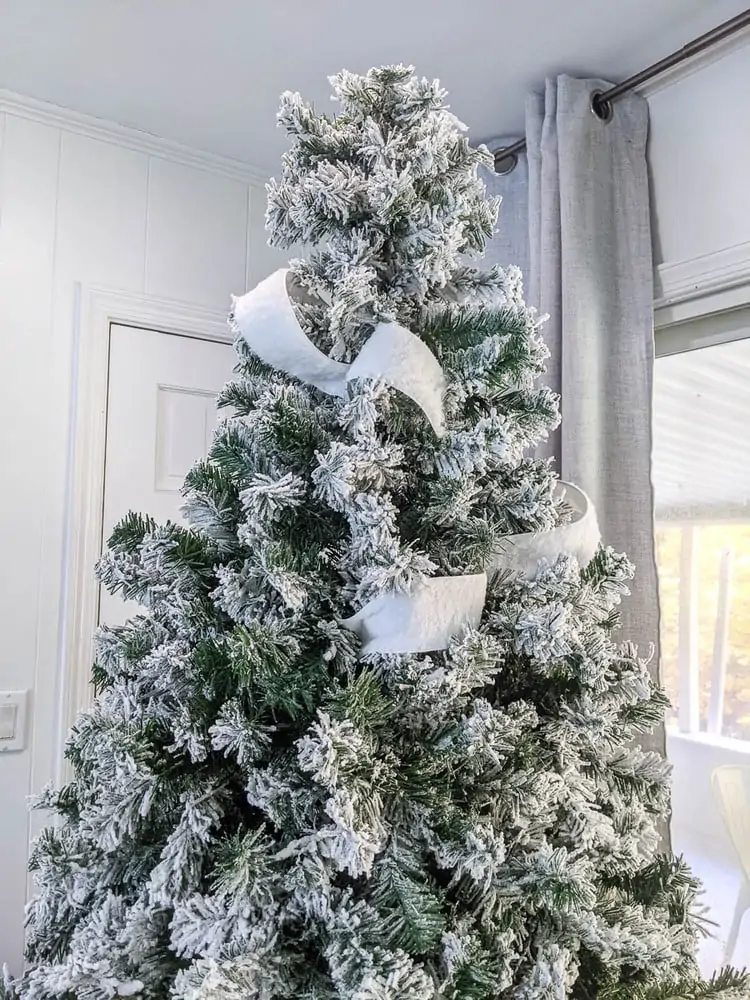
As you are adding ribbon to your tree, you can position the pieces of ribbon a bit more horizontally or a bit more vertically, but try to avoid creating perfectly straight horizontal or vertical lines.
Adding branches, pinecones, and berries
Adding Christmas picks to your tree is a small thing, but it can make a huge difference.
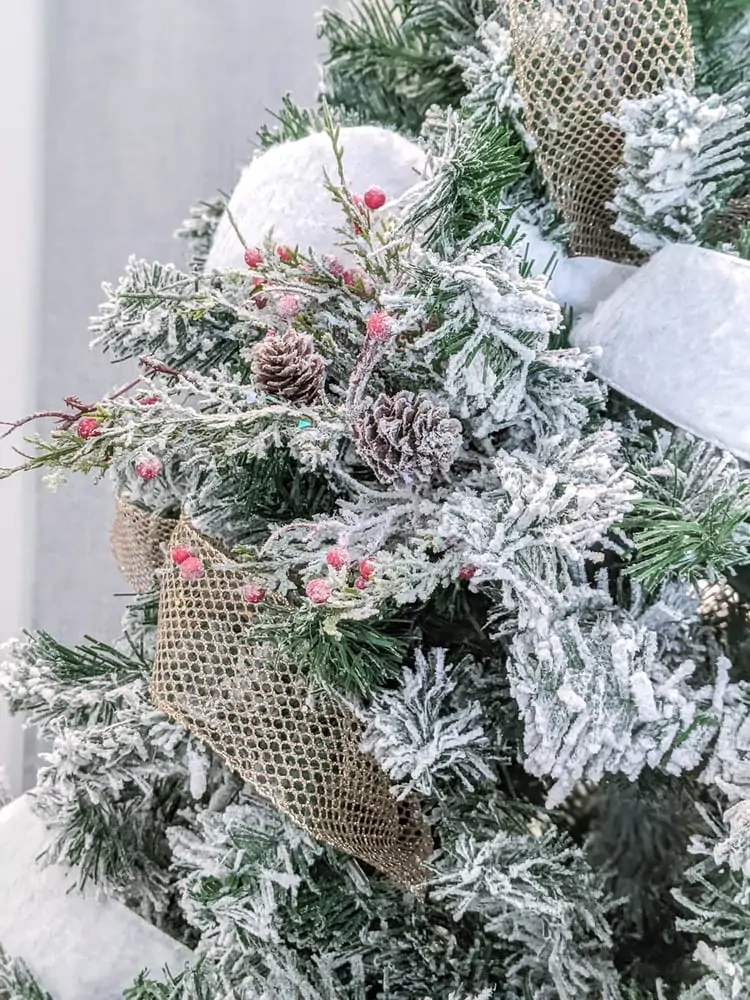
Tip 5: Add Christmas picks or branches to give your tree texture.
One of the things I’ve noticed about gorgeous, expensive Christmas trees is they often include pinecones or berries or a few different types of branches. Adding picks to your tree is an easy way to get a similar look on a budget.
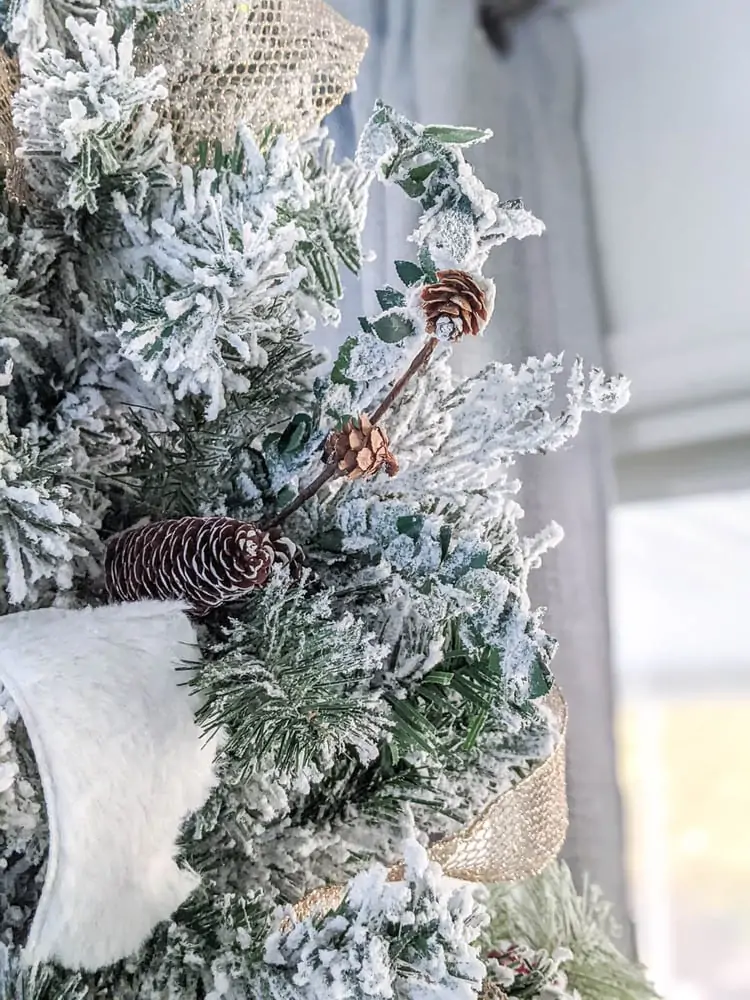
You can find all kinds of Christmas picks at stores like Michaels and Hobby Lobby, but I have also pulled branches and pinecones from my own yard and added them to my tree with great results.
I usually like to add a bit of leftover flocking powder to my picks so they blend in well with my flocked tree, but that’s just a personal preference.
Hanging ornaments
Christmas ornaments are the one part of decorating a Christmas tree that I really thought I had down. But it turns out I was actually missing a few small tweaks that really make the ornaments look amazing.
There are two main types of Christmas tree decorators – the ones who want a beautiful, color coordinated tree with everything perfectly placed and the ones who want a festive, happy tree filled with a hodge-podge of Christmas memories from years’ past.
When I decorate our tree, I try to strike a balance between the two. I do want our tree to look beautiful, but I also want to include all our favorite handmade and vintage ornaments that we’ve collected over the years.
I’ve found that color is key when it comes to incorporating years of special ornaments into a cohesive tree.
Tip 6: Use color to unify random ornaments.
Every year I choose a color scheme for the tree – this year it is white, gold, and silver. Other years it has been red and turquoise or red and white.
I decorate the tree with ribbon and ball ornaments that coordinate with my color scheme and then I add all of my other meaningful ornaments. Even if every ornament doesn’t fit the color scheme, the ribbon and ball ornaments still keep it looking nice and feeling cohesive.
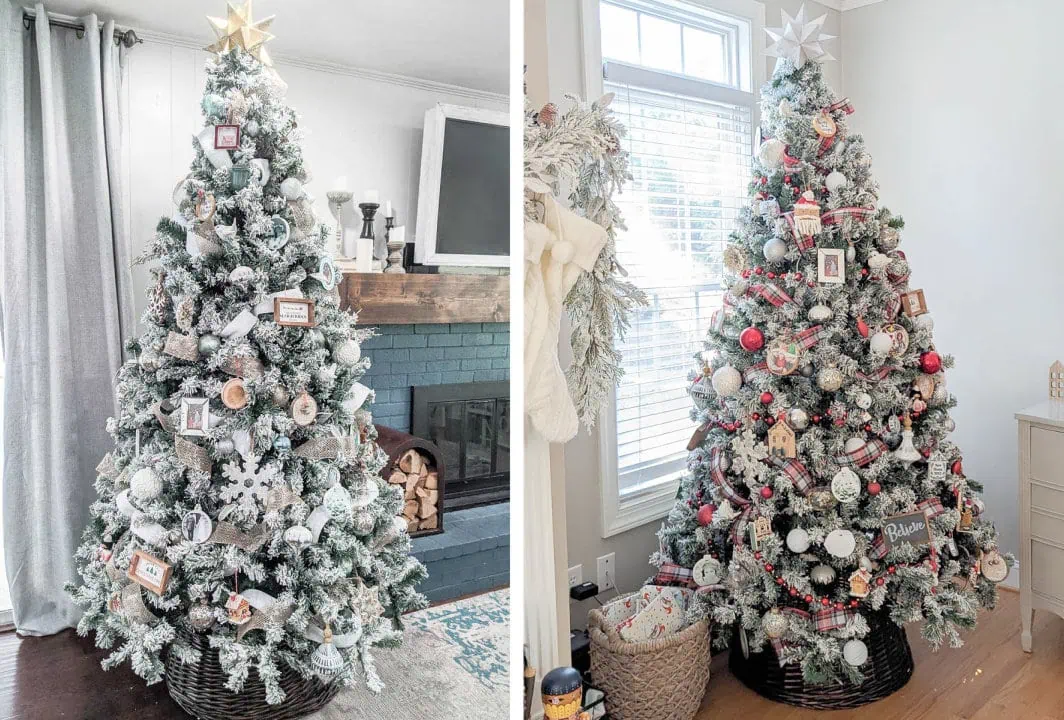
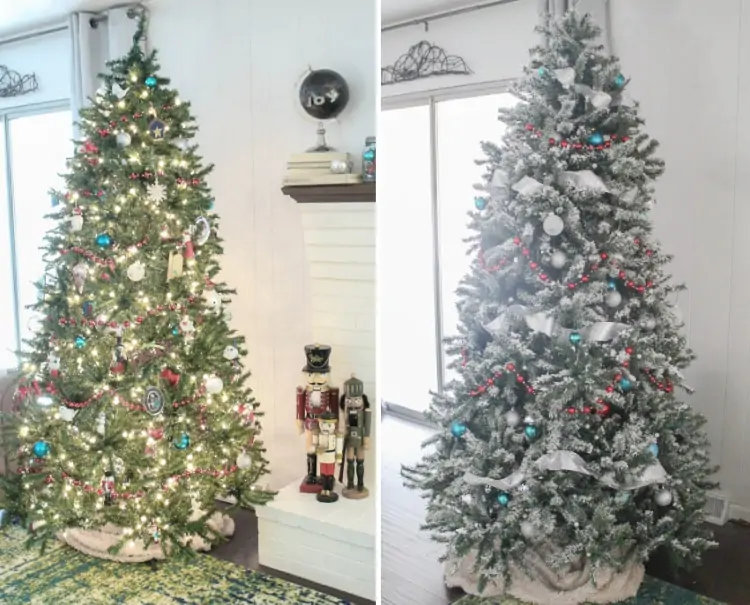
This is the same Christmas tree two different years. The tree, tree collar, and the vast majority of the ornaments are the same. Only the ribbon/garland and ball ornaments are different. Having a unified color scheme for the ribbon and filler ornaments really helps tie together all the random family ornaments on the tree. And it’s also nice to easily be able to change things up year to year without spending a lot of money.
Tip 7: Mix up the shapes and sizes of your ornaments.
When it comes to ornaments, just like with the lights, more is better. You need way more Christmas ornaments than you might think to decorate a nice full tree.
It’s important to vary the shape and size of the ornaments on your tree. Adding just a couple oversized ornaments really ups the visual interest.
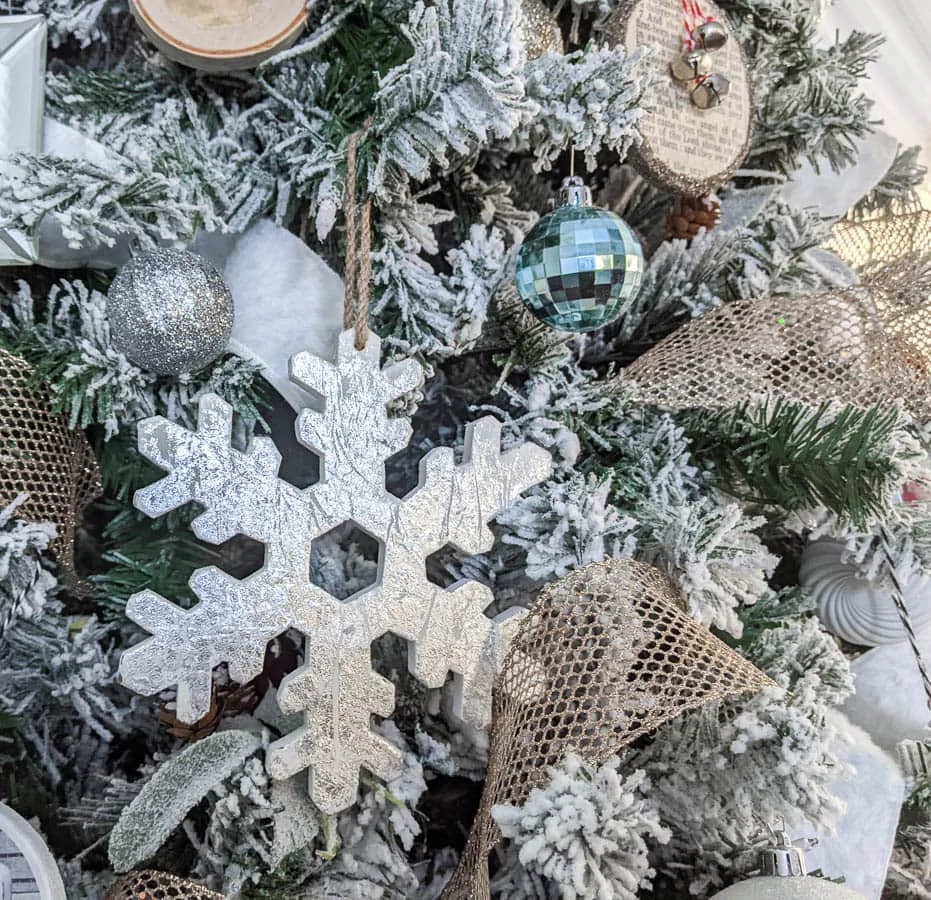
And making sure there are a variety of shapes and not just a lot of Christmas balls also adds to the visual appeal.
I tend to think of Christmas balls as filler ornaments. They usually aren’t particularly special, but they are inexpensive and can really help give your tree a cohesive color scheme.
Tip 8: Hang ornaments throughout your tree, not just at the edges.
As you are adding the Christmas balls to the tree, don’t just hang them on the very tips of the branches. Hanging ornaments further inside the branches really helps add fullness and dimension to your tree.
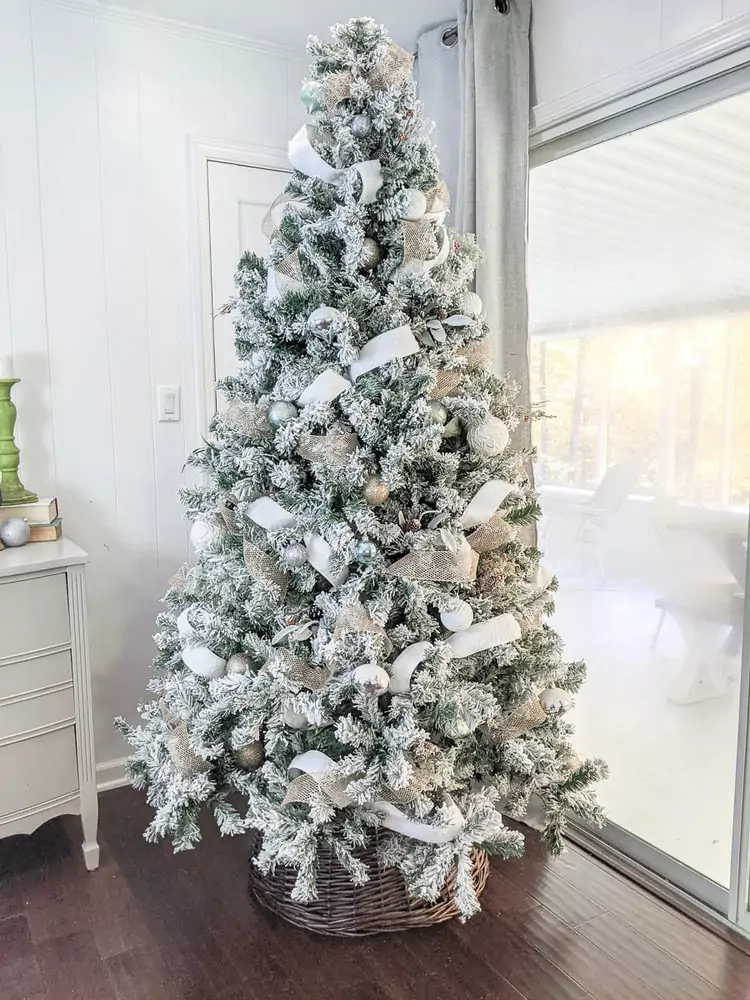
Once the balls are on the tree, you can add your more special ornaments. As you add ornaments, try to make sure similar ornaments are spread throughout the tree and not right next to each other.
And remember, more ornaments is better. As you are hanging the ornaments, it may seem like they are really close to each other, but when you step back and look at the tree as a whole, they’ll look great.
The tree topper
I’ve struggled with finding the perfect tree topper for years. Nothing looked quite right.
This summer, I found a gold Moravian star tree topper at a yard sale for just one dollar. I love that the 3-D shape looks like a star from every angle unlike most flat tree stars that only look like a star from the front.
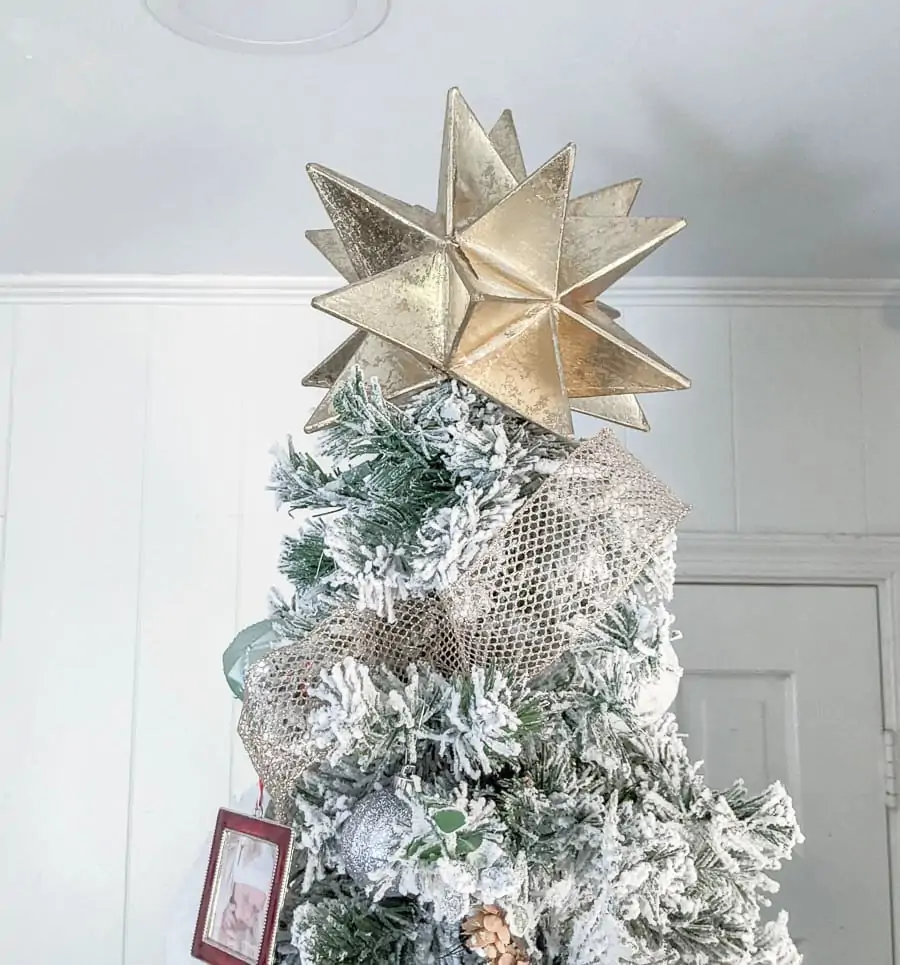
I’ve gotten lots of questions about where to find a Christmas tree star like this one and couldn’t find one just like it, so I created a tutorial for a DIY Christmas star that looks pretty darn similar. Or if you don’t want to go the DIY route, there are some other nice Moravian star tree toppers on Amazon.
I’ve also seen some really gorgeous trees that don’t use a topper at all, but instead add some extra Christmas picks around the top of the tree to create dimension. The first tree in this post from Ella Claire Inspired is a great example and I think it looks pretty beautiful.
Want more tree topper ideas? I put together a post sharing all kinds of Christmas tree topper ideas that may help you find your perfect topper.
Finishing touches
I love finishing our tree off with a nice tree collar at the bottom. It hides the obviously fake tree stump and stand and looks pretty.
Tip 9: Put your Christmas lights on a timer.
I’m looking forward to using a smart plug for our Christmas tree this year. I’m planning to set it up so the lights automatically come on in the morning and go off around bedtime. (Because every part of the day is better with twinkly lights!)
I haven’t gotten it set up quite yet, but this tutorial looks pretty handy.
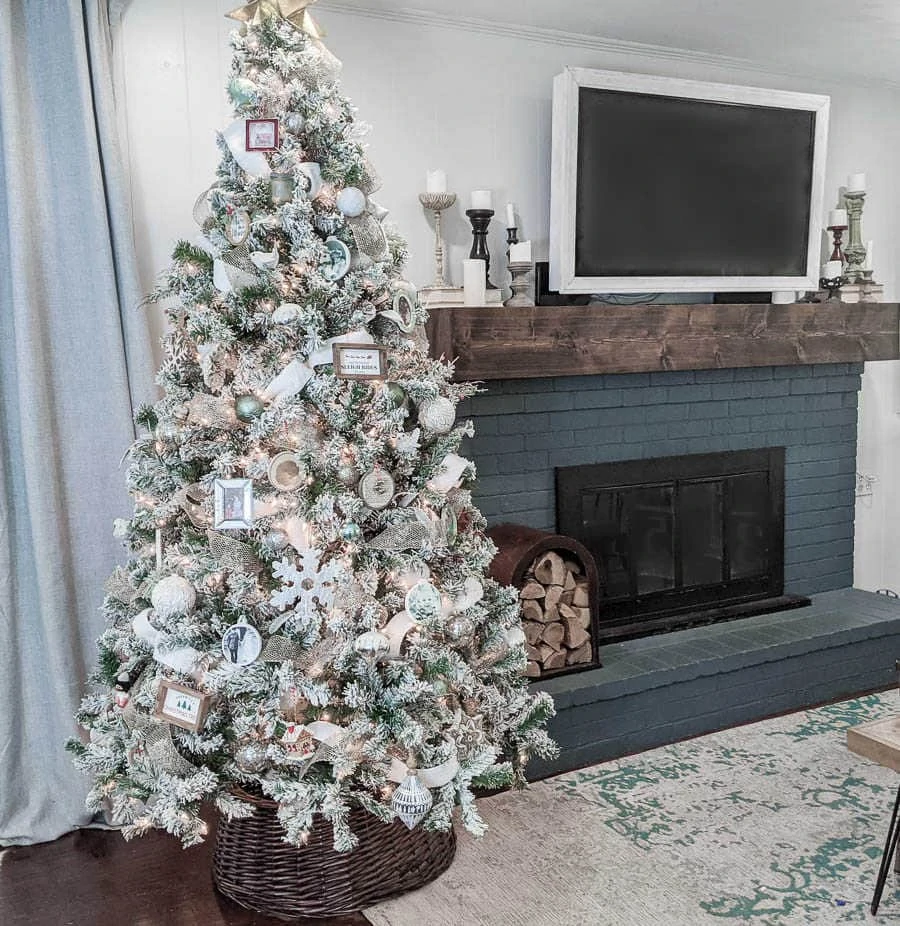
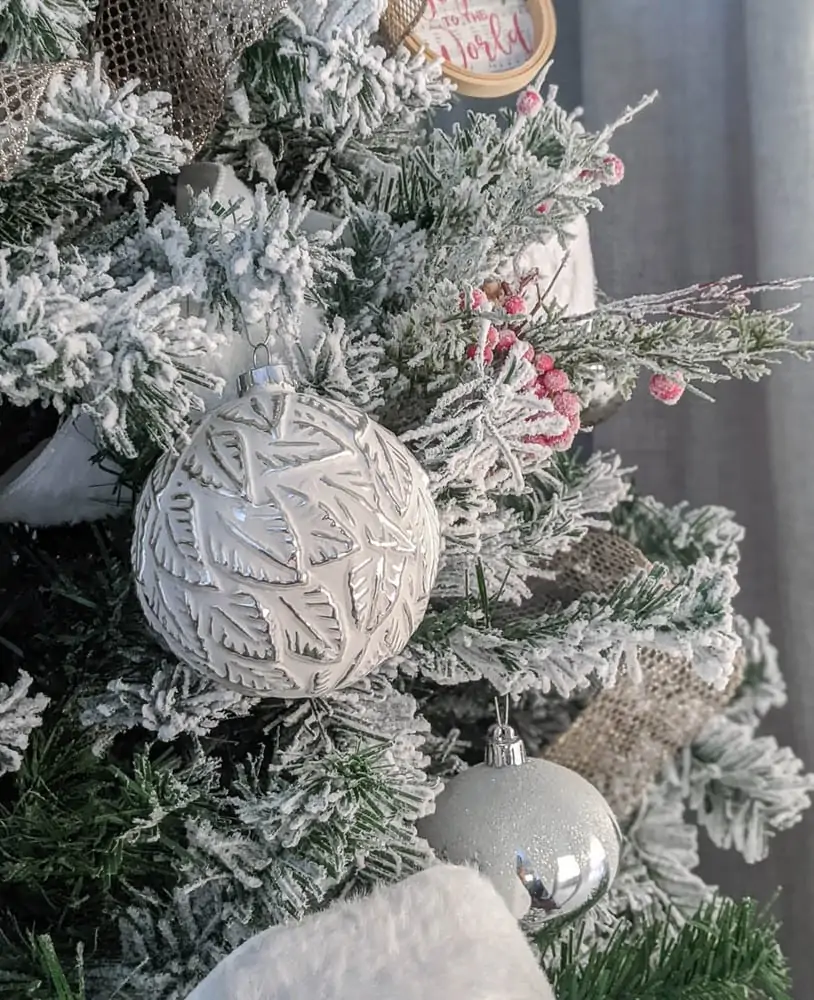
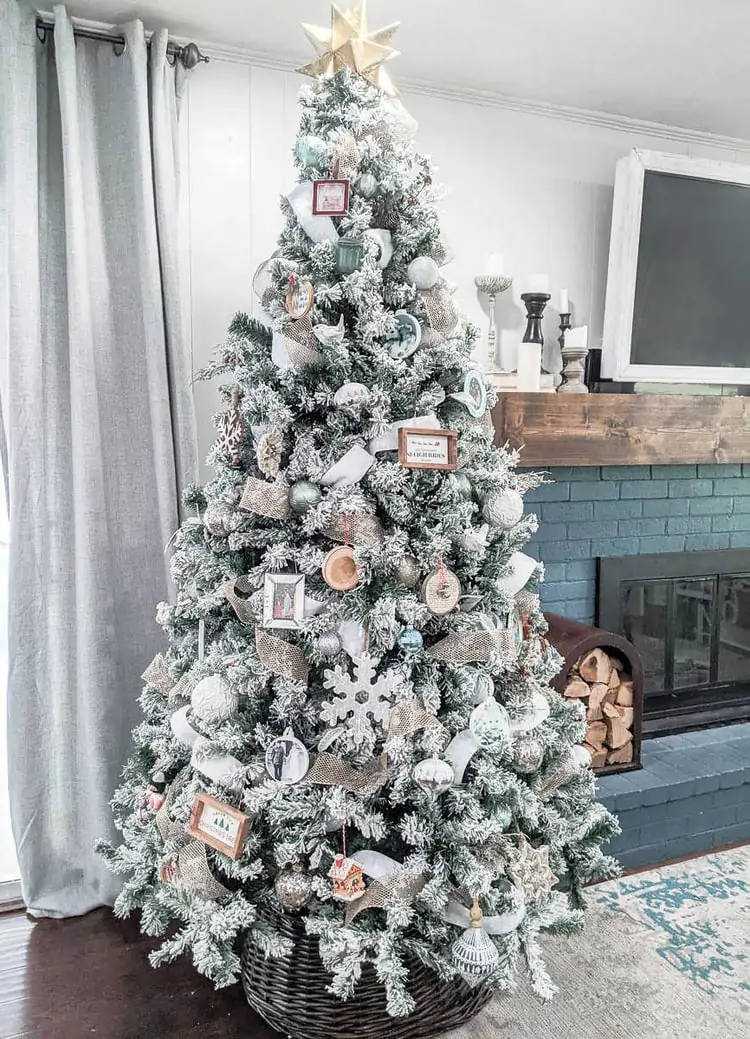
I am seriously thrilled with how our Christmas tree turned out.
It looks beautiful and put together, it still has all of my favorite ornaments, and it’s got me really excited for Christmas!
It may not be quite to the level of the ones in magazines, but I’m quite happy with it!
Christmas Tree Storage
And one final Christmas tree tip. This one isn’t really about the decorating – it’s more about the undecorating.
Tip 10: Store your Christmas tree in a storage bag.
We have a big enough basement that we don’t have to take our tree apart every year to store it.
I usually take off all of the decorations and then we carry the tree downstairs and cover it with a couple of old sheets to keep the bugs and dust away.
I’d seen Christmas tree storage bags before, but I’m cheap and I felt like my old sheets were working just fine.
Well last year, I finally gave in and bought this Christmas tree storage bag even though I was still skeptical. And I’ve been shocked by how much I love it!
It sounds silly I know, but putting the tree in the bag makes it so incredibly easy to carry it up and down the stairs. Trying to wrangle a fully intact Christmas tree around was a huge headache and now we can just bag it up and carry it down by the straps. So much easier.
And for everyone who doesn’t have a huge basement, there are also tree storage bags for storing the parts of your tree once it’s taken apart. I remember the nightmare of trying to shove the tree back in the box it came in after Christmas, and these bags look like a lifesaver. (This one is super cheap and has great reviews.)
Video Tutorial
Just hit the play button below to watch the full video tutorial. It takes you step-by-step through decorating a gorgeous Christmas tree.
More Christmas decorating ideas I think you’ll enjoy:
I’d love for you to pin this post on Pinterest.


Your tree looks so beautiful Carrie. I loved your tips and process for decorating your Christmas tree, great ideas!
Thank you!