How to make a charming DIY house number sign
Add some easy curb appeal to your home with this DIY house number sign full of vintage charm.
Ok, so confession time. This is the fourth DIY house number I have made…for the same house. I know, I know, I may just have a problem. But I’m really thinking this latest one is a keeper.
First, I made this super cute diy house number with faux flowers.

It was really cute, but after a few seasons, the faux flowers were looking pretty shabby. And instead of just replacing them (like a normal person), I got a wild idea to turn an antique mirror into a house number.

And I loved it even more! Then I made a third house number from scrap wood for my book Wood Plank Projects.

So why in the world am I making yet another house number? Well, partially I just love making stuff. I get an idea of how to make something and I just can’t get it out of my head.
But also, our 1970s ranch has some quirks. And one of the quirks is that we had an old school intercom system and 8 Track player with speakers in every single room of the house including the front porch.
I’ve been slowly working my way through the house, removing the old yellowing speakers. We’ve removed the old front porch speaker and sealed off the hole but it doesn’t exactly look beautiful.
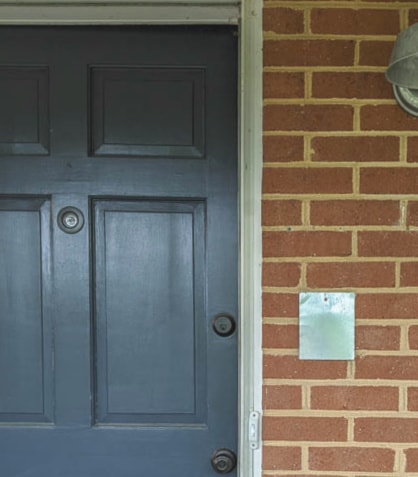
So our house number needs to cover up that eyesore. And as cute as the last few house number I made are, they aren’t quite the right size and shape to get the job done. So I came up with yet another great DIY house number idea and I went for it.
This DIY house number is really easy and inexpensive to make. And it works really nicely when you want a larger house number with a bit of vintage charm.

This post contains affiliate links which means if you make a purchase after clicking a link I will earn a small commission but it won’t cost you a penny more. Click here to see my full disclosure policy.
Materials
Picture frame
1/4″ Plywood – a small piece, at least as big as the frame
Stain – I used Minwax Special Walnut
Rag or Brush to apply stain
White paint
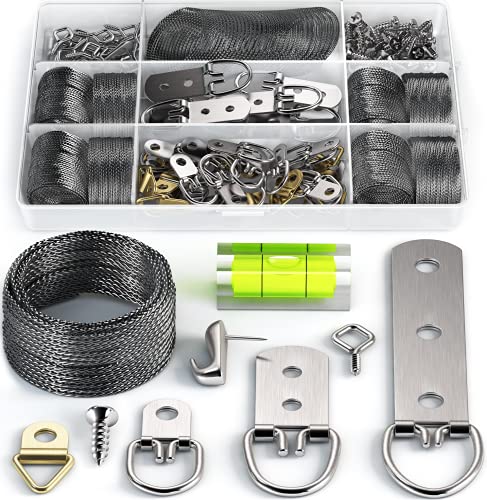
D-ring picture hangers and picture wire for hanging
Concrete screws and masonry drill bit (if hanging on brick)
How to make a DIY House Number Sign
This house number starts with a repurposed picture frame. My particular frame was actually a little framed bulletin board that I picked up for cheap at a yard sale last year.
At the time I wasn’t sure what I would do with it, but it was $1 and I loved the cute shape. You can use any picture frame, but if you have one with an interesting shape or other details, it will be that much cuter.
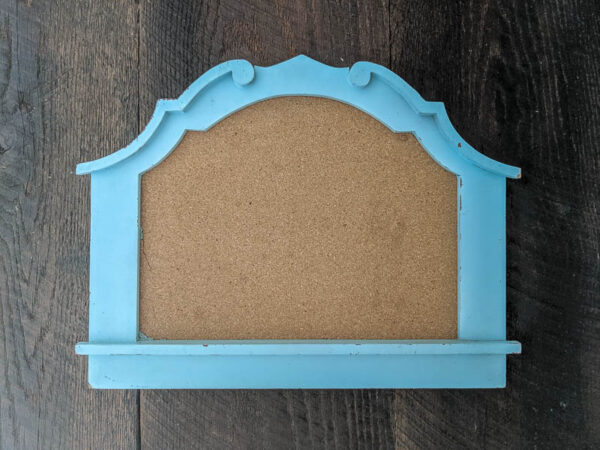
I tossed the scruffy bulletin board and traced the frame opening onto a piece of 1/4″ birch plywood.
Then I cut out the shape with my jigsaw.
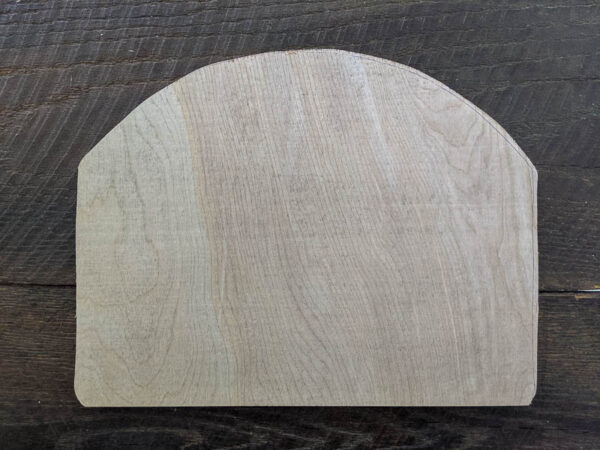
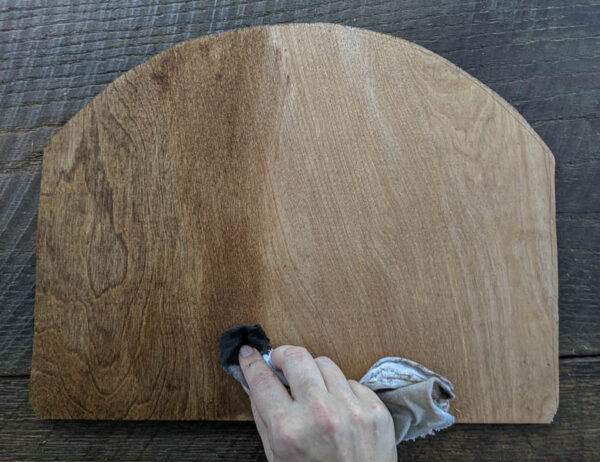
After making sure it fit my frame well, I stained my plywood with Minwax Special Walnut stain. My favorite way to apply stain is simply to wipe it on with an old tshirt rag.
Once the stain was completely dry, I added the numbers. Of course you could attach metal house numbers, but I had a different idea in mind. I wanted the classic look of a wooden sign so I stenciled on my numbers and I love how cute it turned out.

The stencil I used includes all the numbers 0-9 along with the cute little “No.”.

You can see my exact process for getting crisp lines when stenciling wood right here (including how I give my stenciled signs the hand-painted look). Or if you’d rather skip the stencil, you can also print out your numbers in the font of your choice and use this super simple method to transfer them to the plywood.
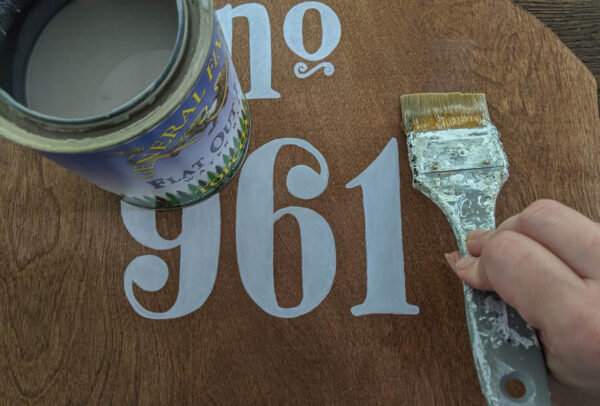
Once the stencil had fully dried, I sealed the entire thing with General Finishes Flat out Flat Topcoat.
If this was a wood sign that would be hanging indoors, I would just skip the sealer. But since it’s going to be getting more weathered being outdoors, I wanted that extra protection.
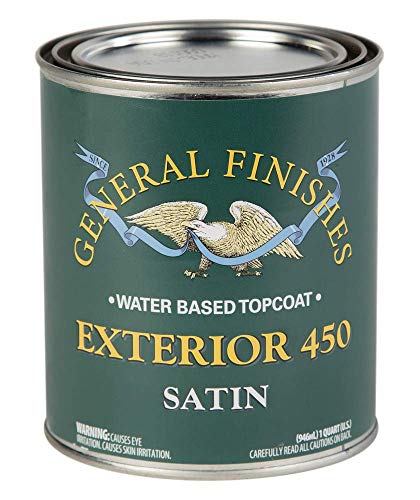
This sealer technically isn’t for exterior projects but it’s what I had on hand and since my house number will be under my porch roof, it won’t come in direct contact with sun or rain. If your house number will be more exposed, you can use a non-yellowing exterior sealer like General Finishes Exterior 450 Water Based Topcoat.
When sealing any untreated wood for use outdoors, be sure to seal all sides, not just the side that shows. This will help prevent the wood from getting warped, moldy, and mildewy from exposure to moisture in the air.
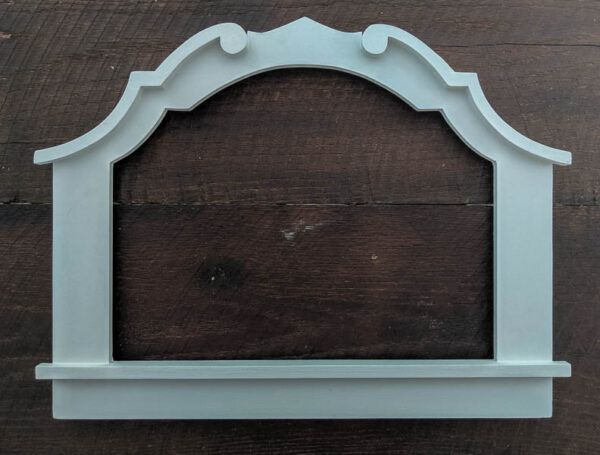
I gave my frame a fresh coat of General Finishes milk paint in snow white and sealed it with the same sealer.
Now here it is all together.

Hanging my house number on our brick house
Hanging things on brick is intimidating but it’s actually pretty simple. You need a couple of concrete screws and a masonry drill bit.

Mark where you need to drill your screws to hang your sign where you want it. If possible, it’s best to screw into the mortar rather than the actual bricks. Use your masonry bit with a drill to predrill holes and then screw the screws into place.
I attached two d-ring picture hangers to the back of my house number sign and connected them with picture wire. Then I just slipped the picture wire over the two screws.

I love it! It sort of reminds me of the signs on all of the historical buildings in Charleston, SC. And it perfectly covers my eyesore of a speaker hole without looking strange and off-center.

I still don’t love the brick exterior of our house; but it’s slowly, bit by bit, beginning to feel more ‘me.’ And this sign was definitely a great addition.
I’d love for you to share this post on Pinterest!

This DIY house number is super simple and inexpensive to make. It's great when you want a larger house number with vintage charm. As an Amazon Associate and member of other affiliate programs, I earn from qualifying purchases.
How to make a charming DIY house number sign
Materials
Tools
Instructions
Recommended Products


so clever to use a frame! looks awesome!
Thanks Cassie!