How to Paint a Textured Ceiling and get Perfect Results
Learn how to paint a textured ceiling including what materials to use, how to patch a textured ceiling, how to cut in along the edges of the room, and more.
To be honest, ceilings are not my favorite thing to paint. All that going up and down ladders and holding a paintbrush over your head can be a real pain.
But after painting several ceilings, I’ve learned some tricks for getting great results while making the whole process as painless as possible.
This go round I’m tackling the ceiling in our open kitchen/family room.
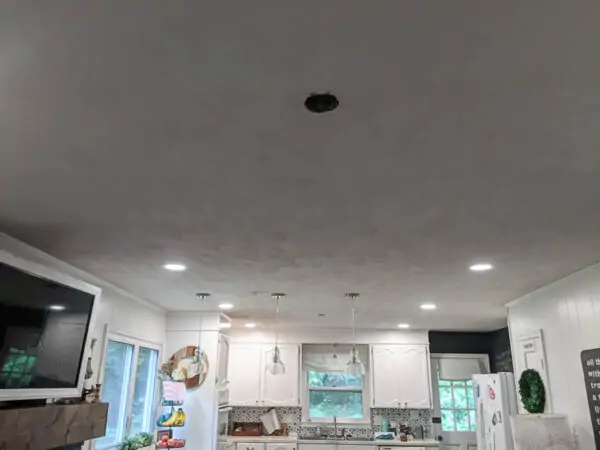
We recently had an electrician redo the lighting in these two rooms.
Our house was built in the 70s and had some pretty odd lighting set ups including lots of rooms with no overhead lighting at all and other spots with overhead lights that didn’t connect to any light switches.
So I’m pretty thrilled that we now have tons of functional lighting in these two spaces.
But it did leave us with three random holes in the ceiling from previous light fixtures that had been removed.
And really I’d been thinking about painting the ceiling for awhile anyway because there were also gray smudges over the fireplace and a general dingy, yellowish feel to the whole thing.
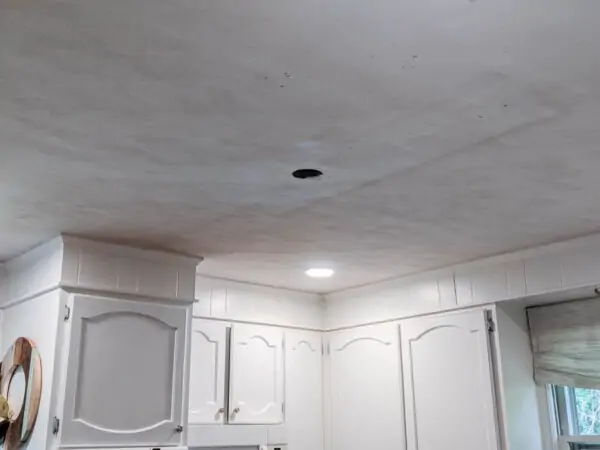
It was definitely time for a fresh new paint job.
In this post I’m sharing everything you need to paint a textured ceiling (or any ceiling for that matter) including what materials to use, how to prep your room, how to seamlessly patch a textured ceiling, how to cut in along the edges of the room, and more.
Plus I have a complete video tutorial at the bottom of this post if you’d rather watch than read.
This post contains affiliate links which means if you make a purchase after clicking a link I will earn a small commission but it won’t cost you a penny more. Click here to see my full disclosure policy.
Materials
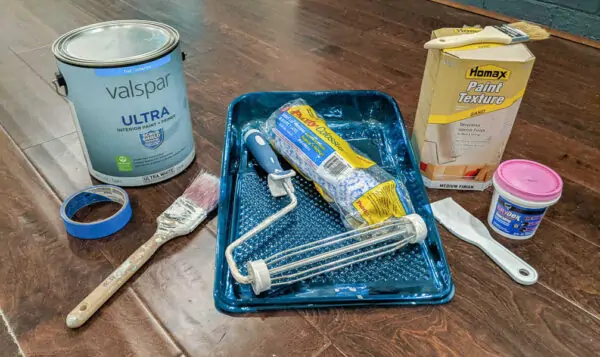
- Paint – you can buy special ceiling paint, but any good flat interior paint will work. (A flat finish is great for painting ceilings because it helps minimize any imperfections.) I usually just use an off-the-shelf bright white flat paint. For this ceiling I used Valspar Ultra interior paint in ultra white.
- One gallon of paint will cover approximately 350-400 square feet with once coat of paint. To figure out your square footage, multiply the length of the room by the width. Then double that number (because most ceilings need two coats of paint.) If it is less than 400 feet you’ll likely need one gallon, 400-800 feet you’ll need two gallons, etc.
- Paint roller and paint tray with a roller cover for textured surfaces – I used a Purdy Colossus paint roller cover and it worked really well. Paint rollers for textured surfaces have an extra thick nap (1/2-3/4″ thick) so that paint can more easily get into all the dips and divots of a textured ceiling
- Paint roller extension pole – This is a must-have for painting ceilings. It screws into your paint roller to make the handle long enough to reach the ceiling without a ladder
- High quality angled paint brush – A great paintbrush is key for getting clean lines along the edges of your ceiling. This Purdy 2.5″ angled brush is my favorite for cutting in
- A ladder – You’ll still need this for cutting in around the edges of the room with your paintbrush
- Plastic cup or small paint bucket – It’s a lot easier to carry a small cup of paint up and down your ladder, than the whole gallon.
- Painter’s tape – You will need to tape off your light fixtures before painting and you may choose to use painter’s tape to make it easier to cut in around the edges of the ceiling.
- Drop cloth – to protect the furniture and fixtures in your room
For patching the ceiling
- Spackling and a putty knife – if you have any nail holes or other small holes in your ceiling, you’ll need to patch them with spackling before painting.
- 220 grit sandpaper – for smoothing the spackling
- Paint texture additive and chip brush – if your textured ceiling has any larger holes or patched areas, you’ll need to match the texture to the rest of the ceiling before painting. This is the additive I used but there are also other options available on Amazon in a variety of grits for different types of textured ceilings.
How to Paint a Textured Ceiling
Clear the room
The first step is to make sure everything in your space is protected. This is always important, but it’s extra important when painting a ceiling since the surface you are painting is literally hanging above everything else in the room.
How much you decide to protect the other things in your room really depends on how neat a painter you are and how easy it would be to clean your items if paint accidentally splattered on them.
Anything that would be ruined by a paint drip should be removed from the room or covered.
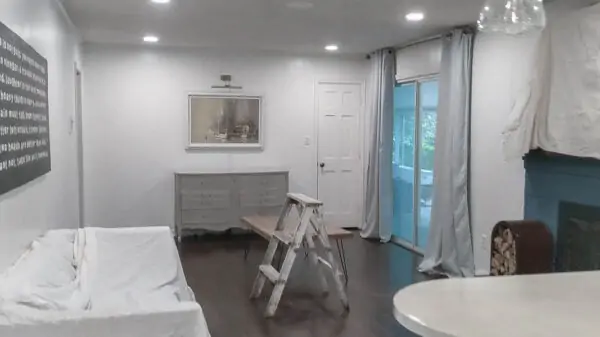
If you have space in an adjoining room, it’s easiest to just move small furniture and accessories out of the room you are painting. Larger furniture can be covered with drop cloths and rugs can be rolled up.
You may also need to protect your flooring with drop cloths. Our hardwood floors are sealed and I’ve cleaned paint off them easily in the past, so I did not cover them. But if you have carpet, tile, or more absorbent wood floors, drop cloths are a very good idea.
And if you aren’t sure how neat a painter you are because you don’t have a lot of painting experience, I would definitely play it safe and protect everything in your room.
Protect your light fixtures
Once all of your furniture and flooring is protected, it’s time to protect your ceiling light fixtures. The easiest way to do this is to use painter’s tape.
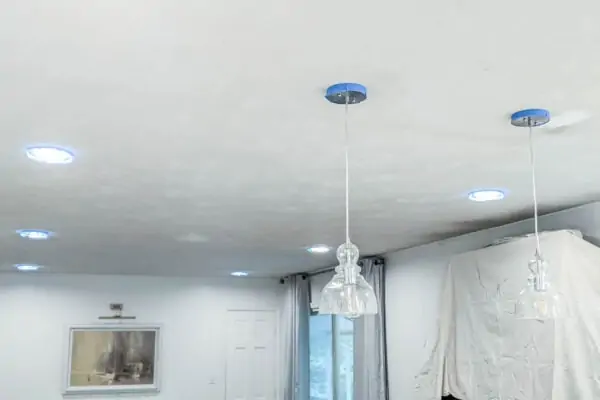
Carefully protect your lights wherever they touch the ceiling with painter’s tape.
If you have chandeliers or pendant lights that will be tricky to paint around, you also may want to wrap the rest of the fixture with lightweight plastic drop cloth to protect it from wayward paint.
Patch any holes
If you have any small holes in your ceiling from nails or hooks, you can easily patch them up with spackling and a putty knife.
We had several larger holes in our ceiling where light fixtures used to be. I patched these using a combination of drywall, drywall tape, and spackling.
Once your patches are dried, you can sand them to blend the edges and knock off any rough areas.
Matching the ceiling texture
This is where having a textured ceiling is both a blessing and a curse. The texture is great because it easily hides any imperfections in your ceiling including a less than perfect patching job.
But it’s also a pain because if you have patched any significant areas, you need to add texture to help them blend in with the rest of the ceiling.
After patching my old light fixture holes, they were super smooth and didn’t match the rest of the ceiling at all. (If you’ve only patched small nail holes, you don’t need to worry about adding texture).
Luckily, patching a textured ceiling is a lot easier than you might think.
You can buy paint texture additive which is basically a very lightweight sand. It comes in a few different grits including fine, medium, and coarse so you can most closely match the texture on your particular ceiling.
For a small patch job like this, you can just mix some of the paint texture with a bit of your ceiling paint in a plastic cup.
Then use a small roller or a chip brush to brush it onto any smooth patches on your ceiling. If your ceiling has a pattern to the texture, try to match the pattern as you brush on the new texture.
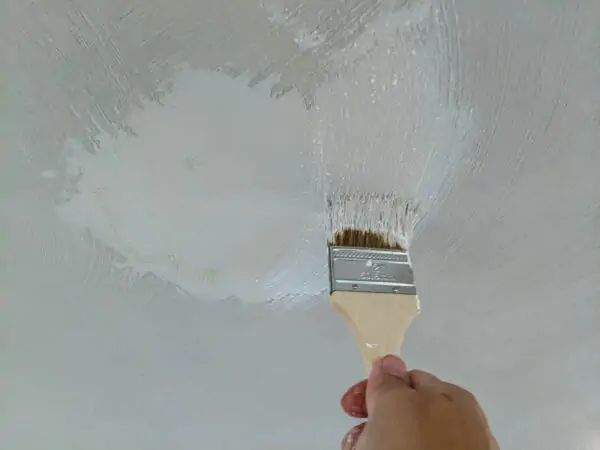
Our ceiling has a scallop pattern, but this same method will work to patch a popcorn ceiling or any other textured ceiling.
You may need to add a second coat to build up the correct amount of texture.
Painting the ceiling
And now finally, it’s time to start painting!
It works best to paint around the edges of the room (this is called cutting in) and then come back and fil in with the paint roller.
If you are painting a medium to large room, it’s best to paint one section of the ceiling at a time rather than cutting in the entire ceiling and then filling in the entire thing. I like to cut in a section of the ceiling around six feet wide, fill in with the roller, and then move to the next section.
If you have two people, you can greatly speed things up by having one person cut in around the edges and the other use the roller, but you can also paint a ceiling just fine on your own.
Cutting in with painter’s tape
When it comes to painting the edges of your ceiling, you have a decision to make: painter’s tape or no painter’s tape.
If you aren’t confident in your painting skills, you can use painter’s tape to get a nice clean paint line where the ceiling meets the wall or trim.
Painter’s tape is more work upfront getting everything taped off, but it means you don’t have to be nearly as careful around the edges as you paint.
The thing about painter’s tape is there are a few tricks to getting clean paint lines even when you are using tape. You need to be careful to place your tape very precisely along the line you will be painting and then press it firmly in place.
If there is a dramatic color difference between your ceiling and walls, you may also want to seal the tape with a bit of your wall color. (I have more details about that and all my top painter’s tape tricks here.)
And you also need to be careful about when you remove the tape to avoid peeling off any of your fresh paint. The best time to remove it is actually when the final coat of paint is still wet.
Cutting in without painter’s tape
You can also choose to cut in around the edges of your ceiling without painter’s tape.
If you go this route, I have a few tips that will help you get really clean, crisp paint lines.
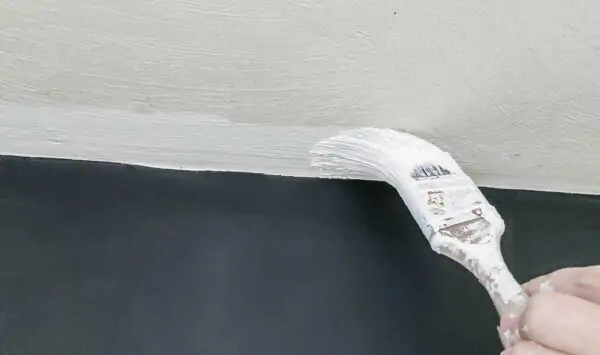
First, make sure you don’t overload your brush with paint. You want it wet, but not dripping because that just makes the paint harder to control.
When you start painting, start with your brush about a half inch or so away from where the ceiling meets the wall and then slowly move it closer to the line.
As you’re painting be careful not to apply a lot of pressure to the paint brush because that’s just going to cause to squeeze out and spread to places where you don’t really want it.
Overall, the main key to getting really beautiful paint lines is just having a steady hand, finding the right angle and taking it slow. This is not a time when you want to rush.
It’s also helpful to keep a wet rag nearby for quickly cleaning up any mess ups. Paint’s actually pretty forgiving when it’s wet. So a lot of times, if you get a little bit of paint on the wall, you can just quickly wipe it up.
Cutting in around the edges of the ceiling
Whether or not you choose to use painter’s tape, you will need a ladder and a good angle paint brush to cut in around the edges of your ceiling.
I also like to pour a bit of my paint into a plastic cup or a small paint bucket. This makes it much easier to hold your paint as you move up and down the ladder.
Once you’ve cut in the edges of the first section of your ceiling, you’re ready to fill in with the paint roller.
Using a paint roller extension pole
After all of the tedious prep and cutting in, painting with a paint roller is going to feel super easy and fast.
As I mentioned before, it’s really important that you use a paint roller for rough surfaces. These rollers have an extra thick nap so they can hold a lot of paint and really push that paint into the low areas of your textured ceiling.
You are also going to want to use a paint roller extension pole. This is exactly what it sounds like – a long handle that screws into your paint roller handle so that you can paint the ceiling without getting on and off a ladder a million times.
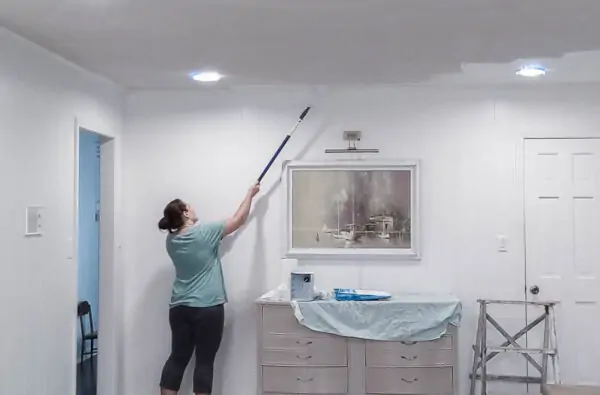
If you don’t have an extension pole, you can also use a broom handle to do the same thing. Just unscrew the handle from the broom and screw it into your paint roller. I’ve done this many times and found that not all broom handles fit, but most do. Just make sure that if you do use a broom handle, it is a nice sturdy one.
If you are painting a ceiling that is higher than eight feet, you will want to make sure to use a telescoping extension pole that extends far enough to reach your ceiling.
Painting your ceiling with a paint roller
When you are loading up your roller with paint, make sure all sides of the roller are covered with paint and then gently roll off any excess paint onto your paint tray.
You want your paint roller to be pretty wet, but not dripping.
Rolling the paint onto your ceiling goes much faster and is much easier than cutting in around the edges.
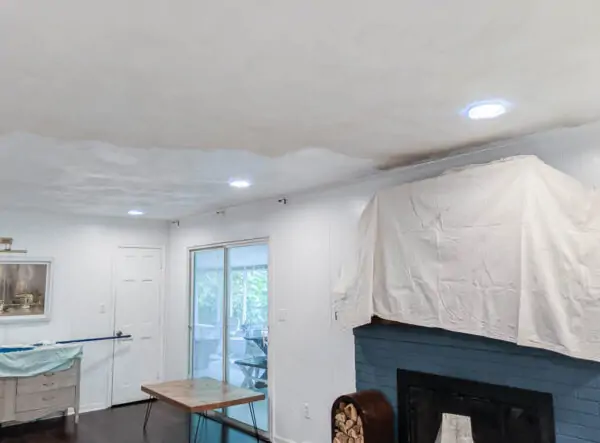
You may have seen or heard before that when you are rolling paint onto a wall or a ceiling, you should try to move your roller in a W pattern.
The main purpose of the W is to make sure you are varying the direction you roll the paint on and each roll of paint slightly overlaps with the last roll of paint.
The idea of the W shape makes that really easy to visualize, but when you’re painting a ceiling, doing a literal W isn’t always the easiest because you’re working overhead. Just make sure that you’re overlapping your paint strokes and keeping the roller moving as you’re rolling paint onto your ceiling.
As you are painting, if you start to feel like you need to press down hard on the roller to get the paint to transfer, it’s time to get more paint. You don’t want to be pressing down really firmly with the roller, because that’s going to lead to lots of tiny little paint drips splattering down on to everything else in your room.
Second Coat of Paint
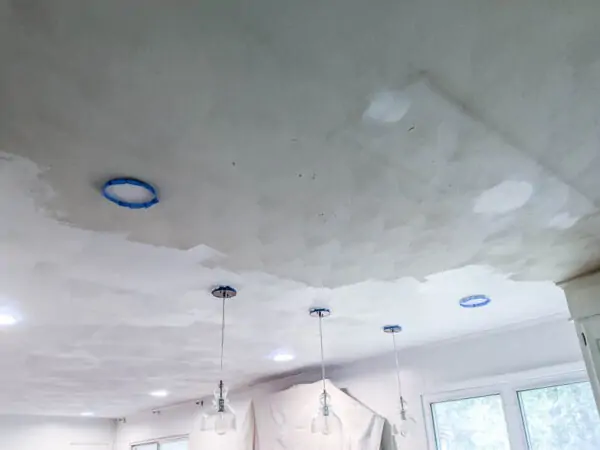
Once you finish your first coat of paint, there’s a good chance your ceiling is going to look pretty splotchy and uneven. That’s totally normal, especially when you’re using white or a really light color, so don’t worry if the first coat doesn’t look great.
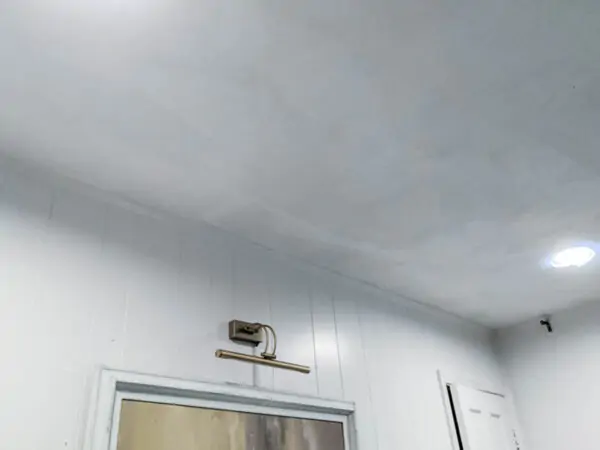
Usually two coats of paint is plenty for a ceiling unless you’re doing a very dramatic color change from very dark to very light or the other way.
Thankfully, the second coat of paint usually goes much faster than the first.
Completed Ceiling
After two coats of bright white paint, here is my finished ceiling!
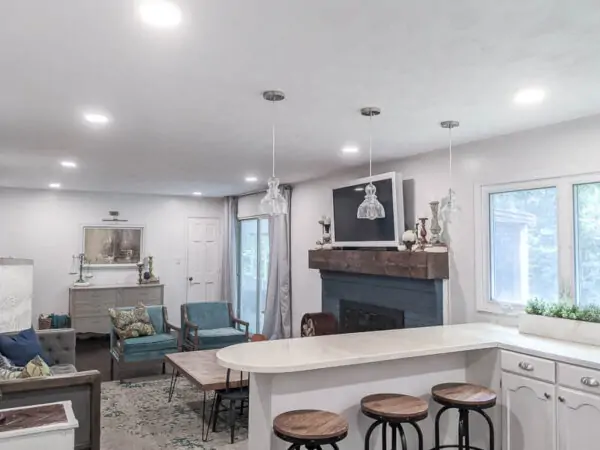
I am so glad to have this project finished. Honestly, I would probably rather paint the walls of three or four rooms than paint one ceiling, because it is time-consuming and awkward painting over your head.
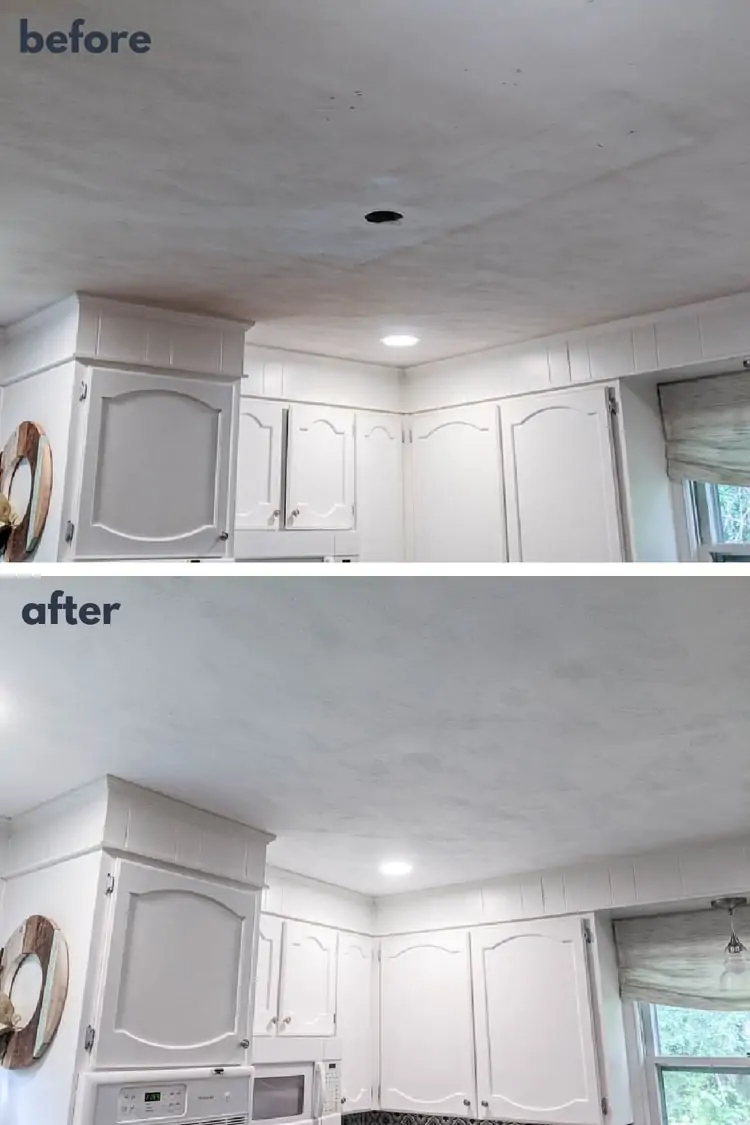
But having said that, I am so glad that I finally painted the ceiling in these two rooms. It’s hard to tell in photos, but this fresh coat of white paint made a huge difference. It makes these rooms look so much fresher, cleaner, and brighter and it was definitely worth it.
Video Tutorial
I’d love for you to subscribe to my Youtube channel!
Other helpful painting tips I think you’ll like:
- How to Get Perfect Paint Lines with Painter’s Tape
- How to Get a Super Smooth Finish when Painting Cabinets
- 8 Painting Tips to Paint with Less Mess and Less Stress
I’d love for you to pin this post on Pinterest!

How to Paint a Textured Ceiling and get Perfect Results
Learn how to paint a textured ceiling including the materials needed, how to prep the room and more!
Materials
- Paint
- Paint roller and paint tray with a roller cover for textured surfaces
- High quality angled paint brush
- Plastic cup or small paint bucket
- Painter’s tape
- Drop cloth
- Spackling and a putty knife
- 220 grit sandpaper
- Paint texture additive and chip brush
Tools
- Paint roller extension pole
- A ladder
Instructions
CLEAR THE ROOM OR COVER ITEMS
- The first step is to protect the things in your room that may get paint on them.
- Either remove the furniture and other items, or cover them with drop cloths, or old sheets. Be sure to cover floors with drop cloth. Protect the ceiling fixtures by covering them with painter's tape.
PATCH ANY HOLES
- Patch up any small holes with spackling and a putty knife.
- Larger holes will need to be filled with a mix of drywall, drywall tape, and spackling.
MATCH THE CEILING TEXTURE
- Now you want to match the texture of the holes you patched to the existing ceiling.
- Mix a paint texture additive with a bit of your ceiling paint in a plastic cup.
- Use a small roller or chip brush to brush it onto any smooth patches on your ceiling.
PAINT THE CEILING
- You can use painter’s tape to get a clean paint line where the ceiling meets the wall or trim.
- If you are confident in your painting, you can omit this step.
- Use a ladder and a good angle paint brush to cut in around the edges of your ceiling. Start by painting around the edges of the room in a section of the ceiling around six feet wide.
- Then fill in with a paint roller using an extension pole.
- Move to the next section with cutting in another six foot section and fill it in with the roller.
- Repeat this same process until the ceiling is completely painted.
- Usually two coats of paint is plenty for a ceiling.
Recommended Products
As an Amazon Associate and member of other affiliate programs, I earn from qualifying purchases.
-
2-1/2" Purdy 144080325 XL Dale Angled Sash Paint Brush, Tynex Orel Pack of 1
-
EVERSPROUT 5-to-12 Foot Telescopic Extension Pole (20 Foot Reach) | Lightweight Sturdy Aluminum | Easy Flip-Tab Lock Mechanism | Twist-On Metal Tip works for Squeegee, Duster, Paint Roller (pole only)
-
Purdy 144630094 Colussus Roller Cover, 9 inch x 3/4 inch nap
-
Grip Tight Tools Classic Roller Frame, 9-Inch


Pink? Oh my…our bathroom at the farmhouse was pink even the vanity. It was the first room to receive a makeover.
Isn’t all the new advances in tape amazing? I didn’t know they had textured surface tape! How great will that be? Love your pale blue ceiling! It’s the perfect color.
Hugs
Cecilia
Thanks Cecilia! A pink vanity – yikes! I’m all for using the colors you love in your home – but maybe not on the permanent fixtures! I can see why you made that bathroom over first!
All the vanities in our house are pink and even though its my favorite color I wouldn’t decorate a bathroom with it! I love the idea of a colored ceiling and neutral walls. But my one experience with frog tape was not pretty. Bleed everywhere :(
Meaghan – I’m with you, pink is not for major house fixtures! I’ve always had good experiences with frog tape but I feel your pain. Hate paint bleed! One thing I always do that helps (at least in my mind) is to make sure I press down all of the tape edges firmly.
I have a textured ceiling myself and this is SO helpful. Thanks!
Thanks Kathleen! Glad it helps!
Those kinds of textures are SO HARD to paint. You always end up looking like a drunk monkey helped you with your paint lines. I am impressed with how well yours came out! Those are some super crisp paint lines!
Thanks Kim – you are totally right! They do so often come out looking crazy – so glad that’s not the case anymore!
What color blue is your ceiling in the guest room?
Samantha, good question! I definitely should have mentioned that in the post – it is Valspar’s icy blue.