DIY Christmas Doormat: How to Paint and Seal a Doormat so it Lasts
Everything you need to know to paint a colorful DIY Christmas doormat that will last for years to come including what kind of stencil to use, the best paint for painting doormats, and whether or not you need to use a sealer.
A big thanks to WallCutz for sponsoring this post. This project and all opinions are my own. This post also contains affiliate links. If you make a purchase after clicking a link I will earn a small commission but it won’t cost you a penny more. Click here to see my full disclosure policy.
When the stencil company WallCutz asked if I wanted to create a project with one of their Christmas stencils, I knew right away I wanted to make a new Christmas doormat.
Changing our your doormat for the holidays is one of those small low-effort changes that can make a big impact. Especially since it’s one of the first things both you and your guests will see every time they step up to your front door.
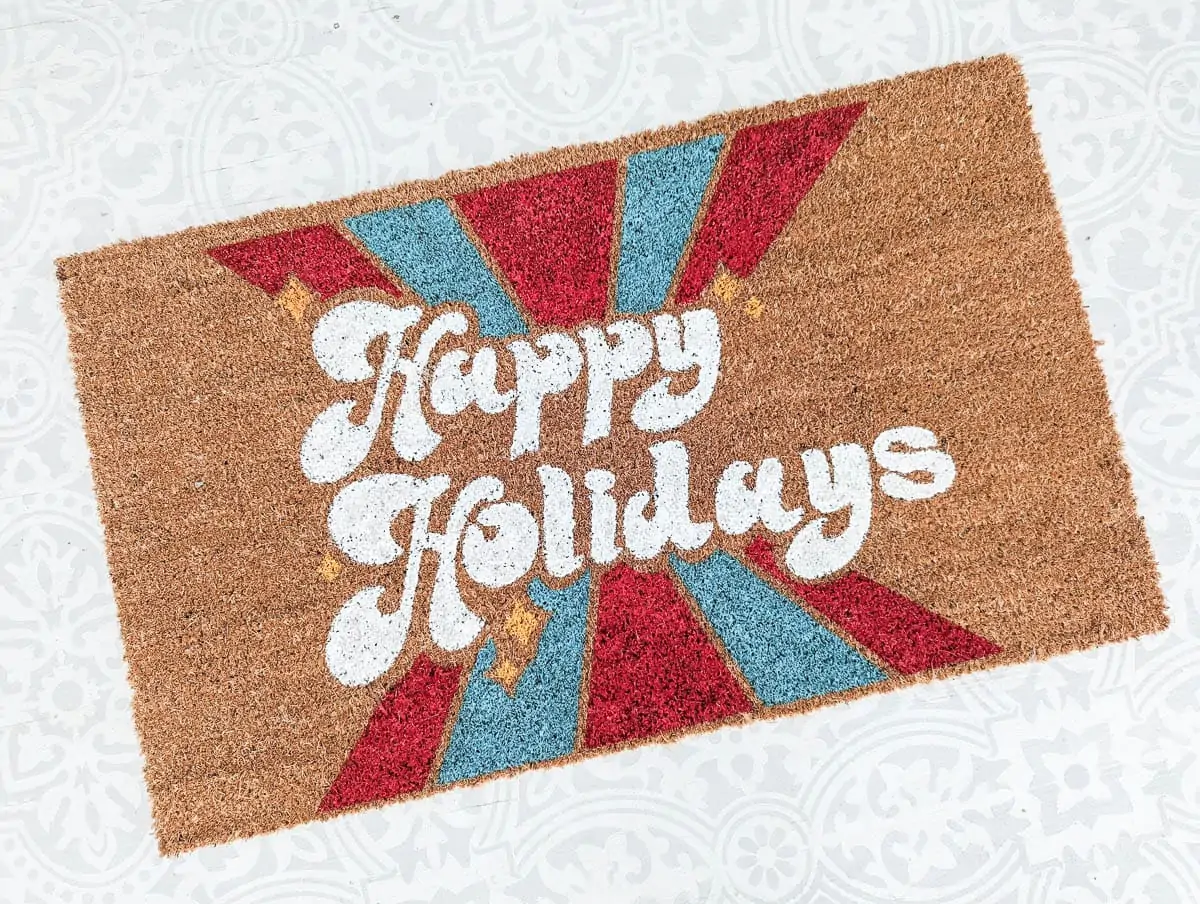
I’ve seen a lot of cute DIY doormats out there, but they are almost always black script lettering on a plain background. While that’s nice, I wanted to do something a little different and make a more festive, colorful doormat.

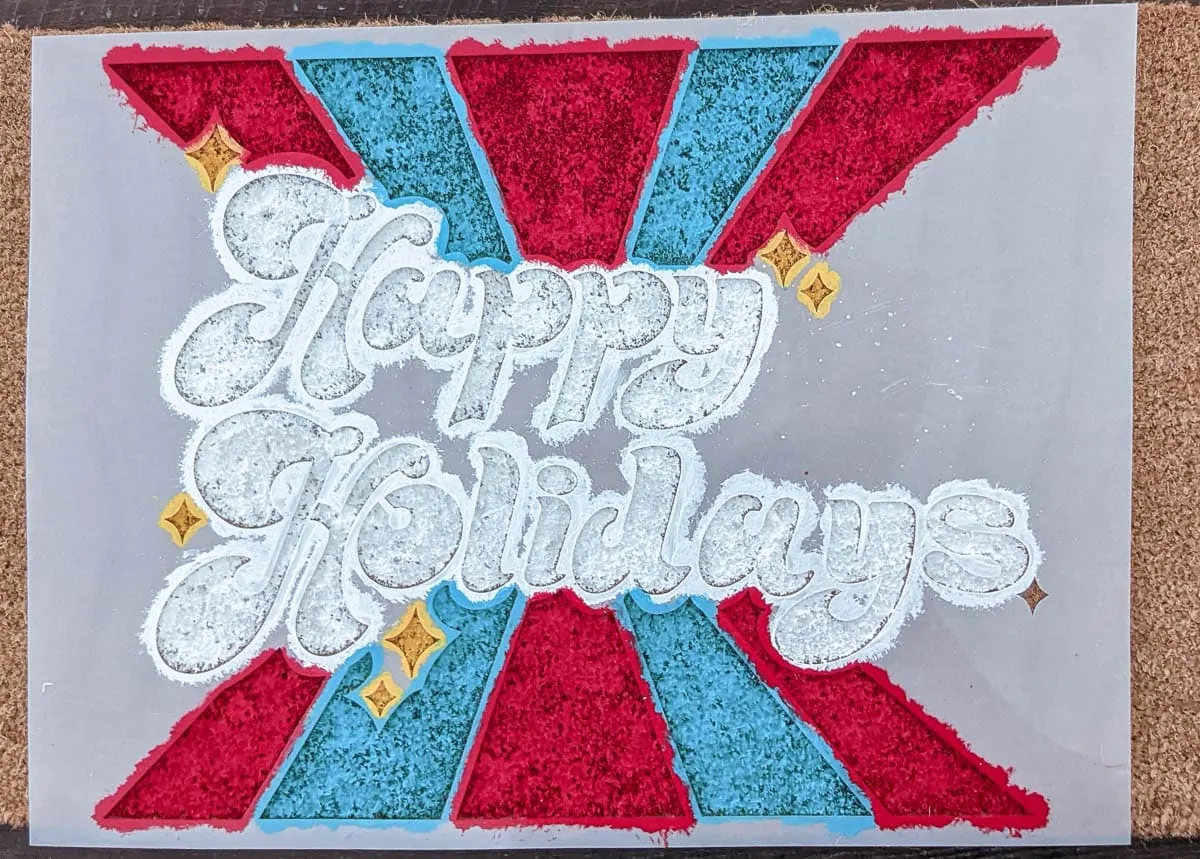
I chose this Happy Holidays stencil for my doormat and I love the fun retro feel of the graphics. To bring out that vintage vibe, I’m using my favorite vintage Christmas colors – white, red, and turquoise.
And after doing a deep dive into everything there is to know about painting doormats, I feel confident my doormat is going to look great for a very long time. Yes, even the white paint!
Update: It’s now been two years since I originally painted this doormat and it still looks amazing!
In this post I’m sharing everything you need to know to stencil your own doormat including how to choose the right paint and how to make sure your design lasts for years.
And I also have a video tutorial at the end of this post for those who prefer to learn by watching rather than reading.
Reusable vs. Vinyl Stencils
Before I get into the step-by-step tutorial, I want to share a few tips for choosing the right materials.
First, let’s talk about the stencil you use.
I highly recommend using a reusable stencil instead of a vinyl stencil for stenciling a doormat.
Reusable stencils are great because they are made of thicker plastic, hold their shape well, and can be stored and reused over and over.
The biggest advantage to using a vinyl stencil is one side can stick directly to the surface you are stenciling. This helps hold the stencil in place as you work.
But after doing a deep dive into the doormat stenciling tutorials that are already out there, I found a common theme.
Pretty much everyone who used a vinyl stencil noted that it didn’t stick well to the doormat and was difficult to work with.
Working with a vinyl stencil that doesn’t stick well can become a bit of a nightmare since they are so flimsy. Using a reusable stencil will make this entire project much faster and easier.
The best paint for stenciling a doormat
When it comes to stenciling a doormat that will be used outdoors, you have two main paint options.
1 – Outdoor paint
Outdoor paints are specially formulated to hold up better to the temperature fluctuations and moisture that are found outdoors.
You can buy inexpensive bottles of outdoor acrylic paint at any craft supplies store. Or you can use exterior latex paint.
2 – Flex Seal
Flex Seal isn’t technically a paint; it is a waterproof sealer that sprays out liquid and creates a waterproof rubberized seal over whatever you spray it on.
It is often used to seal leaks in RVs and gutters and pools and professional crafters also swear by it as the best ‘paint’ for doormats.
Flex Seal comes in liquid and spray forms and is available in a dozen different colors. You can find it at most home improvement stores, although most stores only stock black, white, and clear.
Which paint is best?
So which is the best? Both have positives and negatives.
Outdoor paints are a great option because they are inexpensive and come in a huge range of colors.
Flex Seal’s main advantage is that it is much more durable than paint alone which is important for a doormat. But at around $15 per can, it is also quite a bit more expensive than paint and comes in a pretty limited range of colors.
If you are painting a doormat with traditional black lettering, I would go with black Flex Seal. If you want to paint a doormat using a different color or even multiple colors like mine, I recommend using outdoor paint followed by a good sealer instead.
Do you need to use a sealer on a painted doormat?
You do not have to seal your painted doormat, but it will last longer if you do.
Coir doormats, by nature, break down over time. As people repeatedly wipe their feet on the doormat, the fibers break off and wear down. Because of this, the graphic design or text on any coir doormat will fade over time whether you painted it yourself or bought it from a store.
So whether or not you seal your painted doormat, it will eventually wear down and need to be replaced.
Even so, using a good sealer will help it last as long as possible. And it will also help keep the paint looking clean and fresh much longer.
If you do choose to seal your painted doormat, the best sealer to use is Flex Seal clear spray. As I said earlier, Flex Seal sprays out in liquid form that can seep into all the crevices of your doormat and then dries to create a solid waterproof seal.
How to Stencil a Doormat
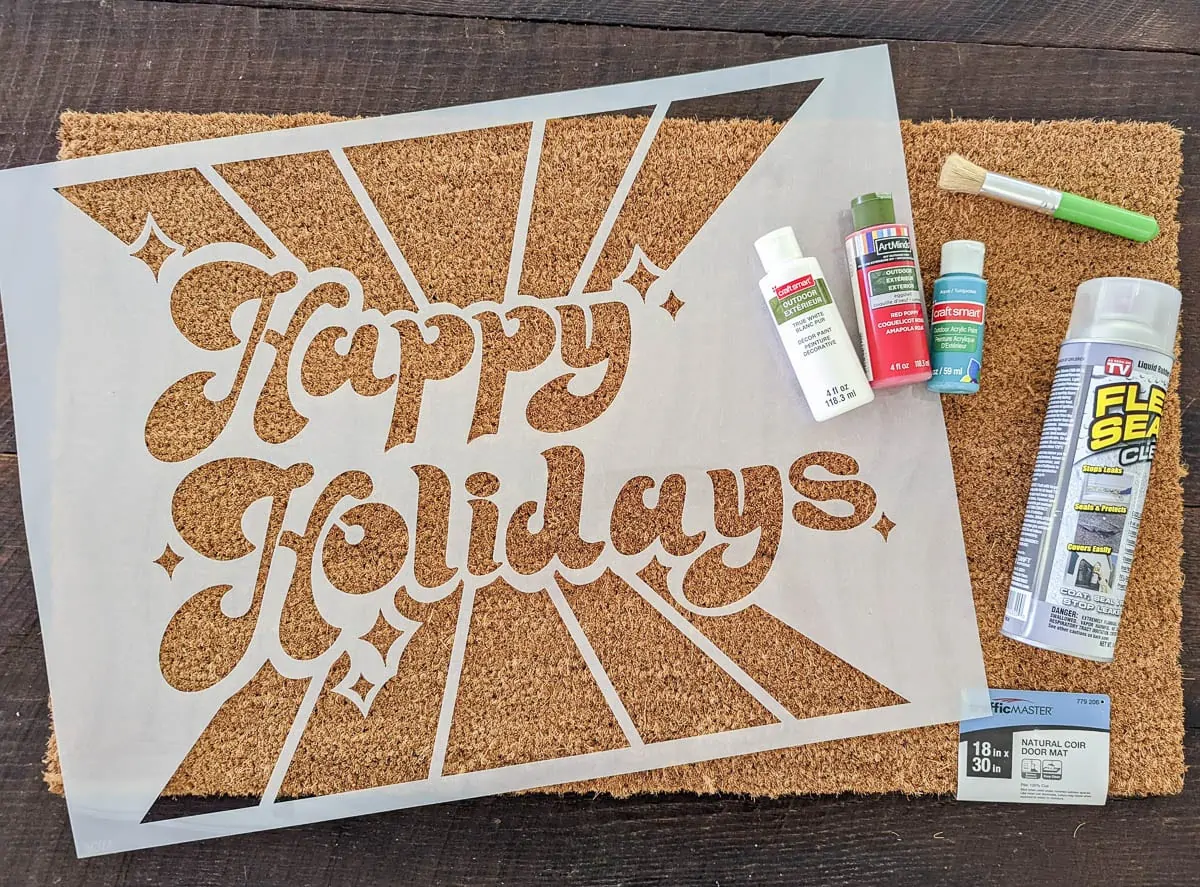
Materials
- Blank coir doormat – you can find these pretty inexpensively at IKEA, Lowes, Home Depot, Hobby Lobby, Walmart, and Target
- Doormat stencil – I am using this Happy Holidays stencil from WallCutz. They also have a huge collection of other stencils that are designed and sized specifically to work well on doormats.
- Repositionable spray adhesive – this works really well to hold your stencil in place as you are painting and one can goes a long way. Just make sure you use ‘repositionable’ or ‘temporary’ spray adhesive.
- Outdoor paint or Flex Seal spray – For my doormat I am using outdoor acrylic paints. I used ArtMinds paint in the colors red poppy and daffodil and CraftSmart paint in the colors white and aqua.
- Stencil brush – a good stencil brush makes stenciling much easier. If you don’t have a stencil brush, look for a brush with fairly stiff bristles
- Flex Seal clear spray sealer – for sealing and protecting the paint finish
- Drop cloth – for protecting the area where you are spraying Flex Seal
- Face mask and gloves – for protecting yourself when you are spraying Flex Seal
Stenciling a doormat is completely different from stenciling smooth surfaces like wood and metal. When you’re stenciling a smooth surface, the big goal is to get perfectly crisp stencil lines.
When you are stenciling a doormat, getting crisp stencil lines isn’t really that difficult. Because the surface isn’t smooth, the paint tends to stay where you want it more easily.
Instead, the biggest issues with stenciling a doormat are getting nice even paint coverage and making sure your painted surface can hold up to heavy foot traffic. This tutorial is going to focus on solutions to both of these problems.
Prep your doormat
Since we’re using a new blank doormat, not a whole lot of prep is needed. But coir doormats do tend to shed loose fibers, particularly when they are new.
It’s a good idea to run your hand or a scrub brush over the surface of your doormat just to remove the loose fibers and any other material that has settled on the surface.
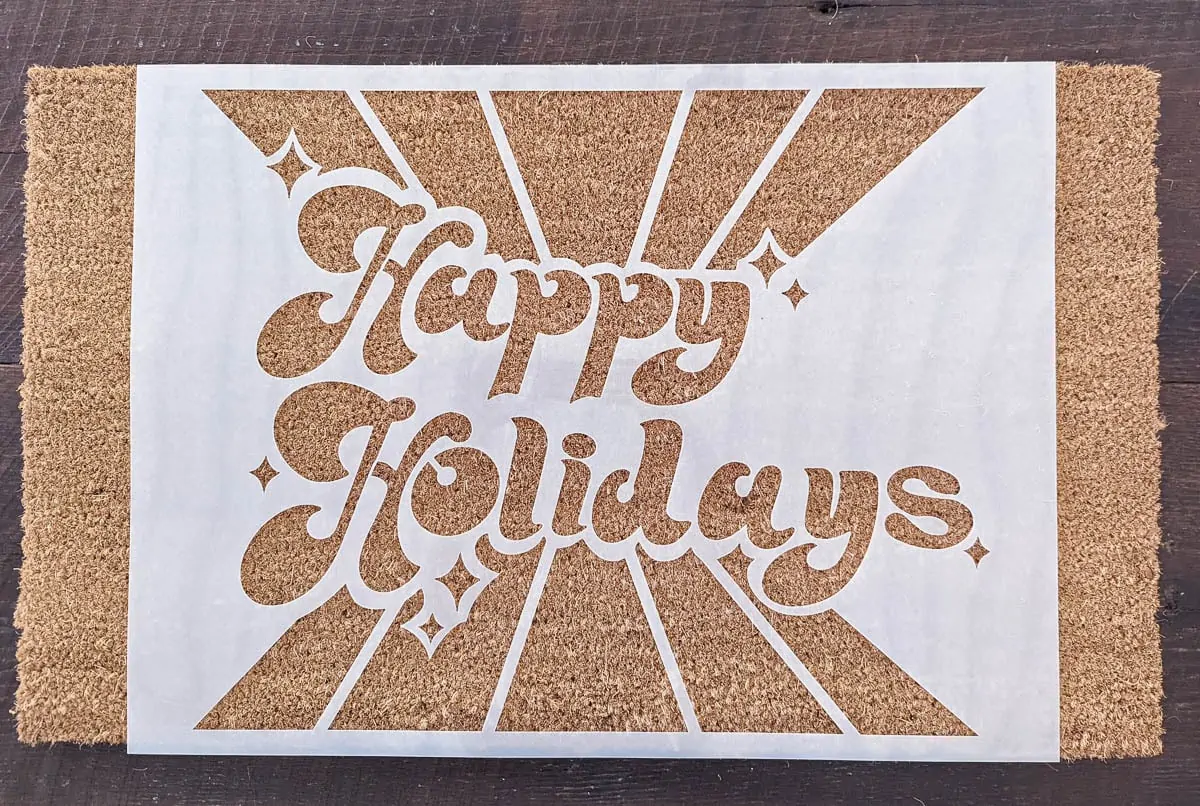
Attach your stencil
One of my top stenciling tips is to use repositionable spray adhesive to adhere your stencil to the surface your are painting.
I wasn’t really sure how well this would work on a doormat since the surface has such a rough texture, but it actually works really well.
Just spray the back of your reusable stencil with a thin coat of repositionable spray adhesive, then stick it in place on top of your doormat. As you place it on the doormat, be sure that it is centered, straight, and placed where you want it.
The stencil won’t stick as firmly to the doormat as it would to a smoother surface, but the spray adhesive still does a great job of holding it firmly in place as you are working.
If you don’t have spray adhesive, you can use tape to hold the stencil in place instead. You will need to be a bit more careful as you are stenciling though, since your stencil will be a bit more likely to move around.
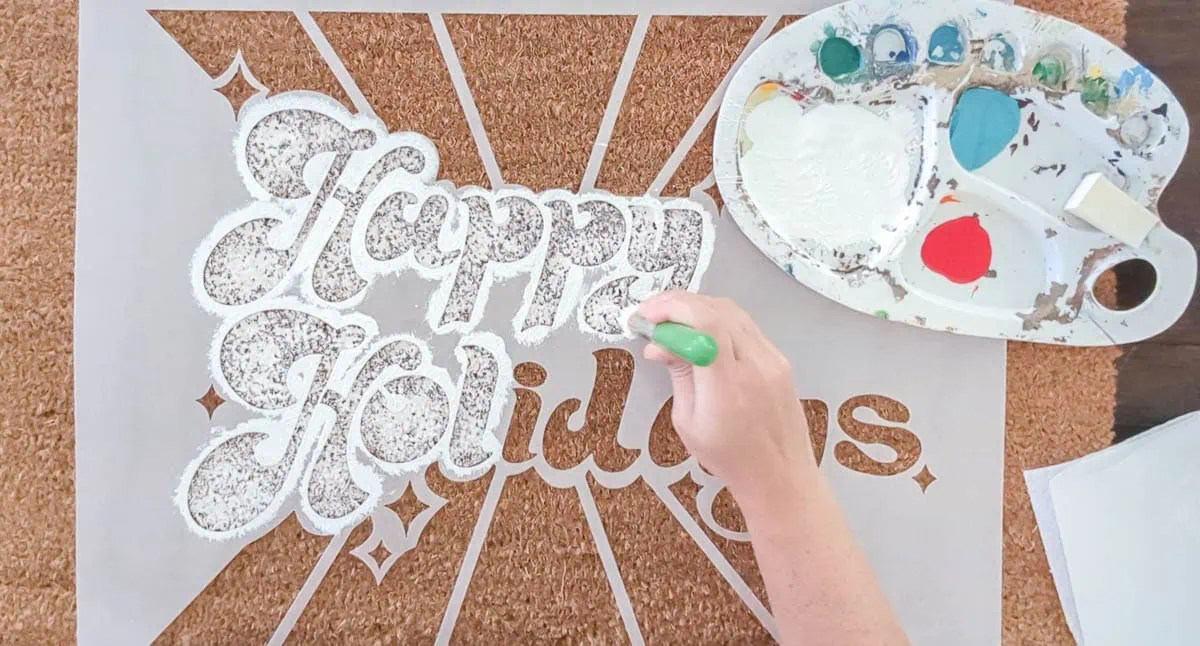
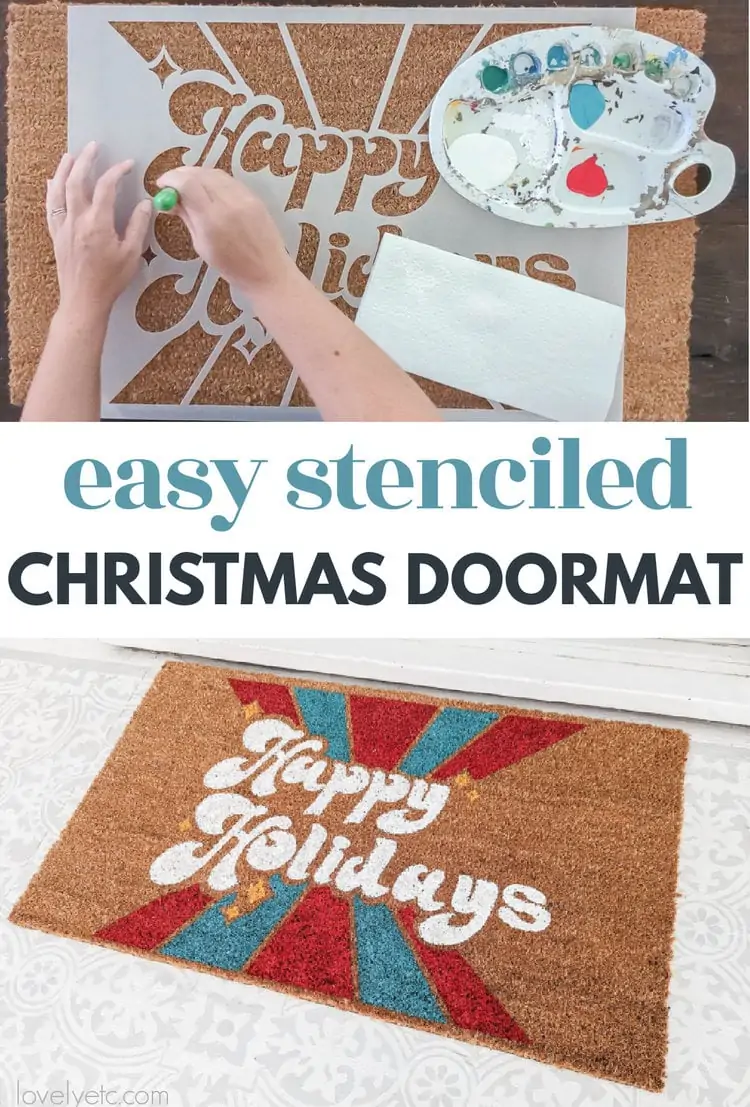
Paint your Doormat
It’s best to use a stencil brush for stenciling your doormat. Stencil brushes are usually round and have a lot of tightly packed bristles with a flat edge at the bottom.
They are designed to apply paint to stenciled designs with an up and down motion rather than brushing it side to side. This helps keep paint from getting pushed under the edges of the stencil as you are painting.
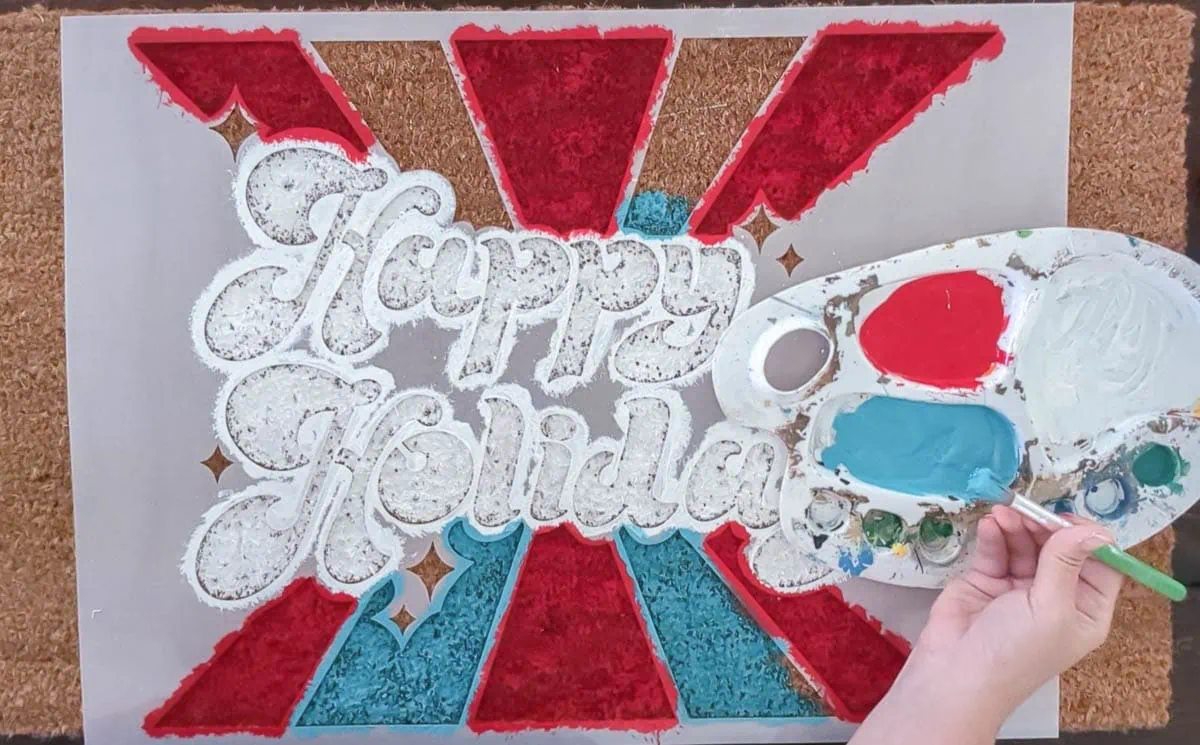
It is much easier to load paint onto your brush if you pour it onto a painter’s palette or paper plate before you start.
Typically you don’t want to use much paint on your brush when you are stenciling. When stenciling smooth surfaces like wood, using too much paint just leads to excess paint squishing under the stencil and making a mess of your design.
Stenciling a doormat is completely different.
You need to use a lot more paint than you usually would to get good coverage. The fibers of the doormat soak up the paint very quickly and doormats are so thick, there is a lot of area for the paint to penetrate.
Start by loading a small amount of paint on your paintbrush and start applying it to your stencil with a straight up and down motion. As you continue stenciling, you will get a better feel for how much paint to use.
When you finish your first coat of paint, allow it to dry fully before applying a second coat of paint.
Two coats of paint will be plenty for most colors, but if you are using white paint, you will probably need to do three coats. White paint is notorious for needing a few extra coats to get good coverage no matter what type of surface you are painting.
As soon as the final coat of paint is finished, you can peel off your stencil to see your painted design.
This part always makes me a little nervous even when I know I’ve done everything right!
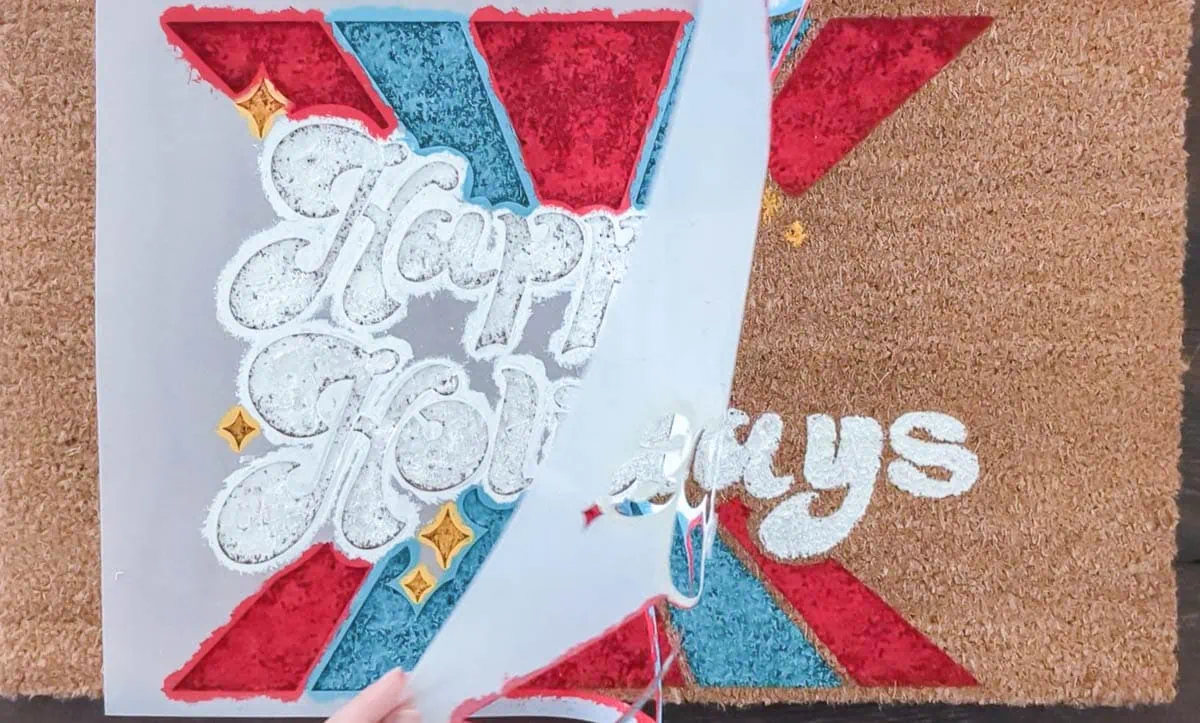
It’s always a relief to see those nice clean stencil lines and clear colors!
Seal your doormat
Before sealing your doormat, be sure to let the paint fully dry.
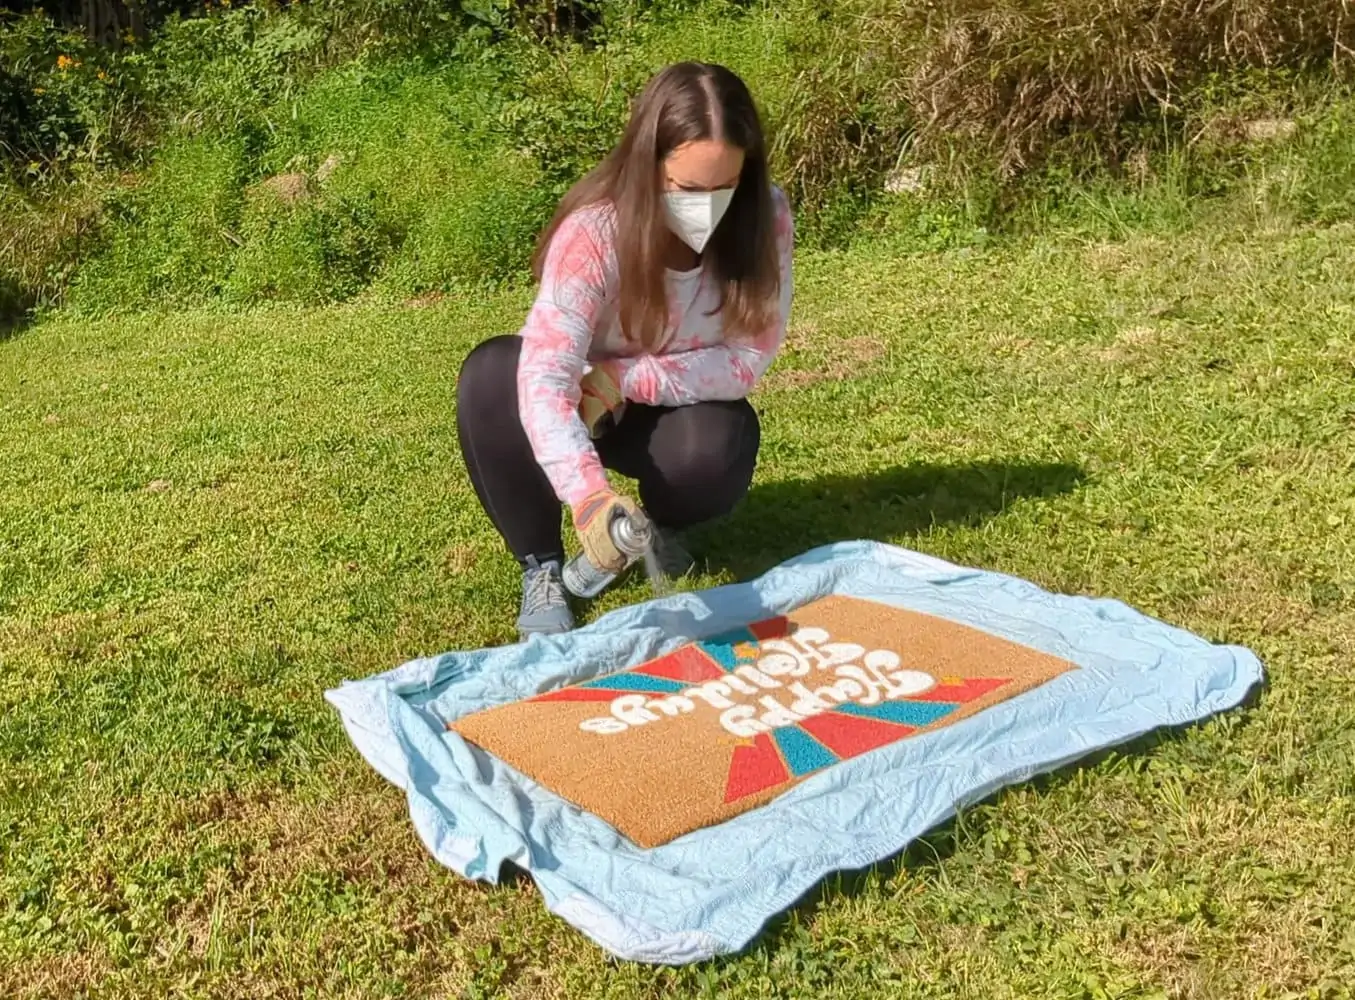
It is best to spray Flex Seal outside since it does contain some strong chemicals. Be sure to protect the area under your doormat with a drop cloth and protect yourself by wearing gloves and a mask.
Spraying Flex Seal is a lot like spray painting. You want to shake the Flex Seal well and spray a thin coat over your doormat.
Hold the can 8″-12″ from the surface of your doormat and move it side to side in a sweeping motion as you spray.
Two to three thin coats of Flex Seal is ideal for a good seal. You need to let it dry several hours between coats.
After each coat, be sure to flip the spray can upside down and spray a short burst to prevent clogging.
If at any point, you notice the clear Flex Seal is spraying out white, stop and shake the can more thoroughly. If it sprays out white, it is likely to dry white as well.
I wasn’t really sure if the Flex Seal would change the texture of the doormat, but it really didn’t seem to make much of a difference.
When I touch it, I can feel that the Flex Seal is there but the rough texture of the doormat that makes it ideal for wiping feet wasn’t affected.
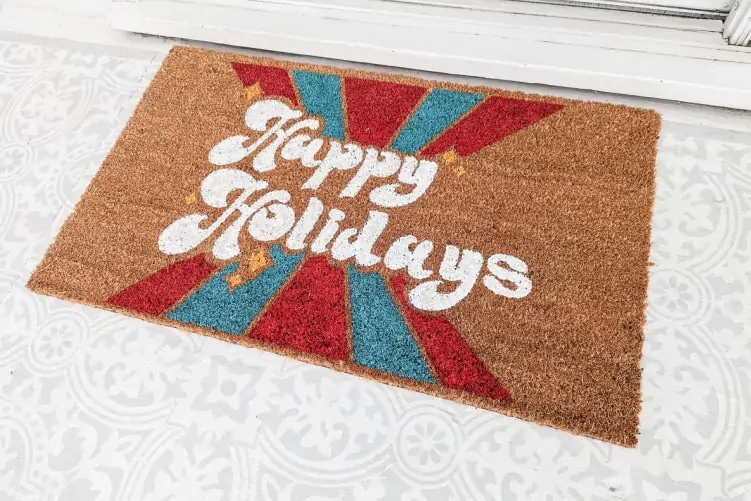
I feel pretty confident that this doormat will hold up well and I’m excited to use it this holiday season!
And I’ve already got my eye on a few more doormat stencils to use to make an everyday doormat for the rest of the year!
If you’re looking for more stenciling tips as well as tons of stenciling inspiration, WallCutz has a Facebook Community that is very active and filled with great ideas. I highly recommend checking it out.
Video Tutorial
I’d love for you to subscribe to my Youtube channel!
More Stencil Tips and Projects from Lovely Etc. I think you’ll like:
I’d love for you to pin this post on Pinterest!


DIY Christmas Doormat
Make a fun and festive Christmas doormat with this step-by-step tutorial. Use this same process for any holiday mat!
Materials
- Blank coir doormat
- Doormat stencil
- Repositionable spray adhesive
- Outdoor paint or Flex Seal spray
- Stencil brush
- Flex Seal clear spray sealer
- Drop cloth
- Face mask and gloves
Instructions
- Prep your doormat by running your hand or a scrub brush over the surface of your doormat to remove the loose fibers.
- Use repositionable spray adhesive to adhere your stencil to the surface your are painting.
- Just spray the back of your reusable stencil with a thin coat of repositionable spray adhesive, then stick it in place on top of your doormat.
- Use a stencil brush to stencil your doormat with paint. Start by loading a small amount of paint on your paintbrush and start applying it to your stencil with a straight up and down motion.
- Allow it to dry fully before applying a second coat of paint.
- As soon as the final coat of paint is finished, you can peel off your stencil to see your painted design.
- Let the paint fully dry then seal your doormat with two to three coats of Flex Seal. It does need to try for several hours in between each coat.
Recommended Products
As an Amazon Associate and member of other affiliate programs, I earn from qualifying purchases.