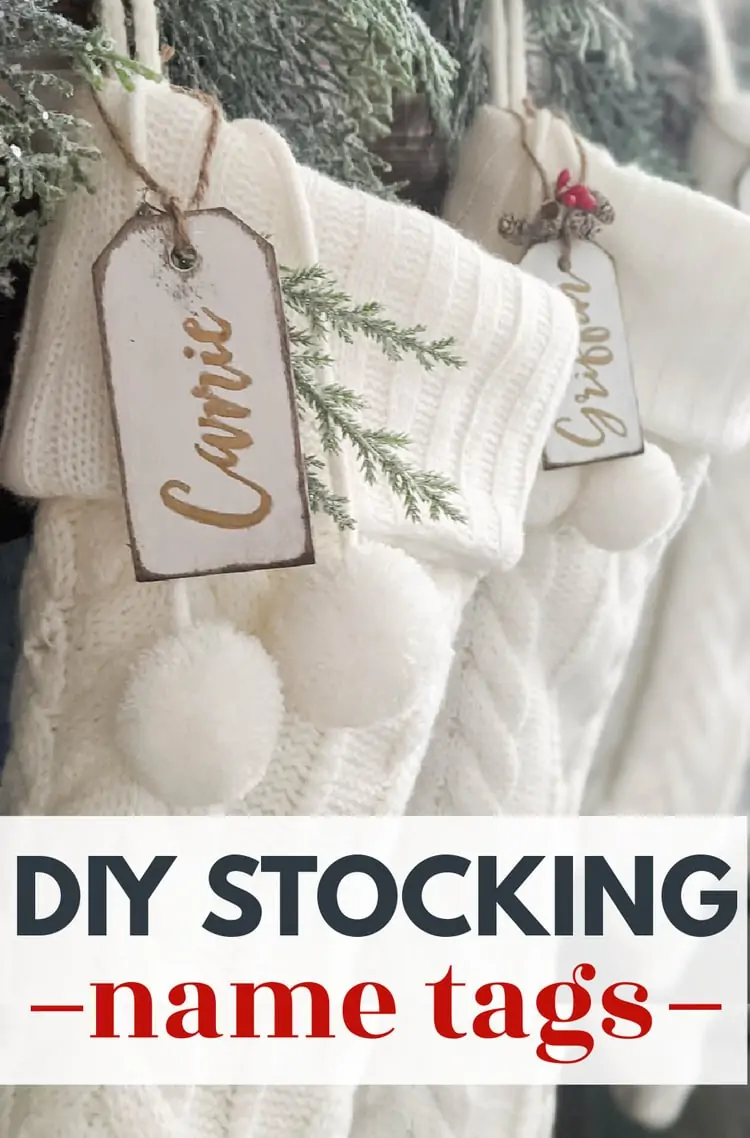
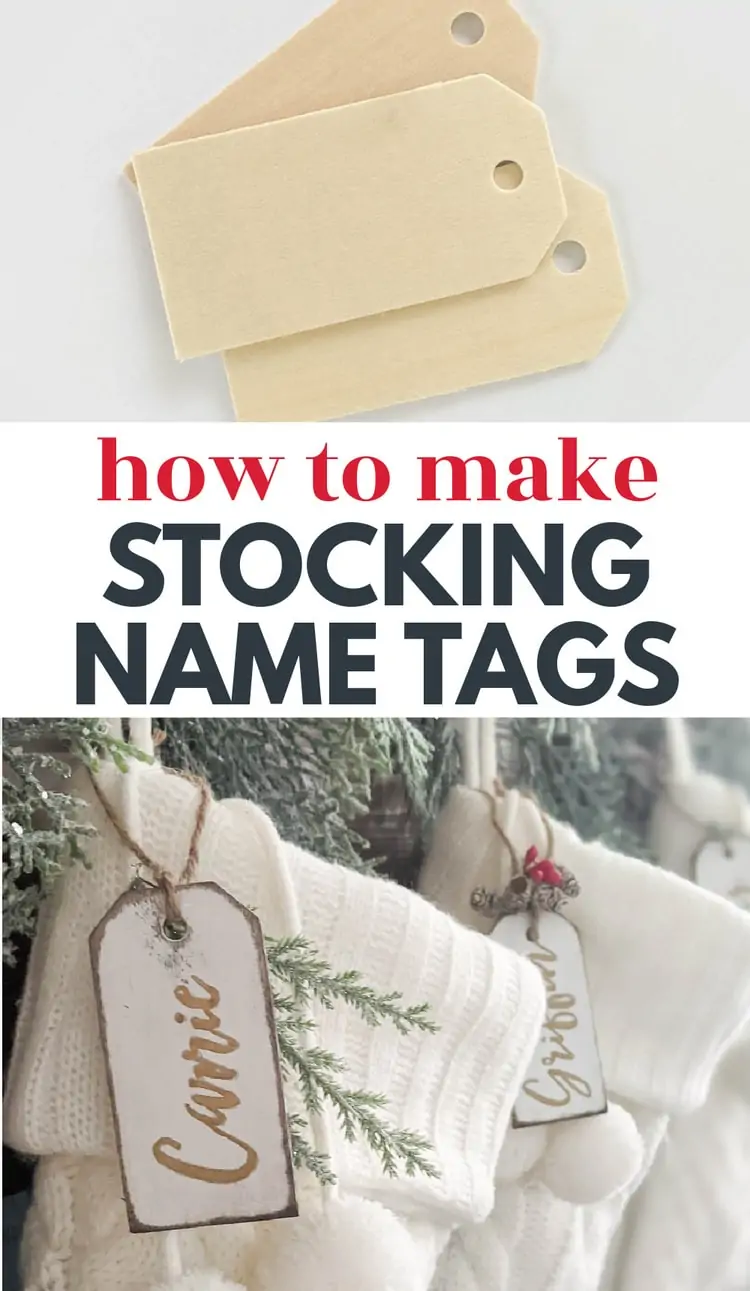
How to make Beautiful DIY Stocking Name Tags
These classic wood DIY stocking name tags are easy and inexpensive to make and will look absolutely beautiful on your stockings for years to come.
This post contains affiliate links which means if you make a purchase after clicking a link I will earn a small commission but it won’t cost you a penny more. Click here to see my full disclosure policy.
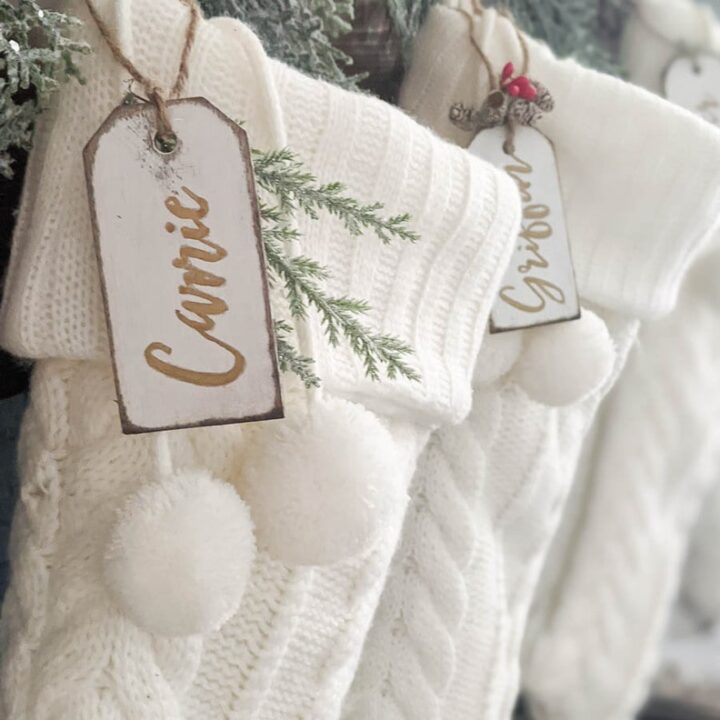
Our family uses matching cable knit stockings every Christmas, so stocking name tags are a must so that everyone knows which stocking to tear into on Christmas morning!
For the past few years we’ve been using initials that I made by covering simple cardboard letters in German glass glitter. (The German glass glitter gives a great vintage feel).
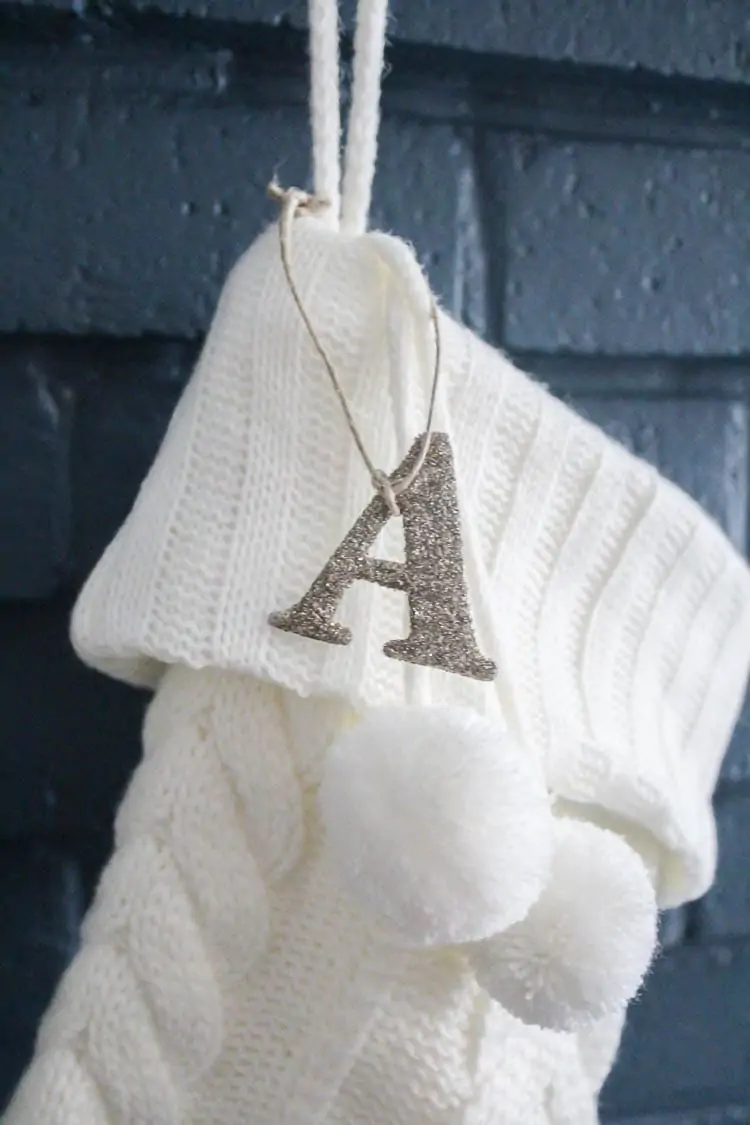
They were beautiful and easy to make and I still highly recommend them if you are looking for super simple stocking tags.
But after several years of use, some of the letters were becoming bent and torn.
So I decided to make new stocking tags this year. I wanted something with the beautiful classic look of stained wood with crisp white lettering.
Unfortunately, things did not go as planned.
I know it probably seems like my projects always turn out amazing on the first try. And sometimes they do, but lots of times there’s a messy middle where things aren’t looking so great. This was definitely one of those times.
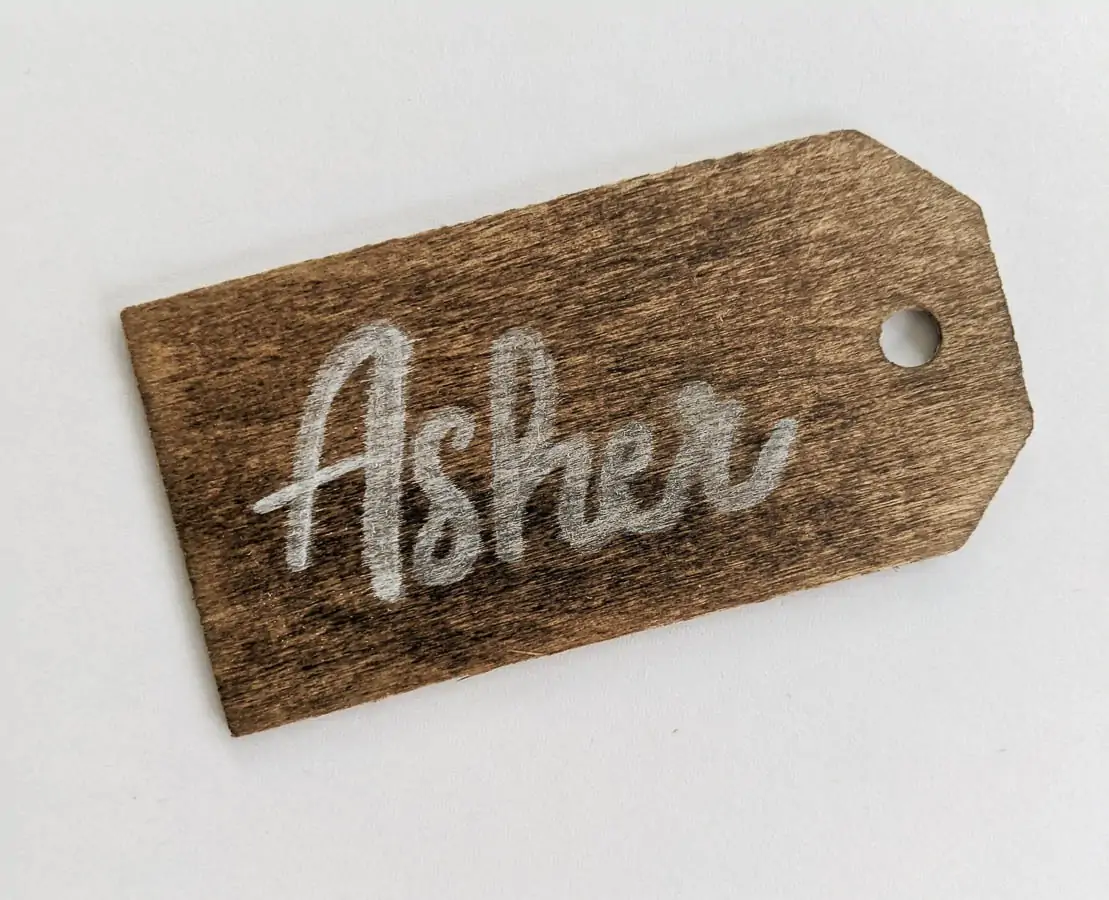
I’m pretty sure I know what went wrong – I didn’t give the stain enough time to dry and I didn’t use a fine enough paint marker. So my crisp white letters turned into faded, blobby letters instead.
But I still wanted some cute new stocking tags so I came up with a plan B. And even though they look a bit different from what I originally imagined, I’m still really happy with the final result.
These painted wood stocking tags require a few more materials than my original idea, but if you like to make things, there’s a good chance you already have most of the materials on hand.
The only thing I had to purchase for my own tags were the wood tags themselves.
I’m sharing a step-by-step tutorial for creating your own DIY wood stocking name tags including a trick for getting perfect lettering even if your handwriting is terrible.
Materials
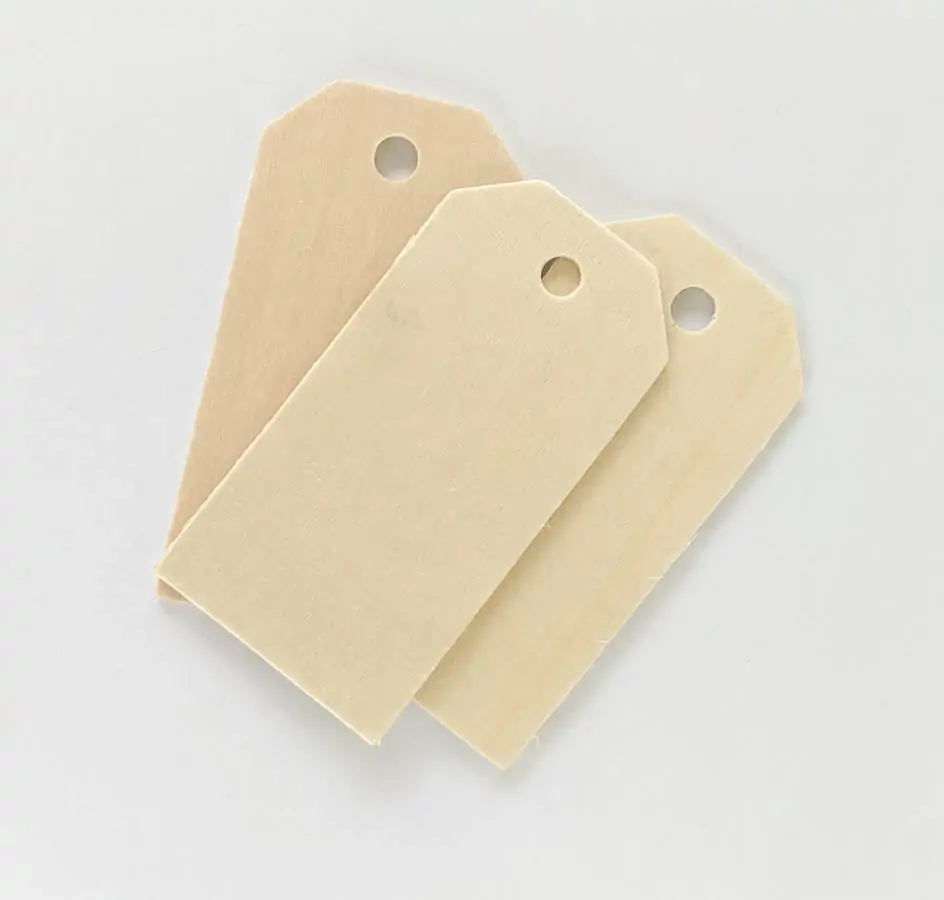
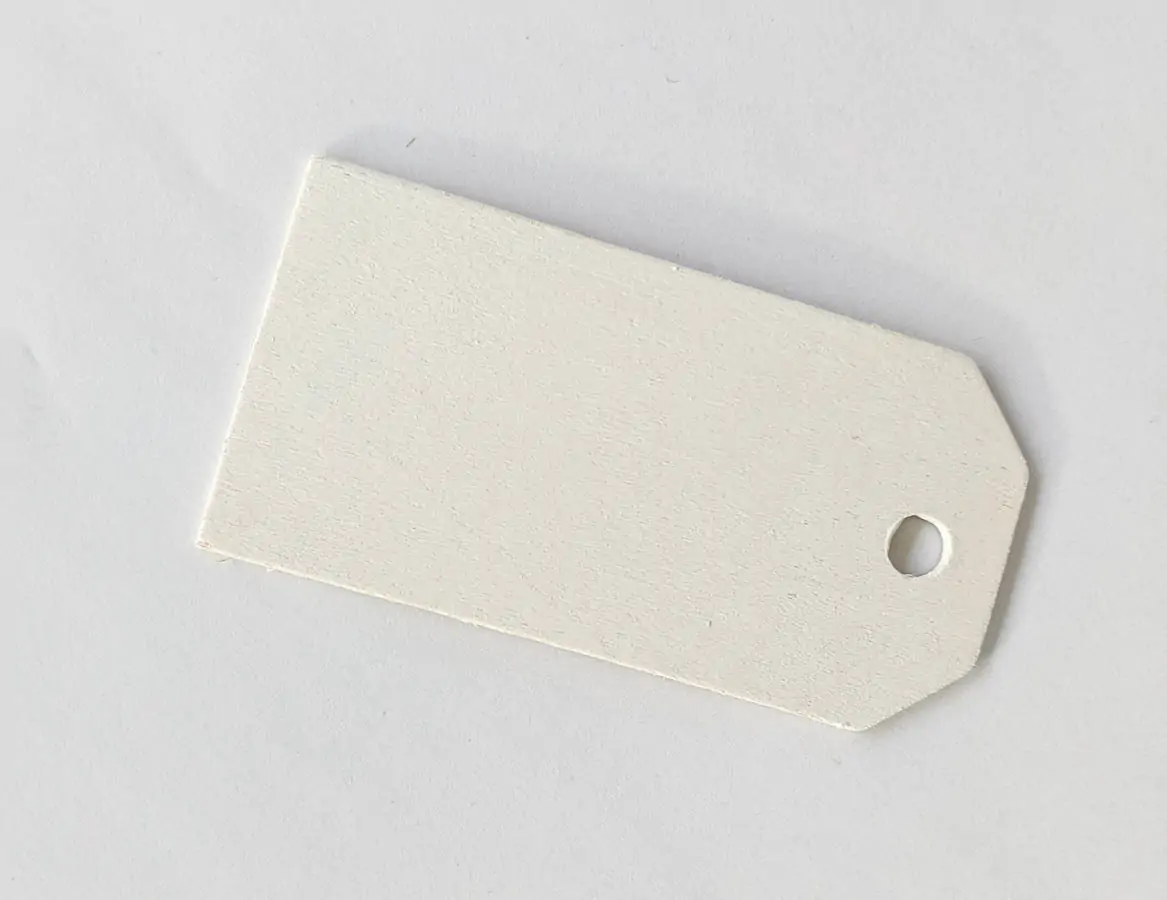
- Unfinished wood tags – The tags I used are around 3.5″ x 1.5″. I found mine at Joann Fabrics but they also have similar tags on Amazon
- White paint – Almost any white paint will work, but this is one technique where some chalk paints don’t work great. This is a great project to use leftover latex paint, paint samples, or craft paint.
- Paint brush
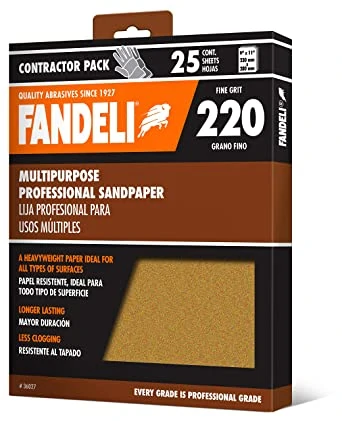
- 220 grit sandpaper – for distressing the edges of the tags
- Wood Stain – I used Minwax dark walnut stain but almost any shade will work.
- Mineral spirits
- A clean rag – to apply the stain
- Printout of your names in any font you choose – you can skip this if you prefer to handwrite the names on your tags.
- Pencil
- Fine tip Sharpie oil-based paint pen – I used gold, but black or even red would also work well.
- Twine – for hanging on your stockings (some wood tags come with twine included, some don’t)
How to Make DIY Stocking Name Tags
Paint the wood tags
When my original stained wood idea didn’t work out, I decided to go with a weathered white paint finish instead.
I’ve used this simple method of weathering white paint many times. It involves several steps, but it’s actually really easy to do and only takes a couple of minutes.
The first step is to paint the tags white. We’re going to be distressing these tags, so you don’t need to be super meticulous about getting a smooth finish or even completely covering the edges of the tag – just a quick paint job will work.
You can use pretty much any white or nearly-white paint for this, but I have found that some chalk paints do not work well because the absorb the stain used in the next step.
I used some leftover latex touch up paint and it worked great.
Distress the painted tags
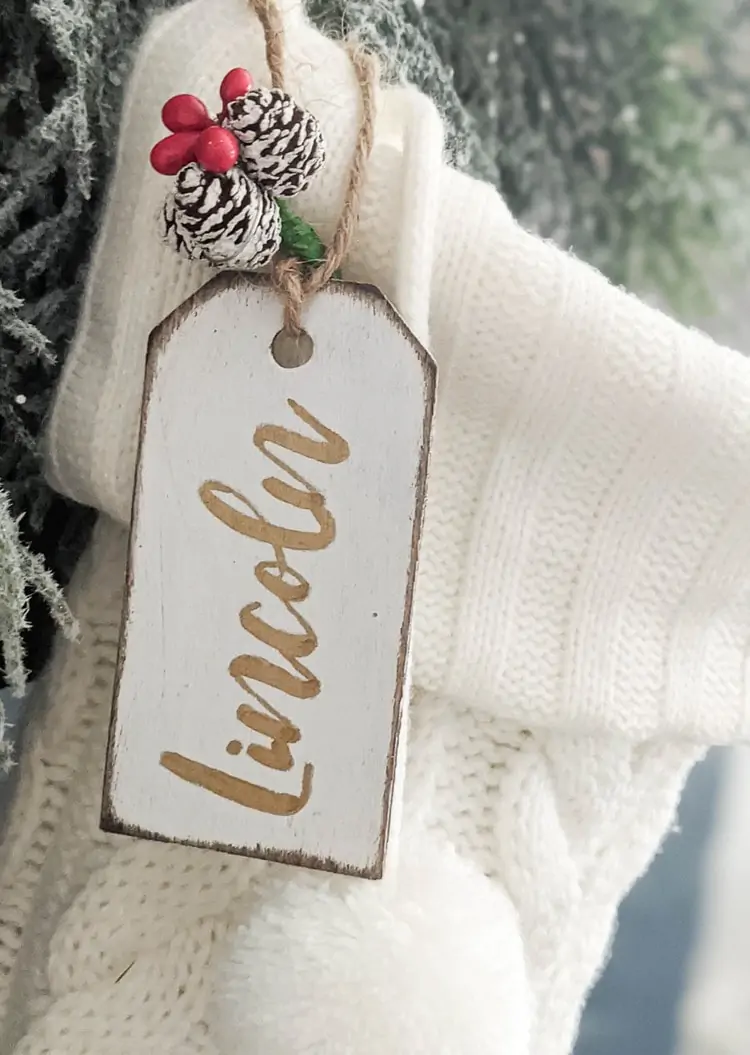
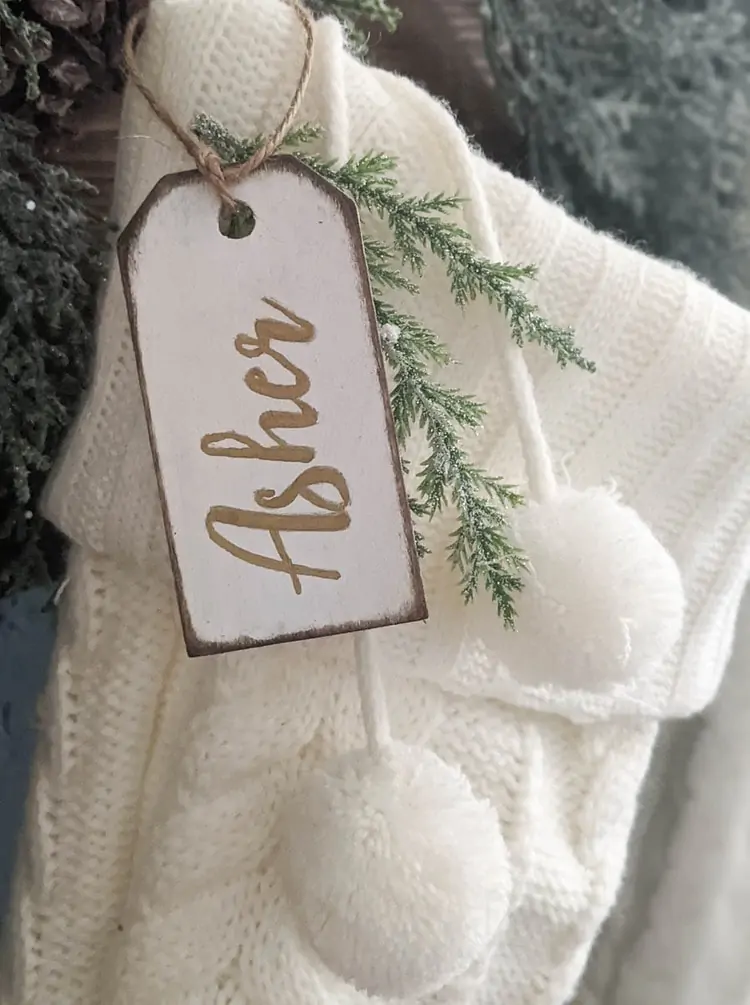
Distressing the tags is optional, but I love the combination of creamy white paint and classic stained wood. Plus, my family’s stockings are white and I wanted to make the white tags stand out against the white stockings a bit more.
To give the tags a great distressed finish, start by sanding just along the edges of each tag using 220 grit sandpaper.
Wipe off the dust and then use a clean rag to wipe dark walnut stain all along the edges of the tags. You want to be sure to stain all of the bare wood that was exposed while sanding.
Don’t worry about any stain that ends up on the painted area. As soon as you finish applying the stain, pour a bit of mineral spirits onto another clean rag and use it to wipe down the entire surface of the wooden tag. This will remove the stain from the painted areas, but won’t affect the stained wood.

Add the names
For projects like this, I always use Sharpie oil-based paint pens. Unlike typical water-based paint markers, they write really well on unfinished wood, painted wood, and even stained wood.
You can simply write your names on freehand if you have awesome handwriting. But if you don’t love your handwriting, there’s a super simple way to print out your lettering and transfer it to your tags.
I printed out all of my family’s names in a font I love (Bloomishly). It took a few tries playing with the settings to get the names the exact right size for the tags.
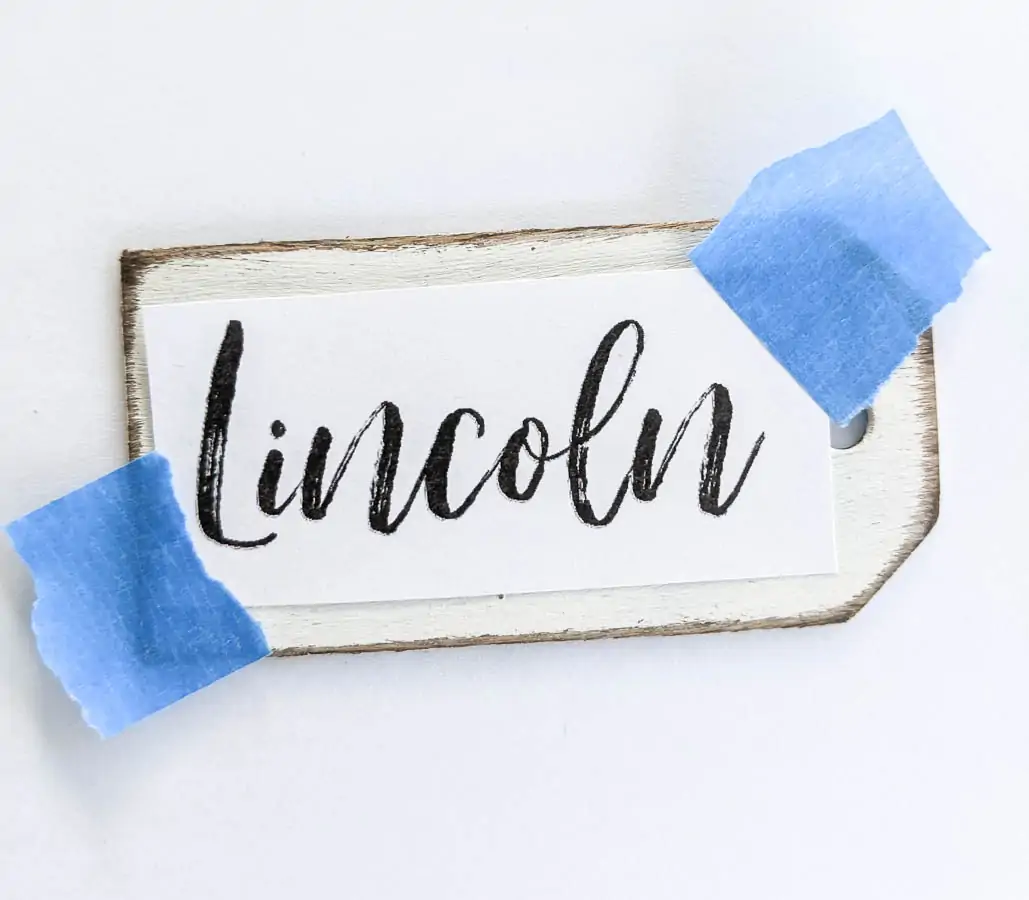
I cut out each name and drew lightly over the back of each printed name with a pencil. Then I taped them in place on the tags and used my pencil to firmly trace around each letter.
If you want a bit more info on this, I have a detailed post about how to transfer designs onto any surface.
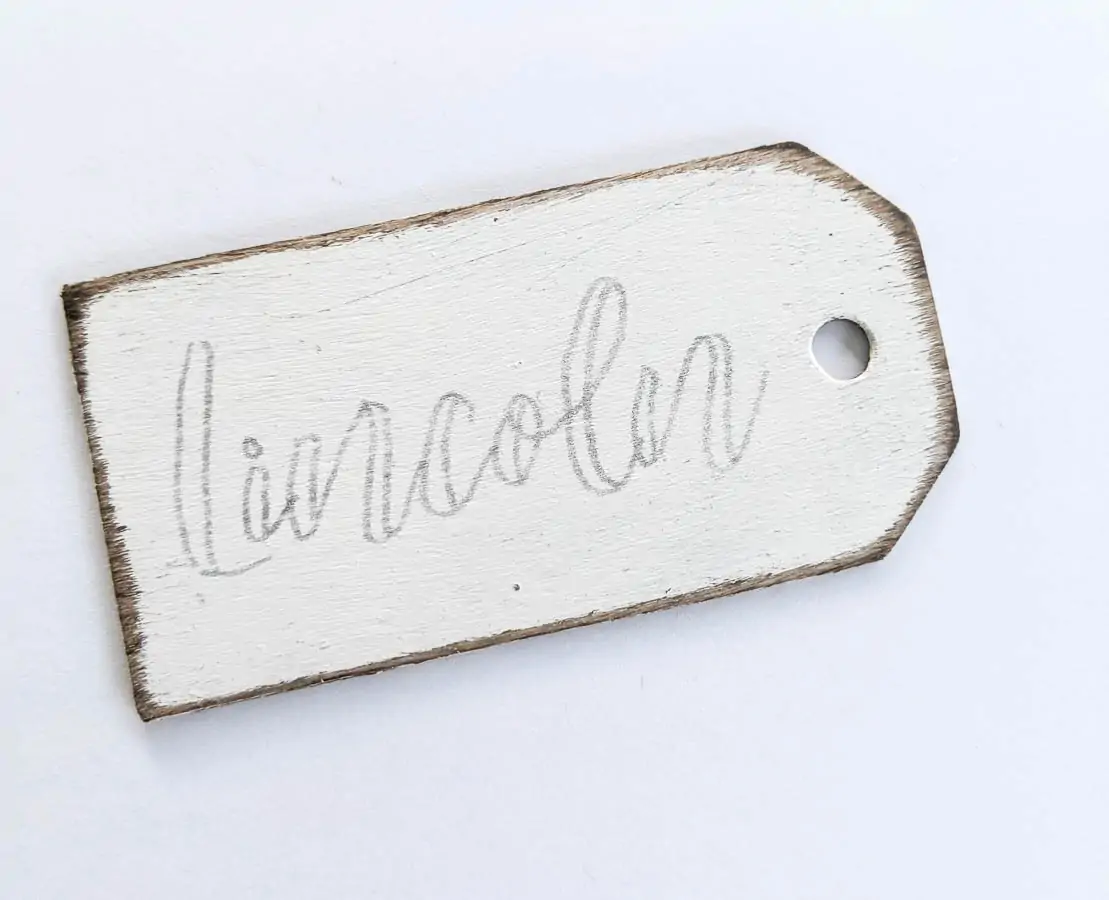
When I removed the paper, a pencil outline of each name was left. Then all I had to do was fill in each outline with my Sharpie paint pen.
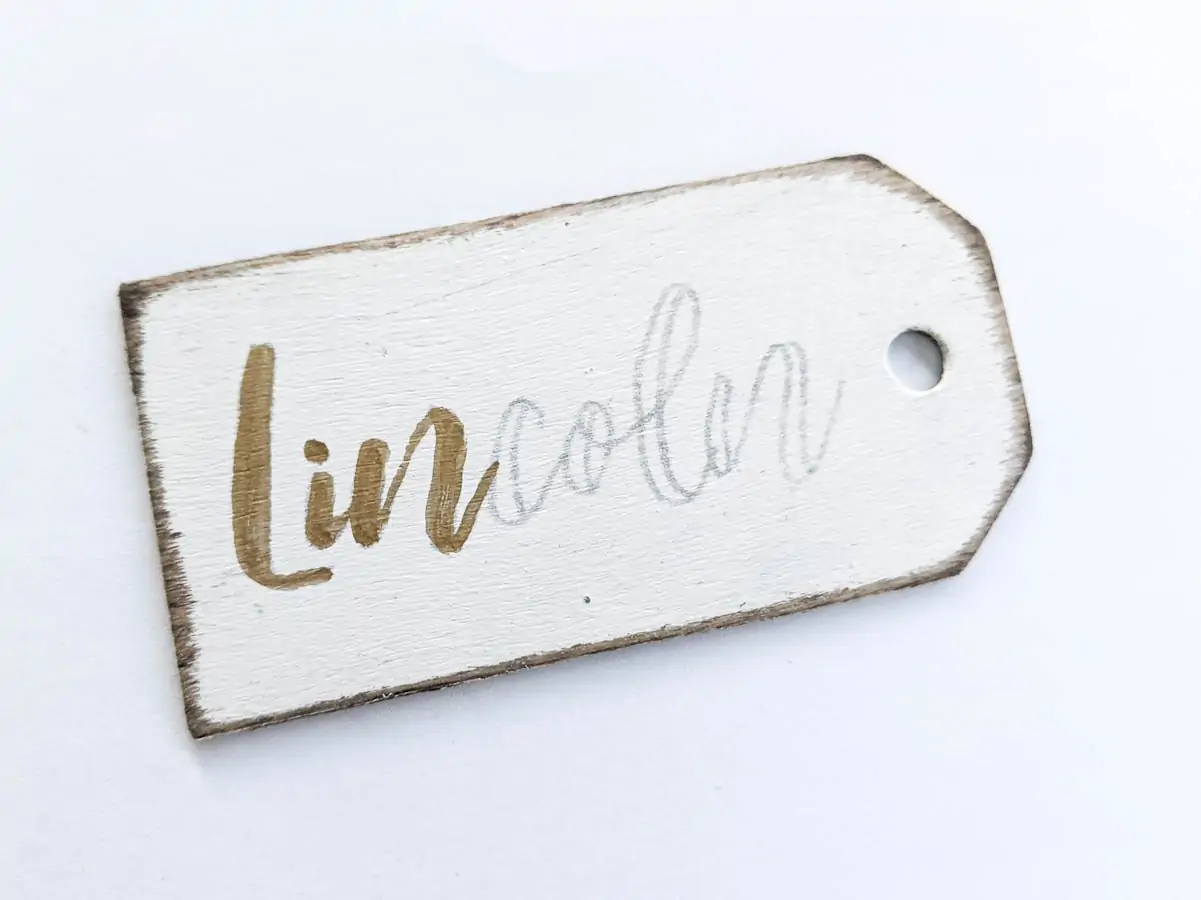
I chose to use a gold paint pen because I love a bit of sparkle at Christmas, but a black paint pen would also work. You may also be able to use a regular black Sharpie, but they can be a bit more unpredictable when writing on painted and stained wood.
Tie on twine
The final step is tying on a loop of twine to hang the tags from your stocking. Then you can slip this loop right over your stocking hanger.
You could also add a few wood beads or ribbon if you like.
I like the simplicity of the plain tags but I did add a few sprigs of evergreen and some tiny faux pine cones to our tags. (I didn’t even attach them. I just tucked them between the tag and the stocking.)

Here’s our fireplace all decked out for Christmas. The candlesticks are there all year, but I did add a few little wooden houses and some garland along with the stockings.
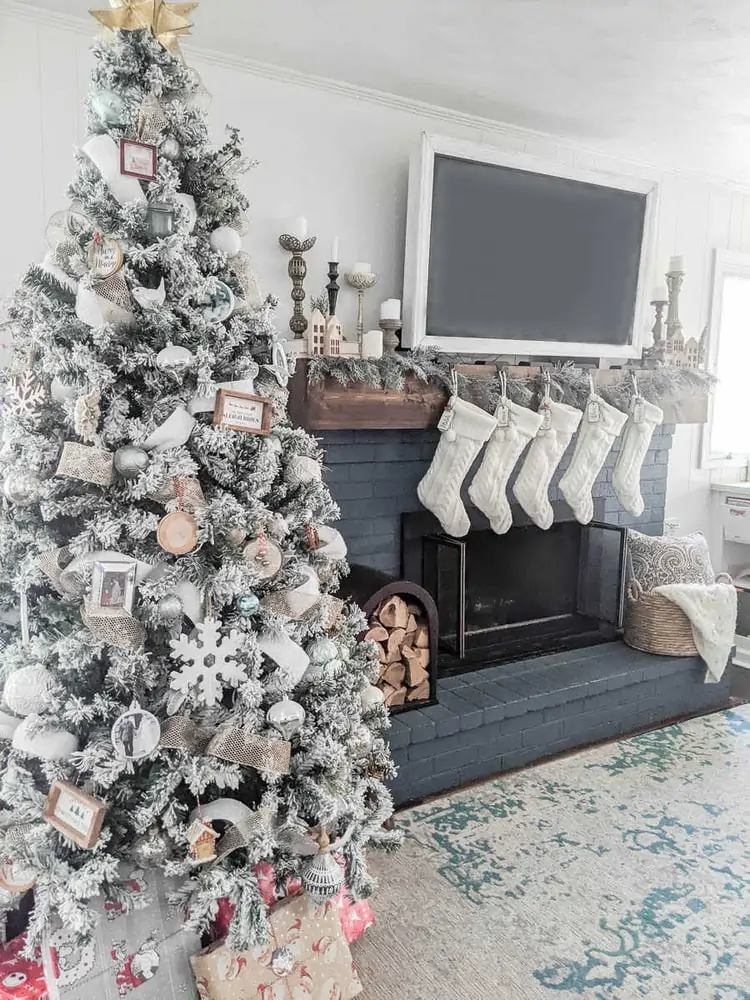
I always love having the Christmas tree right next to the fireplace. It just makes the room so cozy and festive!
This year’s tree is my favorite yet and I put together a post sharing all of my top tips for decorating a beautiful Christmas tree. Just a few simple tricks can make a huge difference in how your tree comes together.
Other DIY Christmas ideas I think you’ll love:
I’d love for you to pin this post on Pinterest!
How to Make Beautiful DIY Stocking Name Tags
These painted wood stocking tags are easy to make and will look great on any style stocking.
Materials
- Unfinished wood tags
- White paint
- 220 grit sandpaper
- Wood Stain
- Mineral spirits
- A clean rag
- Printout of your names in any font you choose
- Pencil
- Fine tip Sharpie oil-based paint pen
- Twine
Tools
- Paint Brush
Instructions
- Paint the name tags white.
- To create a weathered wood finish with stained edges, sand just along the edges of each tag using 220 grit sandpaper. Wipe off the dust and then use a clean rag to wipe dark walnut stain all along the edges of the tags.
- Pour a bit of mineral spirits onto another clean rag and use it to wipe down the entire surface of the wooden tag. This will remove the stain from the painted area.
- Use a Sharpie oil-based paint pen to add the names.
- You can freehand the names or print out the names and transfer them to the tags. To transfer them, cut out each name and draw lightly over the back of each printed name with a pencil. Tape them in place on the tags. Use your pencil to firmly trace around each letter.
- Fill in each outline with a Sharpie paint pen.
- Tie on a loop of twine to hang the tags.
Recommended Products
As an Amazon Associate and member of other affiliate programs, I earn from qualifying purchases.
-
 Sharpie - Oil-Based Paint Marker, Fine Point, Water Resistant, Gold (3-Pack)
 -
U.S. Art Supply Odorless Mineral Spirits Thinner, 125ml / 4.2 Fluid Ounce Container
-
Fandeli 36027 220 Grit Multipurpose Sandpaper Sheets, 9" x 11", 25-Sheet
-
Bluecell 50pcs Unfinished Wood Tags Craft Labels for Home DIY Craft Supplies Gift Wedding Decorations, 3.7 x 2.1 Inch (Wood)
-
Meyer Imports Crushed Glass Glitter for Arts and Crafts - Broken Glass German Silver Glitter for Resin Craft Art/Tumblers/Nail Art/DIY Jewelry Making Decoration - 1 OZ Jar - 90 Grit


Really beautiful, this tag design are soo cute and looking awesome, very amazing idea you gave, thanks for the idea.
Thank you!