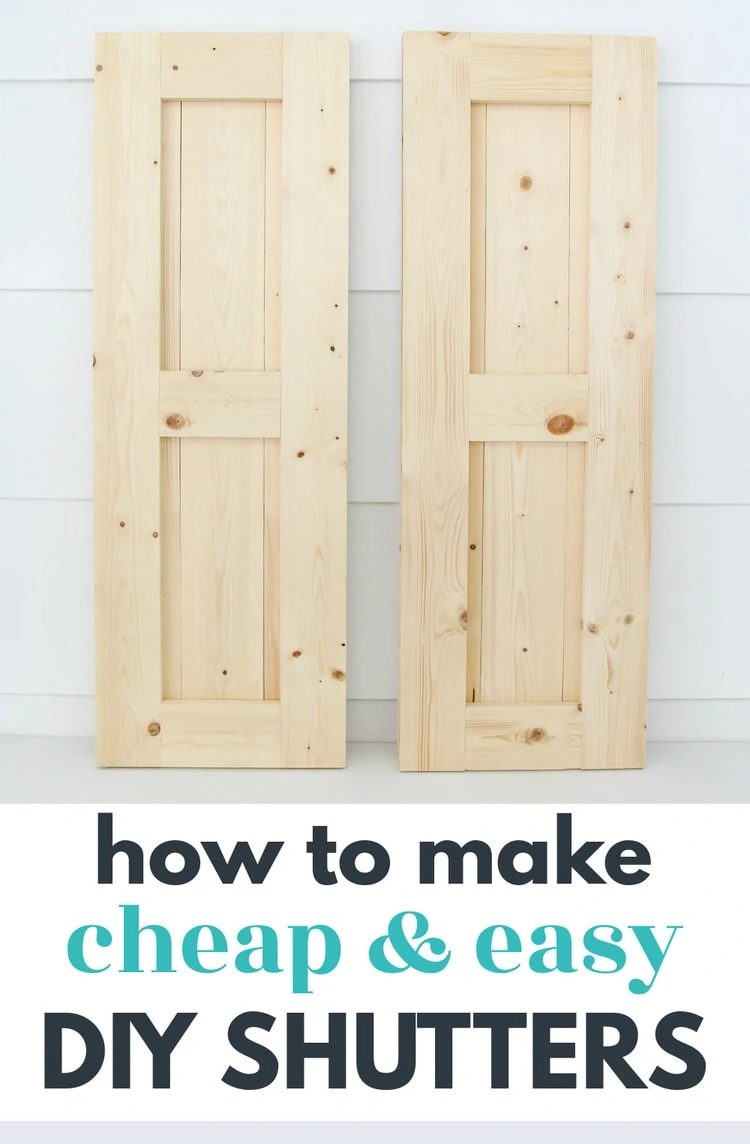
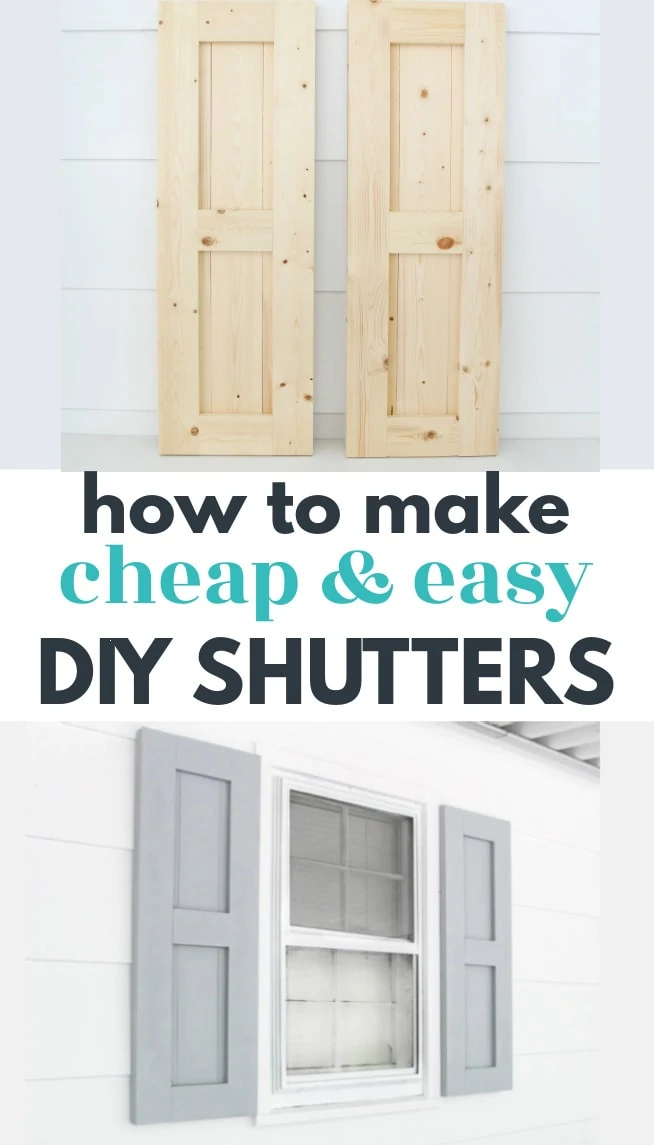
How to Build Simple, Stylish DIY Wood Shutters
These DIY wood shutters are a great way to add major curb appeal to your home on a budget. They are easy to make in any size and any finish you need.
Changing out your shutters is probably one of the easiest ways to really make a difference in the look of the exterior of your home. It’s seriously crazy how different a house can look with and without nice shutters.
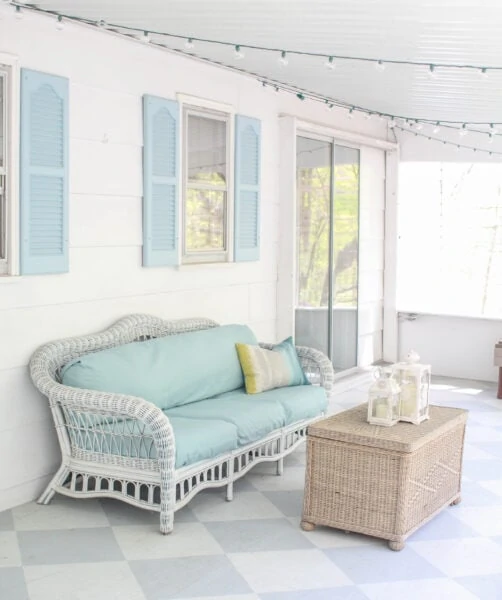
When I started working on my screened-in porch makeover last year, I knew that one thing I wanted to change was our shutters. The majority of our home exterior is brick with black shutters. But our back porch is actually white siding with a slightly different type of shutters. (It doesn’t look nearly as strange as it sounds.)
When we first moved in, the porch shutters (and the whole porch) were an ugly shade of peach. In the years since, I had painted them blue, but I still didn’t love them.
I started looking at new shutters and was honestly kind of shocked at how expensive they are! So I got to work figuring out how to build my own shutters instead.
I found lots of tutorials online for making DIY board and batten shutters, but they looked a bit too country for my taste. So I decided to give my shutters more of a classic shaker style, similar to shaker style cabinets.
I love how these DIY shutters turned out! They are simple, stylish, and major money-savers. Even better—you can easily customize them to perfectly fit your windows, no matter the size. Then paint them in your favorite trim color or stain them for a beautiful, natural wood look.
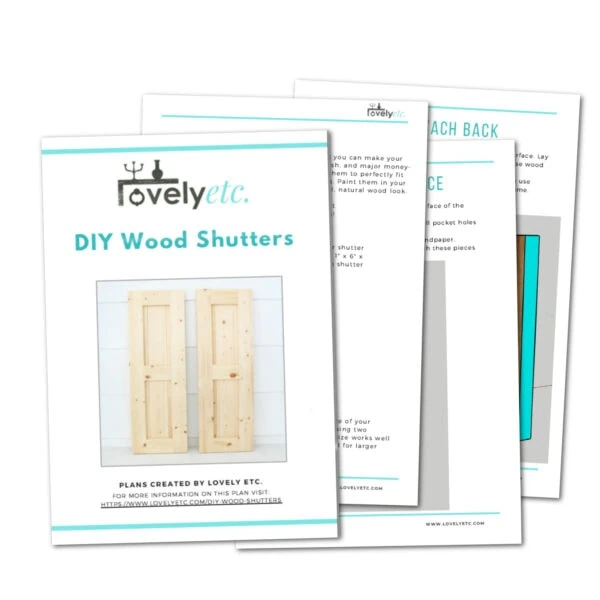
Printable Plans
I have a tutorial below for building your own shutters and I’ve also created more detailed printable pdf build plans. The build plans walk you through exactly how to build the shutters in two different sizes including a tools list, materials list, and simple step-by-step instructions with drawings. You can purchase the build plans in my shop here.
This post contains affiliate links which means if you make a purchase after clicking a link I will earn a small commission but it won’t cost you a penny more. Click here to see my full disclosure policy.
Materials
- 1″x4″x8′ pine boards – You could also make your shutters with cedar if you prefer. Cedar is a great wood for exterior projects, but it costs significantly more than pine. Pine is much cheaper and still works for exterior projects as long as it is sealed properly.
- 1″x5″x8′ pine boards, or 1″x6″x8′ pine boards depending on shutter size – I have found that Lowe’s typically doesn’t carry 1″x5″ boards, but Home Depot often does.
- 100- and 220-grit sandpaper
- Wood glue
- 1¼” exterior pocket screws
- 1¼” exterior wood screws
- Exterior paint or stain and waterproof sealer
- Paint brush
Tools
- Tape measure
- Pencil
- Miter Saw
- Kreg Jig – I have and love the Kreg R3 – it’s a smaller, less expensive Kreg Jig that is still pretty easy to use. If you are new to woodworking and don’t want to make a big investment, the Kreg Jig mini is the least expensive option.
- Drill and drill bits
How to Make DIY Wood Shutters
Determine your shutter sizes.
The height of your shutters will depend on the size of your windows. To find the correct height for your shutters, measure the height of your window not including the window frame.
The width of your shutters also depend on the size of your windows. This tutorial includes instructions for making two different shutter widths: 13.5” and 16.5”.
The 13.5” size works well for smaller windows up to 30″ while the 16.5” size works well for larger windows and double windows.
(The shutters shown are 13.5″ wide; my windows are 24″ wide.)
If you are making 13.5″ shutters, you will be using three 1″x5″ planks per shutter. If you are making 16.5″ shutters, you will be using three 1″x6″ planks per shutter.
The steps below explain how to make one shutter; simply repeat the process for the second shutter to make a pair.
Cut your wood planks.
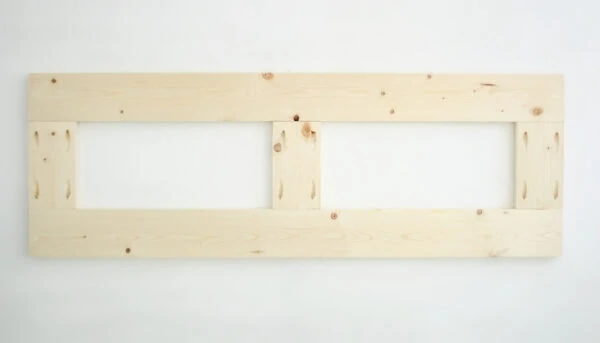
Each shutter is made of two main parts – a solid back and a double-frame for the front.
For the front frame, cut two pieces of 1″ x 4″ wood to the height of your window.
Cut three 1″ x 4″ cross pieces for each shutter. These are the three horizontal pieces for the shutter. The dimensions for these pieces should equal the width of one shutter minus 7″.
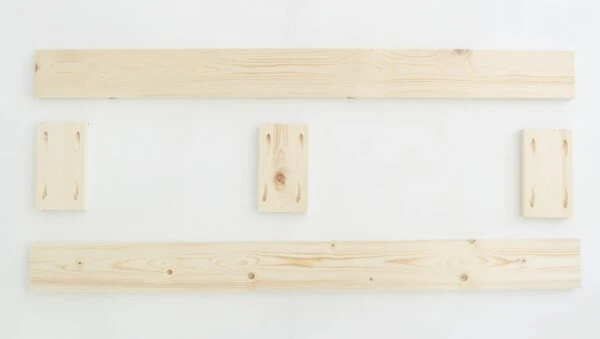
For the solid back, cut three 1″ x 5″ or 1″ x 6″ wood planks to the height of your window.
Build the front shutter frame.
To form the front face of the shutter, turn the three shorter pieces face down and drill pocket holes with a pocket hole jig. Sand any rough edges smooth using 100-grit sandpaper.
Use wood glue and 1¼” pocket screws to attach these pieces together to make the front frame.
Attach the back.
Place the front frame of the shutter face down on a flat surface. Lay the three 1″ x 5″ or 1″ x 6″ boards you cut on top of this. Use wood glue to attach these.
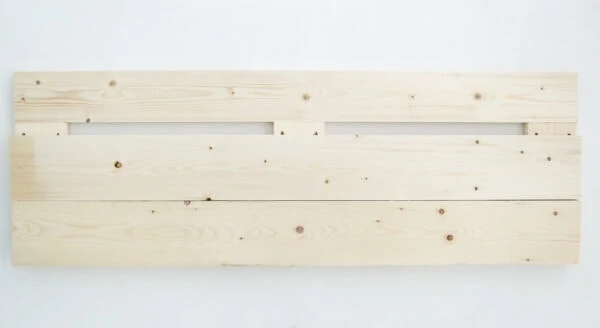
Then use exterior screws to attach the three boards to the front frame.
Sand the entire shutter lightly with 220-grit sandpaper to prepare it for finishing.
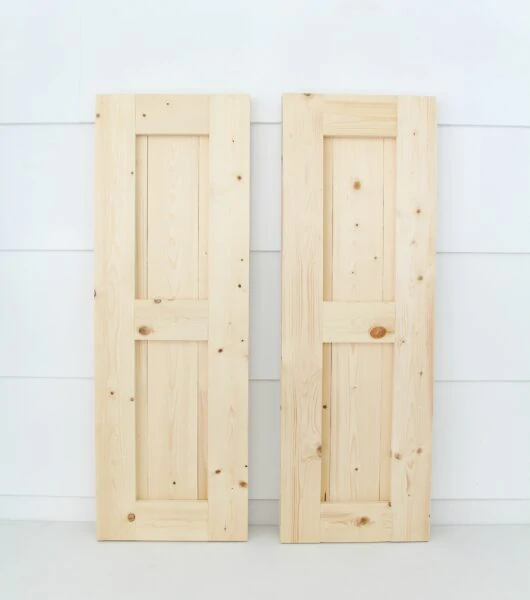
Finish your shutters.
You can finish your shutters with either exterior paint or stain, depending on what look you are going for.
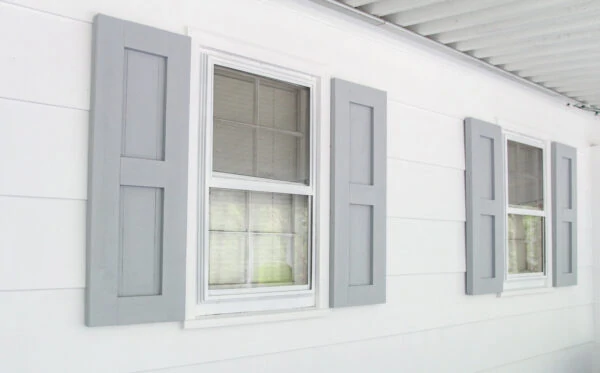
I painted my shutters gray and while I like the color, I do slightly regret that I didn’t stain them instead. I think they would have looked amazing with a medium wood stain like Minwax Special Walnut.
If you do stain your shutters, be sure to seal them with a good exterior sealer.
And that’s it! If you aren’t sure how to hang your shutteres, this article on installing fixed shutters is helpful.
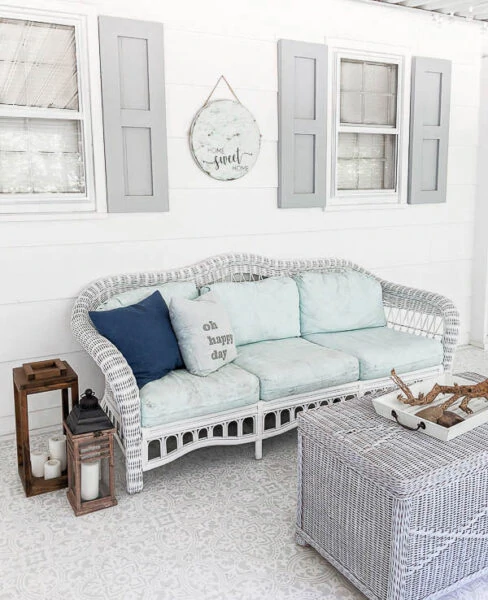
So far I’ve only built these shutters for the windows on our huge screened-in porch, but I’m seriously considering building more to replace the shutters on the rest of the house. (And using stain this time!)
The shutters we have are fine but I just love the presence these wooden shutters give.
Don’t forget, there are printable build plans available in my shop with cut lists and step-by-step instructions
Other simple DIY projects I think you’ll love:
- How to Make a Gorgeous DIY Planter Box for Cheap
- How to paint aluminum windows and door frames
- Where to Get Cheap or Free Wood for DIY Projects
I’d love for you to pin this post on Pinterest!

Excited to try this!
For the cross pieces, why are the dimensions for these pieces equal the width of one shutter minus 7″ rather than 8″ if using 4″ boards?
Great question – it’s because 1″x4″ boards are actually only 3.5″ wide. It’s one of those weird things that is very confusing when you are starting out with woodworking.