Painted Sliding Glass Doors: One Less Eyesore
Learn how to paint sliding glass doors; it’s a quick, easy update that makes a huge difference.
Progress in the family room is still moving slowly considering we currently have a big hole in the wall around the fireplace.
Even so, I did manage to address a major eyesore this weekend.
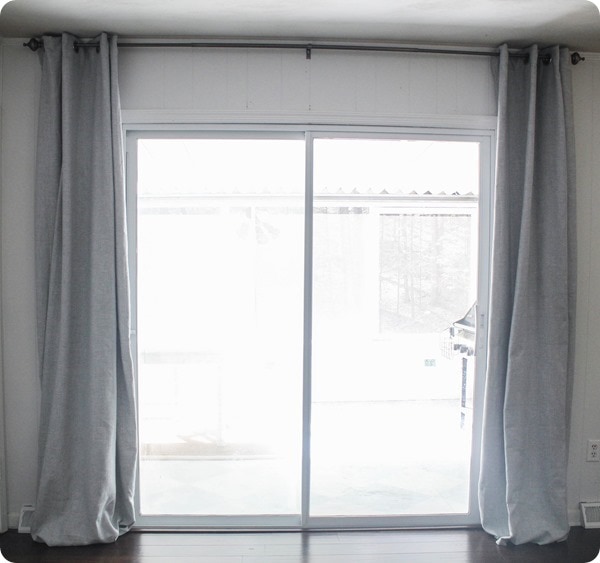
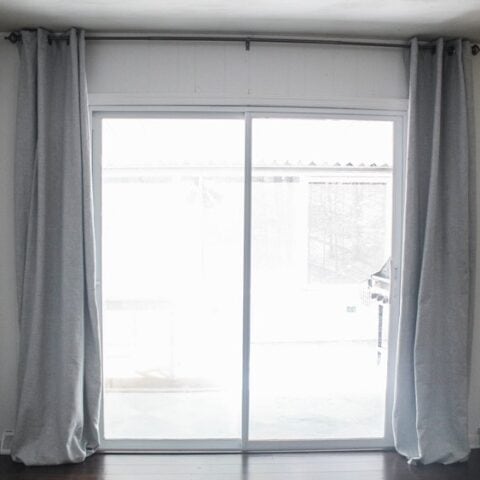
We have sliding glass doors in our family room that lead out onto the screened porch.
They are great because they let in tons of light and give a great view of the backyard. Unfortunately, they are really ugly.
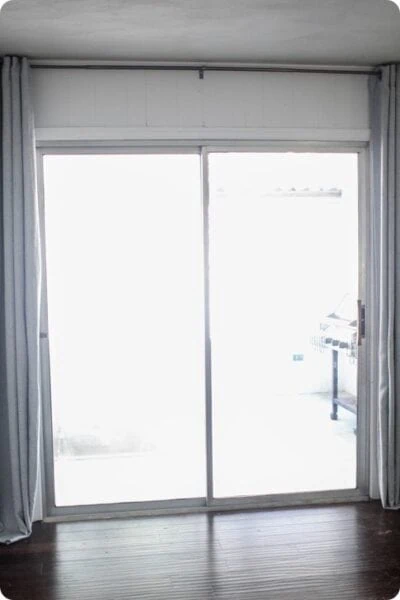
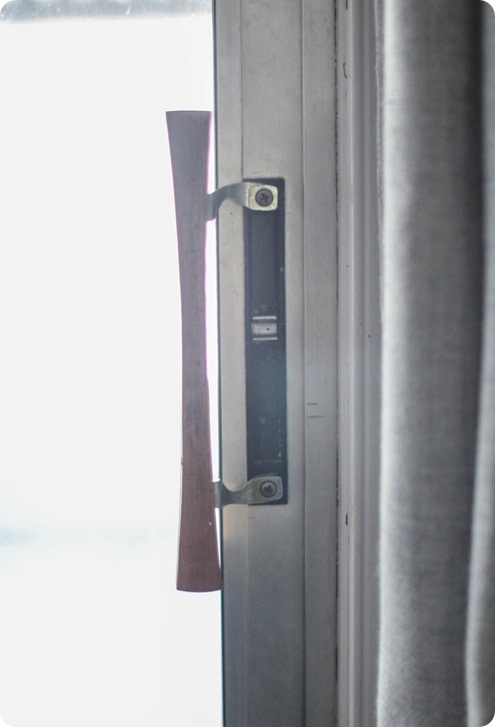
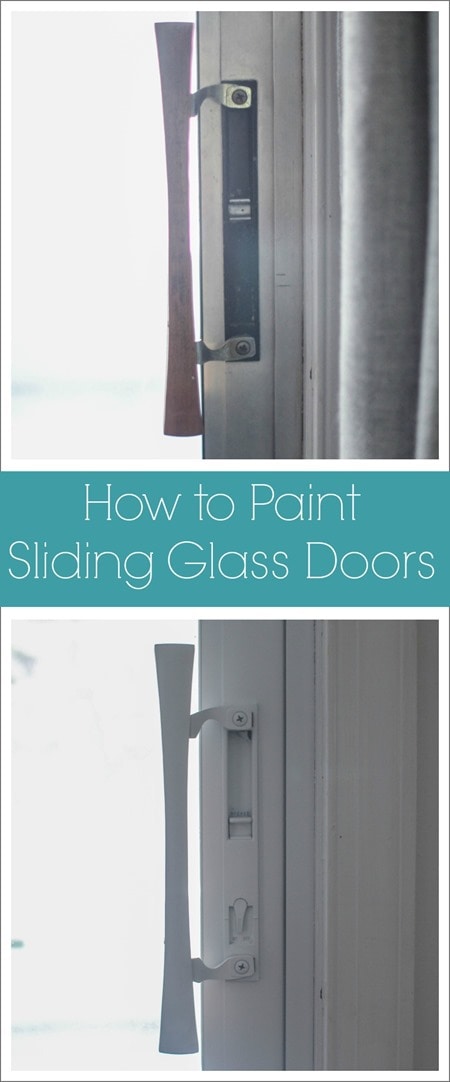
The door frames are unpainted aluminum with an oversized wooden handle.
They look unfinished and just plain ugly, and finally, after 8 years of living here, I did something about it this weekend.
I painted them! And now they fade into the background and you hardly notice them at all – which is exactly what I wanted!
Instead of noticing the ugly doors, now your eyes go straight to the pretty view. Perfect!
I used spray paint to paint the doors because I have always had the best luck with spray paint sticking to the metal.
So far, so good! I will keep you updated on how this holds up. The only part I am concerned about is the bottom section of the track where the door actually moves back and forth.
(UPDATE: The paint has held up so well over the past few years, I recently painted the exterior of my doors as well as my aluminum windows.)
How to Paint Sliding Glass Doors
The first step is to clean the sliding doors and the track really well. My door tracks had quite the build up of dirt and other gunk.
I used a good multi-purpose cleaner (Method all-purpose cleaner) along with paper towels and q-tips to get in the little nooks and crannies.
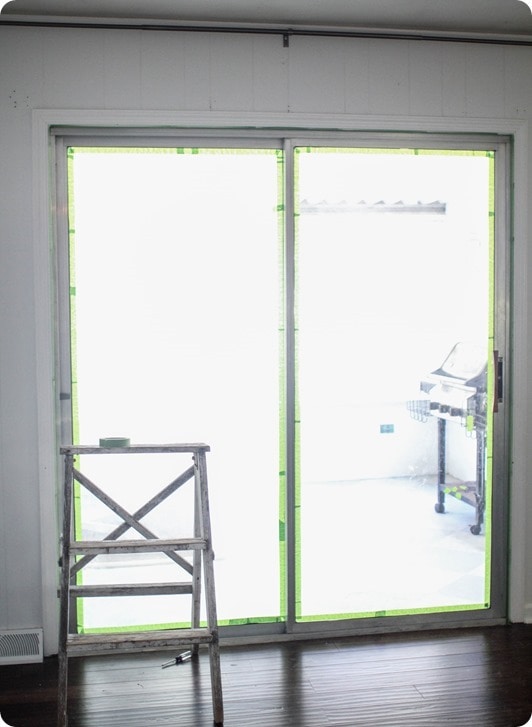
Once the frame was clean and dry, it was time to start taping. Because I was using spray paint to paint indoors, I wanted to be sure to protect everything in the vicinity.
I removed the curtains that were framing the door.
I used painter’s tape to tape off the border of each piece of glass and then covered the rest of the glass with old wrapping paper.
(Extra wrapping paper is something I always seem to have plenty of and it works great as a drop cloth in a pinch. Plus, it is super lightweight so very easy to tape onto vertical surfaces.)
I also carefully taped off the outside border of the door frame and used more wrapping paper to protect the walls all around the door.
I made about a 12 inch border of wrapping paper on all sides and that was plenty.
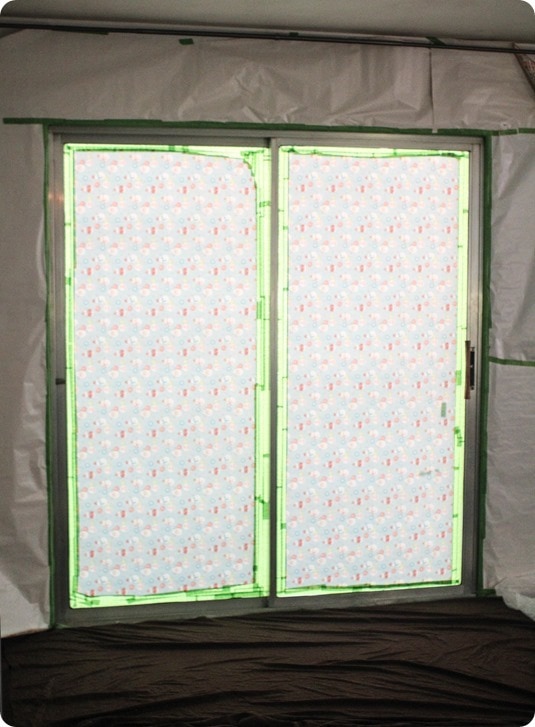
I also protected the floor by taping an old sheet in place over the hardwoods.
I was able to protect the entire area immediately in front of where I was painting, but I wish I had used more old sheets to protect the rest of the flooring in that half of the room.
I didn’t get actual paint on the floors but whenever you spray paint, dust from the spray settles on everything in the area.
When I was finished, I had a lot of paint dust to clean off of my dark hardwoods. Not ideal.
I double checked that everything was well-protected and then sprayed a light, even coat of spray primer over all the metal parts of the doorframe.
Always make sure to take safety precautions when spray-painting, especially indoors.
Open lots of windows and doors for good ventilation and wear a protective mask.
I used Rustoleum spray primer for clean metal (as opposed to rusty metal) but any spray primer made specifically for metal will work.
Spray paints can be really finicky so always make sure to follow the directions on the can.
My primer said to coat with paint within one hour or after 48 hours, so I made sure to start painting after about 30 minutes.
I used Rustoleum satin spray paint in white.
It works on metal and can be used indoors and outdoors. I sprayed three thin coats of spray paint, waiting around 15 minutes between each coat.
Then I pulled off all the tape and wrapping paper (and wiped up all the dust) and got to see my new white, unoffensive sliding doors.
So much better!
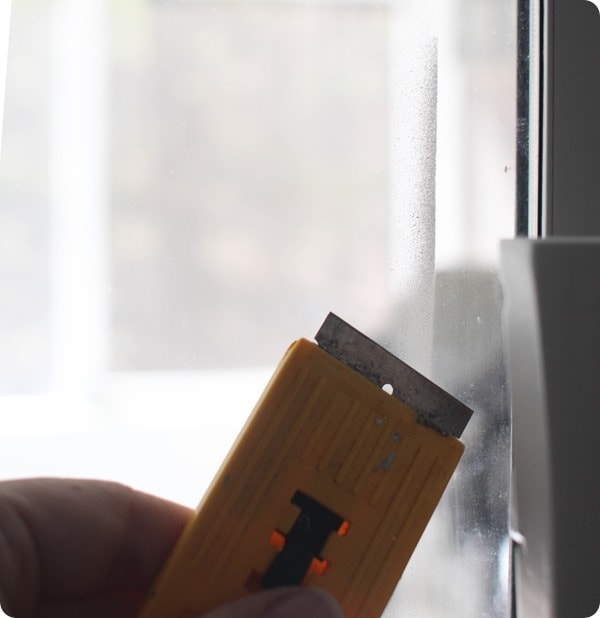
There were a few small spots where some paint slipped through the tape onto the glass.
A razor easily scrapes these small areas off.
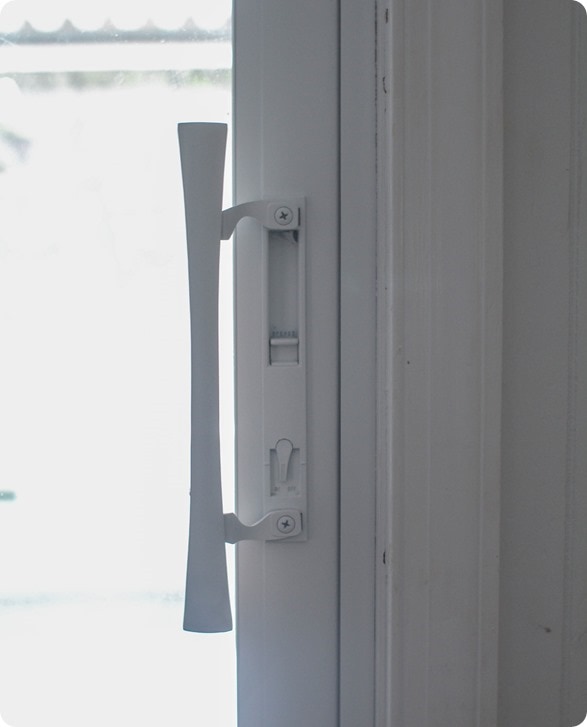
I chose to paint the entire awful handle white as well. I may end up changing out the handle, but for now the white is a major improvement.
And that’s one more eyesore banished from the family room.
Now if I can just get that big hole in the wall taken care of, we’ll be in business!

Painted Sliding Glass Doors: One Less Eyesore
Paint is a simple and budget-friendly way to give outdated sliding glass doors new life.
Materials
- Painter's Tape
- Old Wrapping Paper
- Rustoleum Spray Primer
- Rustoleum Satin Spray Paint
- Multi-purpose Cleaner
- Old Sheet
Instructions
- Use the multi-purpose cleaner to clean the doors and sliding track really well.
- Secure old wrapping paper to the border of each piece of glass with painter's tape.
- Tape off the outside border of the door frame with more wrapping paper.
- Cover the floor with an old sheet.
- Spray a light, even coat of spray primer over all the metal parts of the doorframe.
- Let dry.
- Spray three thin coats of spray paint, waiting around 15 minutes between each coat.
Recommended Products
As an Amazon Associate and member of other affiliate programs, I earn from qualifying purchases.


Looks great! I live in an apartment and have those doors. Thank goodness mine looks out on a gazebo/outdoor room, so I hardly notice them!
Brenda
Thanks! They really weren’t the worst thing in the world but I am so glad I finally painted them after thinking about it for years!
Did the paint stay well? I imagine it would scratch off easily. I am considering doing it on doors at my job but I want to know how they last. Anything you can offer would be helpful!
Hi Leesa, overall the paint has held up very well. It has been a couple of years now since I painted the doors. The handle has a few chips which I expected and all of the paint on the inside of the bottom track has worn off. But that area isn’t very visible anyway.All of the rest of the paint still looks great though. I am planning to paint the inside and outside of the sliding doors in my bedroom this spring and will do it the exact same way other than not painting that bottom track. Good luck!
What a great project and great outcome! You certainly are adventurous. I’ve been wanting to paint the frame of our sliding mirrored closet doors in our bedroom and you’ve given me the inspiration and know-how to do it. Thanks!
Thanks! When it comes to paint, I don’t mind taking chances – I figure I can always repaint or even strip it if I really have to!
Good for you! I never thought about painting mine, which are also hideous, but I’m going to go home and see if I think I can take it on! You are full of good ideas, as usual.
Thanks for sharing.
Vickie Ottley
Thank you Vickie! I tend to think everything looks better with a bit of paint!
Great project. Any update on how this held up?
Thank you Jan – I need to write a full update. I can tell you that overall it has held up great with one exception. The bottom door track (basically the floor of the track) got scratched up almost immediately. If I were doing this over, I would just skip painting that part. I would just tape that part to prevent it from being painted. There is just no way to keep it from getting scratched with the door sliding back and forth across it. Otherwise, it looks perfect!
Thanks for the info & pics. I’m undertaking the makeover of my craft room and desperately needed info on painting the sliders. Now if I could just settle on a color for the walls…too many colors to choose from. sigh
Nancy, good luck with your craft room makeover! Sounds like a fun project! I am so glad I painted our sliding doors – even though it is a small detail, it made such a difference in the room!
This is the tutorial I have been in search of! Thank you soo much, I will be attempting this in a couple of weeks. I wondered if you would suggest removing the hardware? Did the paint on the hardware holdup? Did the paint make it difficult to use the lock mechanism after the paint dried?
Hi Kharin, removing the hardware wouldn’t be a bad idea. I’m pretty happy with how ours has held up but there are a few chips on the edges of the handle itself. The lock hasn’t been a problem at all. Good luck!
Hello! I’m thinking of trying to get my husband to do this project haha
I was wondering though, did you paint the outside as well?
Danielle, I didn’t paint the outside but I am planning to eventually. When I get to it, I’m planning to use spray paint again, just make sure the can says it is appropriate for exterior use.
Such a creative way to get rid of the metal look. I have to paint some sliders like this in my bathroom. Do you think this will work inside a bathroom, given moisture in there? I hope so.. as your solution to these sliders is perfect for my budget.
Hi Angela, I think this would hold up in a bathroom as long as you prime it well first and let the paint fully dry before it gets wet. I haven’t tried it myself so I cant say for sure, but if it were me, I would go for it.
I’m so glad to see this! I have black framed sliders and want to make all our trim white (currently its wood) but I don’t want to spend thousands on new sliding doors. But I’m curious, did you paint the track too? I’m not thinking so much of the bottom part but the sides and top? Our sliders go out to a porch we enclosed but they still are very functional when we need to corral young children. But generally the doors are open. I’m really hoping I can get the insides of the frame white also. Think that will work ok?
Hi Alison, I definitely understand not wanting to spend the money on all new doors – that is exactly how I feel. I didn’t paint the inside of the track of our doors. We do leave the doors open when the weather is nice but since ours were originally aluminum colored, the contrast isn’t so stark. I’m not really sure if it would hold up well or not.
Great idea. I’ve been thinking about painting our 3-door sliding glass doors but I think I will take them out of the frame (by lifting them up and pulling the bottom out first) and wash and paint them outside. The windows are VERY heavy so some people may not want to try this without help. I’ll be using two saw-horses to put them flat at a good working level to wash down with a brush and bucket of soapy water and then hose them down. Once dry I plan to tape them off and paint them as you suggested. I will probably wait a while to do the other side as the paint won’t be fully dry for at least a few days. Meanwhile I’ll put them back in place.
This sounds like a great plan! I’m sure taking them down will make things easier as far as painting. Good luck!
How many cans of paint (or how much of the can) did it take to do your 3 coats? Would love to do all the window frames in our house…. but there’s 12 windows and doors in total!!
I believe I used most of a can of paint to do one set of sliding doors. I am going to be doing a couple more windows and doors this week so I will be sure to pay more attention to how much paint I use this time!
Hi. Did the spray paint not seal the lock on the door shut? If not, does spray paint not seal it shut? Thanks.
No, it didn’t seal it shut. When the paint was barely dry to the touch, I flipped the lock so it wouldn’t completely dry in one position and it worked fine.
I know this has been awhile but how did you deal with the section of door that overlaps? I would think when the door is opened that part would stand out like a sore thumb. I want to paint the interior of ours but haven’t figured out how to deal with that. Thanks and nice detailed instructions.
I just left the overlapping part unpainted. Mine really doesn’t stand out when the door is open since my door was originally aluminum color and is now white so there isn’t a huge contrast. (I just went and opened the door to double check :) But if you were painting a hugely different color, it might stand out more.
What a great project! Your tutorials are just wonderful.
Is there a brush on paint you could suggest for the project? We have a family member that is especially sensitive to aerosol.
Much appreciated.
Hmm, good question. One option would be to use an oil-based primer like Zinsser cover stain. This primer will stick to pretty much anything. But if your family member is sensitive to aerosol, they might also be sensitive to oil-based products because they do give off more fumes. In that case I would look for a water-based primer that says it is a bonding primer or adhesion primer. Kilz has a few different products that should work. The primer is really important because it does the work of making sure the paint can stick to the metal. Whichever type of primer you use, you can then follow it up with a regular latex paint like you would use for painting walls.